
Properly selected lighting makes a beautiful interior even more interesting. Also, light affects the convenience for a person: it should not be too bright and not too dull, go to the right areas (if it comes to the apartment).
The source of light is not only a light bulb in the chandelier or edge. Supplement or complete replacement of the "standard" lighting are LED tapes (LED tapes, duralite). With their help, you can create an interesting interior or conveniently highlight a plot to which the lamp cannot be installed. Mounting LED ribbon do it yourself really: the task is relatively simple.
Advantages and disadvantages of LED ribbons
Main advantages:- Low power consumption (LEDs consume 5-6 times less electricity than incandescent lamps with equal power);
- Quick installation (tapes have an adhesive basis on the back side);
- the ability to cut the tape to the desired length;
- the ability to hold a tape on any route;
- An extensive color scheme (the backlight is not only a yellow or white shade, but also another color, and several different colors can be included on 1 tape, which can be turned separately).
The main minus is a relatively high cost. In addition to the tape itself, which costs about 35-45 rubles per 1 m (with a capacity of about 5 WT) you will need to buy another controller, power supply and connector.
To make the lighting of 1 room, with an area of 12-15 m² by LED ribbon - it will take about 1700-2000 rubles a minimum (for the connector, BP, controller and about 12-15 meters the tape itself). The cheapest lamp will cost about 600 rubles.
In addition to the price, minus is another difficulty of replacing 1 LED separately. If 1 led will be changed to change the entire tape.
The most winning places of installation
The choice of installation site depends on the task:
- The tape is used for decorative illumination (optional, except for the main light source). In this case, Duralight is mounted around the desired element (for example - above the picture, or around the perimeter of the niche, or under the mounted kitchen cabinet). The light is not necessarily the brightest, directed to the desired element or surface.
- The tape is used as the main lighting. In this case, Duralight is attached from above - along the perimeter of the top of the wall or the ceiling, according to another scheme. LEDs should be powerful to ensure the lighting of the entire room. The light is directed from the wall, "inside" the room to dissipate.
Article on the topic: How to put a porcelain stoneware + photo in the interior
Places to install the ribbon if it is used as the main source of light:
- For ceiling plinth.
- In a niche on the suspended ceiling (it can be done at the installation stage of the ceiling, or if the niches in the ceiling already exist).
- Around the perimeter - on the top of the walls or on the ceiling.
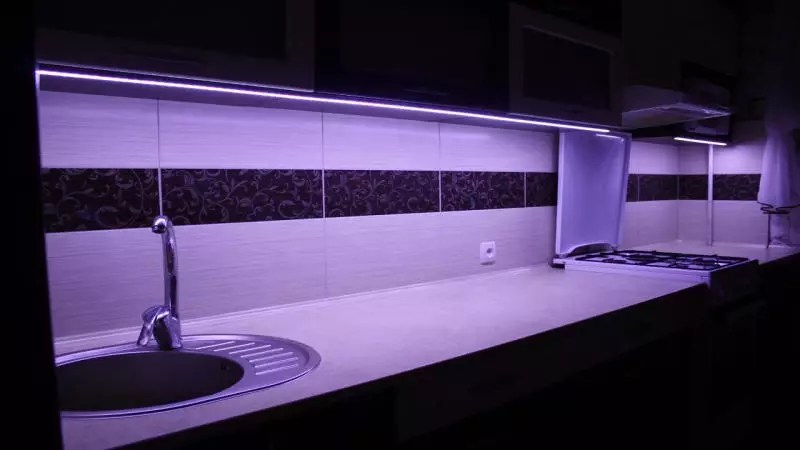
When installing on kitchen furniture
In the kitchen, the LED tapes are used not only as ceiling lighting - they are also installed on kitchen headsets.Possible installation sites:
- Front or back plank of the bottom of the housing of the hood (along the filter) - if the hood lamps are weak;
- under mounted cabinets - in the corner (between the closet and wall) or on the bottom of the locker with the edge (further from the wall);
- at the bottom of the tables (in this case, the backlight will be only for beauty);
- In retractable boxes, opening shelves, cabinets - to illuminate space.
For such places, the tape is most often mounted not in profile, but simply glue to the surface, not covering.
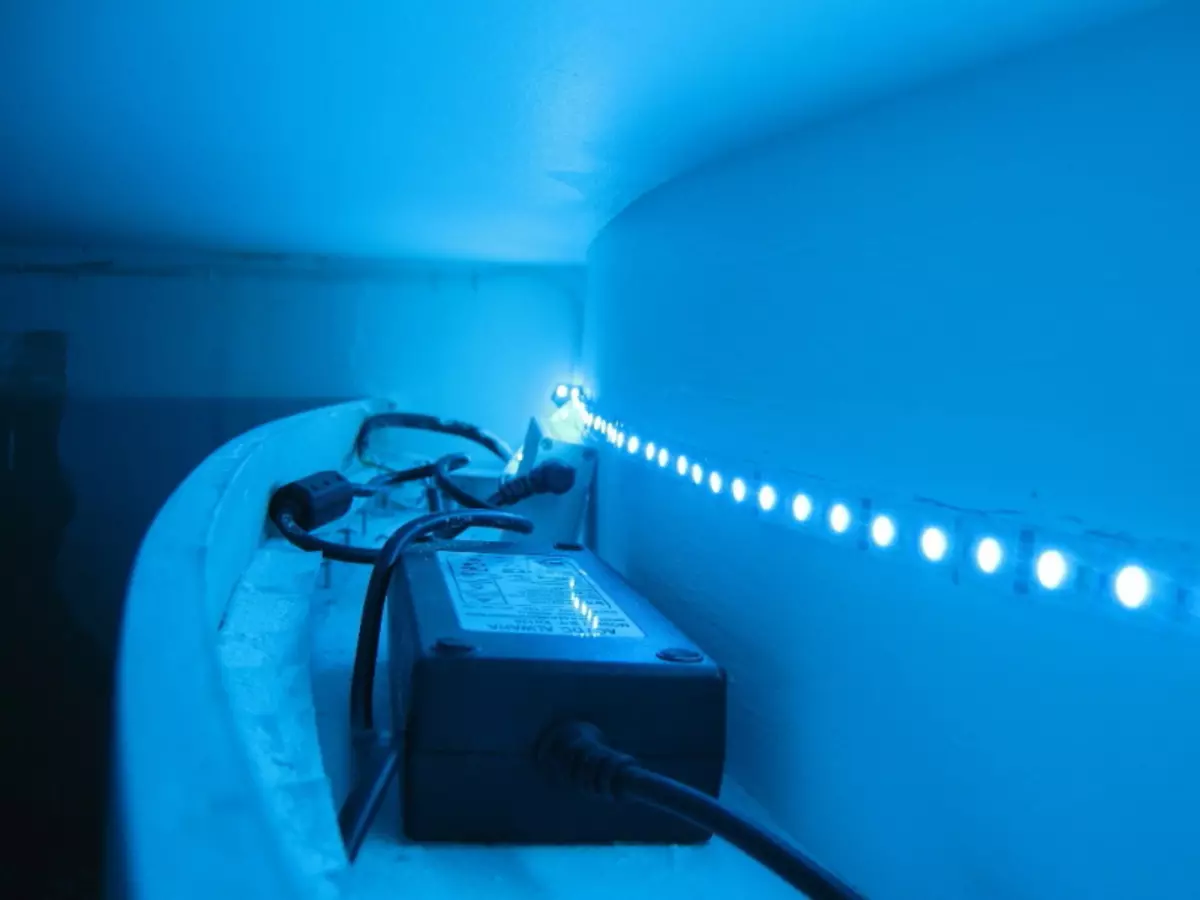
When installing in a niche or wardrobe
Ribbon can highlight the insides of the cabinet or the internal space of plasterboard niches. Most often, they are simply glued to the surface, without mounting profiles.
Installation Places:
- in the depths of the niche or the cabinet, if it is deep (a lot of space inside) and stands in a poorly illuminated place (corridor, or just away from the window);
- inside drawers (cabinets, chest, bedside tables);
- inside plasterboard niches for paintings, partitions;
- In the cabinets in the bathrooms.
Ways to install backlight
Duralate can be mounted in 3 ways:- In the box. The drywall is a box with a hidden cornice, which is installed in the ribbon (it will not be seen from the room). The minus is that the box is mounted only at the stage of repair of the room, and it will have to do it throughout the ribbon laying route.
- On a special profile (plastic or aluminum). The option is simpler and cheap, can be applied at any time (even if the repair is not planned). Fastened to any surface (tile, wallpaper, plasterboard, brick, wood and so on).
- On the ceiling plinth. Plinth in this case is not mounted on the ceiling, but below by 5-10 cm from it. In this gap and the tape is installed. Plinth has a rise in the ceiling. Between the raised part and the wall, the removal is obtained into which Duralight is stacked so that it is not visible from below.
Article on the topic: Recreation area in the country
Types of LED tapes
LED tapes vary by:
- Number of colors . There are monochrome or multicolor (RGB ribbons).
- Type of lighting . There are dynamic (lighting characteristics - brightness, color - can vary by controller), flat (with an angle of glow in 120º) and end (used to illuminate the ceiling).
What do you need for installation?
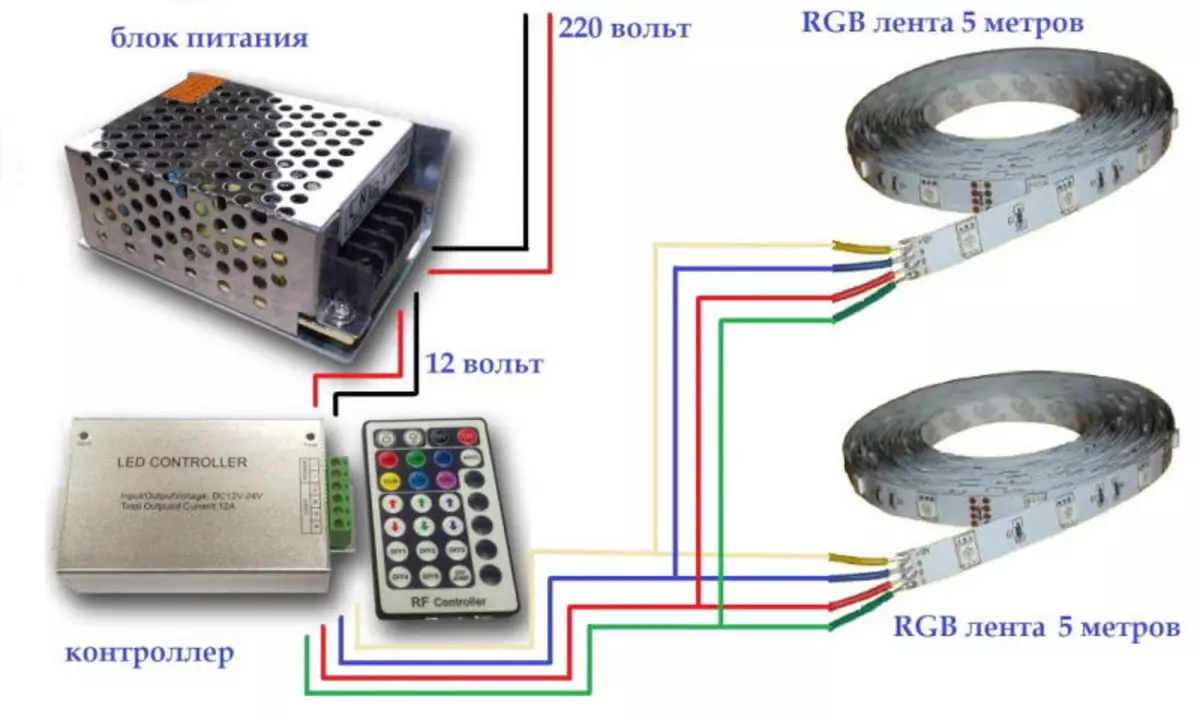
In addition to the tape itself with the desired color and the desired length, you will need:
- Controller. In fact, the control panel. From it will turn on the backlight, as well as switch the color and adjust the brightness. It can be wired and remote. Connects to the power supply.
- Power Supply. Plays the role of a transformer that converts voltage to the desired one. Power BP is selected, depending on the length and power of the tape.
- Connector . We are needed to connect individual pieces of tape into one. You can collect backlight without it, but then you will need to solder segments.
LED Tape Installation Guide
Step-by-step installation instructions:
- The total length of the tape is determined. To do this, the gasket route is planned and the full length is measured, including areas suitable for connectors and controllers.
- Slices of ribbons are connected in 1 line with connectors (or soldering iron).
- The collected tape is connected to the controller, and the controller is to the BP. The main nuance: the poles need to be connected correctly, otherwise you can disable duralite when turned on.
- Enable the assembled line into the socket and the lighting from the console - to check. If the backlight fell down - check the brightness and colors (if provided).
- Disable the tape from the controller and mount to the desired location.
When Duralite is attached, it is connected to the controller again, and check again. If the backlight is working normally - the work is completed.
Possible errors are only in the wrong assembly of the chain.