Bolero is a universal thing of a modern wardrobe for both a girl and a woman. Depending on the desire, preferences, and necessity, the bolero can be an elegant or everyday, with a fastener or on a sprinkle, with a sleeve or sleeves, winter or summer. In this article, consider several Bolero variants knitted with knitting needles. Models are universal, so suitable for performing both experienced needlewomen and beginner masters.
Simple option
Let's start with the simplest way to knit bolero for women. Work is performed by one web and with all two seams. Stops simply and quickly. It will be well suited even for the first work of Master.
We will need only two subjects: acrylic or woolen yarn and needles. The amount of material depends on the size required, usually about 2 swells.
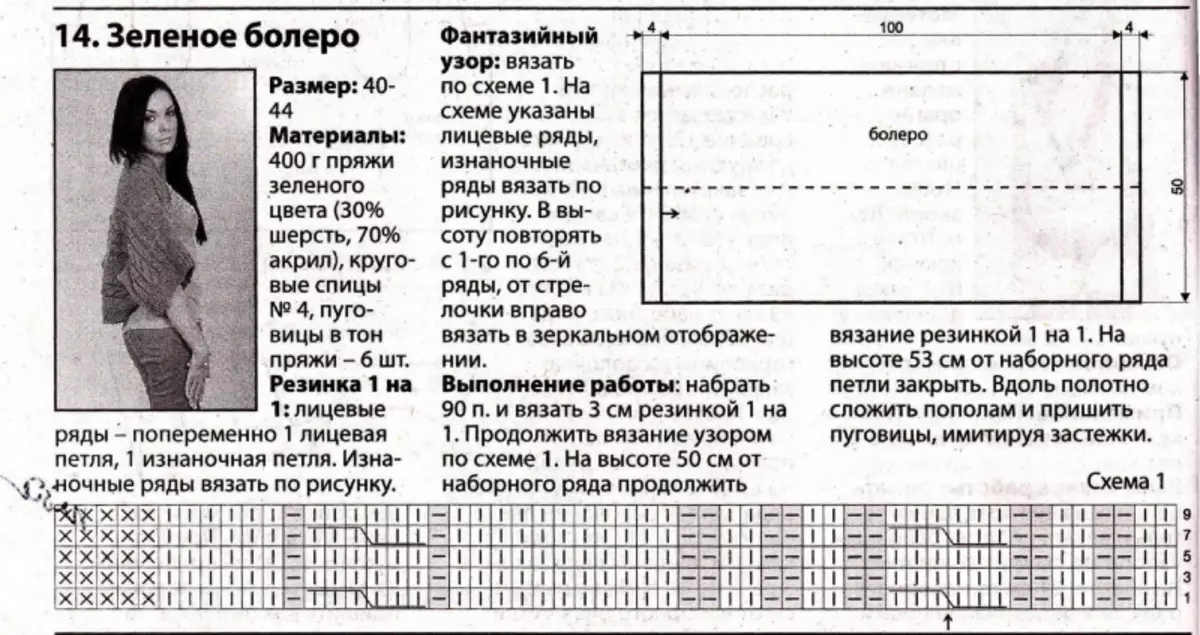
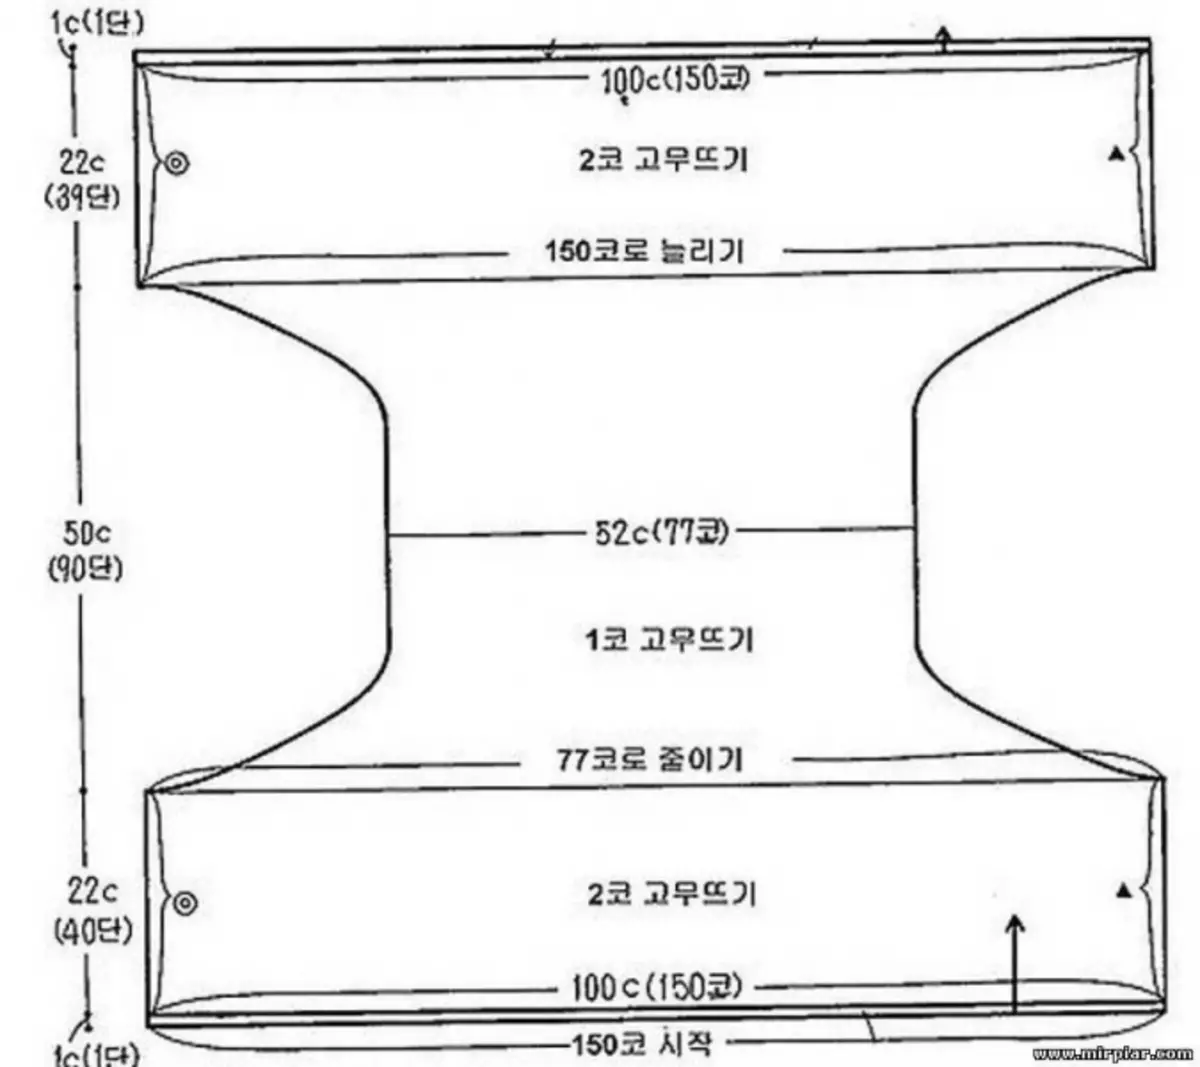
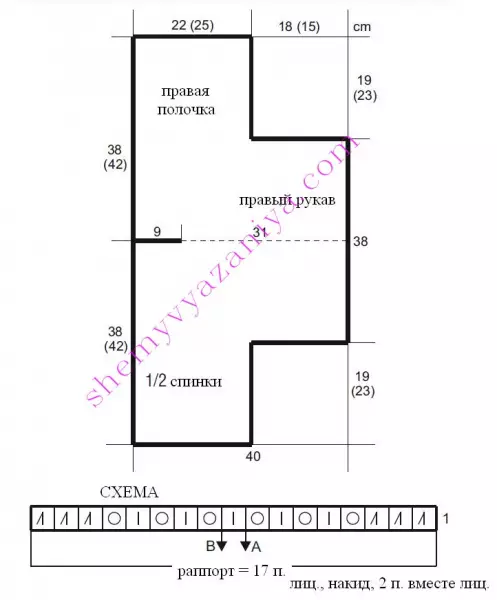
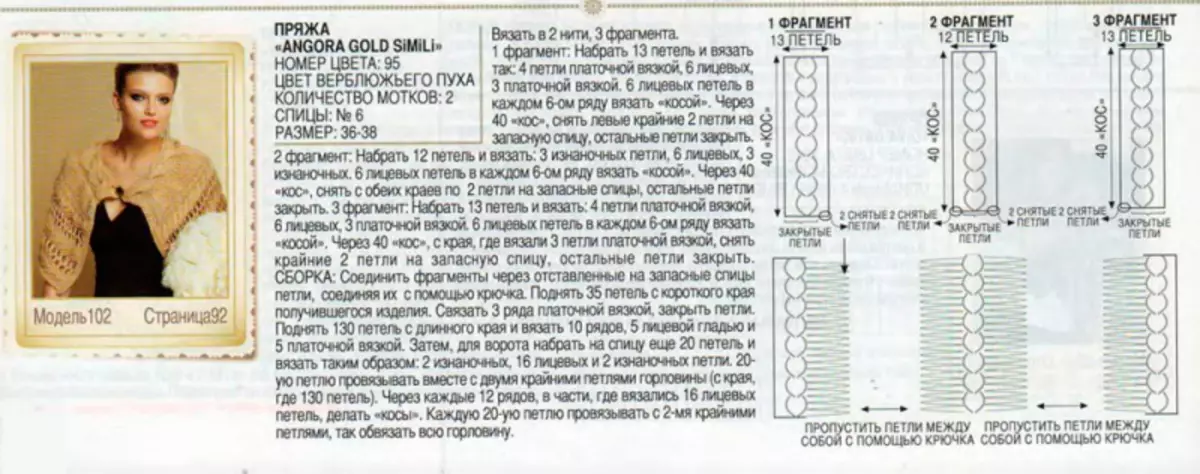
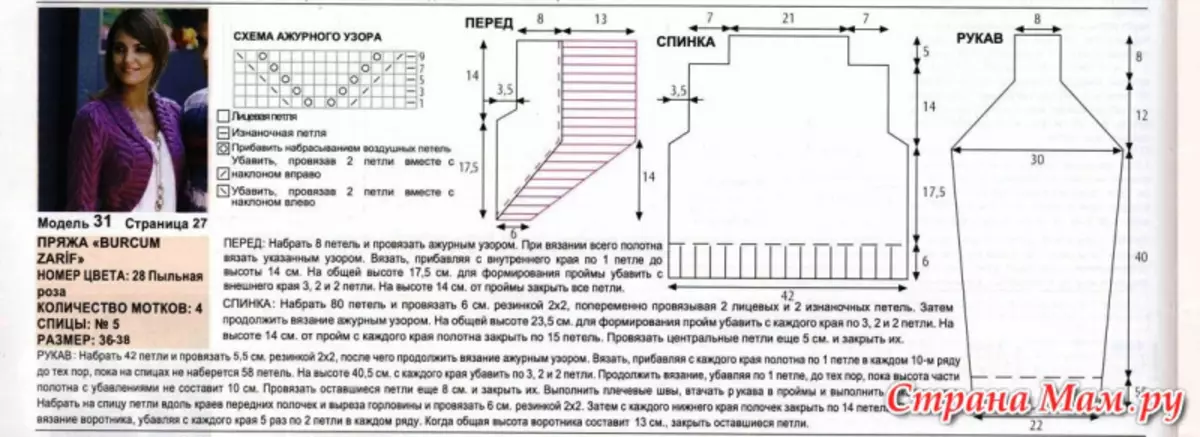
Let's proceed. Bolero is performed on this pattern with one web. According to measurements, the loops are added or reduced. Approximate work size 42-46 is depends on the selected spoke size, yarn thickness and knitting density. The pattern can be easily adjusted by its parameters: the narrow count of the pattern is set to 52 cm in size (in the photo). The length of the bolero is 50 cm plus 22 cm, you can also add or subscribe.
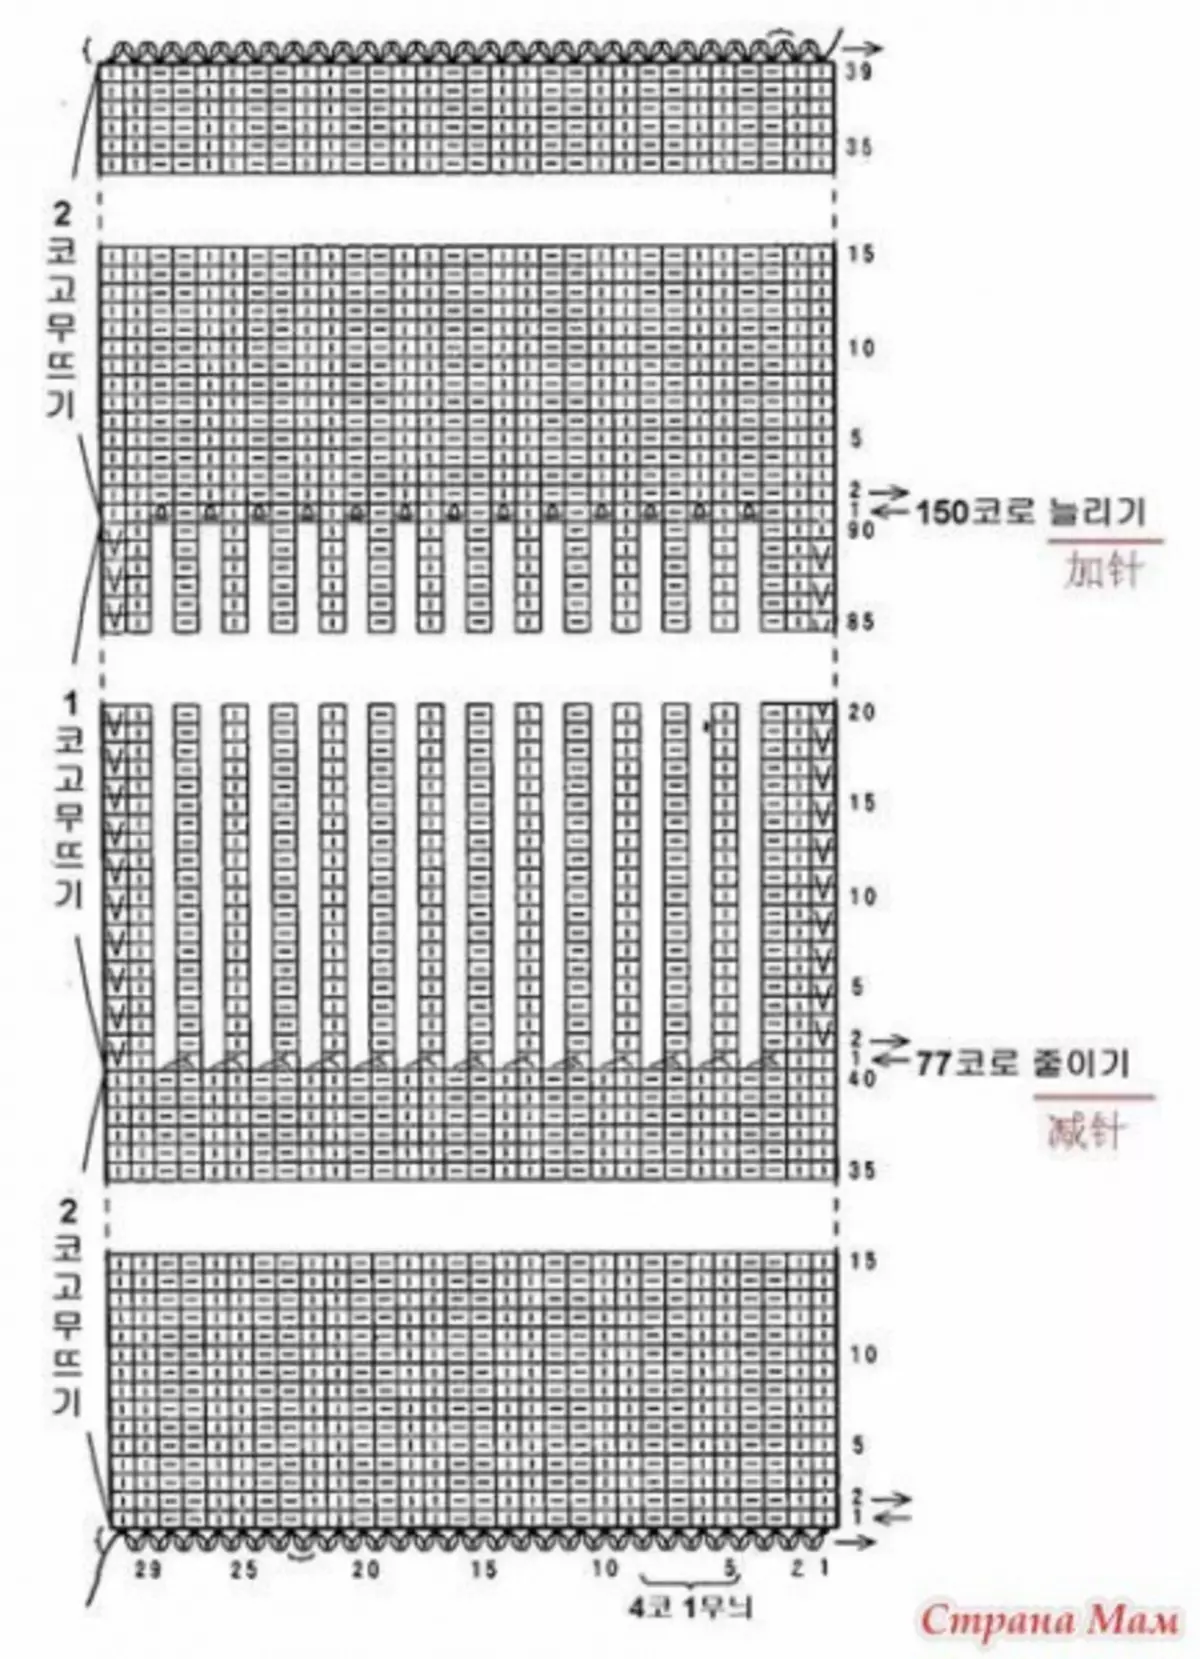
Work is performed according to this knitting scheme.
After the item is ready, it should be sewn. Moving it in half so that the details of 22 cm coincide. They should be sewed from the wrong side. Bolero is ready!
Elegant ahura
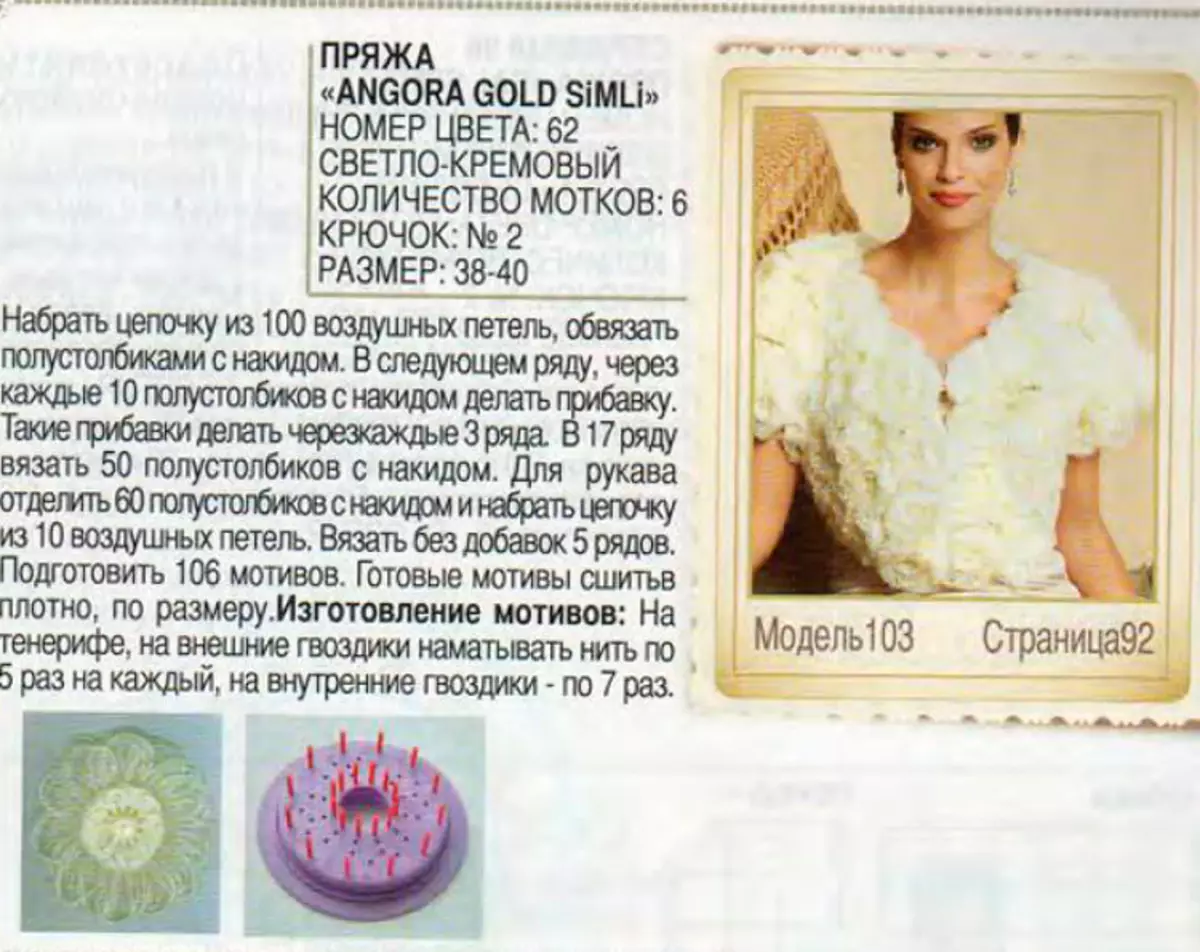
Consider another option of female bolero. This time it will have an elegant festive look. Performing will be more complicated, but it is exactly worth it.
Required materials: yarn in the amount of 200 grams, spokes number 3.5. These materials are indicated on knitting density for a square 10 * 10 cm: 27 loops on 33 rows. Depending on the individual density of knitting, the yarn may be needed more or less. The calculation is indicated by 44 European size.
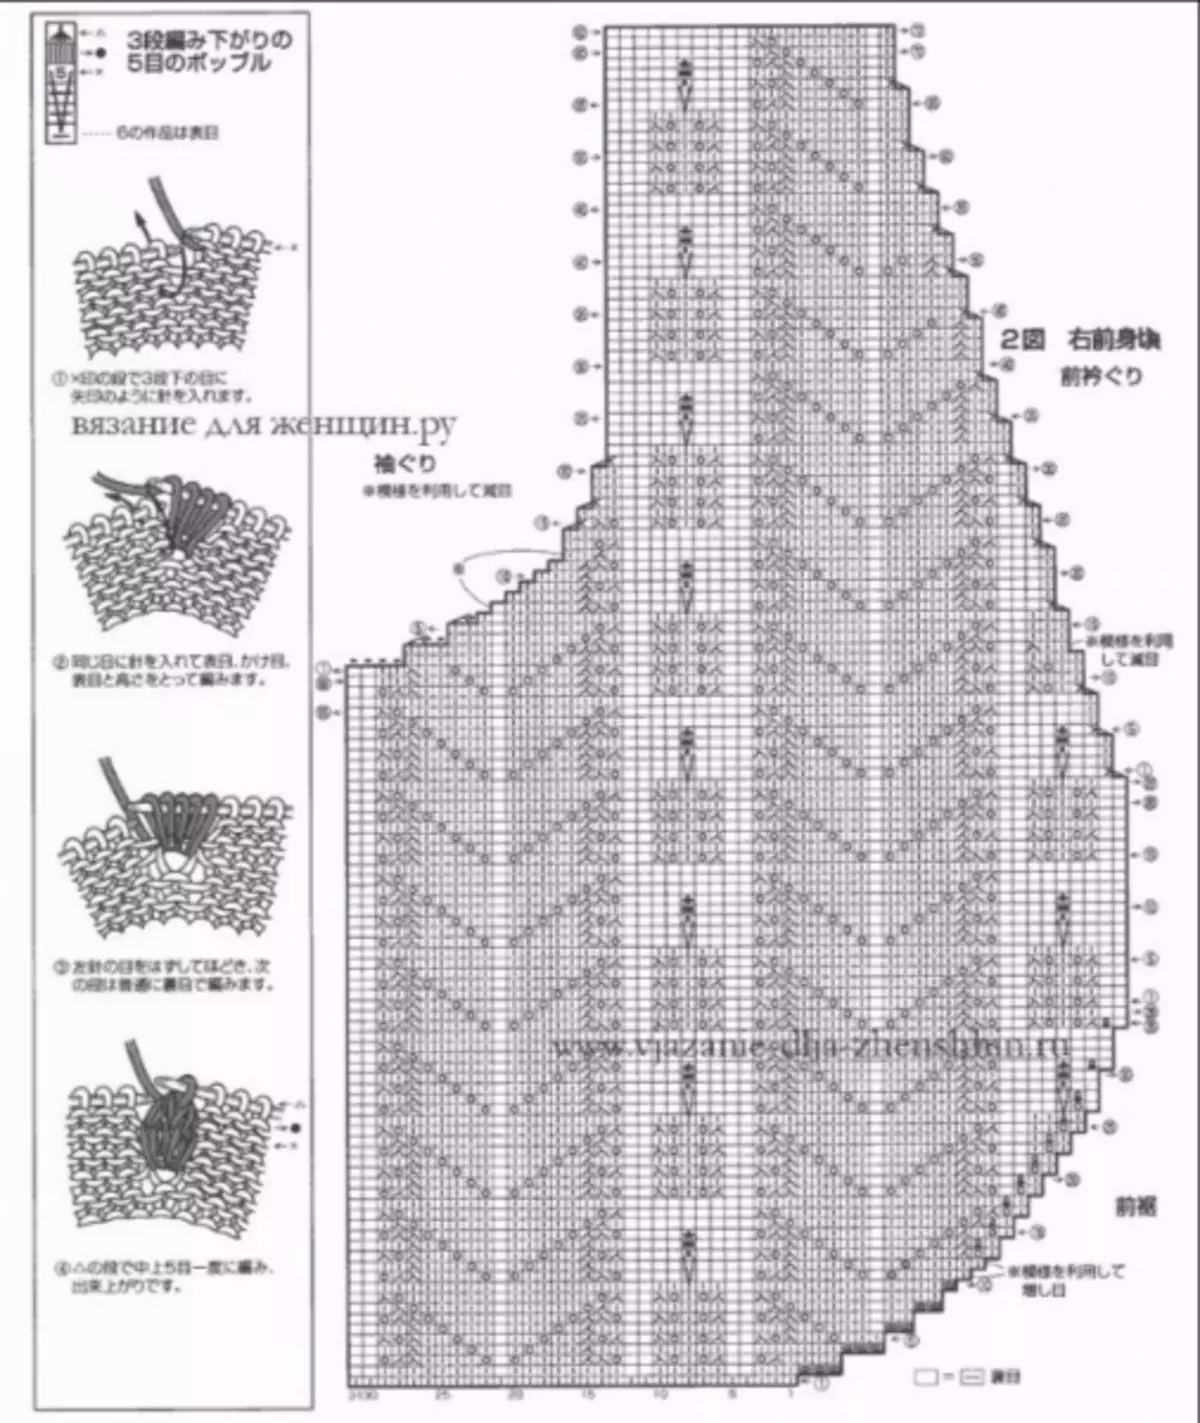
Let's start a master class. The product ties according to these schemes. We start work with knitting back. Scheme "A" in the photo detailed, with an indication of the addition and lubrication loop.
Article on the topic: The handbag muffled the crochet for the doll
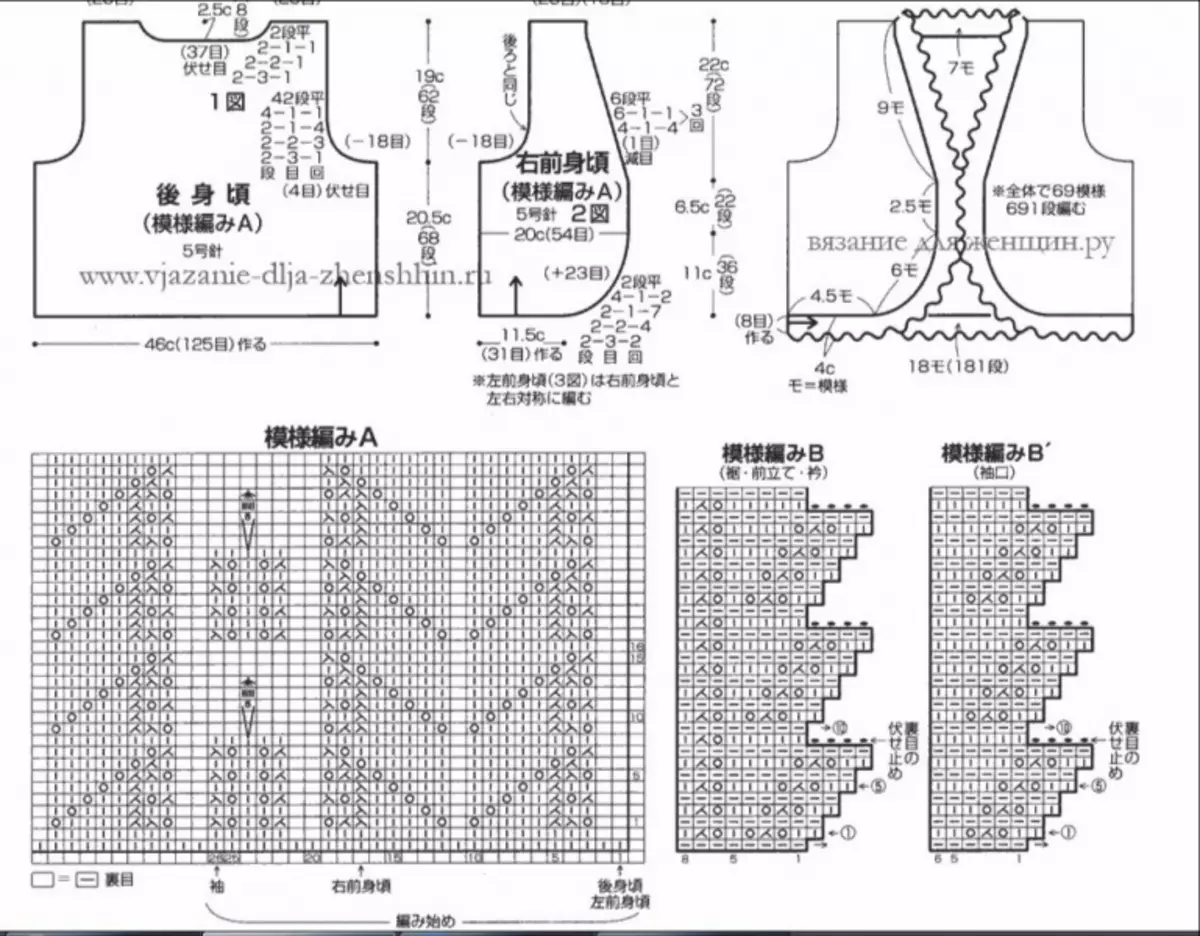
When the first part will be ready, we will take care of the manufacture of the right and left shelves. The scheme is indicated below.
For this scheme, bolero sleeves are manufactured.
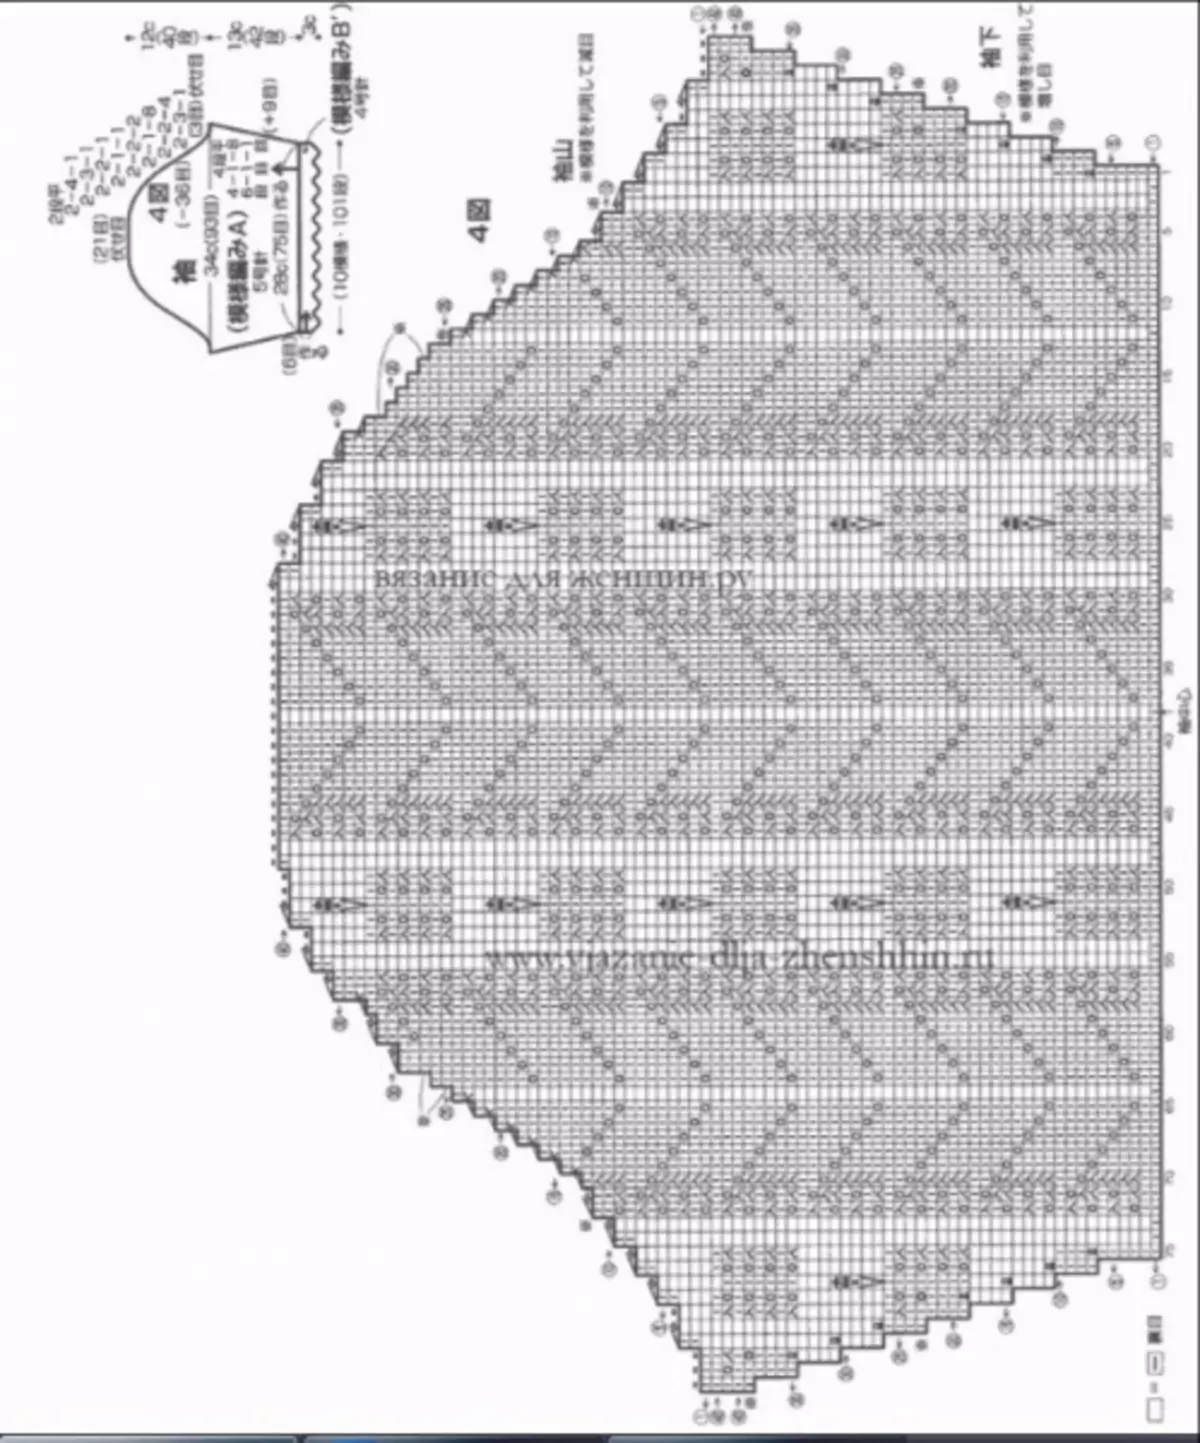
Perform an assembly. The right and left shelves are sewn to the back, leaving the place for the armor. Then, we sew the sleeves.
We begin strapping. The location and strapping scheme are indicated in paragraph number 1. Bolero is ready!
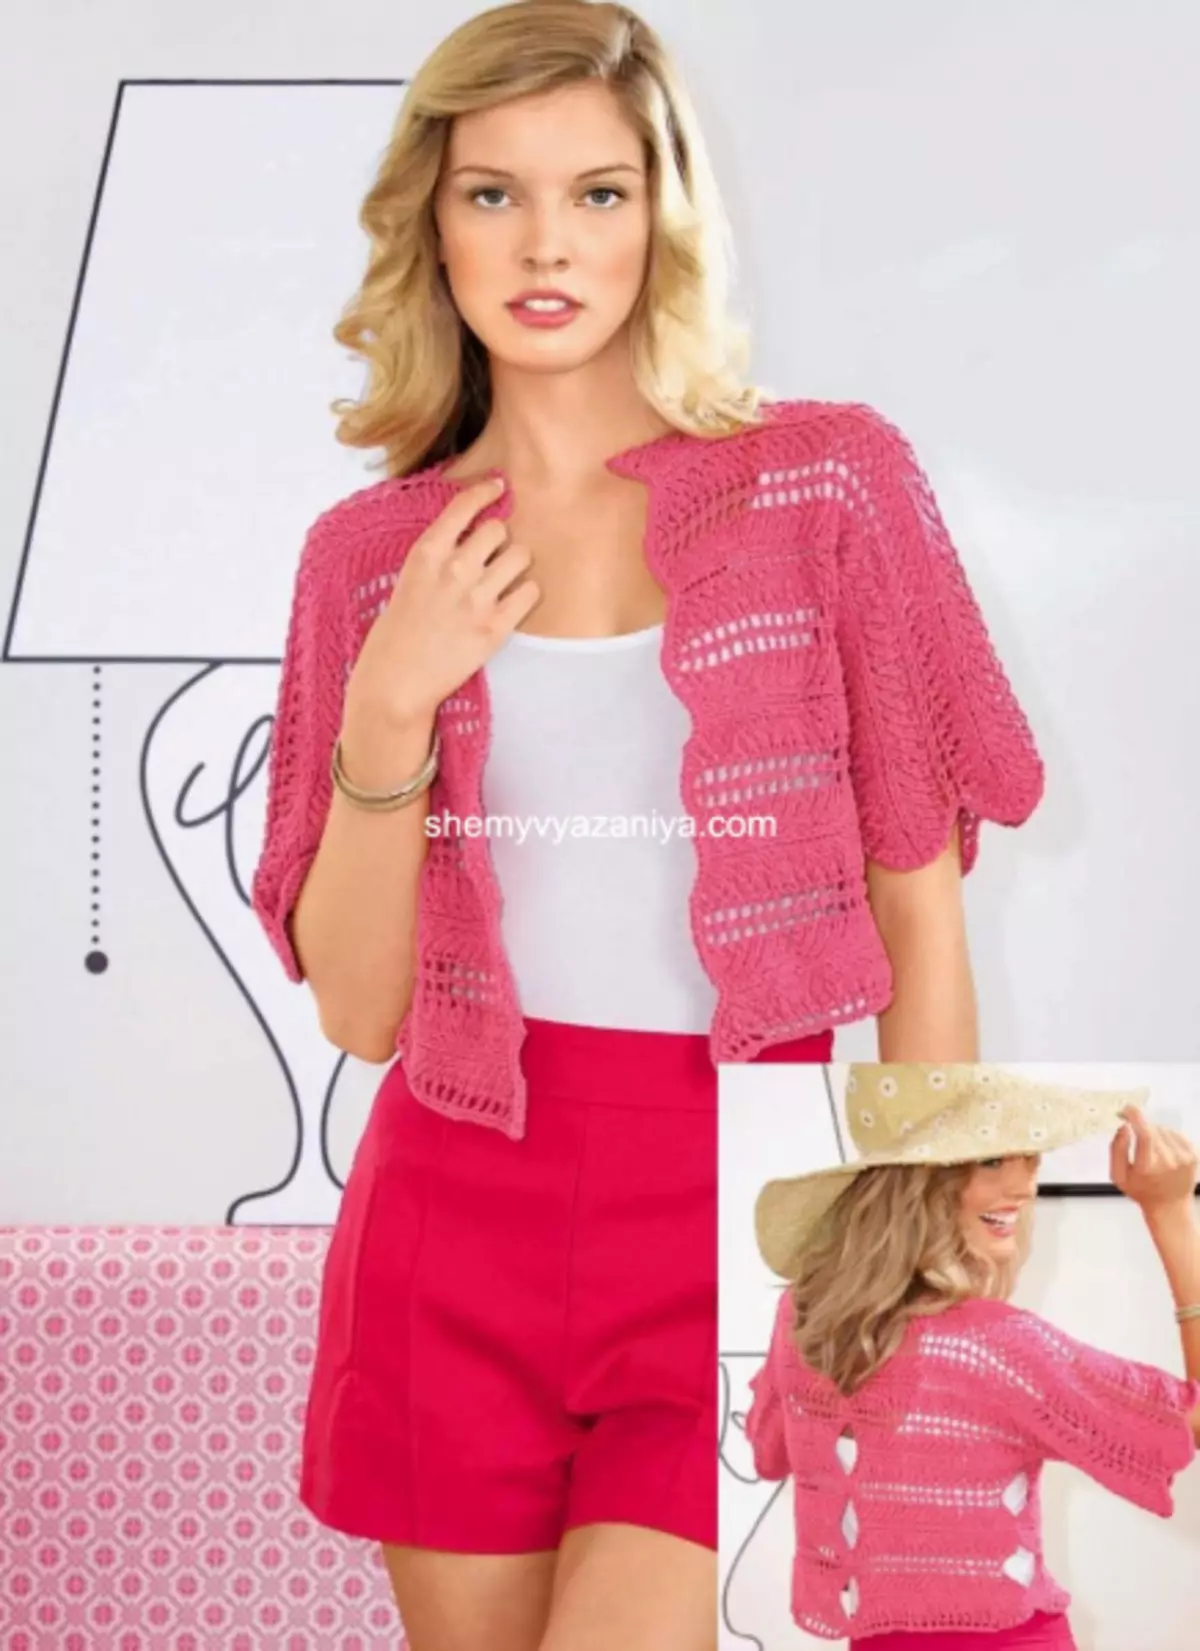
Cross binding
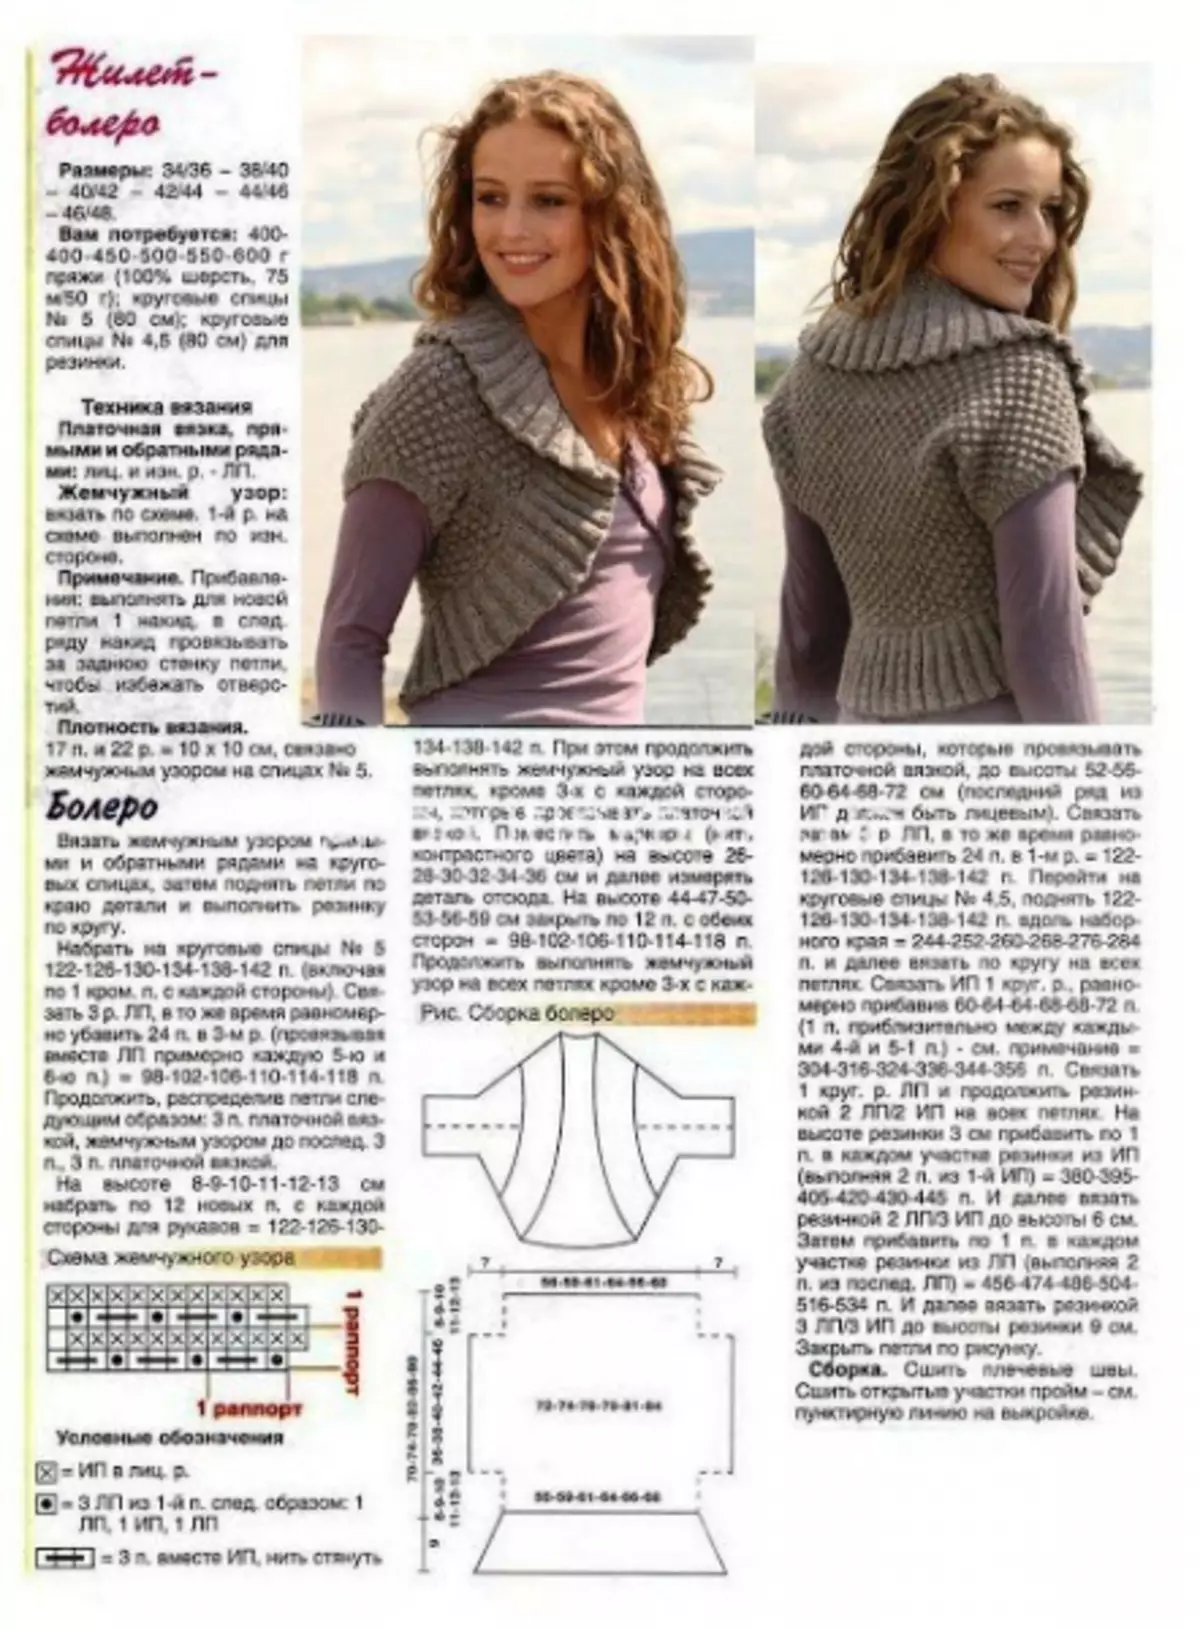
This model looks very original and is a universal wardrobe subject.
The description is indicated for size 40/42, but experienced craftsmen can easily adapt it to the desired measurements. The model consists of two parts. It is important to start work from the left side.
So, we will need:
- Yarn is a thickness of 90 meters by 50 grams. The composition and seasonality can be adjusted at will;
- Spokes of 5 mm.
Let's start knitting. We score 87 loops + 2 edge loops (the number of loops should be multiple 17 + edge). Next, knit according to the scheme, there must be 5 reports + edge loops.
When knitting reaches 15 cm, on both sides, add 51 loops. This will continue the backrest and pass. In total, 189 loops should come out. Now they knit according to the same scheme, only 5 reports will not be 5. After increasing the number of loops, the average loop to double and divide into 2 parts.
To perform the front of the bolero, the left 95 loops continue: the edge loop, knitting, ranging from the arrow with the letter "B", according to the scheme in paragraph number 1. Next, 5 reports and edge loop. The latter row needs to be knocked out face loops. Thread consolidate. The left part of the bolero is ready. We will proceed to perform the right part of the bolero. It is performed similarly to the description and scheme, only the "mirror" display. When both parts are ready, they are spreading them on the pattern and moisturize with the help of a spray gun.
Article on the topic: Master class on Mandala Crochet: Schemes with description and video
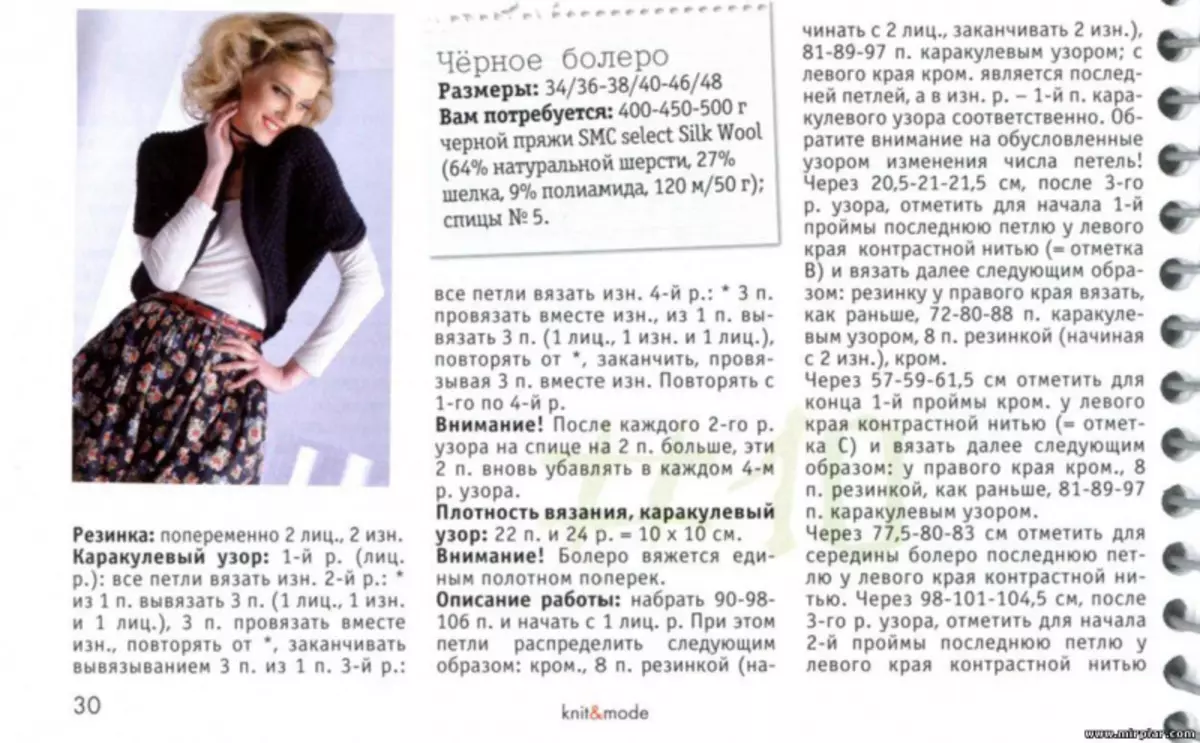
After complete drying of the workpieces, the details are sewn. Shoulder seams with a mattress seam. The back, according to the photo, to close a few stitches in the corners. Bolero is ready.
In this article, we reviewed several options for how to tie a bolero for different cases and different seasonality. The models are ideal for beginners and considerable masters. For those who easily focus in the schemes and confidently owns the art of knitting with knitting needles, provide several options for knitting women's bolero knitting needles in the schemes. For poorly extreme knitters below the article, you can find detailed video lessons.
Schemes and descriptions. Festive bolero - ideal option for a winter wedding.
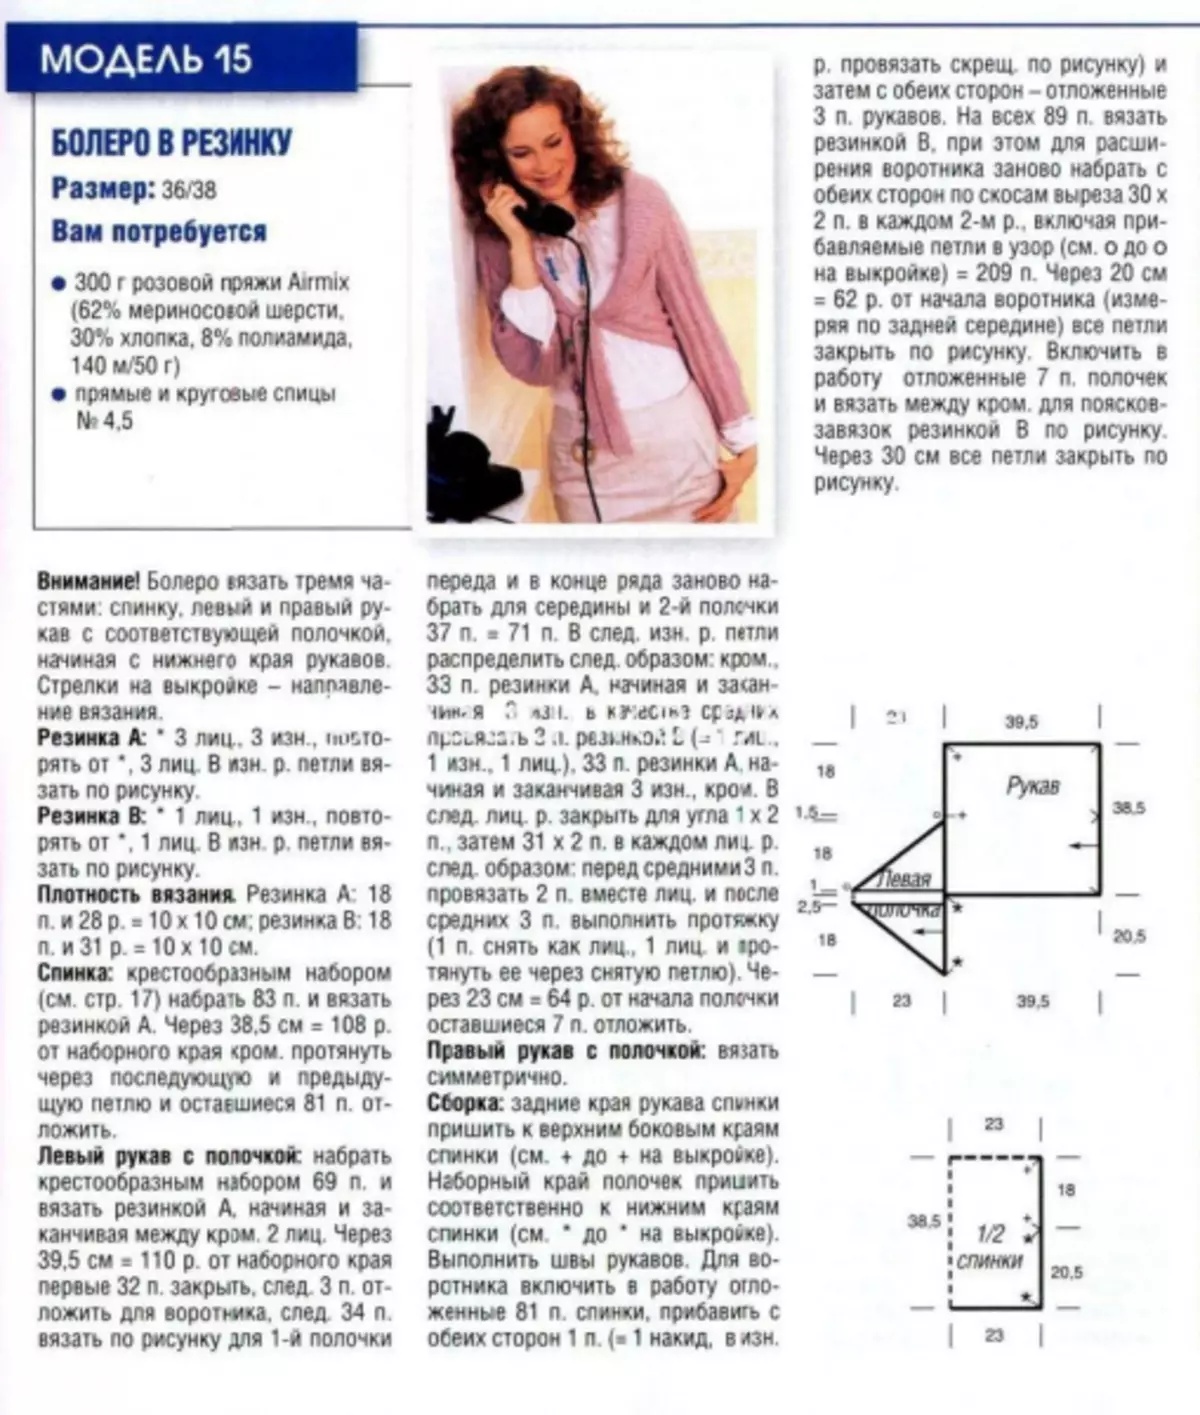
Warm winter bolero.
Universal cape needle.
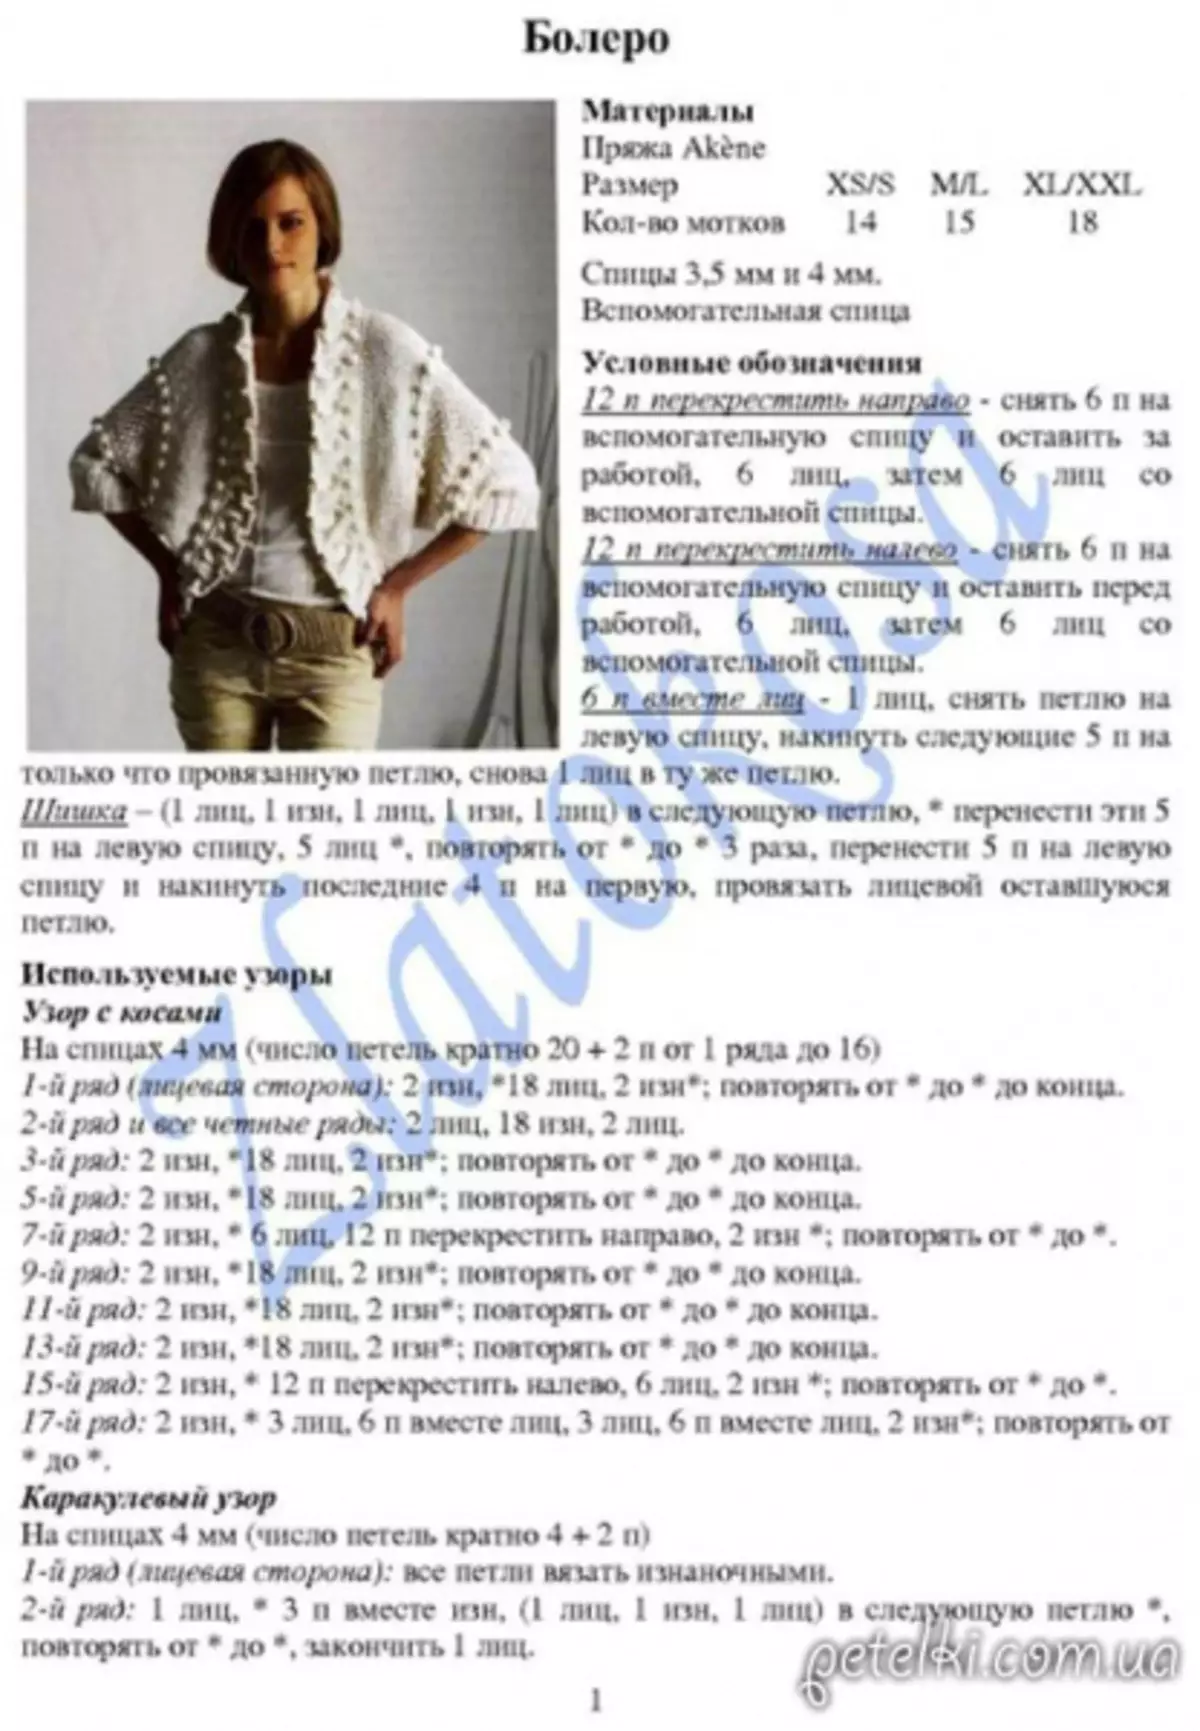
Bolero with braids.
Warm and volumetric female bolero.
Casual bolero with strings.
Warm transverse bolero.