

But the Venetian plaster related to coatings is simpler, representing the imitation of marble, can be done with their own hands. Also, simple methods can be attributed and known to all the effect of cracking. In this article we will tell about how Venetian plaster is done.
Preparation of the wall of the wall
Venetian plaster, being essentially a decorative coating, is usually applied to the walls with a thin layer, which is why quite strict requirements are presented to the state of the surface.
First of all, the walls should be very high-quality Oshpacean. There is no presence on them the slightest flaw in the form of pits, bugrov, scratches. It is possible to obtain this result if used to stripped the walls abrasive grid. In other words, the walls need to be stuck as under painting.
Another of the mandatory conditions - the walls after stripping must be predicted by applying the composition of deep penetration Ceresit CT17. After the first layer of primer gets dry, you need to apply another layer of soil, now another quality is a composition containing small quartz sand. It is done to achieve two main goals: to enhance the adhesion of materials, as well as set the coating type of initial pattern. To achieve this, the soil should be applied with chaotic and at the same time ordered movements. After completing work on the primer of the walls, they should dry, takes it about six hours.
Article on the topic: Socket for plinth: box installation tips
Tool for working with Venetian plaster

Separately, you should talk about the instrument that will be required for the qualitative application of Venetian plaster.
His arsenal is not so great:
- For the design of the walls of the walls, it is necessary to prepare polished Kelma made of stainless steel.
- You will also need a wet rag, it will be cleaned by Kelmu from thickened Venetian plaster.
- A suede mitten is useful for final watering of wax.
Prepare all these tools, you can safely begin work.
Technology of applying venetian plaster
Getting Started, it is necessary to give the composition of the plaster the desired shade or color. You can use two ways: using machine tinting or tooling the composition yourself with the help of painting pigment and building mixer. The first option is more preferable, since the computer is able to calculate the required amount of coloring segment, and therefore, as a result, you will get exactly the tone that you need.Applying the first layer
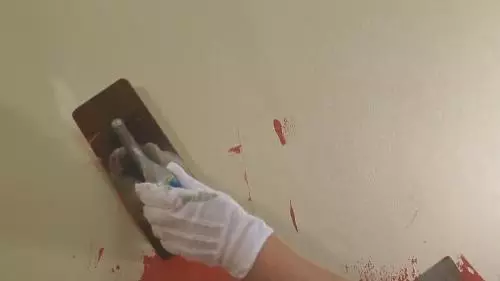
Fully prepared the composition of plaster, you can start work. A little solution is applied to the cells using a typper, then the culma is pressed against the wall with a certain force and under a minor angle, it is carried out along its surface. As a result, a thin layer of plaster appears on the wall. The next smear is performed in the perpendicular direction, overlapping the first. The Venetian plaster is applied with small and uniform smears. One of the most important points is the periodic wiping of the Kelma with a damp rag, if not to do this, he will soon be dried on the plaster tool will leave ugly stripes that violate the overall drawing.
Getting Started to work, you need to be prepared for what you have to make a maximum effort. It will very soon begin to hurt with inappropriate hand, but it will not be back the paths, since the finished wall will be distinguished by tones. After covering the plaster, you need to leave for 2-6 hours to dry up the composition, and only then you can take on further work.
Article on the topic: Self-adhesive film used for kitchen
Application of subsequent layers of plaster

The next stage will be the applying of the second layer of Venetian plaster. In order to close the surface of the walls to the texture of natural marble as possible, the second layer is necessary to smoke a little lighter or vice versa is darker than the first layer. To apply plaster, use the same way that was previously applied.
The quality and appearance of Venetian plaster is completely dependent on the amount of layers made. Most often, to achieve the desired result, as well as the depth of the picture being executed, it is applied from 3 to 5 layers, and each of them is allowed to dry out 2-6 hours.
How to apply the last layer of Venetian plaster?
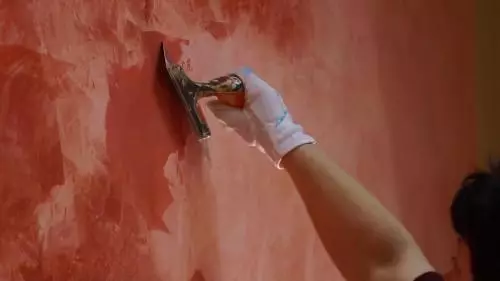
The most close attention must be given to the last layer, which is somewhat different in the same way than the previous ones. The thing is that he needs to give the corresponding gloss. This is done as follows: Applying the plaster, we return back to that section where the composition is reduced, and with a noticeable effort we carry out a spatula on the fiberglass. Specialists call such an ironing process, in fact it can be compared with the surface polishing. The direction for polishing is chosen as the same as when applying a solution.
Having completed the polishing of Venetian plaster, we leave the surface to the complete drying. Continue work will be possible only after 24 hours.
Waxing and polishing surface

And finally, the last stage. Completes the work on the device of the decorative surface covering it with special wax. The wax gives Venetian plaster with genuine depth comparable to natural marble. It is applied quite simply, such a different movement of Kelma.
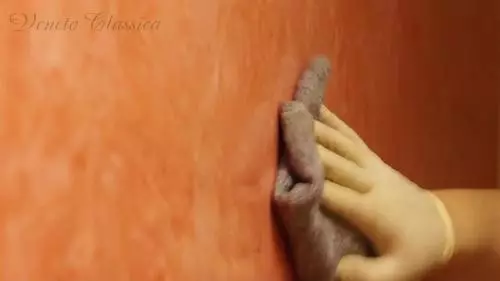
And after the surface of the wall is fully covered with wax, you can take it to polish. It is done with the help of mittens from suede, trying on the surface to perform circular movements.
Silvering effect
Now we can say that the application of Venetian plaster is fully completed. After reading this peculiar instruction, everyone may decide for himself, whether it is forces to him this fairly painstaking and time-consuming work. And in completion, we will tell about how to achieve the effect of cracking. Believe me, it is not so difficult and performed so. A thick layer of 2 mm Venetian plaster is applied to the wall, after which it is strongly heated with the usual construction dryer. Such a fast drying and causes cracks. Their depth, as well as the size depend on the thickness of the decorative coating layer and on how intense you will run the hairdryer. The cracking layer will dry up and it will be possible to apply another layer on it, which will fill the cracks, making them noticeable.Article on the topic: How to collect a two-row metal eaves: a detailed description