
In winter, almost all people dressed in gray tones, but creative personalities always want to stand out from the crowd and put on something that will emphasize their individuality. To do this, you can independently make some kind of accessory or attribute. One of these can be mittens, which will warm and decorate, and will also give a person what he wants. In addition, such mittens can be decorated with different elements - ribbons, embroidery, beads and patterns. Recently, mittens made with braids or animals are very popular. On how to tie the knitting mittens with the pattern, you can learn from the material below. It is only important to find the pattern that I want to do and follow the instructions provided.
Especially difficult for beginners are elements of the transfer of loops on one side to another - crossing. In this process, it is important to be extremely attentive and follow the instructions that are presented in each master class. And then it turns out exactly what I want.
Movement for decoration
One of the trades that keeps in fashion is not the first year, are mittens with a pattern of brass. In addition, such a drawing is used in all knitted products, which gives special elegance. Knit such a pattern is easy, it is important to have patience and a desire to tie it. In our master class, we will be able to learn how to knit braids and thus decorate our mittens. So, our mittens can be decorated with a fringe with a hook.
We will knit a mittens on a small female handle, but this size may come for a teenage girl.
What we need to knit:
- Magic threads of 100% microfiber 225 m per 100 g, one motor selected;
- Spokes with a number 2.5;
- Hook at number 3.
Article on the topic: The jacket on one shoulder crochet or knitting with photos and video
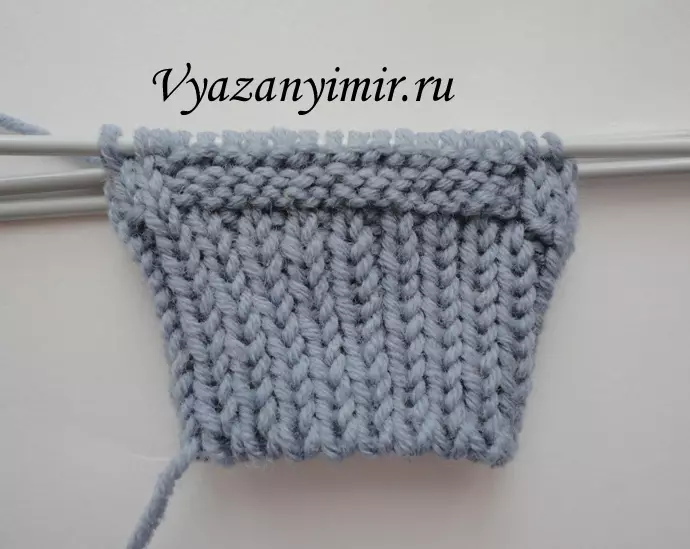
Spites are taking into account the scheme, which is presented in this lesson. But only facial buttercups are indicated on the scheme, and invalid knit taking into account the pattern. We will knit for 5 spokes.
We recruit 40 loops and distribute 10 kettles on each needle evenly. 20 loops are in line with the facial - this is part of the palm, and the upper part is 20 kettops - they see the scheme. When you connect 8 cm, 8 loops put on the auxiliary needle and we gain over these loops that lacking 8 kettops. I knit 9 cm in height again, and then the SCOS formed, at the beginning of each knitting, they seek 8 rows 2 butters together. When it remains only on one butt on one needle, we remove the knitting needles and stretch through the petakers, tighten.
We do not forget that during knitting it is worth trying to try a mittens, and when we reach the thumb, 8 ottops leave on the pin and peck on. When the mittens - the main part - will be connected, we go to knit your finger. To do this, remove the loops from the pins and put them on the needle, on the other hand as much as the side of 2 loops. Further, we all distribute to all the knitting needles - it is 20, each will be on 5. So we are tied up to the middle of the nail and begin to make the outflow, as in the main part. Then they pull out all the knitting needles and with the help of the thread stretch the thread through them, tighten.

It remains to perform a fringe. To do this, we begin to knit the column without a nakid, introduce the hooks into the subsequent column without the preceding row, and turn the thread around the finger. We cling to hooks at once two strings - the beginning of the loop and the end, and stretch the double loop. It turns out that three loops will remain on the hook. And through them, stretch the string as with the usual column without Nakid. So they are tied to the end of a row with ordinary columns without Nakid. And here our mittens are ready!
Article on the topic: Cotton Plus Polyester: What is this fabric (Polykotton)
Stylish Sovuka
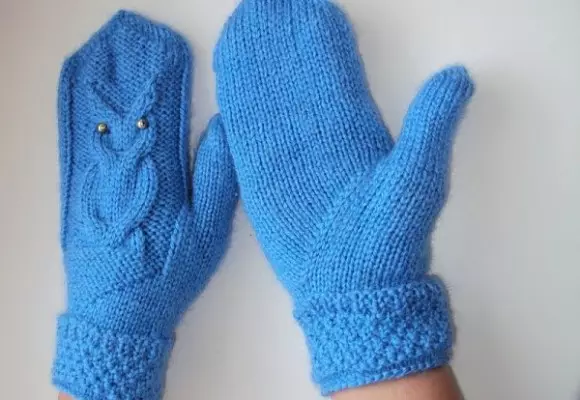
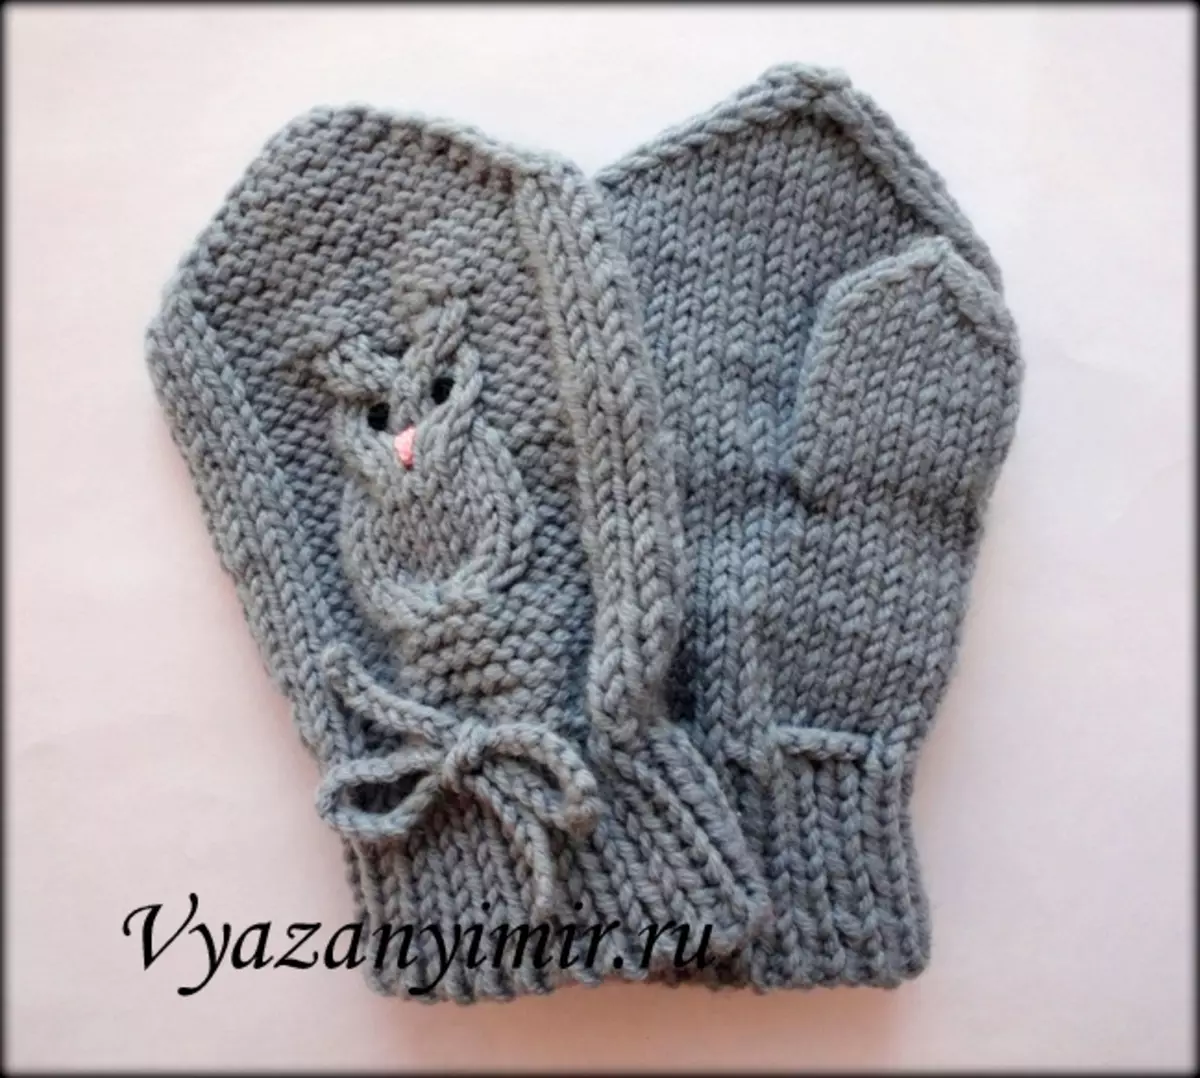
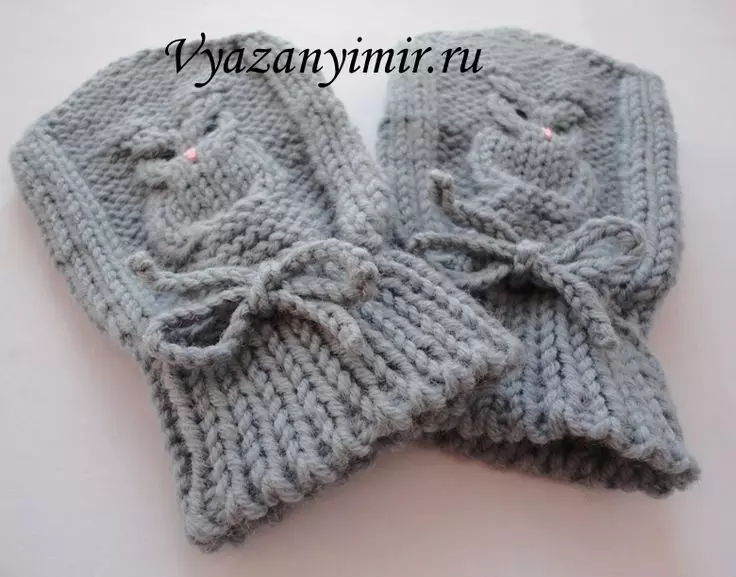
Another pattern that is popular - Owl. Such mittens can be associated independently and no need to assume that this pattern is complex. In this master class, a step-by-step instruction with photos that will help to cope with this task even those who are just starting to get acquainted with knitting on the needles.
What you need for knitting:
- Rights of gray Cashmere 100% 100 g;
- 5 spokes number 2.5 and number 3 - Rytroke Rose Rotch to embroider the beak;
- big needle;
- hooks;
- Two black beads.
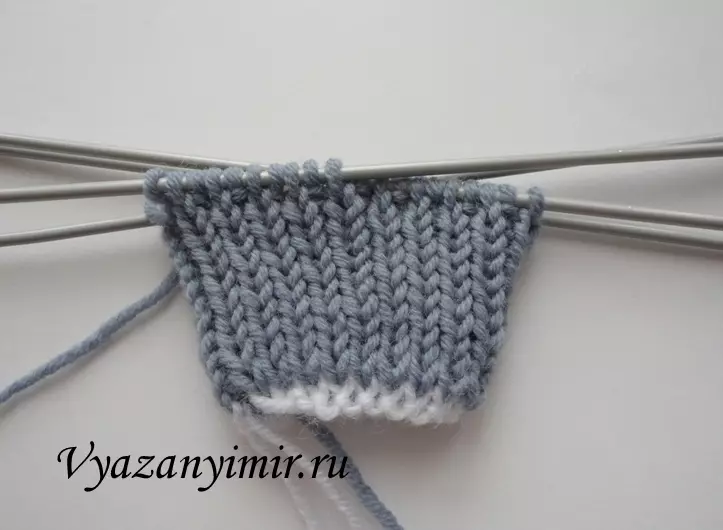
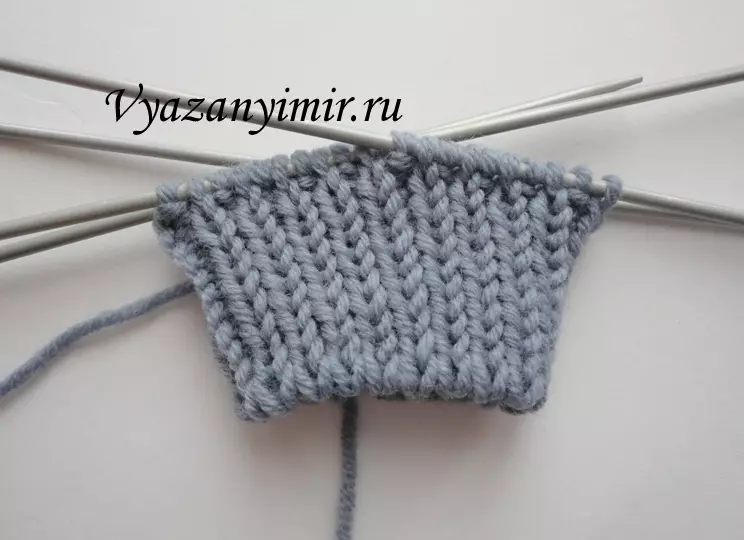
We take the auxiliary thread and the spokes of size 2.5 and score 21 loovers, closer into the ring. Go to the gray thread. In the first row * knit the front, we make the nakid * and so until the end of the row, in the amount there should be 40 loops. Now the facial loops do not lie and take on the needle for work, and the capes knit off. In the next row, the facial buttercups in the facial, and the invalid remove before work. Now we repeat in the fourth row, as in the second, it turns out the beautiful edge of the product. Next, we feed the usual elastic band one by one 10 cm. And a thread that is auxiliary can be removed.
Now knit the bulk part. 6 Rows are signed as follows: 22 facial, 16 Pouring and 2 facial. We begin to knit the pattern that will be in place 16 of the purl. The first row is 4 wrong, 8 facial and 4 irons. The second is 4 Pointing, 2 buttons remove to another needle for the work, then 2 facial, they are tied 2 facial with auxiliary needles, removing 2 buttons before work, again knit 2 facial, inhibit 2 buttons with additional spokes and 4 irons.
And so from 3 to 9 rod knit 4 Pouring, 8 facial and 4 irons. And 10 row, they see how the second. 11, 12 and 13 knit 4 Pouring, 8 facial and 4 irons. And in 14, a row should be kept as 2 row, and 15 row should have 4 irons, 2 facial, 4 irons, 2 facial, 4 irons. Further, all row, where 16 kettops, we are in charge. We try to make a mitten when we reach the palpist of great, then debug 7 kettles. I knit like this: 2 facial, removing 7 ottops in need with an additional string, we recruit 7 loops and knit until the drawing. If you knit the right mitchka, we remove the right, while from the edge we need to retreat 2 loops, and on the left mirror right.
Article on the topic: how to make a ring with your own hands
When to reach the tip of the little finger, we begin to subscribe loops. 2 Buttermits in one at the beginning of the first and third knitting needles, and also at the end of the second and fourth until it remains on the knitter on one loop, then remove them and stretch the string - we drag it.
Now knit your finger. We transfer to the knit 7 of the pending and then we recruit another 7 loopers, even on the bottom loop with side, it should be 16. So we knit until it reaches half of the nail. Then we start to subscribe, as it was in the main part. When the finger will be ready, it will remain to issue a mittens. We sew two black beads to the place of the eyes, and with the help of a hook to recover a chain of 30 cm, to turn this laugh in one mitch, as indicated in the photo. The same actions repeat with the second mitigation. And here our mittens are ready for a child!
Video on the topic
This article presents a video selection, with which you can learn to knit mittens with a pattern of braids and owls.