Adjust your guests to friendly conversations with a beautiful design of the table. Figures from napkins will be able to help you. Make exquisite swans, fan, beautifully wrap cutlery and guests will immediately understand that they fell for a holiday to the real mistress. It will place them to you, and they "come up" your tablecloths and dishes. After all, with such delights, I don't want to overshadow the events of the organizer. For the new ideas of figures, consider the origami icons from the napkins on the table specifically collected in this article.
Floral Salpars
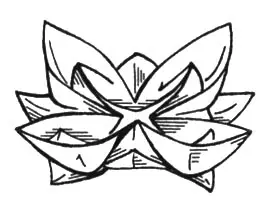
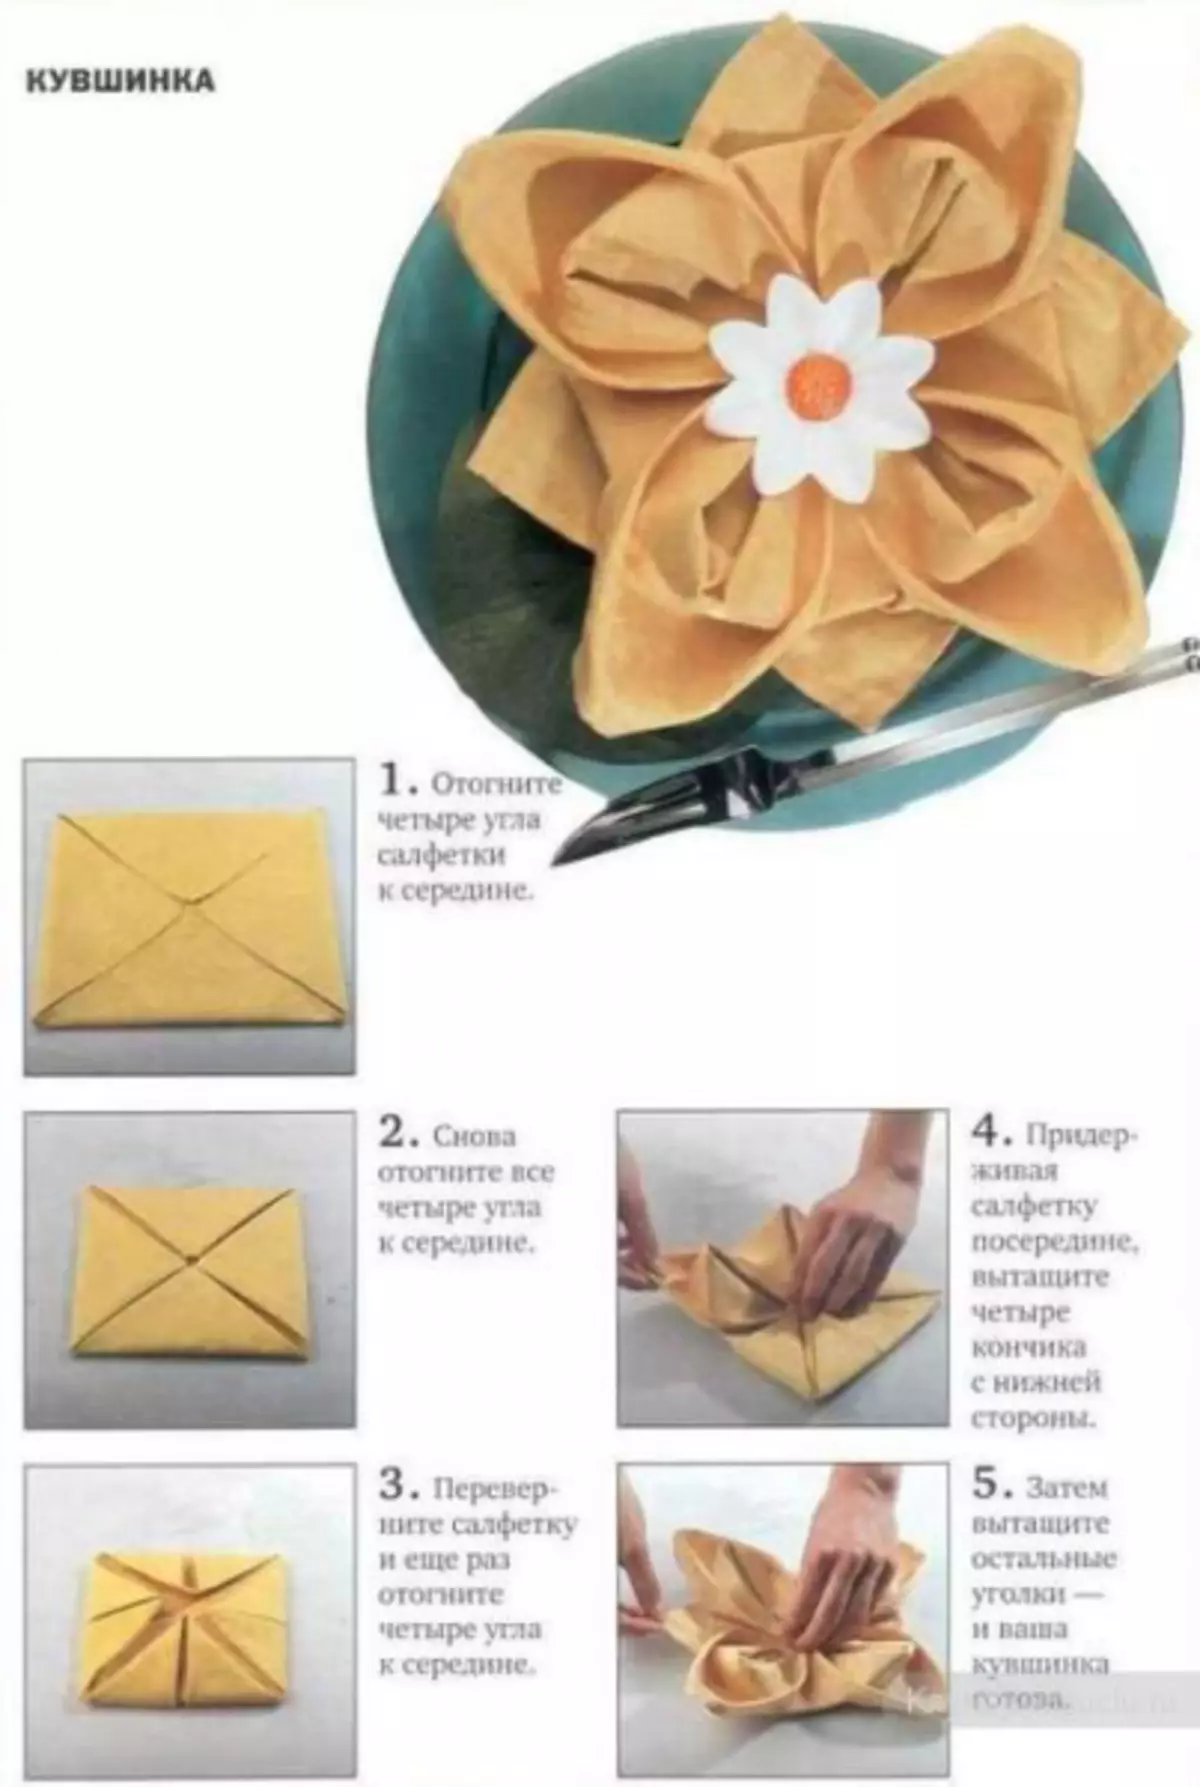
Lotos's cloth is made easy and simple. Categories of colors from napkins can be highlighted with a large chapter, as a variety of folding methods is very much, on any choice and taste. A very interesting way to fold from paper napkins in a lotus flower, which is a kind of carpet. It looks very gorgeous, but how to do it, show in the instructions with photos. The technique of creating these colors origami modules is called.
To start work, we need to prepare napkins, 8 napkins on the base of the flower and 24 napkins of any colors, will actually look like white and yellow napkins. We will also need a stapler or dry glue, it quickly glues and does not soften.
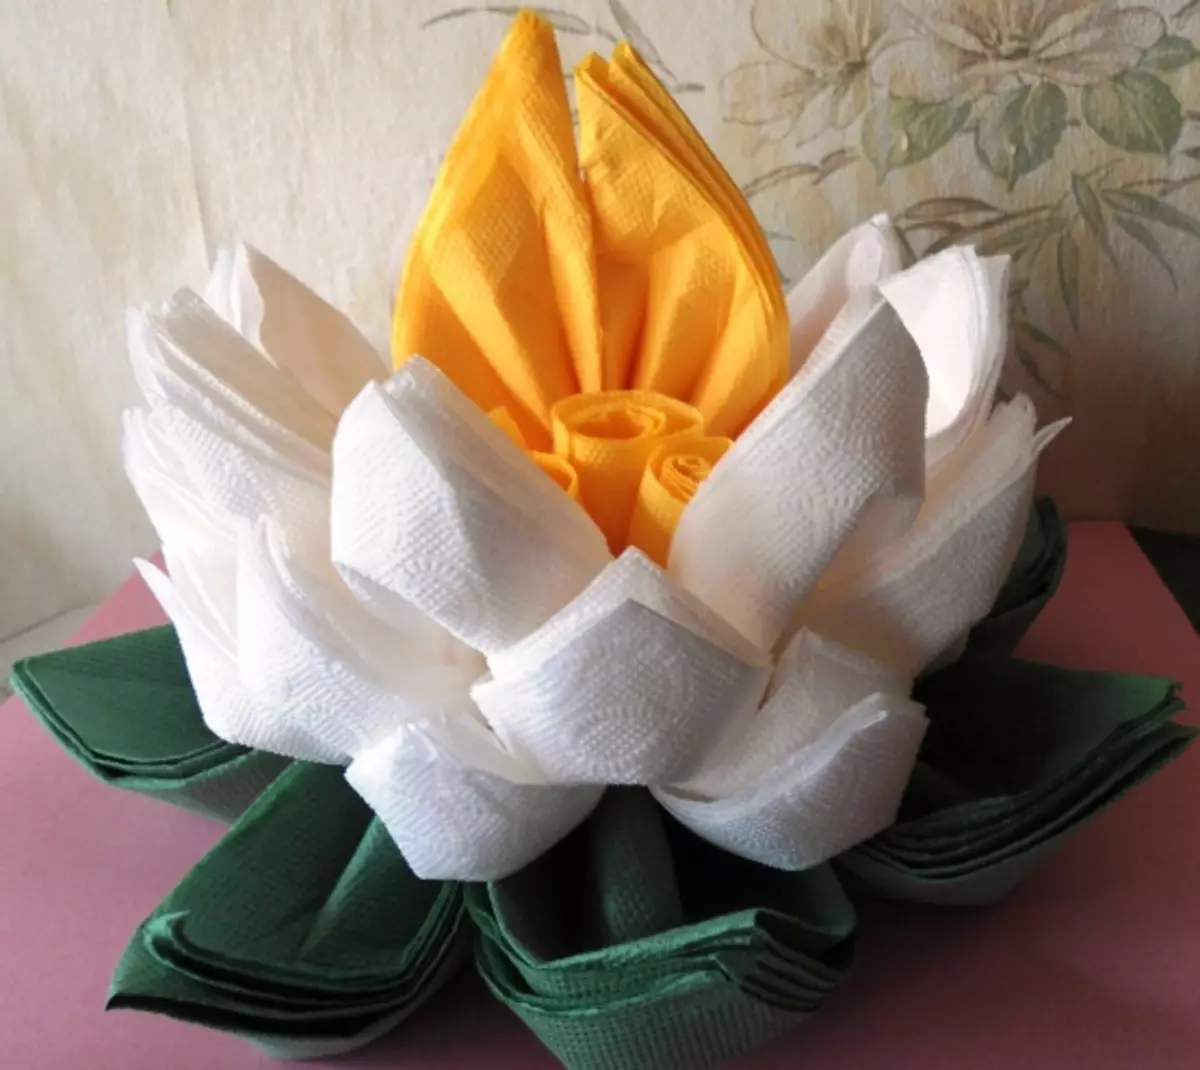
We make modules based on green napkins. The folded napkin is four of them, fold diagonally. Side angles fold on the airplane, and tips wrap under the bottom. We put in the center. We make such 8 pieces. We bind over the stapler's pockets up.
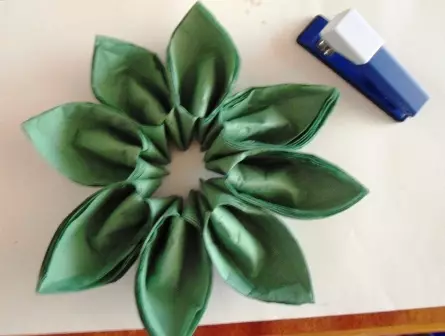
From white napkins, we make the same modules and simply insert them to the wipers between the two fastened base modules, and so the layer behind the layer up.

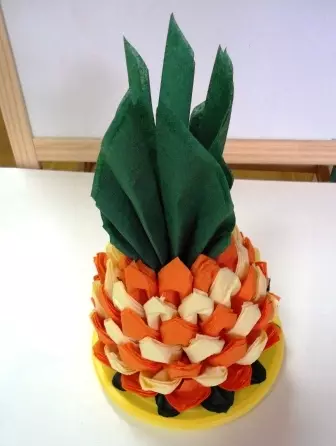
In fact, you can continue so until the bud closes. Or insert other color napkins, twisted, for example, rolls or veins. In this way, tank-pineapple can also work.
Article on the topic: What does the Tattoo Dream Catcher mean
These closets will serve as the original decoration of the festive table and simply use them functionally.
Bouquets for the holiday
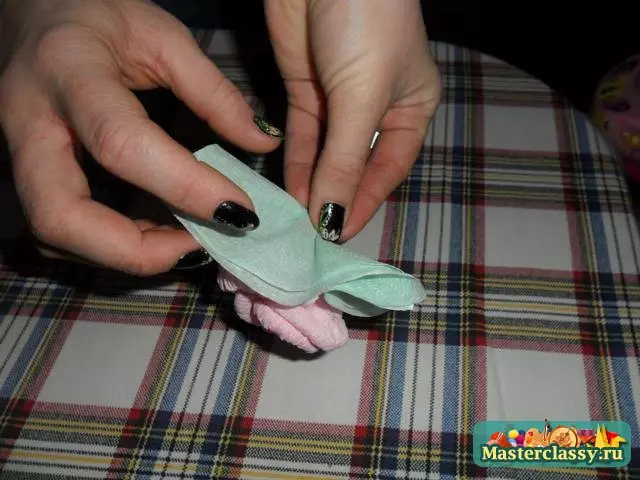
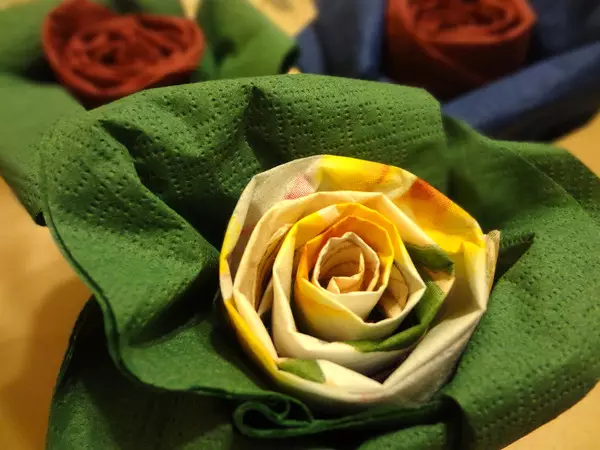
To serve the table for the holiday, make each guest an individual rose in a glass. Take the napkins of two colors. To make the semblance of leaves, fold the napkin diagonally into the triangle and laid into the glass. For bud, the triangle of napkins are twice as well, and switches to roll, as in the instructions in the figure below, and insert "leaves".
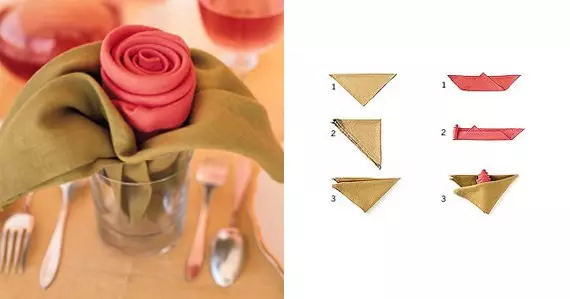
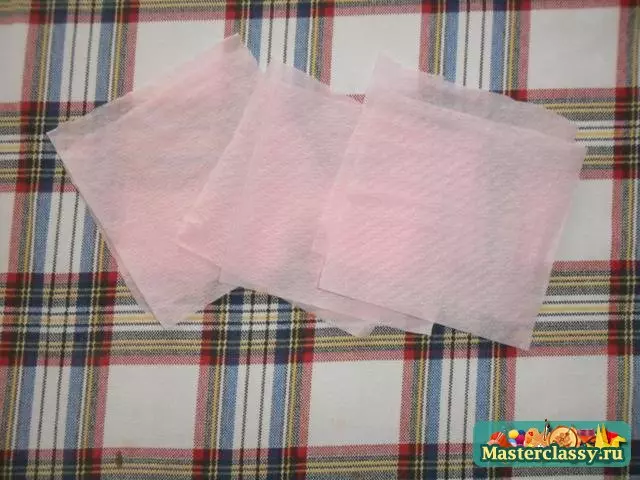
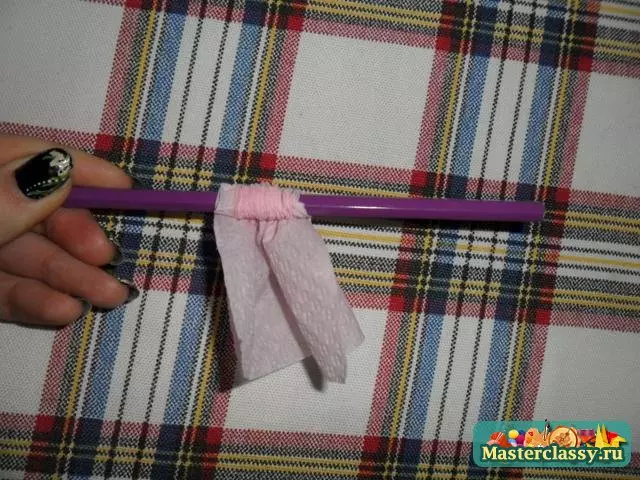
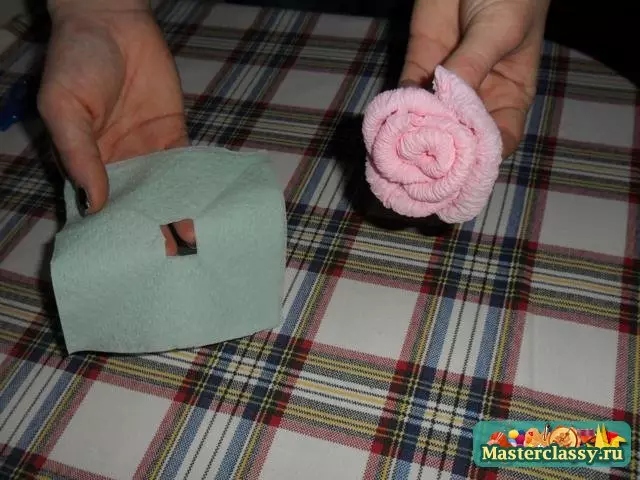
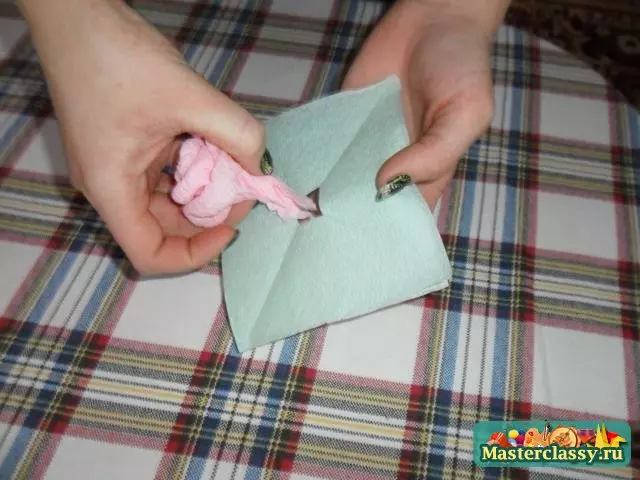
You can decorate the table with a rose from the napkin, though it will not work it already. Cut the napkin into 4 parts, we take a pencil and begin to wrap a roll from the napkin on the pencil, but not to the end, we leave a piece. Forming the harmonica, we remove the pencil, turn into the tube, take the other parts of the napkins and repeat the procedure, turn our rose buds in the petals.
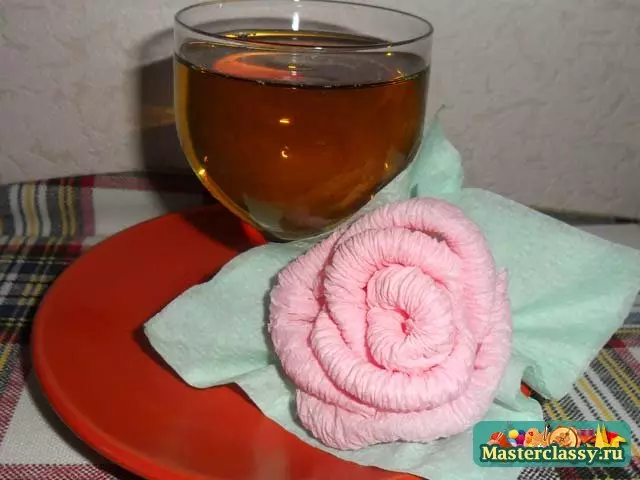
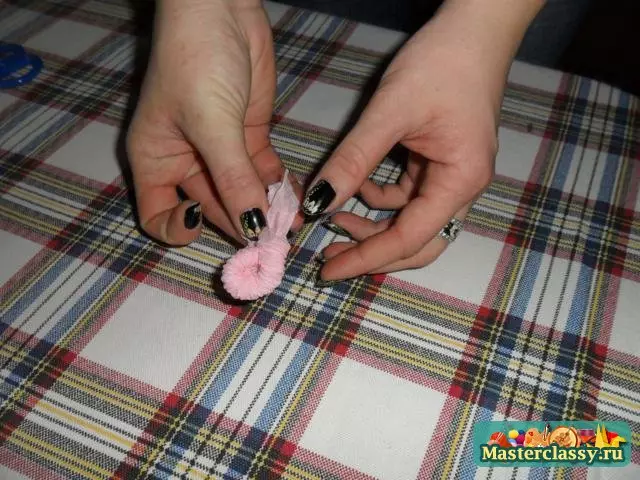
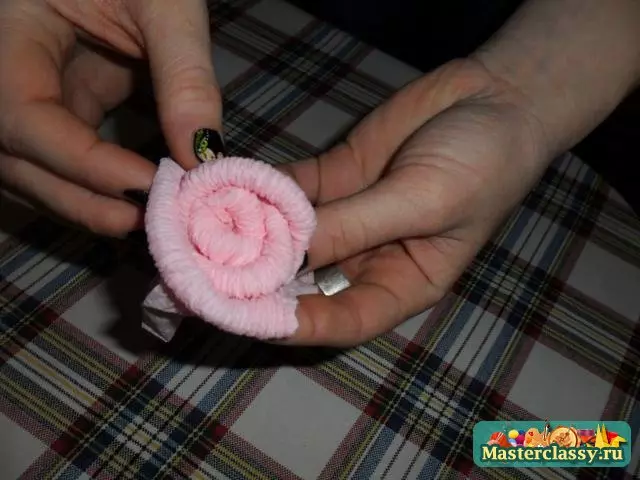
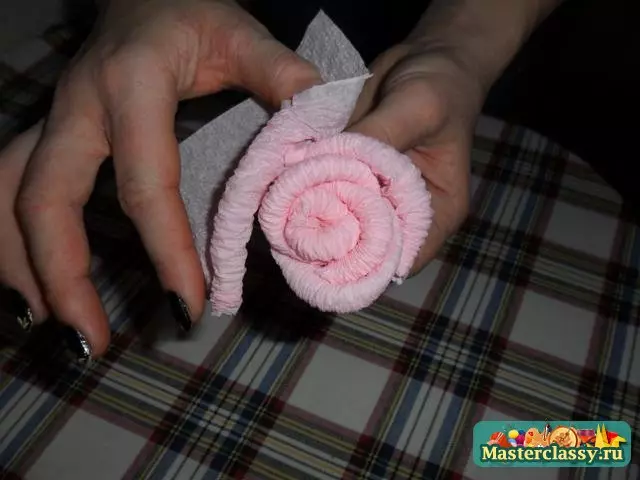
When the petals seem enough to you, the ends that we did not change, tighten the spiral, take the napkin, make the hole with scissors neatly the hole right in the center, make a napkin near the center. And insert the rose stem.
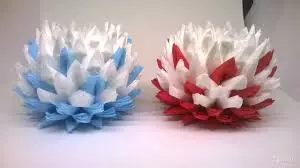
Light vase
Such napkins serve vases. They can be folded, for example, candy, like treat, cakes and other confectionery. The photo shows examples of folding tissue napkins, but the paper fold will be the same, the main thing is to take them more size, not the cheapest.
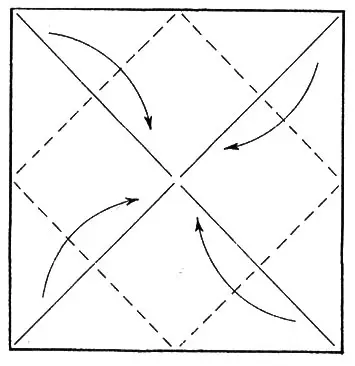
Lily. Expand the napkin, fold the corners to the center and repeat with the resulting square. Then turn the napkin and fold the corners again.
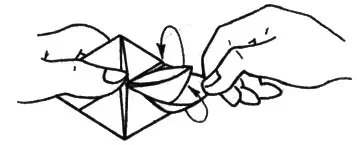
Now, holding the corners of the center with your fingers, remove the corners from under the bottom of the petals.
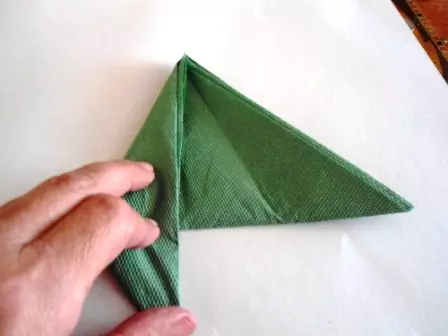
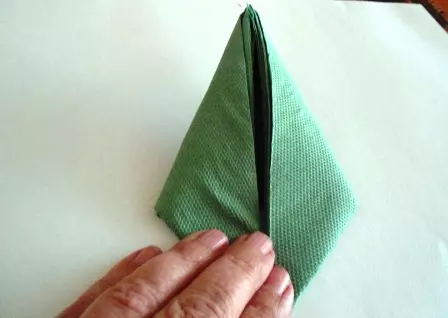
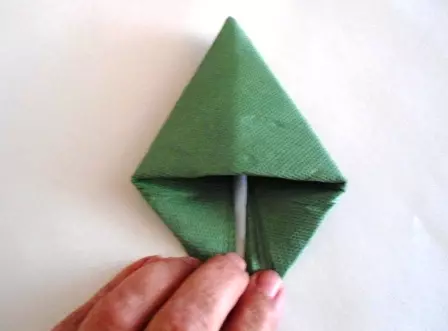
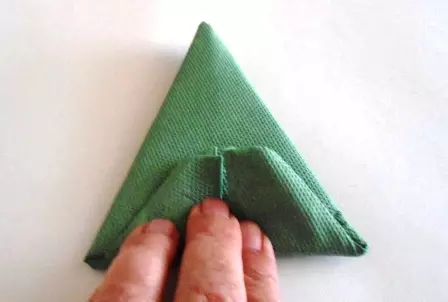
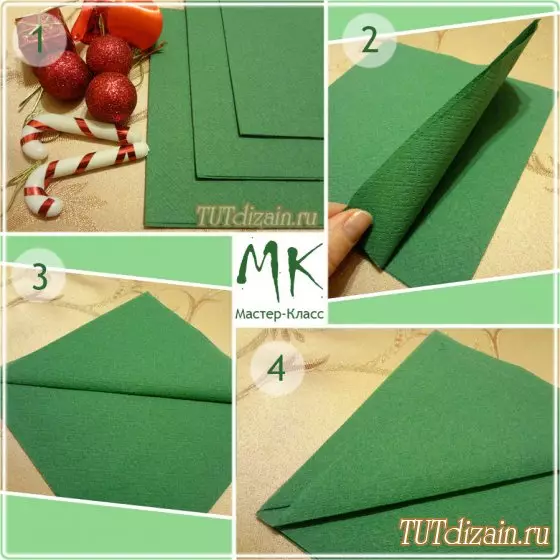
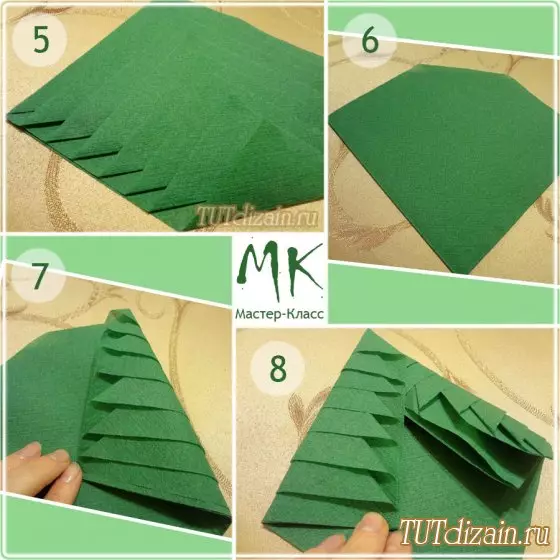
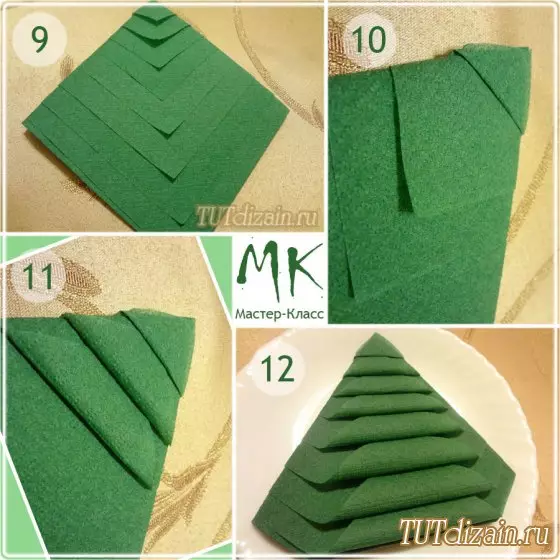
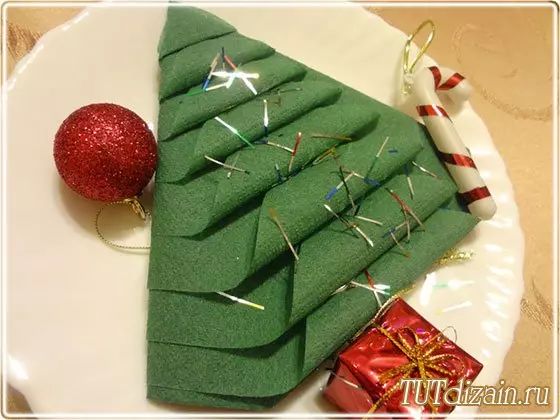
Christmas tree. We take napkins from the pack, do not unfold. We relax the napkin to 8 corners, bend corners in the center at a distance of each other. We fold the parties inward and turn the corner in the pockets of the previous angle.
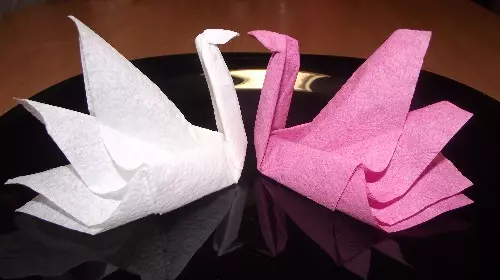
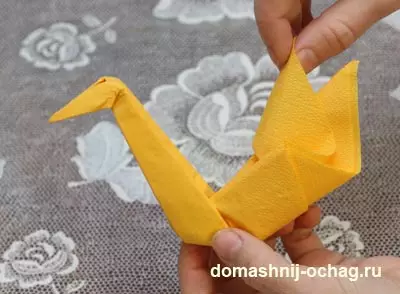
Swan from the napkin - Grace symbol on the table. We put the napkin diagonally. Stroke the fold line. We put up and put two sides to this line, as on the airplane, turn the napkin and we also fold again. Now the resulting figure is folded across the corner to the corner and on one third flexion the narrow part upwards, it will be a head. We fold in half along. Now bring our swan neck, head and straighten your wings.
Article on the topic: Poncho Crochet Babushkina Squares