
Wooden chest is a convenient and practical invention, which was considered from our ancestors a symbol of prosperity, wealth, prosperity. It can store things that usually cannot be placed in the closet: books, toys, sports equipment and much more. If the small size of the apartment or house do not allow to furnish with large furniture living room, place the table in it, the chest will perfectly cope with the role of a coffee or tea table.
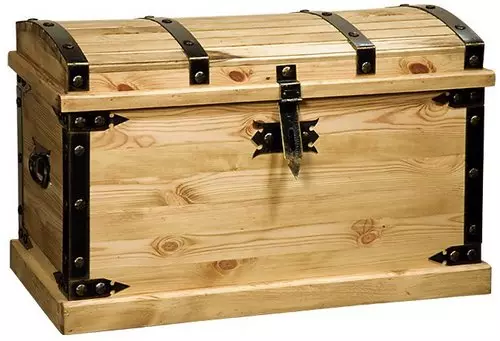
Using the chest houses, you will not only get an extra bed storage, but also a coffee or tea table.
Wooden chest make hands quite simple. With this task, even a beginner inexperienced master will cope with this task. The beginners in working with wood specialists are usually advised to start with the chest model in which wooden parts are connected on spikes.
Location, drinking, clearing
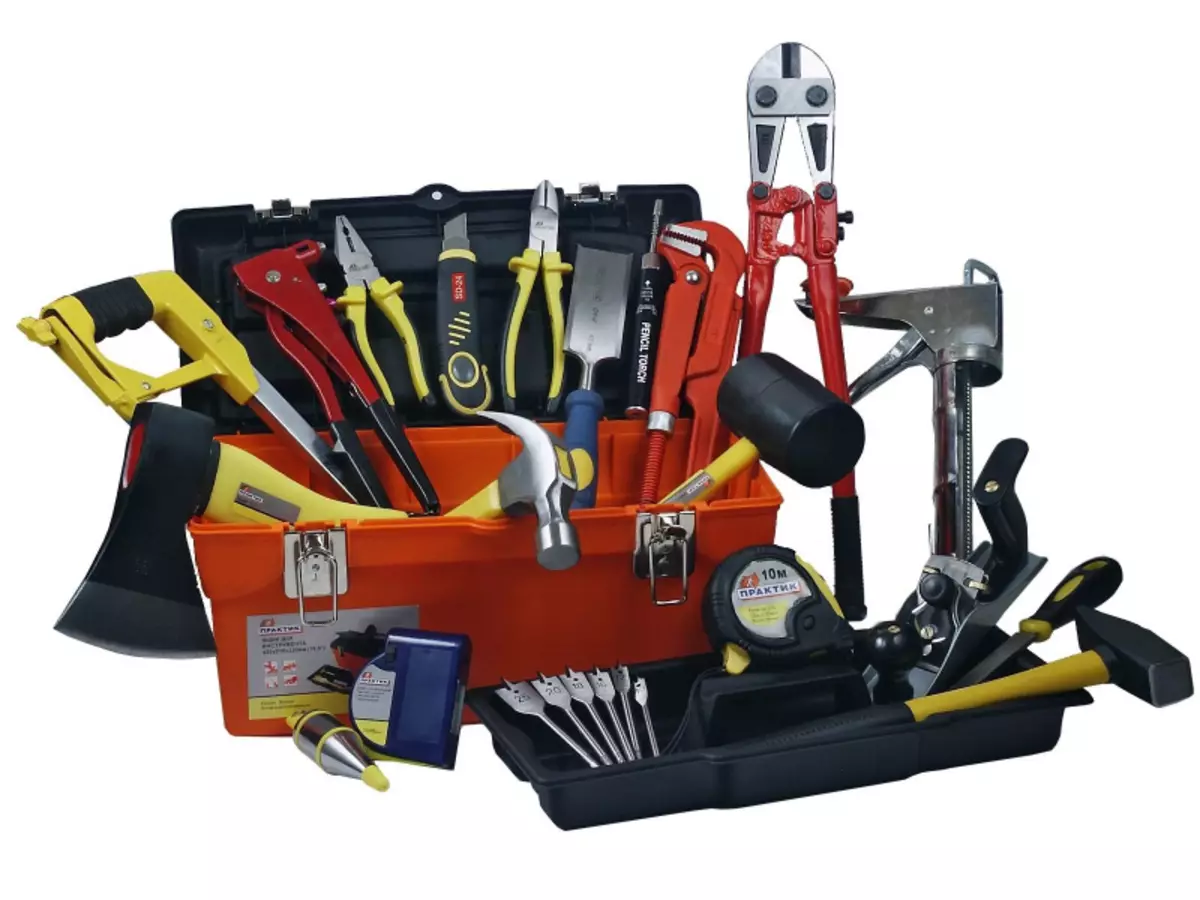
Tools needed for work: Electrolovka, hacksaw, screws and screws, clamps, screwdriver, thermocons, painter brush, carpentry glue, paint, greasy tape, sandpaper.
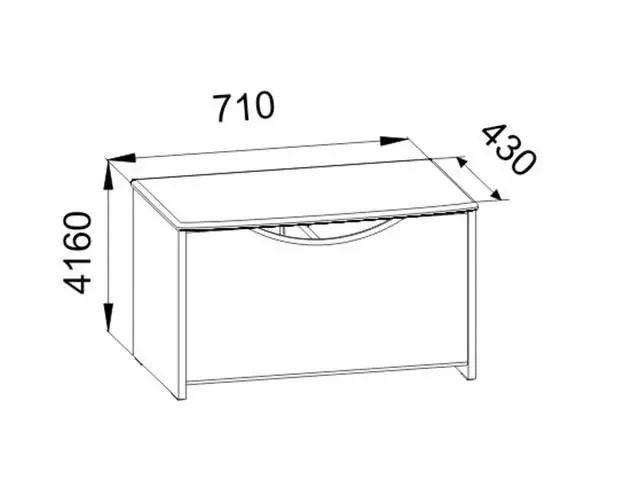
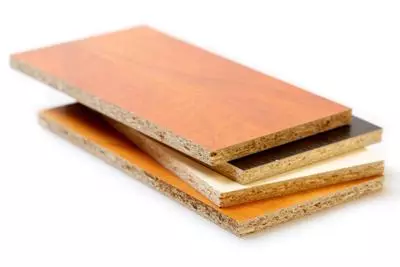
The chest is quite easy to collect the chest. It is somewhat more difficult to do those who have never worked thoroughly with a tree. In this case, you must correctly perform marking and cut the components of the elements. The wooden chest of rectangular shape consists of two parts: the bases and covers. The basis appearance resembles a box. The sizes of the core of the chest can be any - it all depends on what purpose it creates a thing that will be stored in it. An important role is played here and chosen for the interior item materials. Made with its own trees made of wood - pretty hard thing. Newcomers are often recommended for the manufacture of interior items to use multilayer Phaneur, because it is much easier.
For the manufacture of the product, the following consumables and tools will be needed:
- electrolovik;
- hacksaw;
- self-tapping screws, screws;
- clamps;
- screwdriver;
- Thermocles and construction gun to it;
- painting brush;
- joinery glue, paint;
- Malyary Scotch, emery skin.
Article: Modern wallpapers in the living room: 35 interior photos
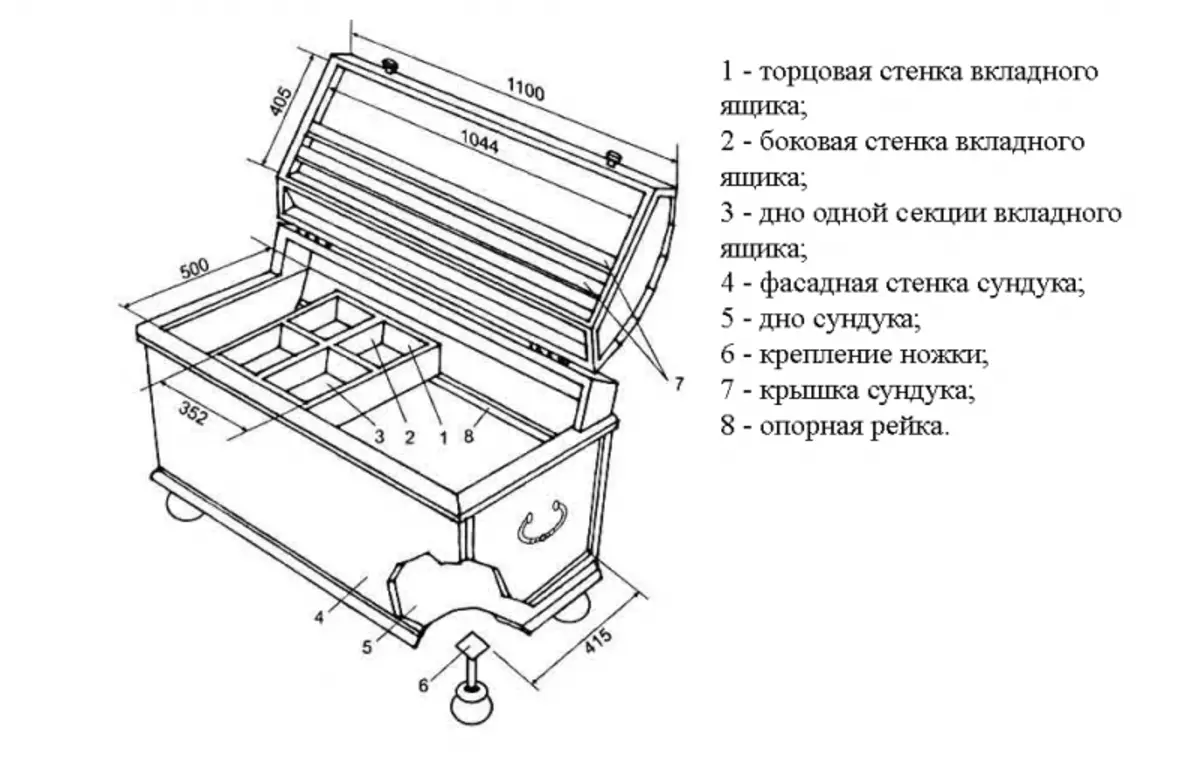
The chest device.
The first chest is easiest to do with plywood or wood, the average thickness of which is 2 mm. It all starts with the manufacture of patterns. For it, paper, ruler, pencil and scissors will need. All wooden elements from which the chest will consist are drawn on paper, then cut out, apply to the surface of the tree and on the pattern, as the template, place the details of the future thing. It is possible through a ruler and pencil to mark the markup immediately on wood. But it is believed that the first things from it are better to produce in templates. Such paper blanks will help avoid the disproportionateness of cut wooden elements.
Details of the future chest are manufactured using an electrollized or hacksaw. As soon as the parts are cut, their ends need to be taken with sandbroke. For working with wood, sandpaper medium grain paper is selected. If the chest is small and thin-walled, taking the "null" (the smallest grinder), intended for the processing of delicate materials and surfaces. And now the most painstaking stage of work is to be: making drawbar connections for lateral parts.
Marking nests and lylish
Chest diagram.
Before the start of the sample of the faces, so that the connection was then the connection (direct open spike), carefully and gently mark all the nests. If it is incorrect to place spikes and eyeles, all the work on the production of the chest will be in vain spending time. This operation must be done well and very carefully. For the markup, the triangle line and the simplicity of the pencil will be required. How to correctly calculate the size of the spike? It depends on the nest and is calculated with the way that the part is inserted into the eye tight. Marking of thickening connections should be as accurate as possible.
Here is another nuance: the spike should not be too thin, otherwise he will not be able to keep the wall in the chest. If the spike turns out to be too thick, the detail of the wood will receive damage and will become unsuitable for the manufacture of the chest. That is, in order to prevent errors in performing spikes, you must adhere to the Golden Middle Principle. It is very important for the markup to use high-quality stationery. A simple pencil should be well sharpened.
Article on the topic: How to make a mirror ceiling with your own hands?
In order to bring down the chest frame, it is recommended to use plywood or chipboard sheets.
As for lines, they are not applied without marking. If for a number of the same type of elements you need to outline the blanks, the parts are placed in a row. To perform such an operation, clamps will be required. If the chest is made of fine wood, it is necessary to worry about its safeness in advance.
For the markup of the same type of parts, gaskets will be required. The latter are placed between wood layers to protect material from mechanical damage and defects.
In order for the work to be made with maximum accuracy, the borders of the spikes need to be outlined on the inner and outer part of the chest elements.
As soon as the spikes are marked, their drinking begins. There is another secret of marking, which will help to avoid common mistakes from newbies. How to make spikes properly, not every wizard knows. In such a simple, at first glance, operations, there are its secrets. The workpiece must be carefully and firmly firmly so that its end was up. With a thorough way, the connection on the surface of the spikes first make marking on one part, then the operation is repeated on the other - the socket. This operation is repeated in a checker order.
Additional work
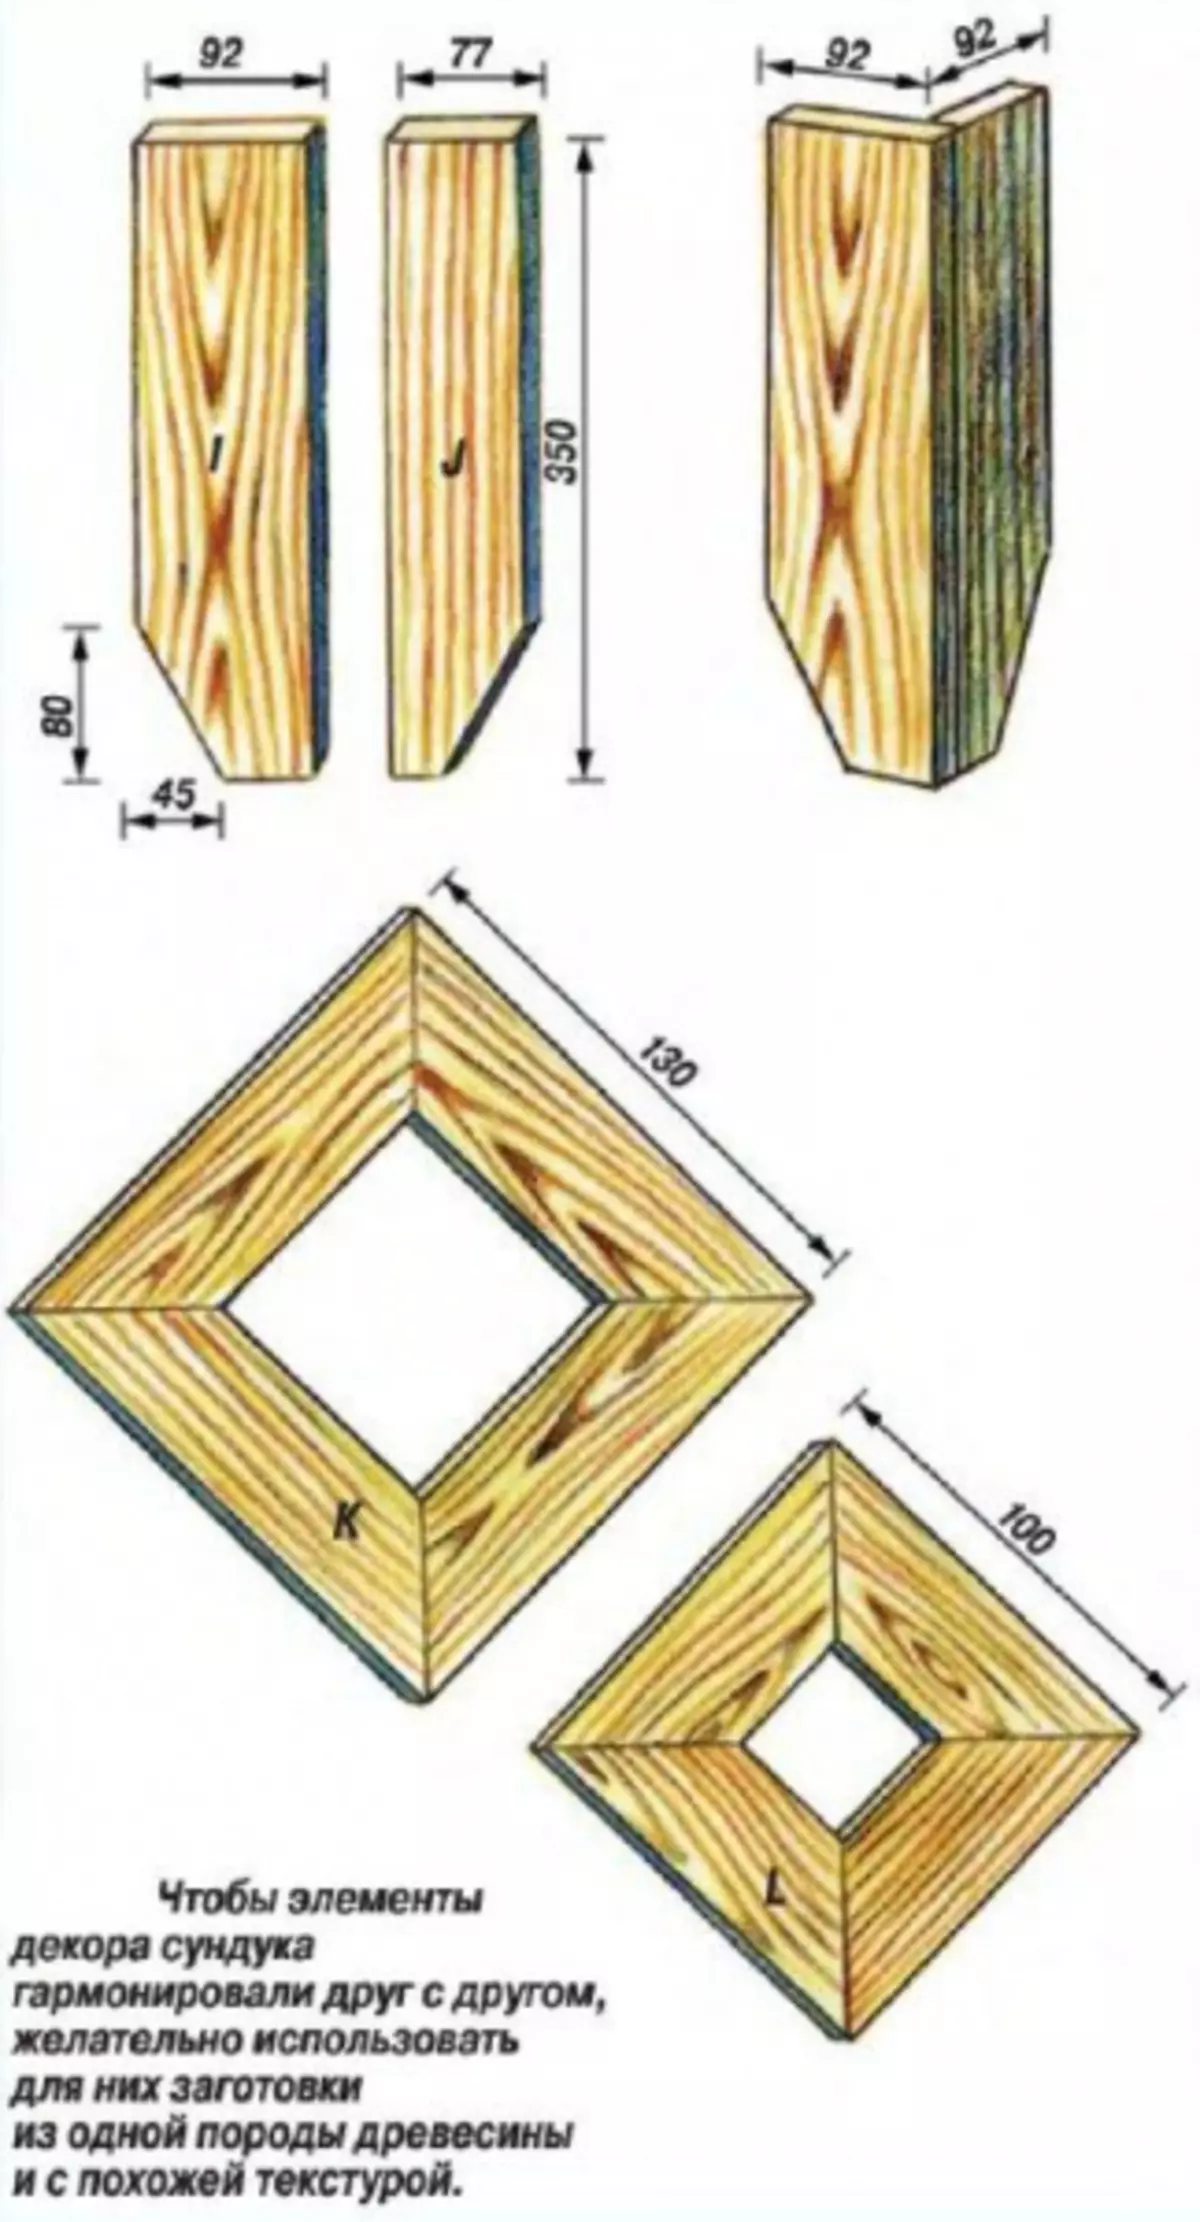
Scheme of the elements of the chest decor.
There are those wizards that perform spikes and eyelets without marking. If the newcomer will perform this operation in the same way, no smooth, aesthetic looking chest will fail. Distribution of the eyelets are carried out only after stamp markup. Following the suggestion there is a connection of the detail of the chest. For this operation, joiner glue is best. When connecting the blanks, it is necessary to check that all angles are equal to 90 °. To simplify such a task, a triangle line is used again. For fixing the details of the chest, clamps with gasket are required. The first in the chest always collect his sides and only then the bottom will be fixed to them. The bottom is attached to the main part, too, by means of glue for a tree. However, it is better for greater strength of the product in combination with glue to apply the screws.
Article on the topic: Sliding doors for the dressing room in Lerua Merlin
The chest cover is less than its main part in width. It is made in the same way as the main part of the interior item. Stylish is considered to be the solution if the core of the chest is made of ordinary plywood, and its lid is made of natural wood. Spikes and sockets when performing the lid are performed by the above-described technology. Therefore, a simple pencil and triangular ruler will be required for a more accurate cut cover. As soon as the upper part of the future chest is completed, go to the processing of all its surfaces, sandpaper sandpaper. Especially carefully performing operations on the corners with the help of grinding. The easiest, classic version of the decoration of the resulting thing is impregnation of olifa and an autopsy varnish.
It remains the final step - installation of fittings on the chest. The self-tapping screws will help to attach decorative loops, firmly by connecting the upper and lower parts of the chest. The loop for the decorative lock will help him fix it well. So that the chest cover does not overturn when opening, a strong braid will be required, the ends of the segments of which are attached from the inside of the chest. What else can you do to give the subject of the interior a unique look? For this, it is not necessary to carry out a wood carving, wood coloring in various colors and applied to decorating overhead parts, rhinestones, ribbons, laminate and wallpapers, imitating sea pebbles, look no less effectively.