
Photo
If you need to somehow make a wall, and the usual wallpapers seem boring, then a faithful choice in this case will be a photo wallpaper. But as far as it is a specific material and how to contact him, not everyone knows.
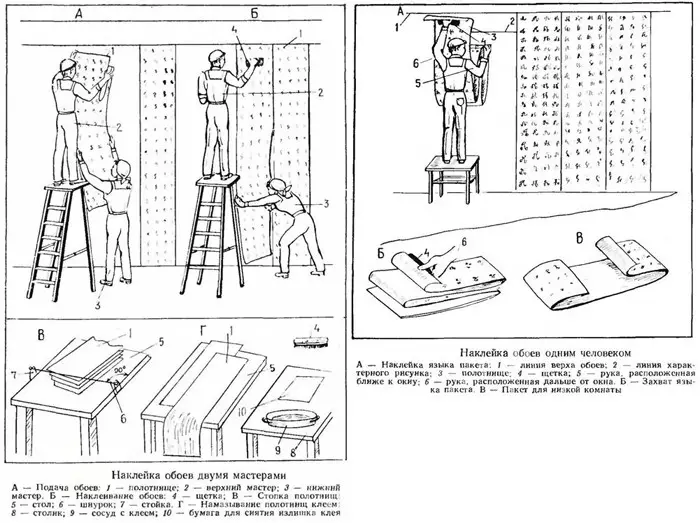
Stowing wallpaper.
How to stick a photo wallpaper on the wallpaper and can it be done?
What will be needed for work
- Level, roulette and ruler.
- Stationery knife.
- Rubber roller for wallpaper to get rid of air bubbles.
- Brushes (at least 2 - wide and narrow).
- Glue.
- Ladder.
Therefore, the glue needs to be selected for those photographic, which you chose.
One invariably - glue thickness increases in proportion to the thickness of the wallpaper, that is, the thickness of the wallpaper, the ground should be shy.
As a rule, universal adhesives for vinyl wallpaper are suitable for photo wallpapers. Also remember that glue should be enough for the promotion of the walls and walls themselves. That is, you need to take 2 times more than the area of pasting.
Surface preparation
Scheme of gluing wallpaper on the wall.
In order for your photo wallpaper to look stylish and perfectly, the surface must be absolutely smooth and dry. It follows from this that the photo wallpaper can not be glued on the wallpaper! The junction and relief (if any) will be bought on the surface of the photo wallpaper, because of which they will look untidy.
In addition, you can not be 100% sure that the old wallpaper in all places hold well, and the additional load of new wallpapers will make the detachment even more apparent and dangerous.
The glue to which you are going to shove the photo wallpapers will soften the old layer, and thereby will increase the drying time and the likelihood of the detachment of old ones. Therefore, do not be lazy and get rid of the layer of old wallpaper first. It's just done.
- Treat the wall with wallpaper hot water - this is done using a foam roller or sponge. Also efficient pulverizer.
- Wait 10 minutes until the paper splashes (if it is thick wallpaper, you should wait longer). If the wallpaper is washable and waterproof, you can use the metal washcloth for the dishes - it will score the upper protective layer.
- Spick wallpapers from the wall. If they sit somewhere quite tight, the spatula will help you.
- It is good to walk the surface on the surface and, when the naked smooth wall remains, paint it with water-level paint. When it dries, leak up the surface. This is done so that the drawing on the photo wallpaper turned out to be conceived color and through the light elements did not overtake anything superfluous.
Article on the topic: Select the mirror in the hallway: Decor tips and an increase in space (50 photos)
Getting to work
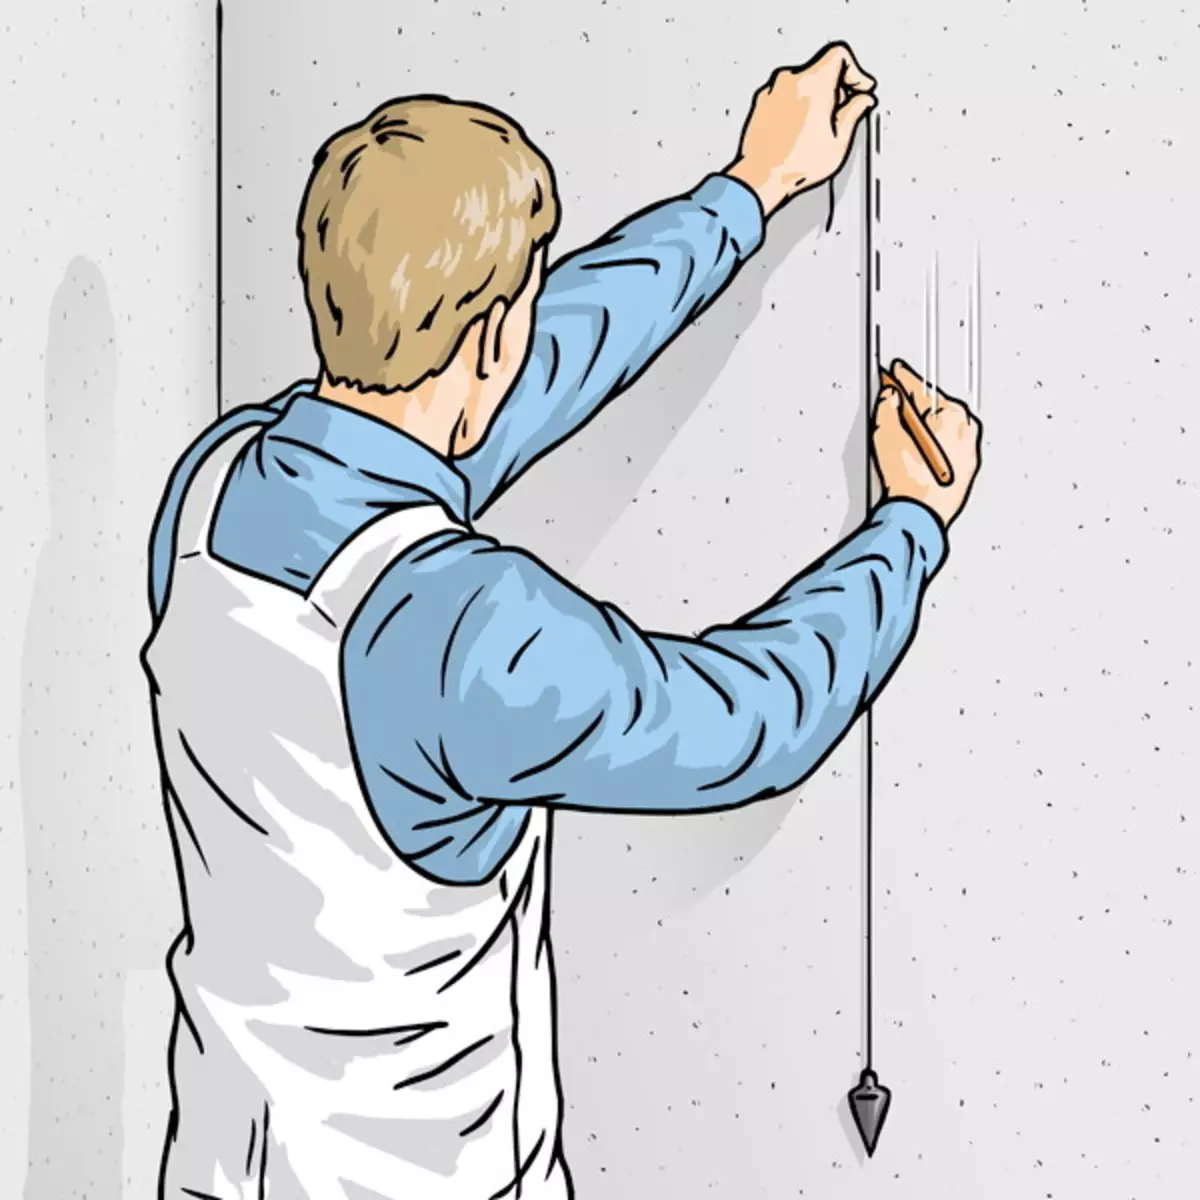
Using a plunder for applying vertical.
Usually on the canvases of photo wallpaper there are white fields that need to be cut. You can do it with big scissors or stationery knife - as you are more convenient.
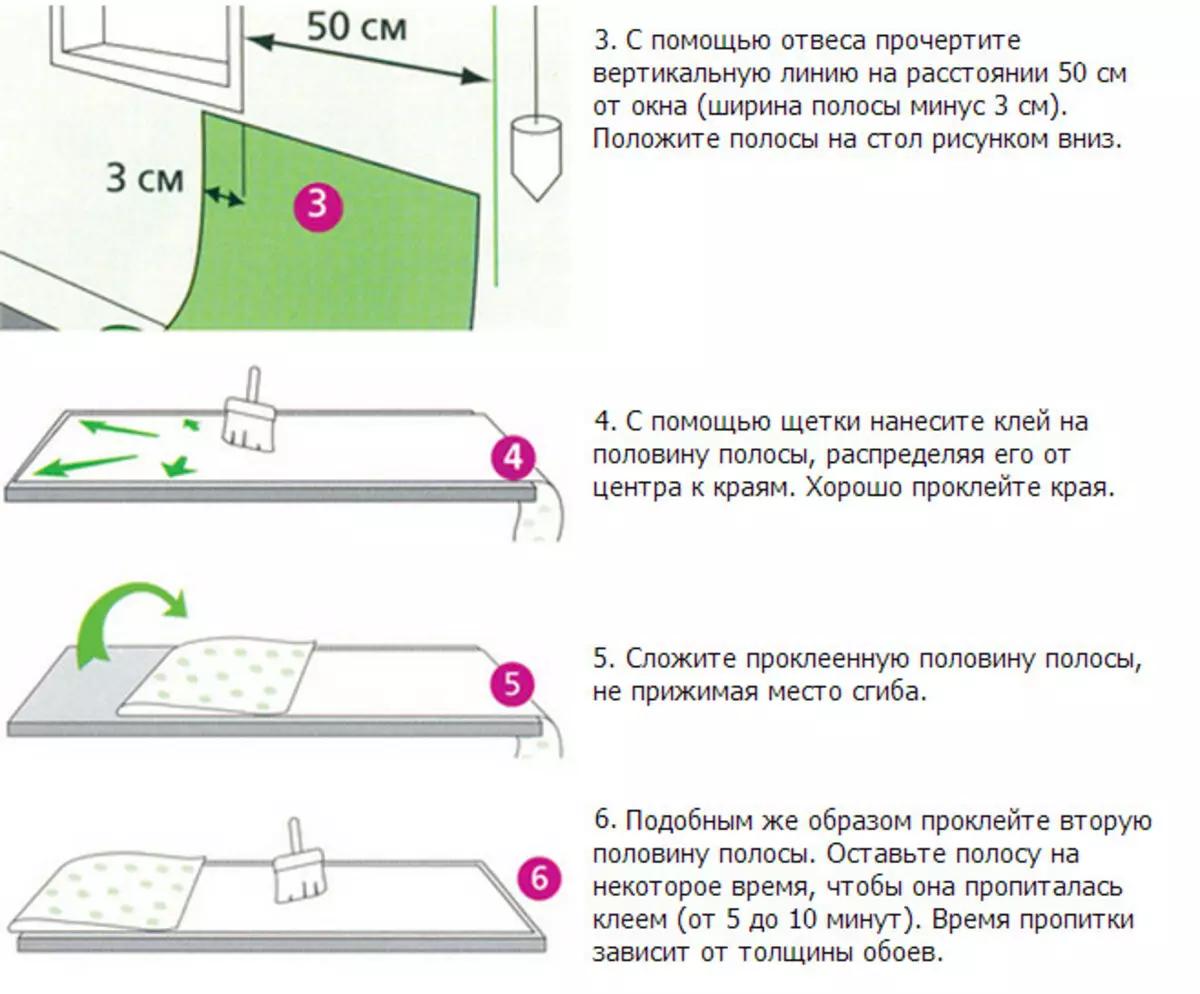
Follow the auxiliary lines on the wall using a ruler and pencil.
It happens a simple markup. This is a flat vertical line, it should be a little more width of the wallpaper.
The complex markup differs from the simple thing that you draw a few cells, namely their number coincides with the number of parts of your wallpaper. The numbers indicate the possible sequence of sticking sheets of your photo wallpapers.
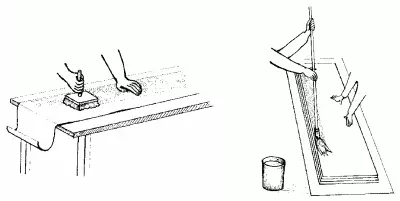
- On the floor, spread the newspapers to add wallpaper sheets to blame with glue.
- Melt the wall first with glue, and then the photo wallpaper. Leave them for 3 minutes, after which you can stick pictures on the wall.
- The first canvas glue strictly by label. Next, focus on the rest of the labels and on the previous glued sheets of wallpaper.
- Using a roller, output air from under sheets. This should not be made with a cloth, because it can spoil the drawing and in general paper.
- Next, it is better to shove the photo wallpaper from left to right. Each subsequent bandit strip with an adhesive to the previous, thoroughly combining drawing. Do not cut off the knife at the place of combination and remove the unnecessary stripes, cutting through both web.
- Launch the joints of the joints with a tassel and put the roller.
- During drying, there should be no drafts and open rays of the sun.
It is worth noting that there are self-adhesive wallpapers. They will not make it easier for you to task, especially if you glue the photo wallpaper for the first time. This is something like big stickers. It costs it once to attach it to the wall - and do not fix anything, it will stick. So it is better to use those that need to be lossed by glue.
Article on the topic: Bathroom cabinet with laundry basket
If very lazy
Application of glue on the wallpaper.
If you do not have any desire, nor the time to remove the layer of old wallpapers from the wall, and the light irregularities on the photo wallpaper in the form of joints and reliefs you do not bother you, then it will be able to help you, perhaps only self-adhesive photo wallpapers. After all, as it was mentioned above, a new layer of glue over old wallpapers can provoke their detachment, and then your work will be unsuccessful. Here are some tips, how to beat the photo wallpaper on the adhesive basis.
- Before use, degrease the surface to which the photo wallpaper is going to glue, and check the old wallpaper not wet. If they are wet, then you must dry them.
- Separate the protective film on the reverse side literally for several centimeters and attach photo walls smoothly to the top of the wall. Next neatly and consistently remove the protective layer from top to bottom and at the same time smoothed the wallpaper so that bubbles are not formed. Best of all, if someone helps you, as one is difficult to keep track of everything.
- When wallpapers are pissed, crumple the surface with a roller, getting rid of small bubbles if they were formed. In the case when large bubbles occur, which do not go out from under wallpaper, you can pierce them with a thin needle so that the air is released through the resulting hole.
So quickly and unfortunately, you can diversify the walls of your apartment. The main thing is to do everything thoughtfully and carefully.