
This type of art has become very popular in recent years. Paperoplasty is art modeling, where the volume compositions on the plane are made using paper. In this technique, the basis is the good ductility of the paper. Now in many schools use paper plastic for children. There are such types of this technique - bigric, gluing, folding, cutting and cutting. We will deal with each of the techniques: Bigovka - linear squeezing; Folding - three-dimensional modeling; cutting and cutting - gives a visual bulk form; Bonding - a compound between paper from paper. Such modeling methods are mainly used in elementary school and in kindergarten. Little children are very easy to perform, so do not have difficulties.
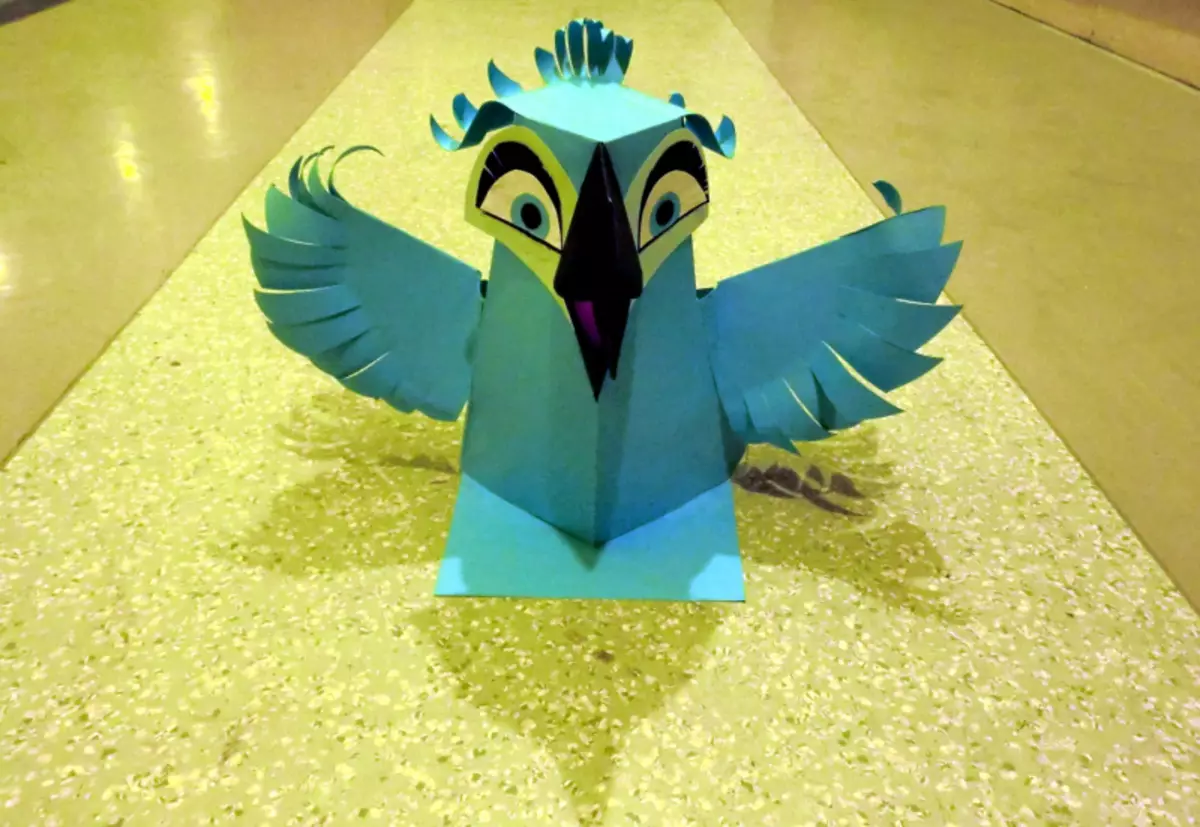
Mainly in this technique, various animals, flowers, birds, nature, tree, snowflake are performed. Such crafts in school and pre-school organizations are particularly popular at the festive period - for the New Year, March 8, Birthday, Easter and Other.
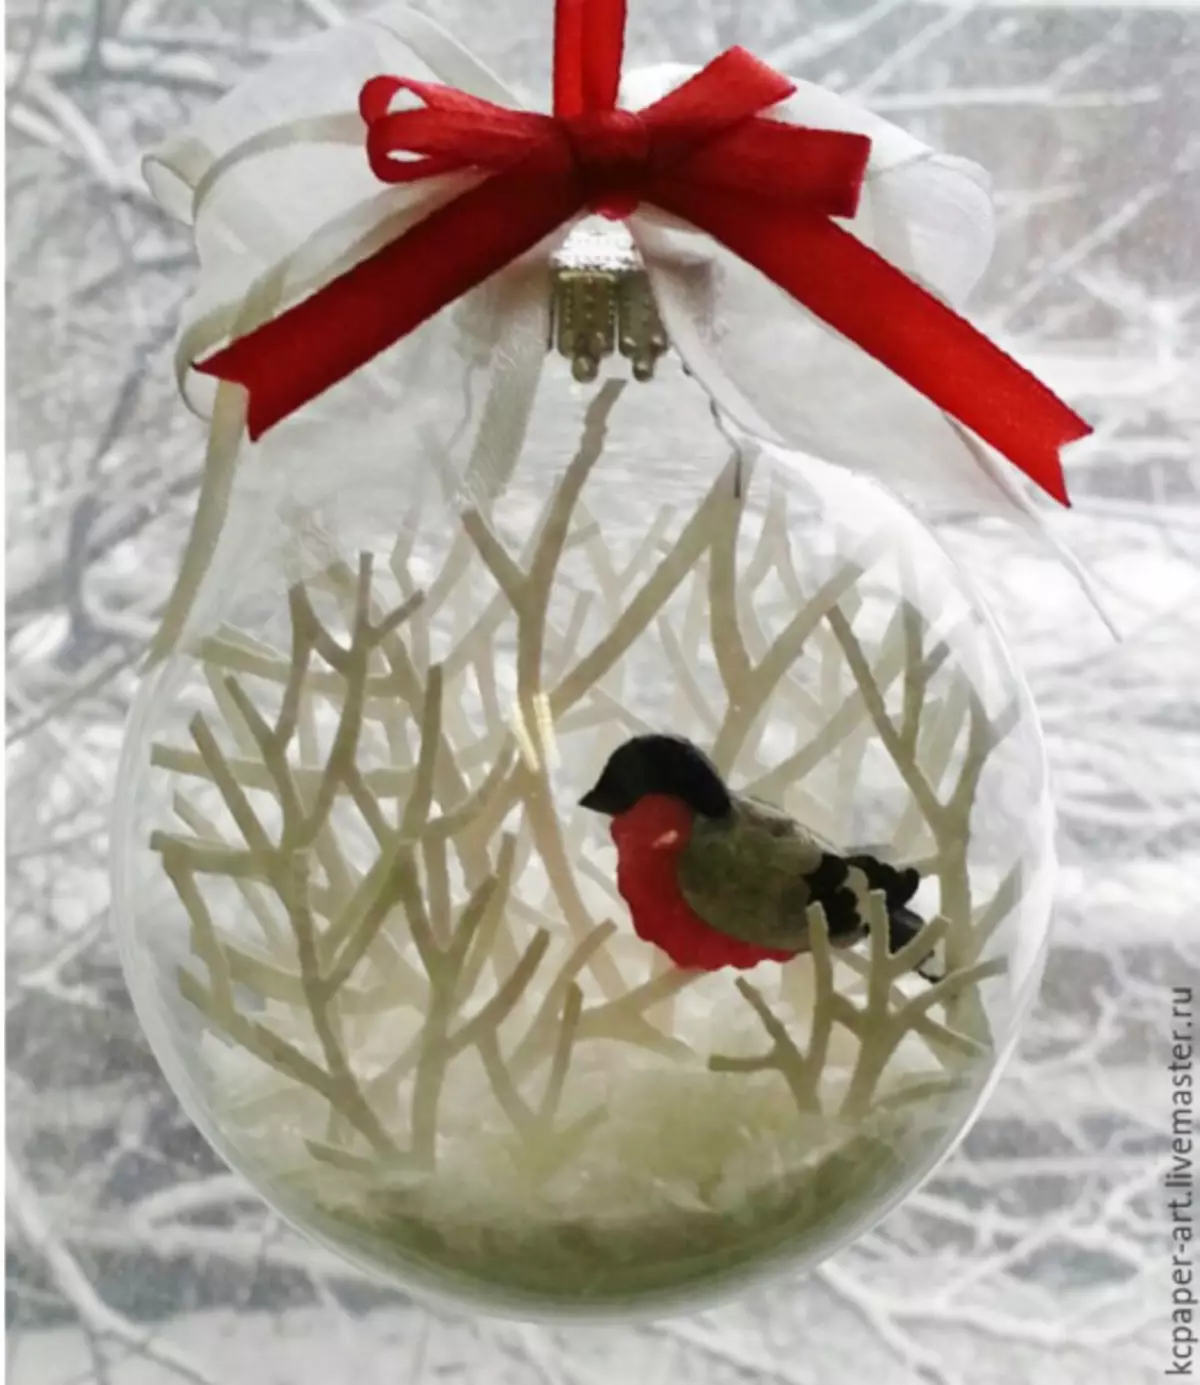
Ball "Snegir"
Little children love to make different animals, as well as birds. In winter, children are taught to make those birds that can be found outside the window. So, for example, it can be bullfinch, sparrow and others. For beginners, at first, this kind of art may seem difficult, but the schemes represented will help to understand even those who are just starting to learn to work in this style. This master class will teach how to make a New Year's toy - a ball with a bullfire. If you do with the child, then such creative work will undoubtedly like the baby and eventually remember the process for a long time.
What needs to be prepared:
- scissors;
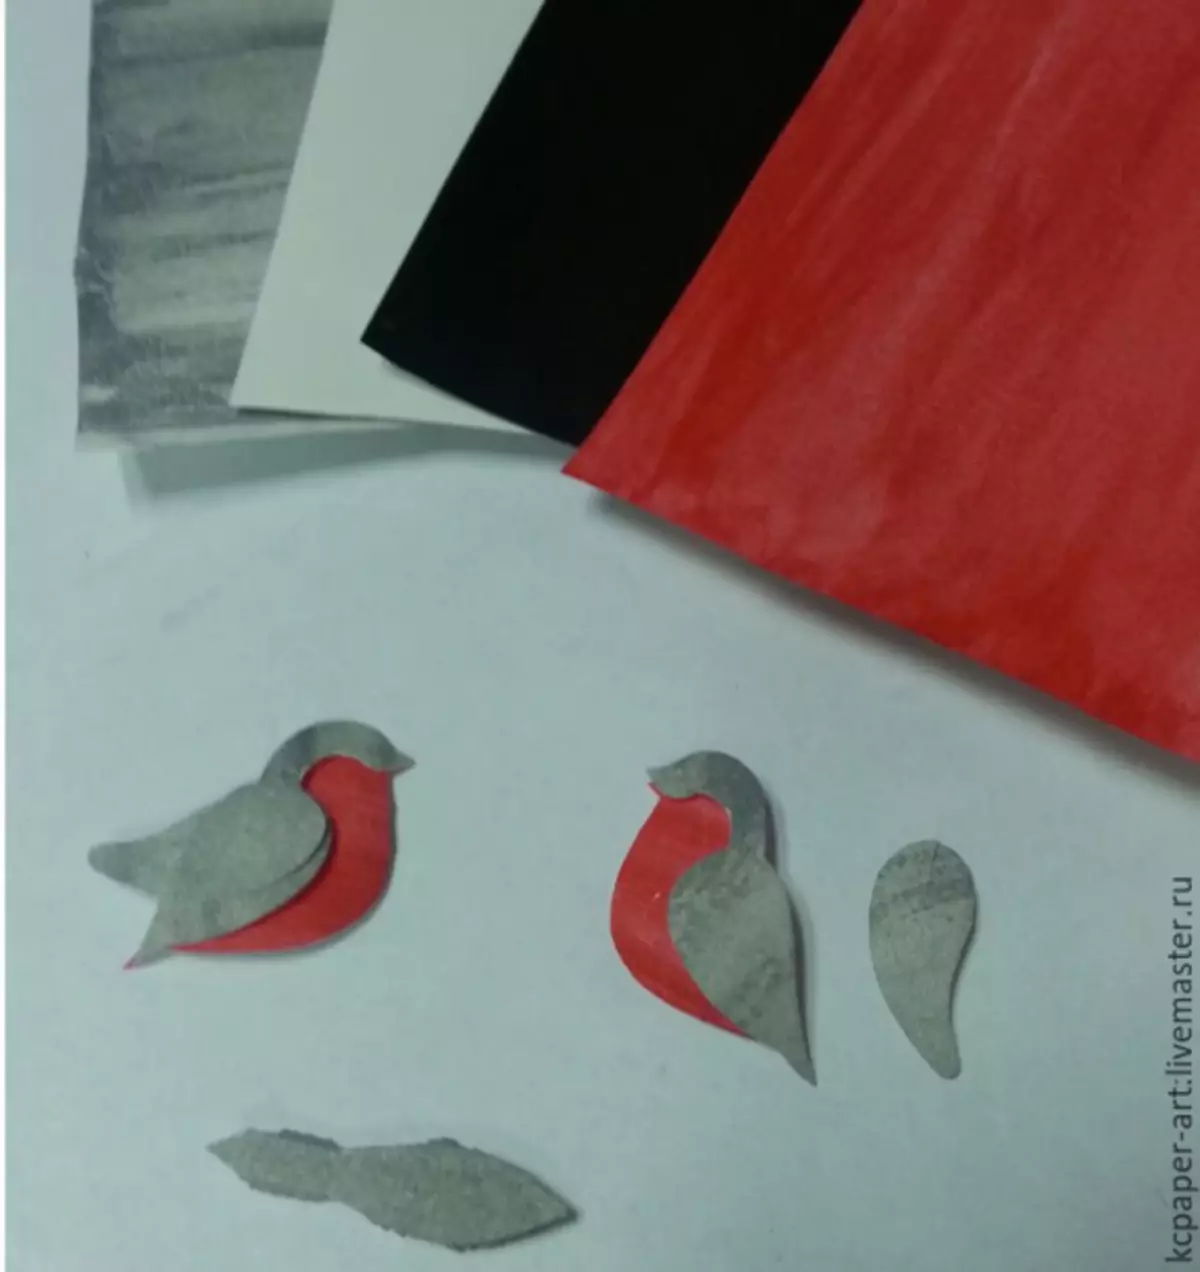
- Color paper or you can paint white paper in the right colors;
- glue;
- Stationery knife;
- tool for beats with ball;
- line;
- hole puncher;
- Plastic ball, which consists of two parts.
Article on the topic: Dimensions of the scene in two turns: Schemes with long and width of products

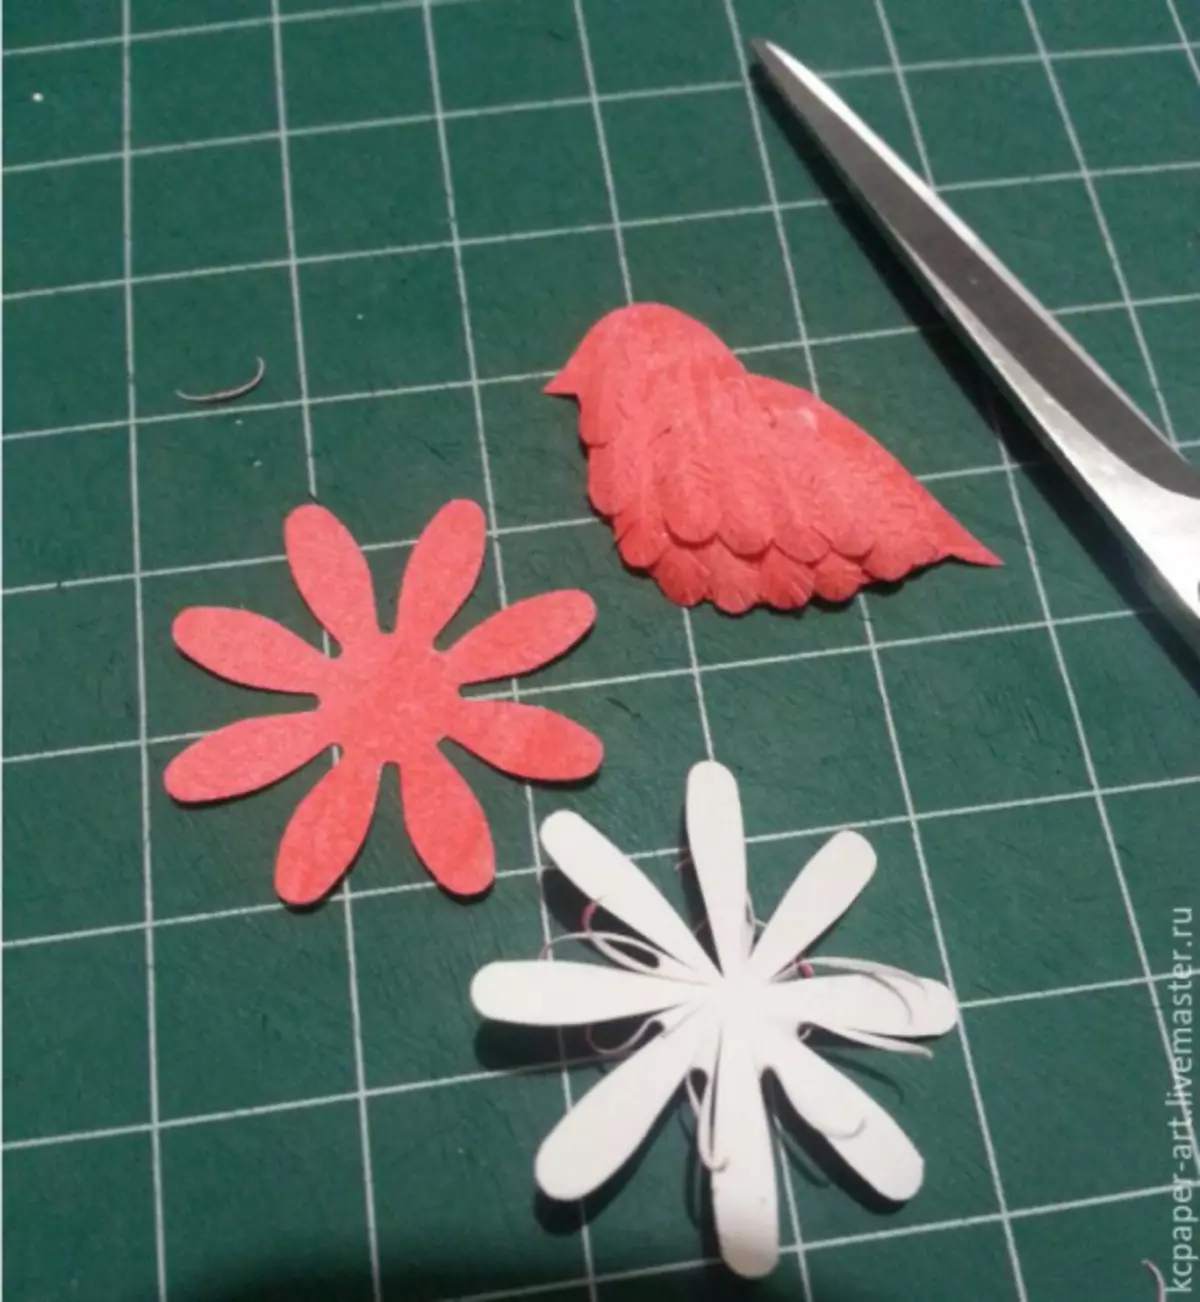
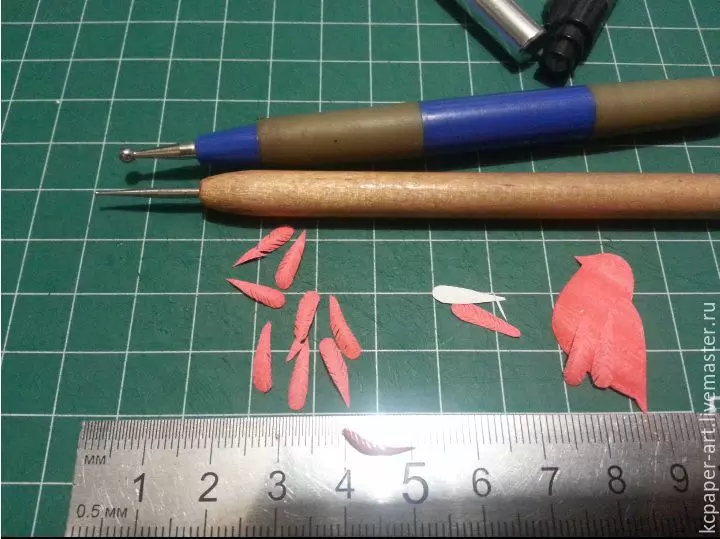
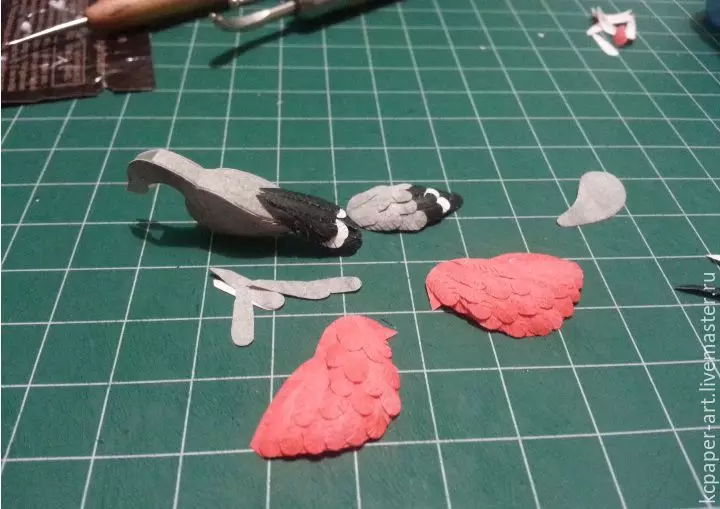
First of all we do the bird. To do this, take the paper of those colors from which we will do bullfding. In our master class, paper was banned independently. Taking into account the scheme, we apply a pattern on paper and cut out, but make the back with a small allowance. Next, we need to glue the details of gray, just do not touch the wings. We proceed to the manufacture of feathers - with the help of a hole, cut the chamomile, the petal needs to be pressed and then make a features. After, the feathers need to give a shape, where everyone has small slots with a side, so that the desired species come out. On the moonlock in the center of the auto side of the pen, we roll the tool for the crown with a large ball, and after, on the solid surface in the center with a small ball, draw the middle. When all the features are ready, we glue them to the wing.
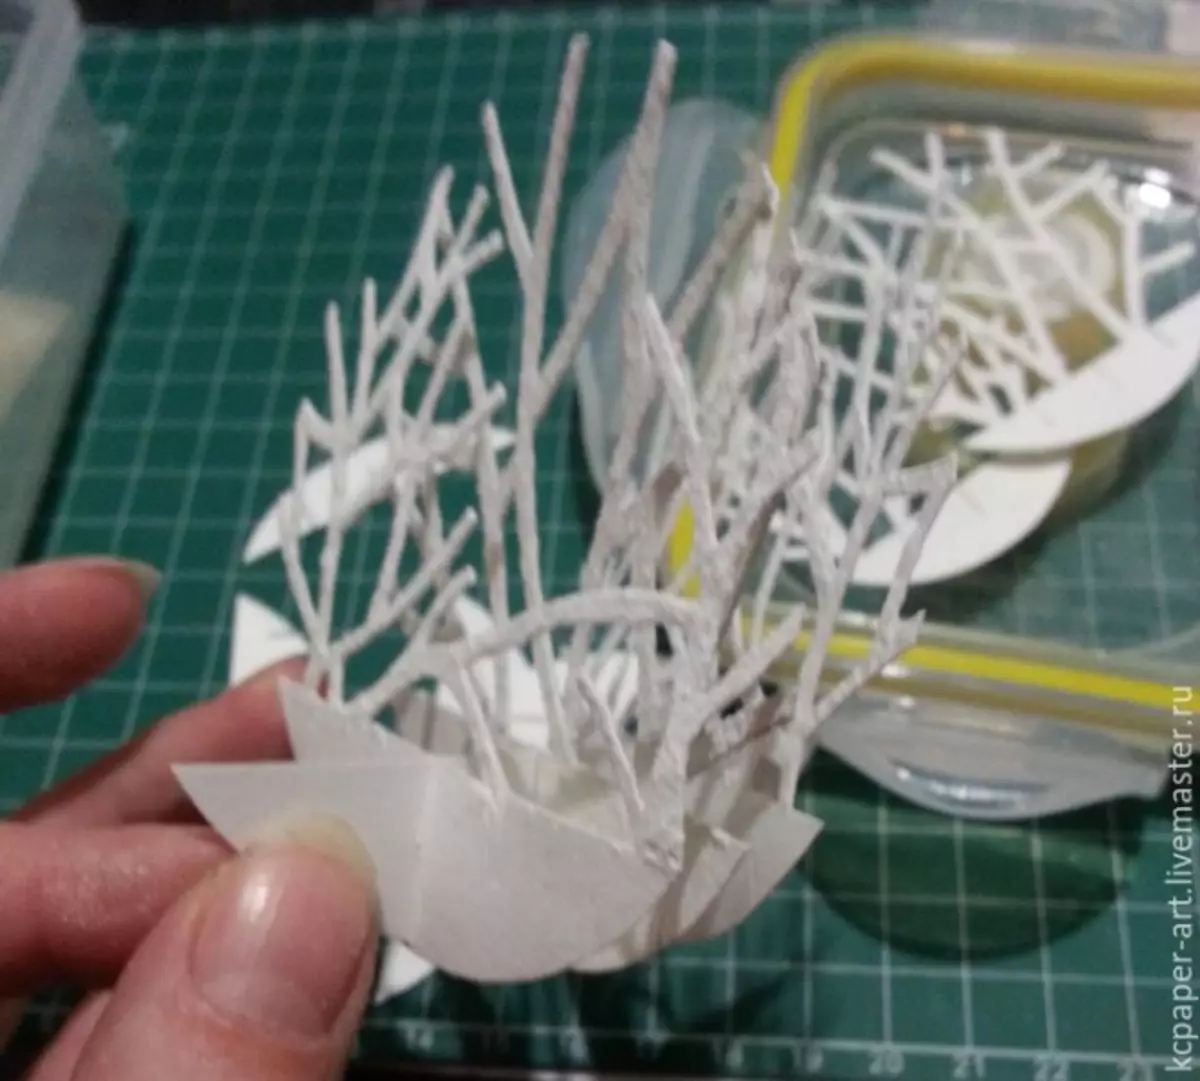
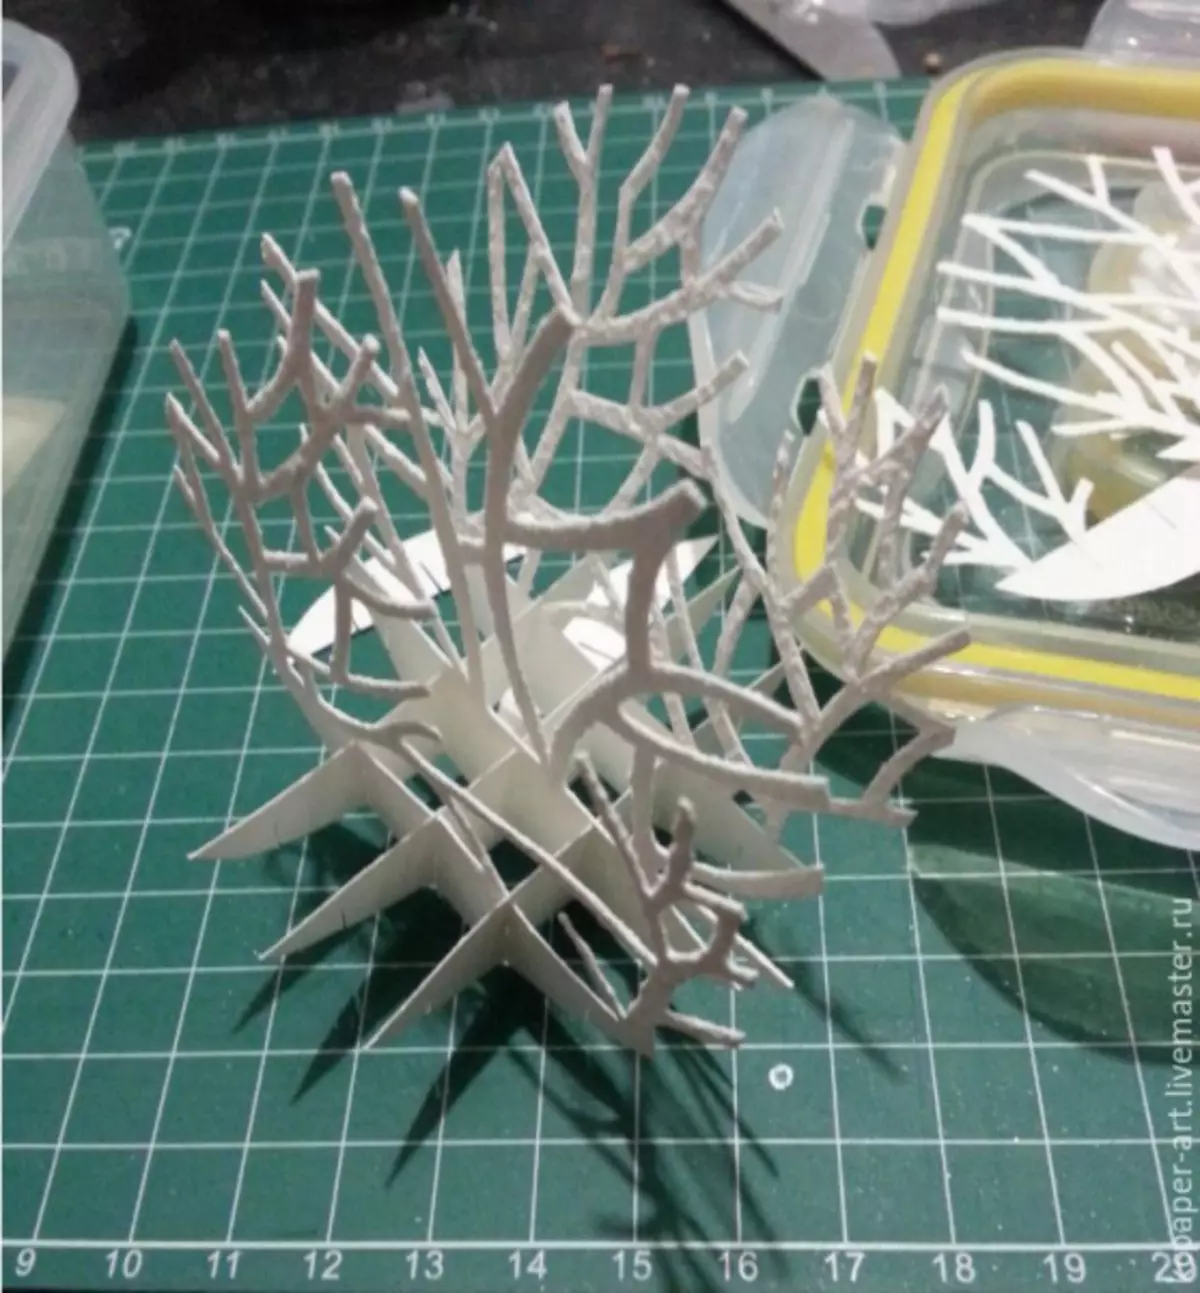
On the wings glue the shading and glue them to the bird. Head must be cut into black. Next, we make eyes, you can with the help of black beads. Snegir is ready, then we need to make a twig. According to the diagram below, cut out of white paper:

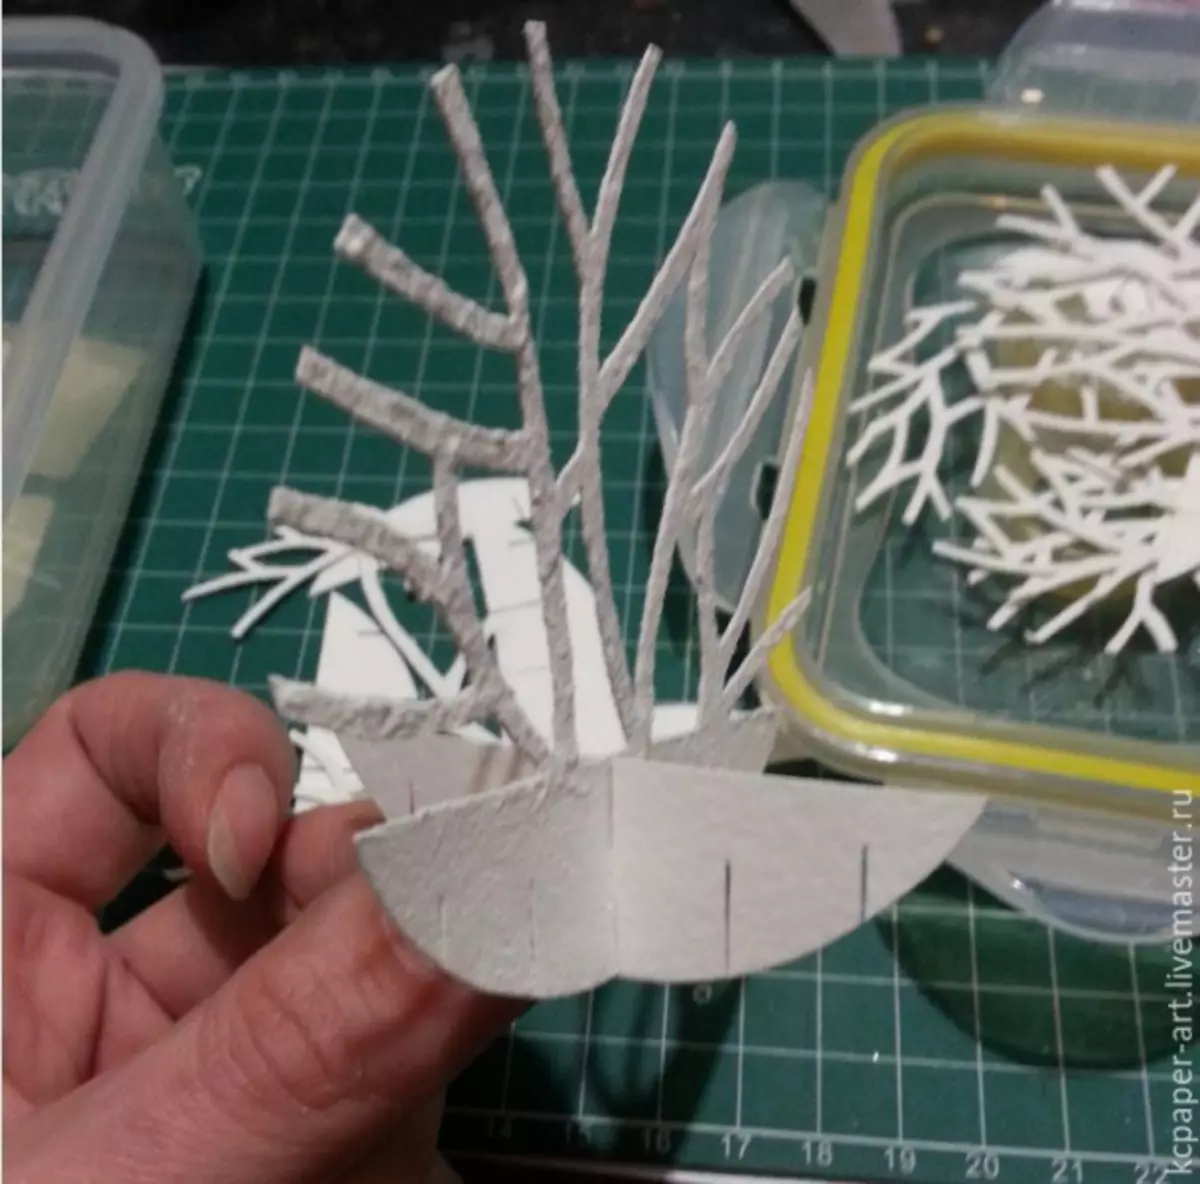
When the twigs are cut, they need to apply to them. And in the ball, glue paper mosses and wait for dry when it dries. Now it is necessary to assemble the details A and A1. In the subsequent cuts from the center insert detail in, B1, B2, B3 and connect them with each other. Attention, B and B1 should be in front of the detail A. insert the remaining twigs with, B, A, B1, C1 in the same way. After, to the base - and - we must stick two paper ribbons. With the help of them, we will attach our twigs to a circle inside the ball.
When everything is ready, everyone neatly laid into the ball and in the sprigs of Sadim Schirly. If there is no ball with two parts, then we put the twigs in the tube and go through the neck. Now you get patience and with the help of a tweezer we spread all branches. Next, you need a sprigs that come into contact with the ball, stick to it and fall asleep the ball with artificial snow. We glue bullfding in a bowl and tie a ribbon. Our exercise is ready.
Article on the topic: Garden do-it-yourself sick materials with photos of ideas

Butterfly in technique
Butterfly is one of the most popular insects that children do with great pleasure. Moreover, it is this beauty that can be found in any sphere of life of small girls. Make such a cradle with the kids will be very fun. Beautiful and light butterflies are made easily, and children will not be difficult to perform this task.
What needs to be prepared:
- White paper A4;
- Stationery knife;
- glue;
- Butterfly pattern;
- Dense paper for background.
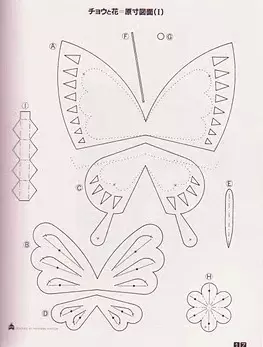
We take a sheet of paper and apply a template to it - we circle a pencil and take out gently. Next, we need to bend all the lines where there are dotted pointers. When everything is ready, after gluing all the details between themselves and the resulting butterfly glit to tight paper. And here is the butterfly ready. Baby will be easy to perform this job.
Color details can be made, then it turns out a multi-colored butterfly, or paint with paints. Also on the insect you can perform a beautiful ornament with the help of paints or handles.
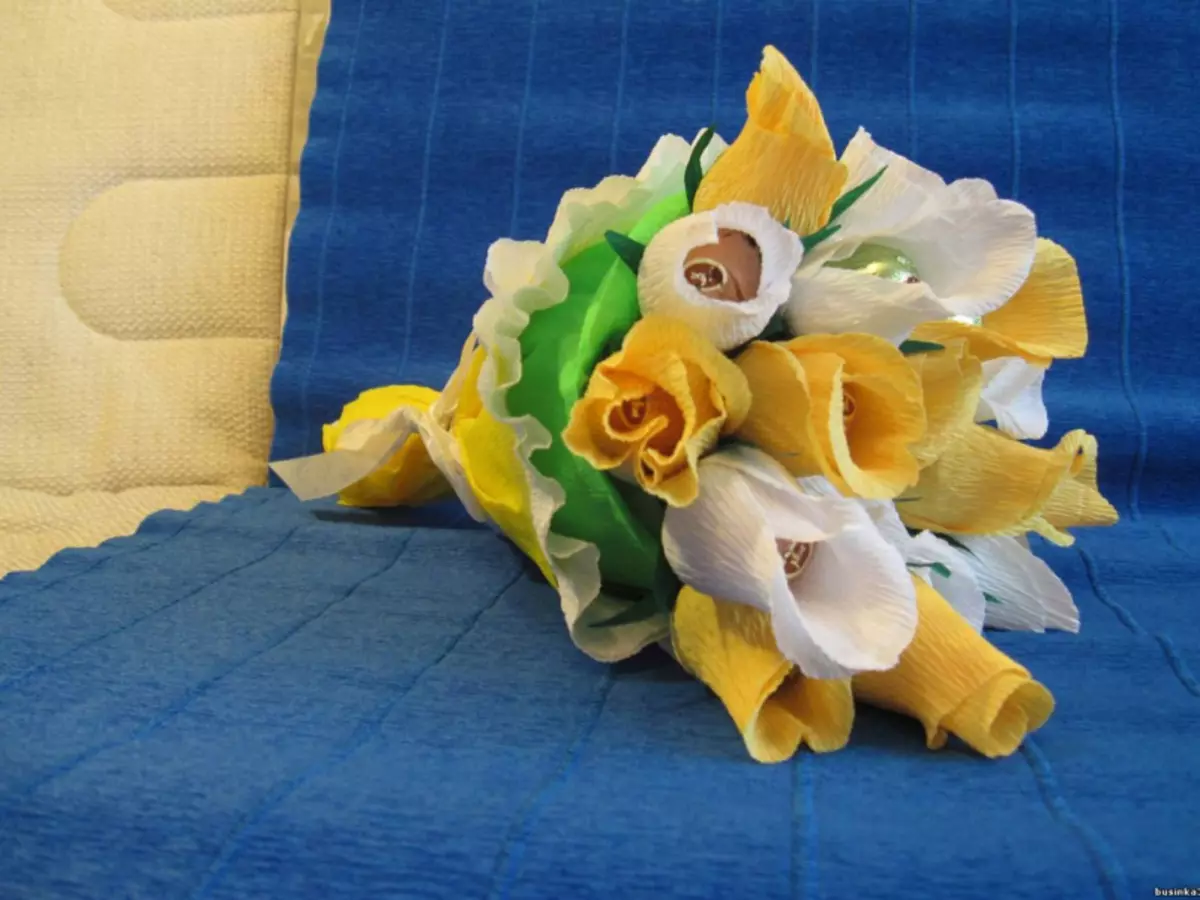
In the technique of wet paper, you can also make various crafts. Surround flowers look very beautiful. But such flowers can be made with conventional corrugated paper.
Video on the topic
This article provides video with which you can learn how to make crafts in the technique of paper plastic.