
In our time, the hat is very relevant. The type of this head remove does not indicate its monotony at all, because there are a lot of variations of the pattern. And today we will analyze how to tie a cap of braids, a scheme with a description of the work will help make the process rapid and very interesting.
Cap with tit
To work, we will need: thick high-quality yarn, any hook and pinch of inspiration.
The cap must be knitted in a circle, starting from the center. Type 5 air hostels and connect into a circular chain.
1 row - Make 1 column with Cathwood, 15 columns with an attachment to a hole made of air loops. This number of columns are divided into 8 parts and knit in a circle. 2 row - * 1 Relief column with an attachment from above on 1 post of the previous row, 2 embossed columns with an attachment from below 2 batch of the previous row *. Between ** Make 24 embossed columns. 3 row - * 1 Relief column with an attachment on top of 1 batch of the previous row, 2 embossed columns with an attachment from below 2 posts of the previous row, a relief column with an attachment from bottom to 3 column wedge of the previous row *. Between ** Make 32 columns. The embossed column with an attachment from above form convex paths that share wedges. 4-23 rows - knit, leaning on the diagram of previous rows, adding the loop on their own.
Knit, given the size of the head to which you make this product, until the gum knits on the caps.
In 24 row, let the following way: pull the long loop and associate a column with 2 nakida in the arch between 2 and 3 by the embossed columns of the previous row. Then tie a four-fold magnificent column in the hole between 1 and the last embossed columns of the previous row - it will be 2 crossed columns. Next, knit a column with 2 in the hole between 4 and 5 with the embossed columns of the previous row and a four-time lush column in the arch between 2 and 3 by the embossed columns of the previous row. So continue to knit according to the scheme to the end of the row. It will turn out 24 pairs of crossed columns.
Article on the topic: Butterfly from ribbons do it yourself for a boy in the style of Kanzashi
Connect the last magnificent column with the first column with two nakida of the same row. Turn knitting on the wrong side and tie 25 row by crossing the columns (skipping 1 pair of crossed columns of the previous row), knit columns with 2 nakidami in the arch formed by 1 and 2 posts of the previous row. So continue knitting to the end of a row, connecting the last and first column of the row. In the same way, tick another 5 lanes for the challenge. The first hat is ready.
Effect of gradient
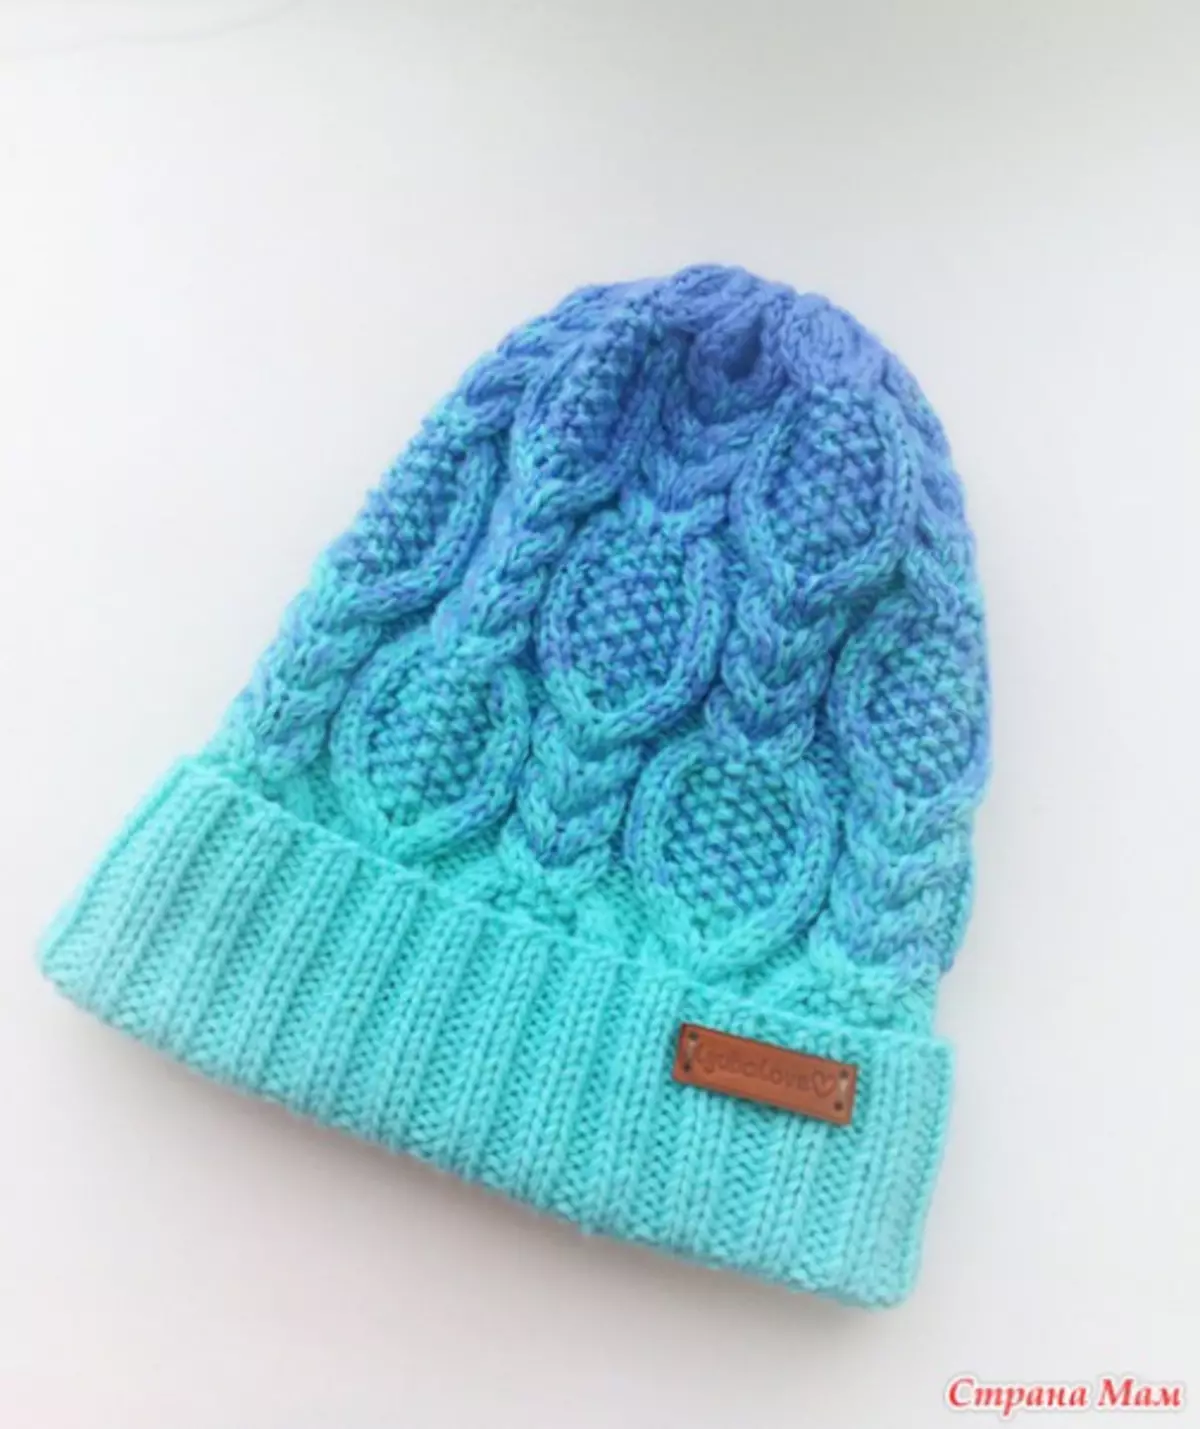
This option with the shadow we will knit with the help of the spokes. For him, we need a dense yarn of two colors, scissors, hook (for strapping) and the main tool - the knitting needles.
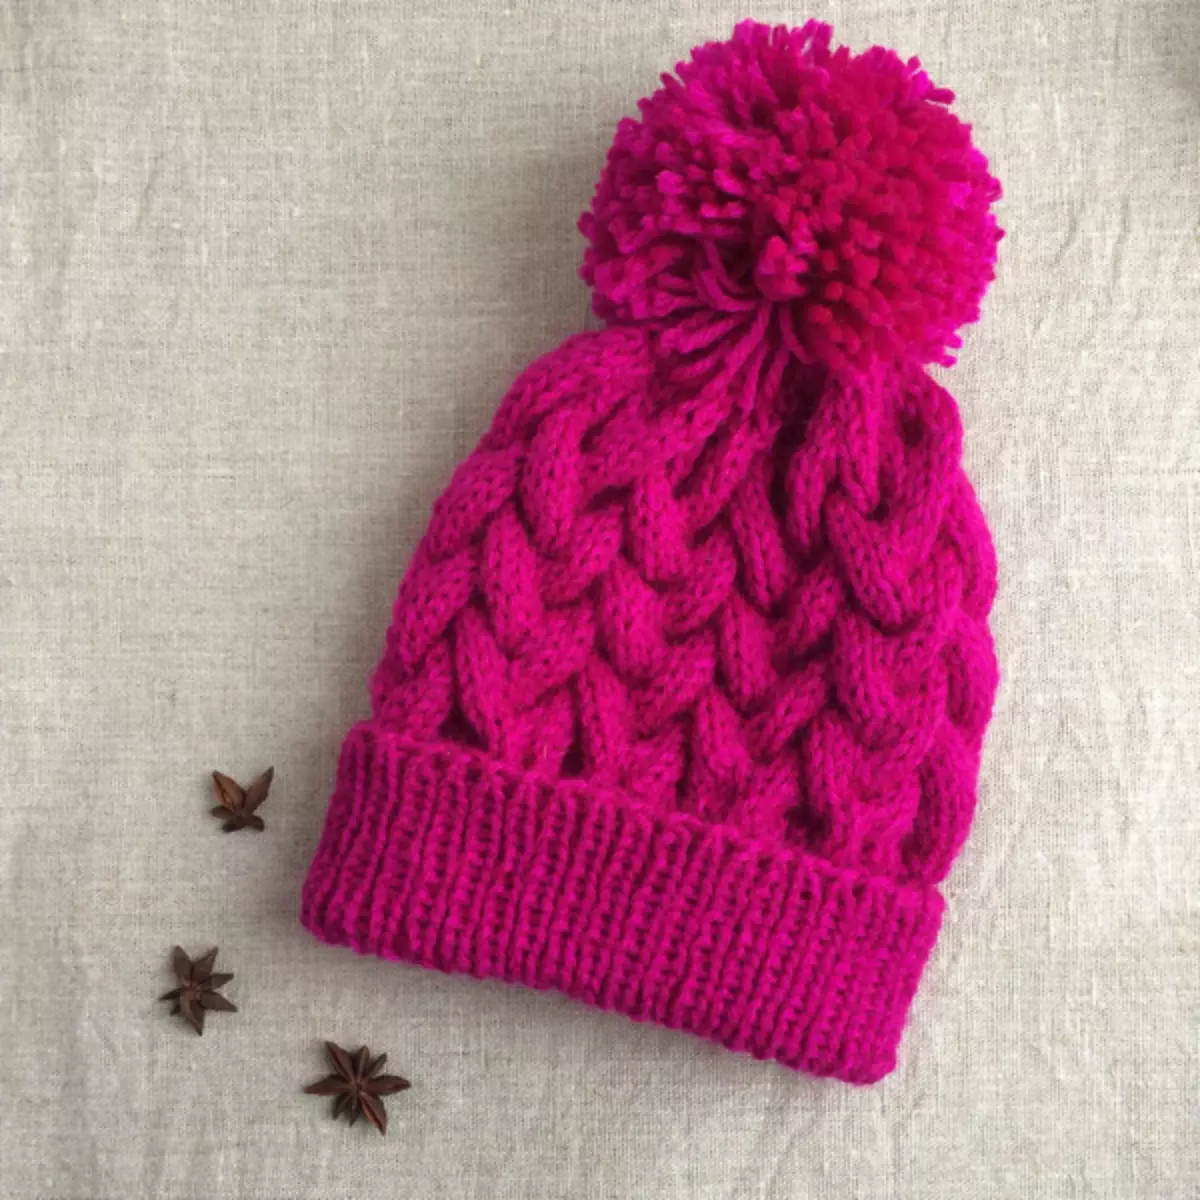
Ready example can be seen in the photo below:
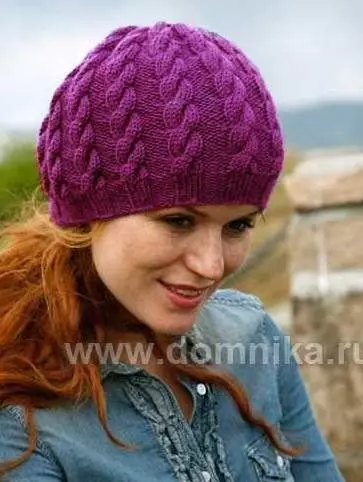
To begin with, measurable the size of the head for which you knit a hat. If you have purchased 2 colors of yarn in two tangles to work with a gradient, then you need every single email to split even on.
The first to our action will be the analysis of the knitting scheme. The hat is connected by braids without intermediate loop. Separate Spit has three dials of 4 loops, that is, it follows that in the width we only have 12 loops. The approximate height will be 12 rows.
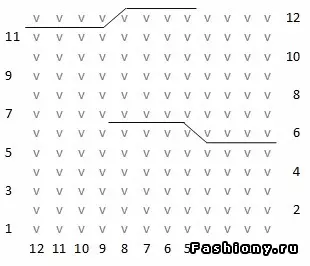
1-5 row - facial stuff fit, and only in 6 row we can see the weave. Then with 7 -11 a row facial smooth and 12 weave. Type 20 loops: 12 for weaving, 6 for the wrong, 2 edges. Now stick 5 rows from the wrong side. Consider the fact that braids will always be from the front side, so the number of rows for them will necessarily be an odd number. So, proceed.
Remove 1 edge loop and check 3 facial loops. Then check the 12 wrong loops. Now there are 3 facial and involving the edge (last). I turn our work and knit according to the second rapport scheme. We are tied up to 5 rows and make sure that it ends up from the wrong side (this is a prerequisite). 6 row begins with the removal of the edge loop. Now tie 3 wrong. Remove the product the main thread and remove the 4 loops on the utility knitting needle. Leave it before work.
Article on the topic: Crochet with an extended backrest with diagrams and video
Check out 4 loops with facial knitting needles and return the loop on the left major needles. Tie the eight of the braid and with the help of 3 wrong and 1 edges complete the range. Check out 5 rows according to the scheme and proceed to 2 weave. For him, we need to remove the edge, pepper 3 irons, as well as the first 4 loops of the braids. Working the work thread in front of the product and remove 4 medium loops on an extra needle and leave it at work. Now stick the last 4 loops and return the loop from the extra needle to the main, check. A row finish again using 3 wrong and 1 edges.
A moment came to stock paper and pencil to calculate the amount of loops for gum (bottom of the header). To select an accurate number of loops, you need to associate several probes. Dial any amount of stable 4 loop, plus 2 edges. Tie a few loops in height and measure the line of the pattern. From the calculation of 24 loops, 19 cm. Now we define the amount for the COP. To do this, dial the number of multiple 12 (do not forget about two edges). After that, we will calculate: 3 braids of 12 loops are 36 + 6 insolne and 2 edges. We had 44 loops. Measurement data show that the width is approximately 14 cm.
For a medium-sized person, whose head is 56 cm, we type 74 loops for gum. For Kos - 134 loops. Now you can proceed to knitting. Type 74 loops and check the gum of about 7 cm in height. Then increase the number of loops up to 134 and proceed to knitting brass. After you connect several rows with weave, change the thread to another color. Following the calculations and approaching the painter, we reduce the number of loops. When the height of the cap will be connected, and the number of loops is reduced, then skip the thread through all the loops and tighten. It remains with the help of a hook to sew our hat, and she is ready!
Article on the topic: Shawl "Clematis": a scheme and a description of the crochet for beginners
Video on the topic
Thematic selection of video lessons with a detailed description: