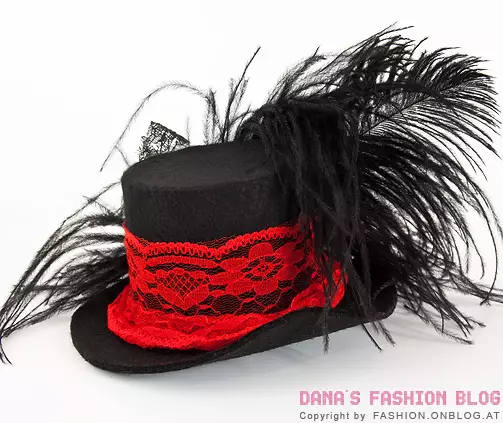
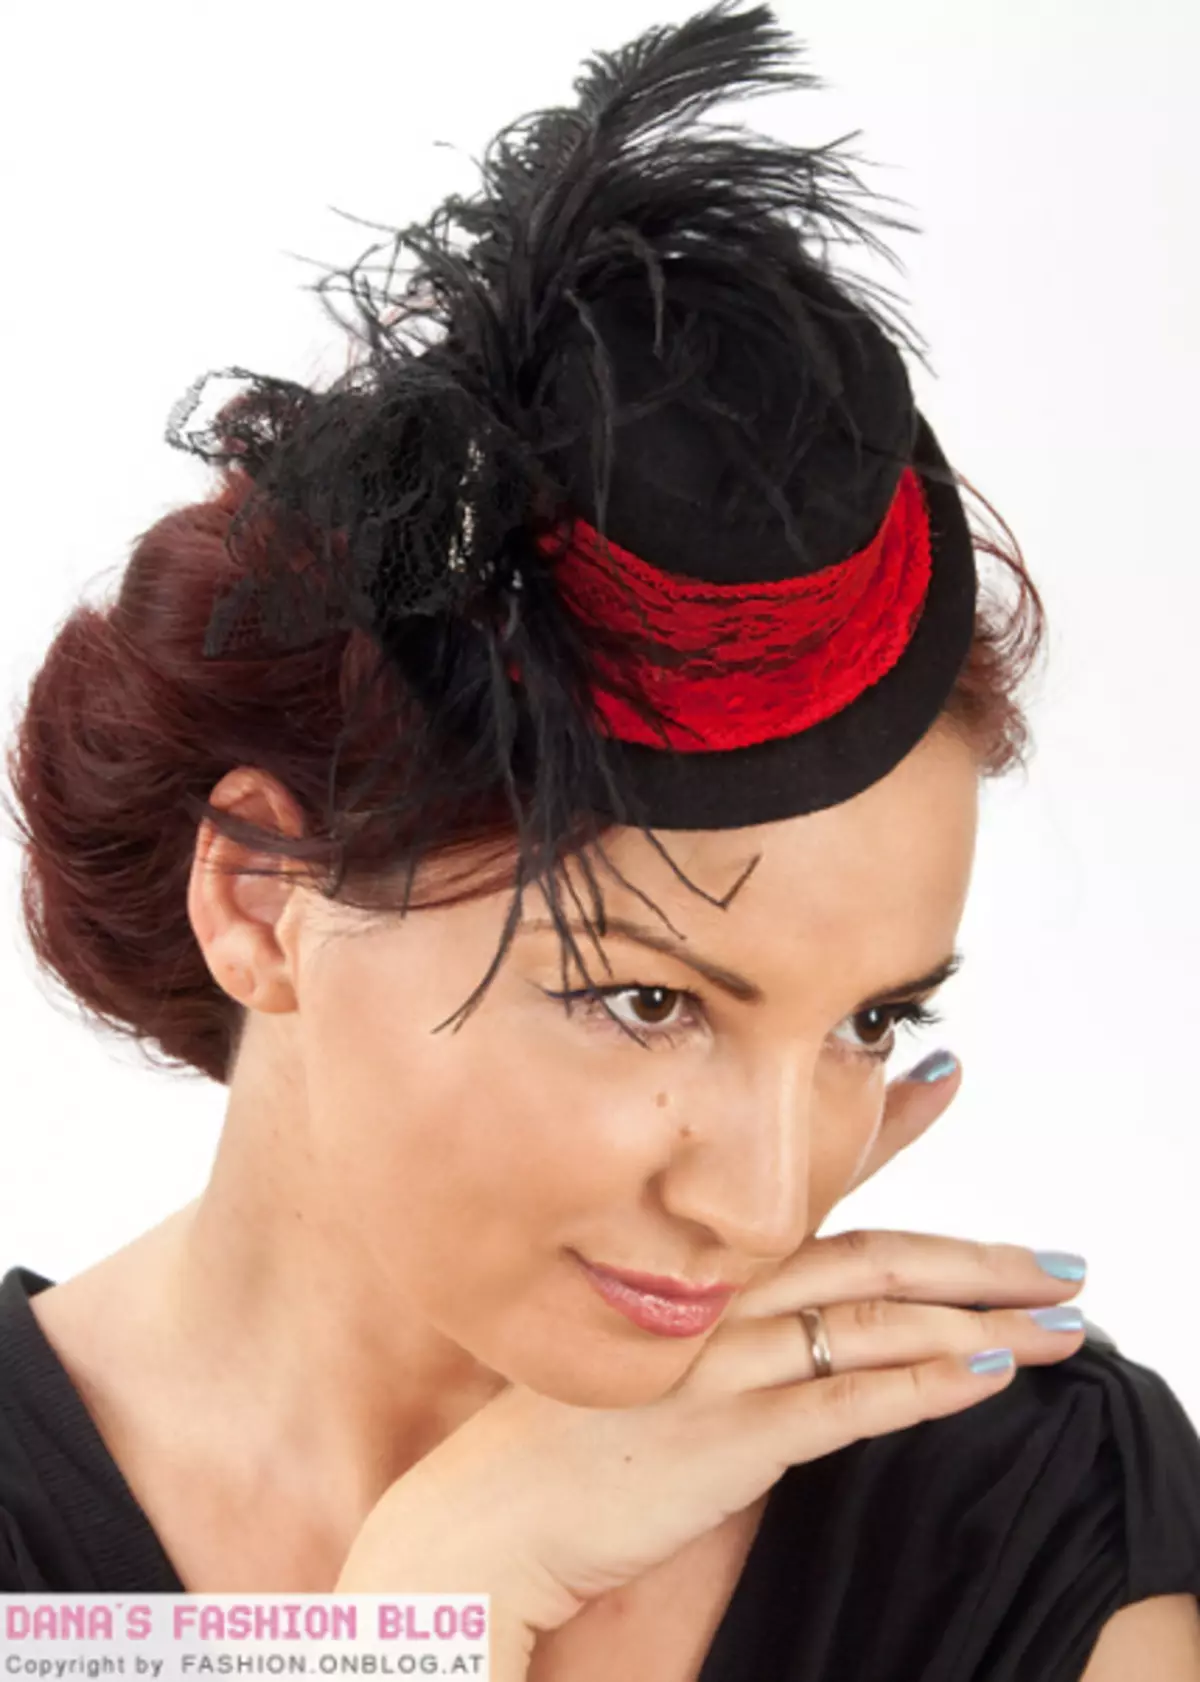
In this lesson, we do without much effort to make a cute hairpin-hat from, it would seem incredible material, a cup of yogurt. Such a hairpin looks like a small crown that hoved in the curls of your hair. It wonderfully completes your evening image, suitable for the thematic party and it will look very extraordinary and interesting. If you want to surprise your friends and familiar with the original accessory and your creative abilities, then made with your own hat on the rim, the perfect option.
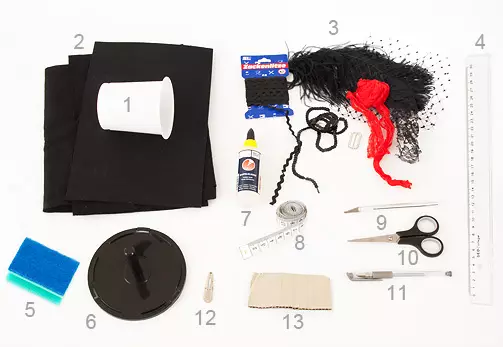
Required materials and tools:
- A cup of 400 ml yogurt;
- several felt sheets;
- Elements for decor: lace, feathers, rhinestones, sequins;
- line;
- kitchen urine;
- base from CD box;
- glue;
- measuring tape;
- cutter;
- scissors;
- labeling handle;
- one or two hairpins;
- Custom cut from a length of 9 cm.
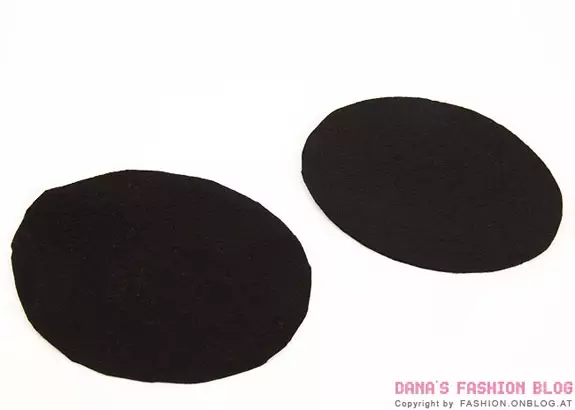
Cut the base from felt
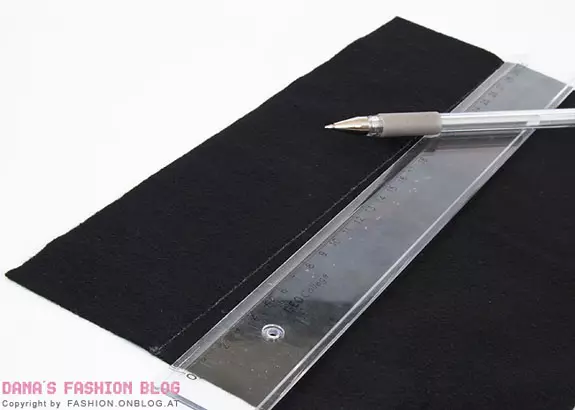
The base from the CD-box we need as a template of the future hats fields. You can also use the CD itself, but then the fields will be 2-3 cm less in diameter. We put the basis for felt sheets and mark the form in a circle. With the help of scissors, cut out two circles from the felt.
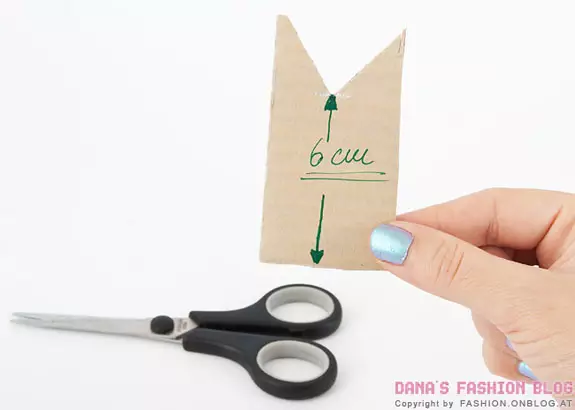
We make a blank of cardboard
On a piece of cardboard, we make a triangular nozzle 3 cm down to the edge of the rectangle and to the top corner of the triangle it was 6 cm.
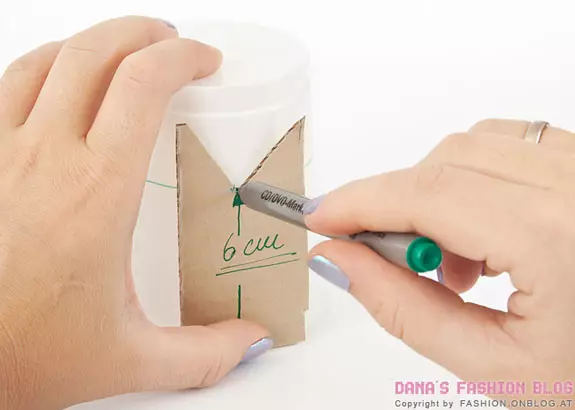
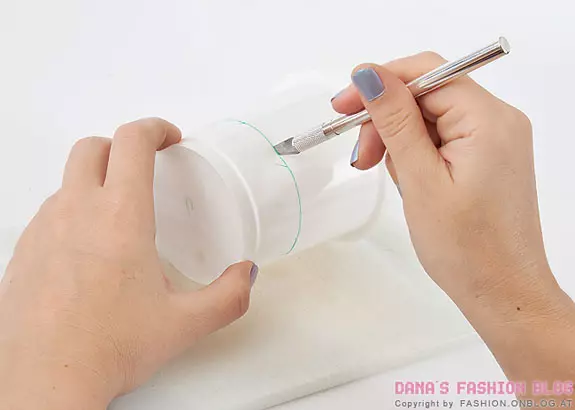
Cutting glass
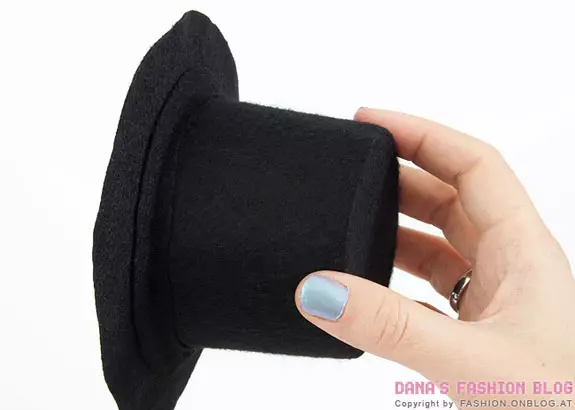
I turn over the cup from under yogurt upside down. With the help of a rectangle with a triangular neckline with a handle of a line around a glass as shown in the figure. Now you need to cut off the top marked part of the cup. Cut the cutter, the stationery knife or ordinary scissors exactly along the drawn line. Be extremely careful not to hurt.
Article on the topic: knitted top with spokes with schemes and descriptions: how to tie with photos and video
Purchase felt
While we need a sliced piece of glass with a bottom. Another element will be used further, so do not rush to throw it out. Measure the height of the sliced cup cap. Transfer the measurements to the felt sheet and cut the striped striped with a slightly smaller width. Apply glue on the walls of plastic and glue the felt a few millimeters from the deaf edge of the glass and so that the edges of the strip are slightly found on each other. Put the attached shape on the felt sheet and mark the circle for several centimeters more than the diameter of the glass. Cut the shape for the designated lines with scissors. Now it is necessary to attach the bottom of the glass. Apply glue evenly on the carved circle of felt and glue it to the bottom, leaving the edges of the free.

Create bottom
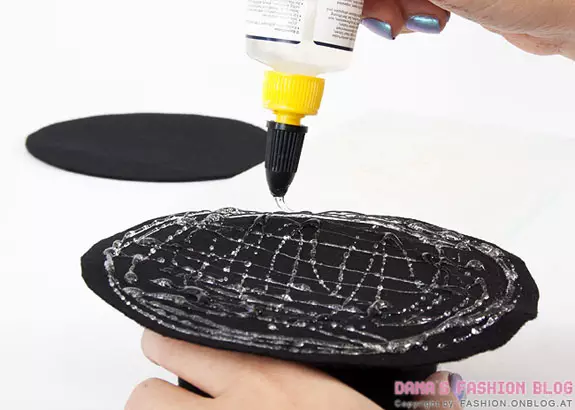
When the glue gets dry, make small cuts, approximately 1-1.5 cm, throughout the diameter of the felt. Uniformly distribute the glue along the top of the felt where cuts were made. And then immediately apply glue over the felt glued on the walls of the glass. We return to the other half of the cup from the yoghurt, the one that without the bottom. It is necessary to place the already attached shape inside the cut part, thereby forming the bottom.
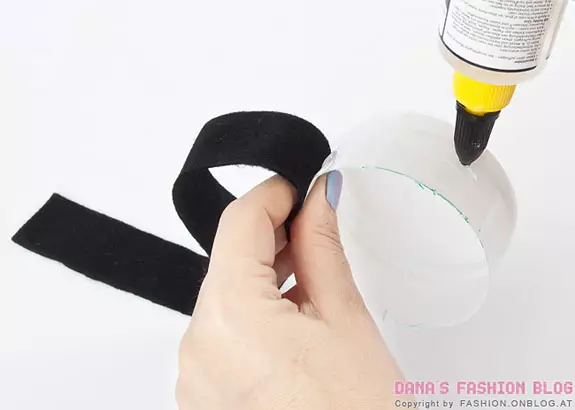
We make the walls of the hat
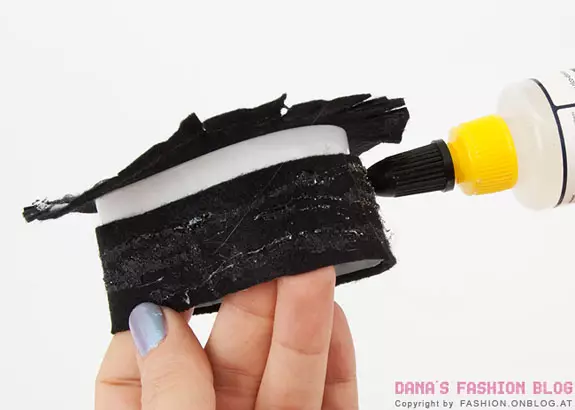
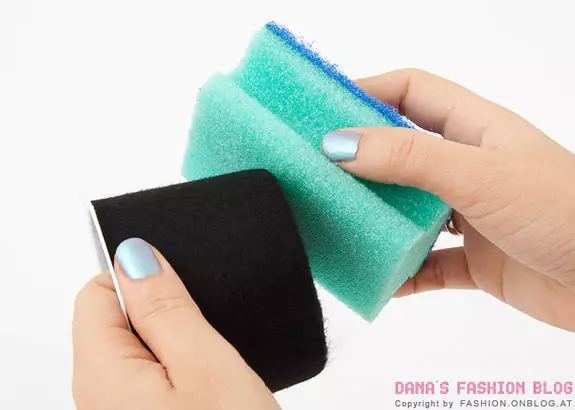
We measure the line height that turned out at the base for the hat. Cut from felt strip the same width. It will be the walls of the Hats. Apply glue on the walls of the glass and glue the felt in a circle. After that, make small cuts (several millimeters) on fetra with scissors. Now it is necessary to wash the edges of the felt where they come into contact with the help of kitchen washcloth. Felt's patches are very podiatilivis and, if you do everything carefully, then all the cuts and joints will merge among themselves.
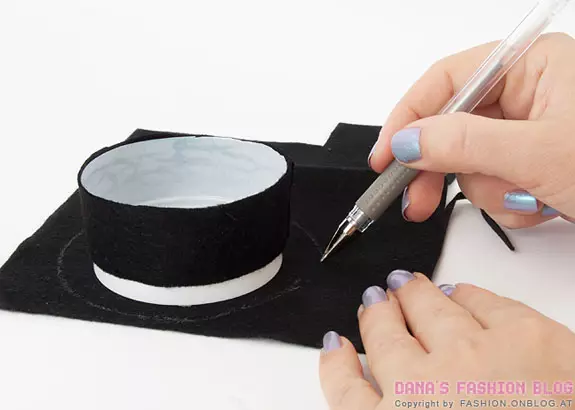
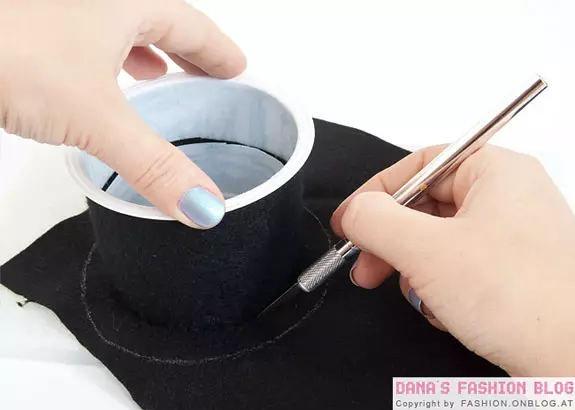
Cut the mount for fields
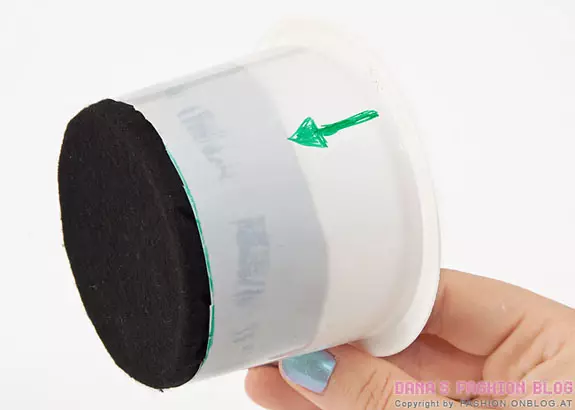
Place the glued cup down the bottom on the felt sheet and circle a circle with a diameter, 1 cm larger than the diameter of the glass. Cut the felt so that inside the emptiness is, as shown in the figure. Apply a little glue throughout the perimeter of the base of the cup and put on the circle to it so that 0.5 cm was glued, and the remaining 0.5 cm remained free and went over the edge.
Article on the topic: How to make Furniture for doll furniture?

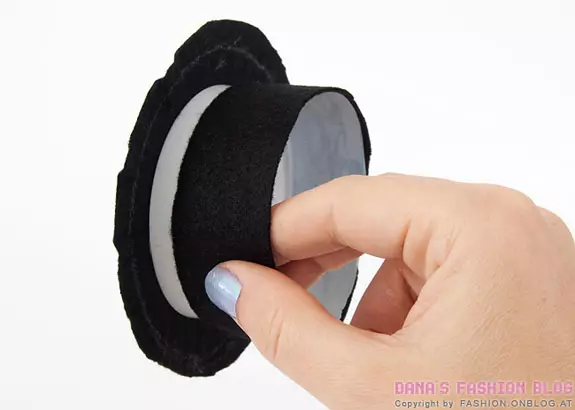
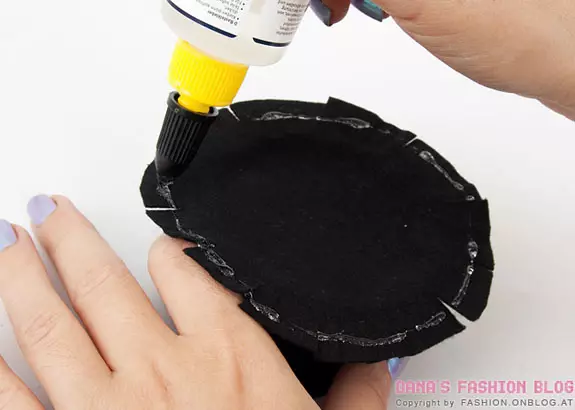
Forming fields
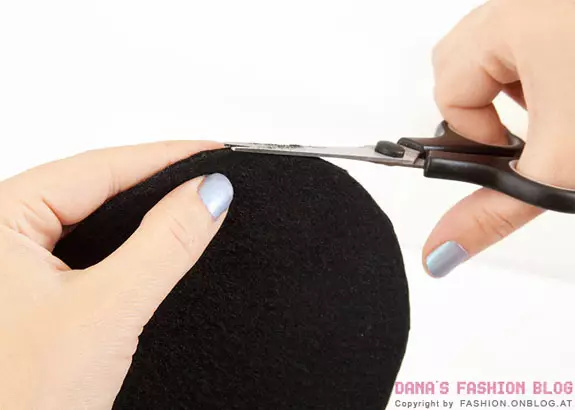
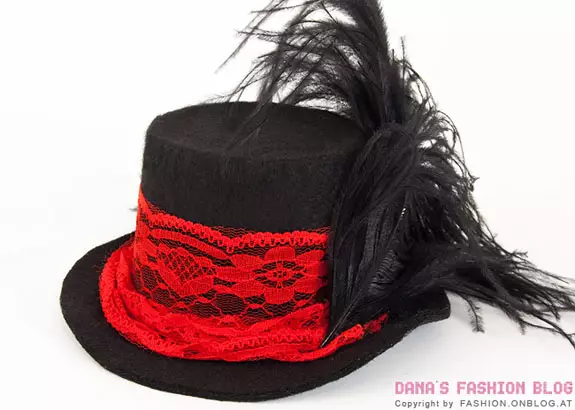
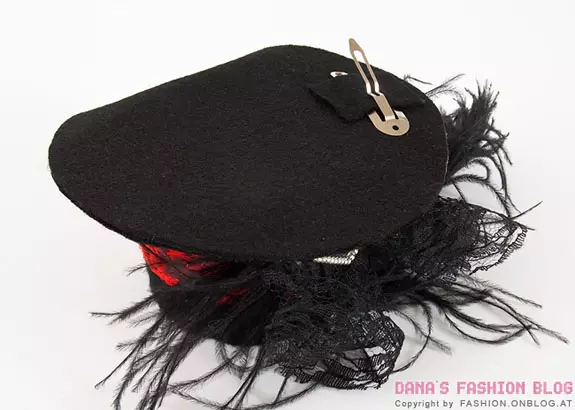
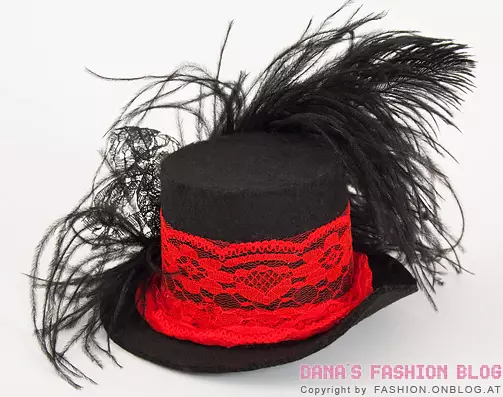
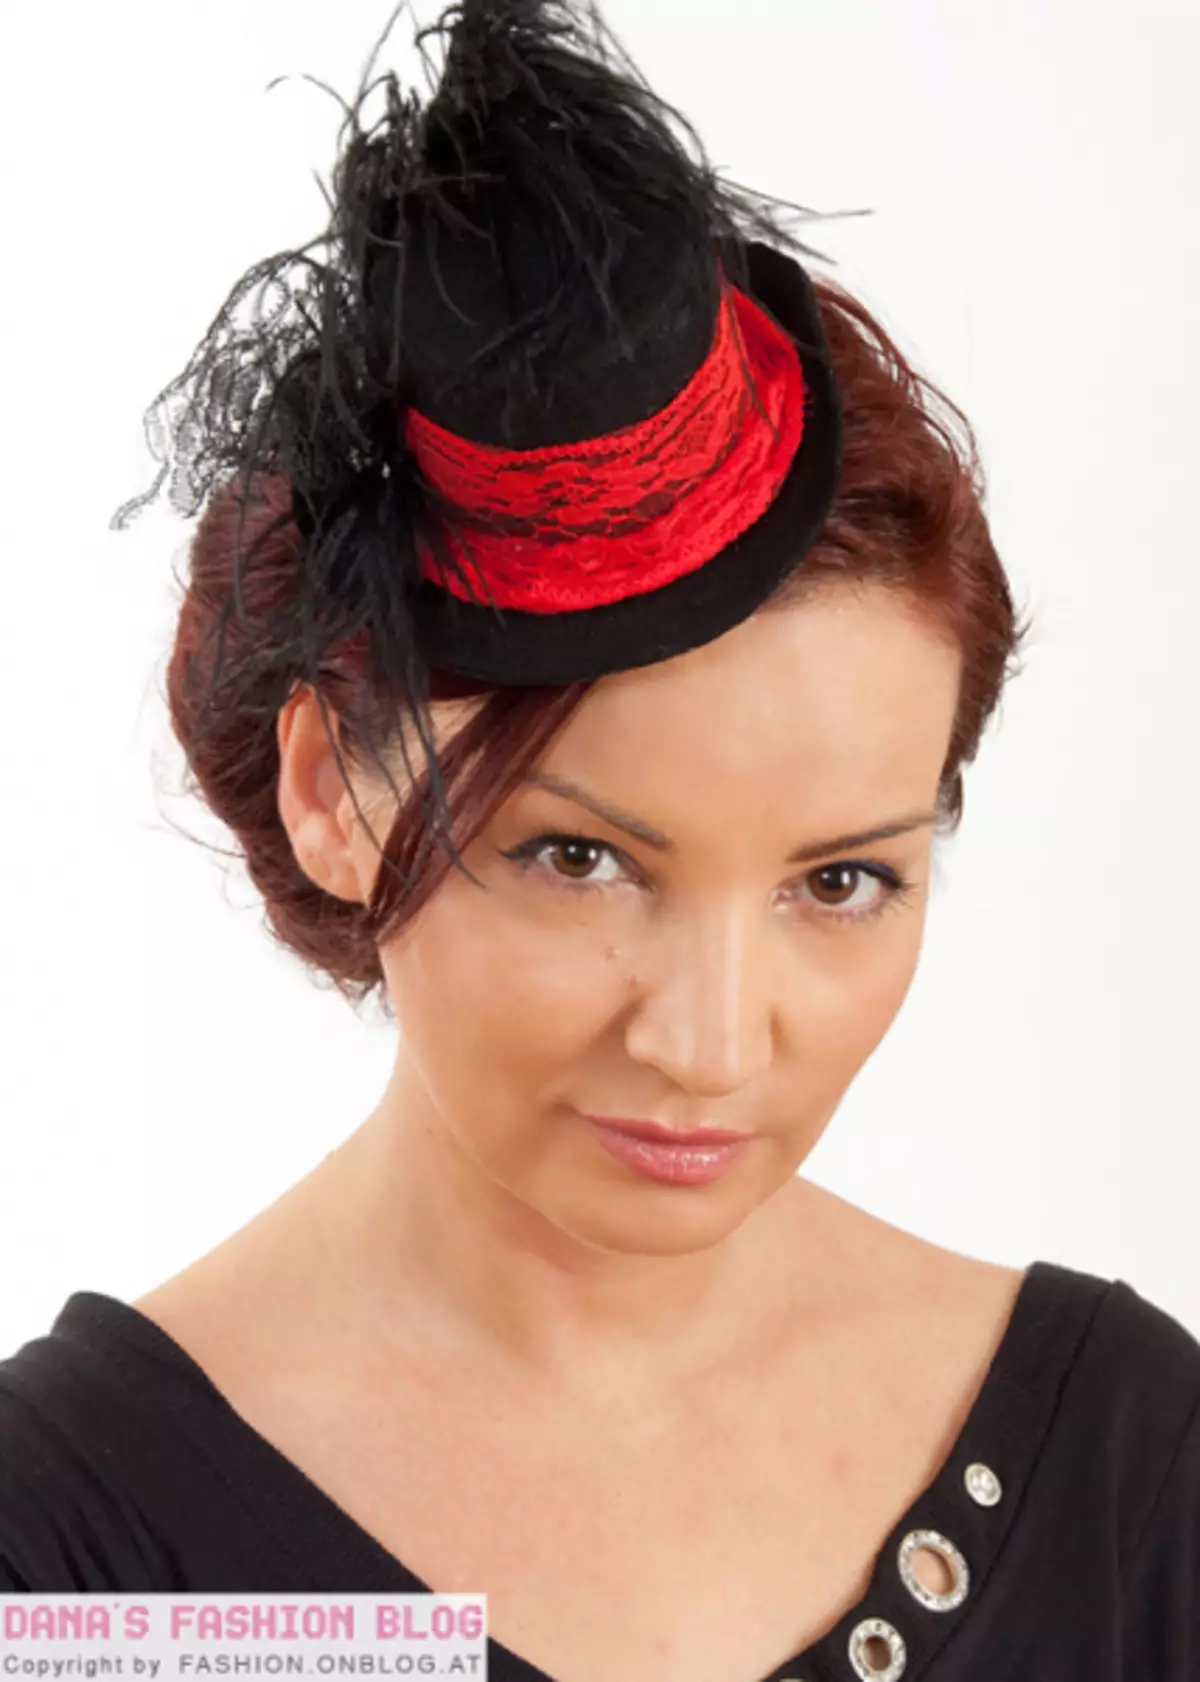
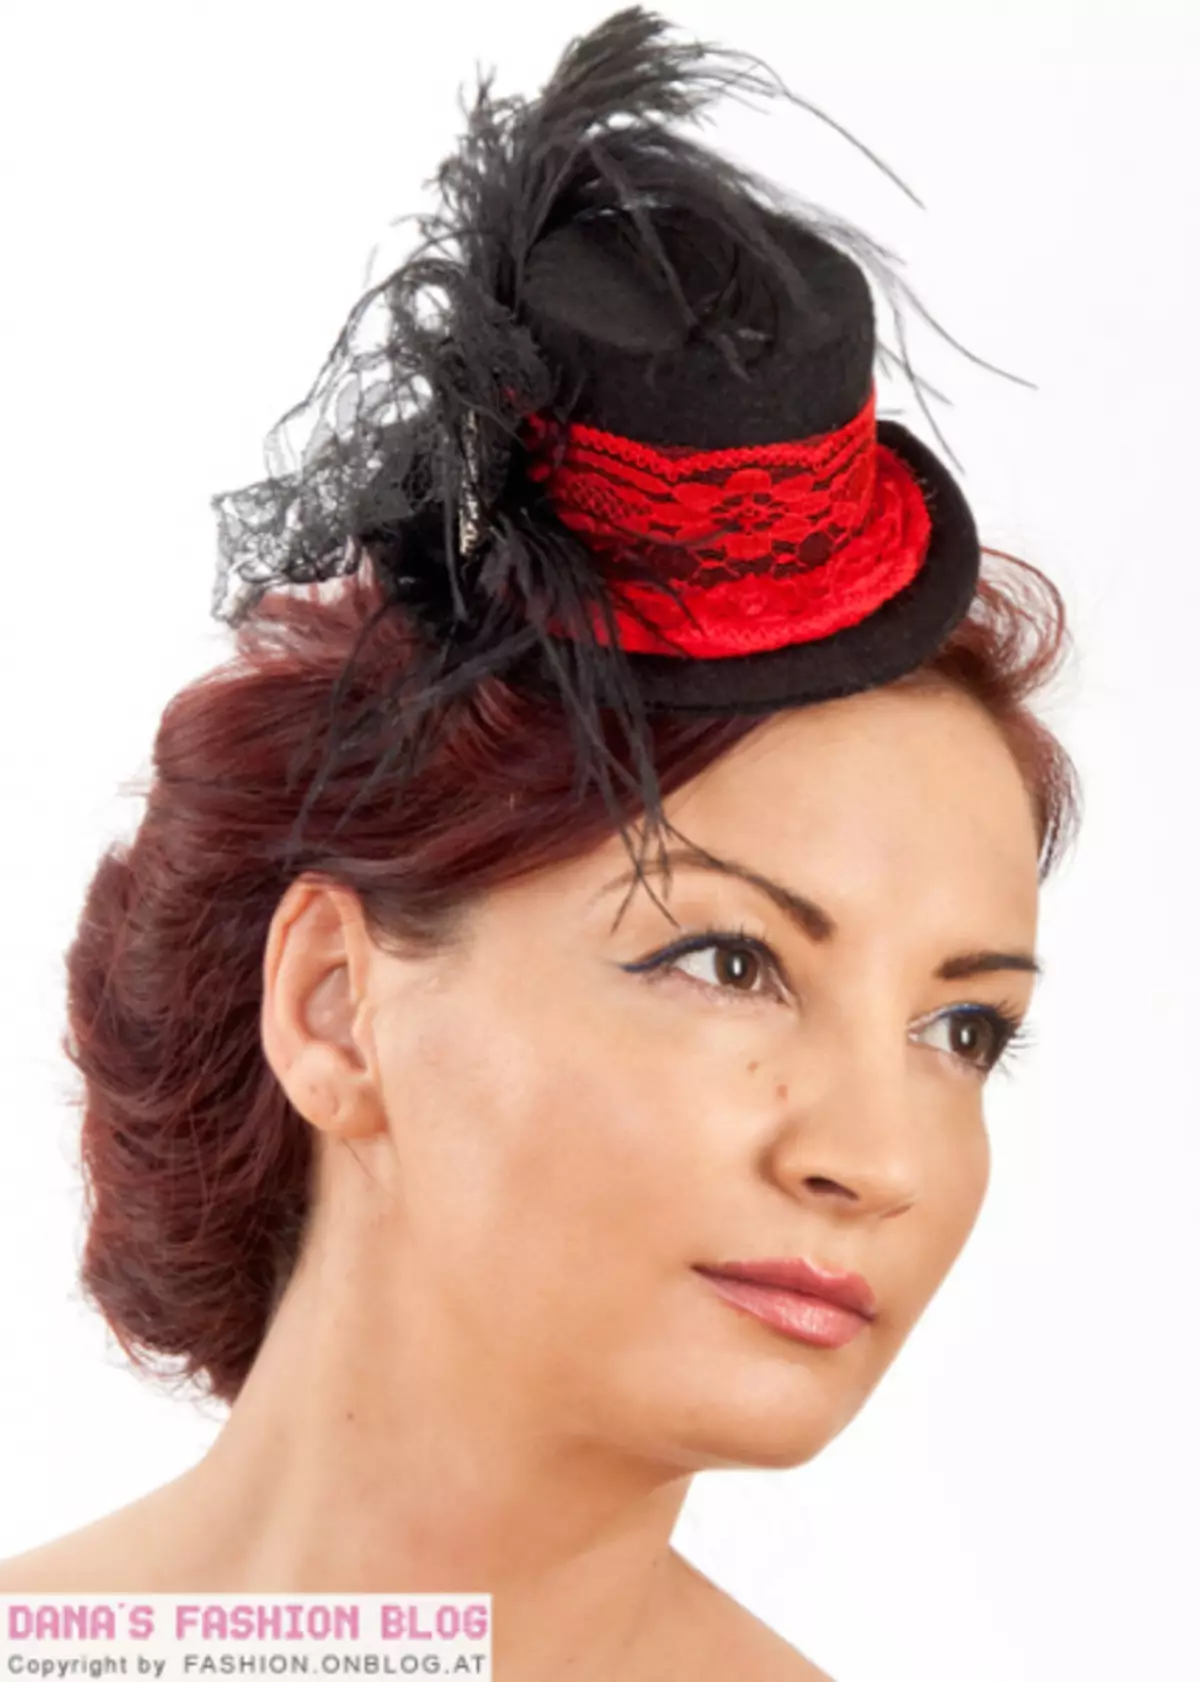
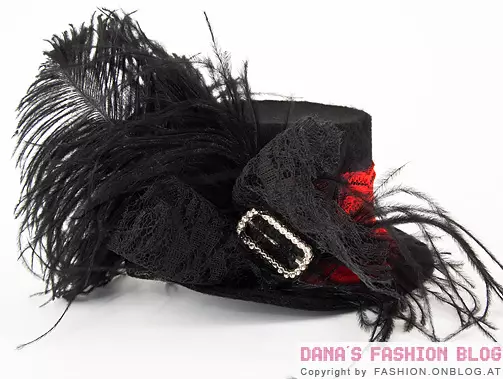
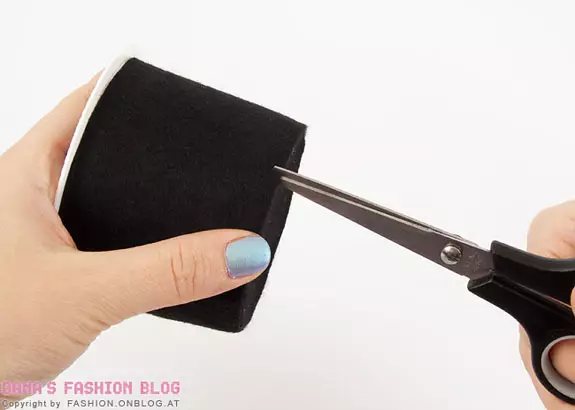
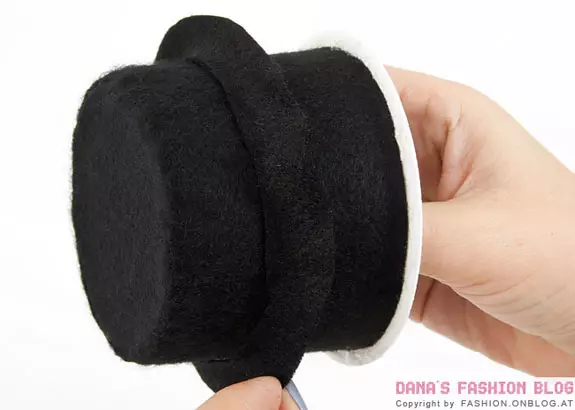
We return to the base from the CD box and the two circles that we cut on this pattern. We apply glue to the middle of one of them and glit to the glass. Here we already have an almost finished hat. It is necessary to make the edges of hats more durable. Therefore, we glue two circles and we have hats, consisting of two layers of felt. Cut all the irregularities with scissors. Now you can decorate the hat. We glue lace, feathers. Here you can show the entire flight of fantasy, play with decorative elements on your taste. At the final stage, we glue the hairpin to the hat. Decoration for your hair is ready! Charm, isn't it?