
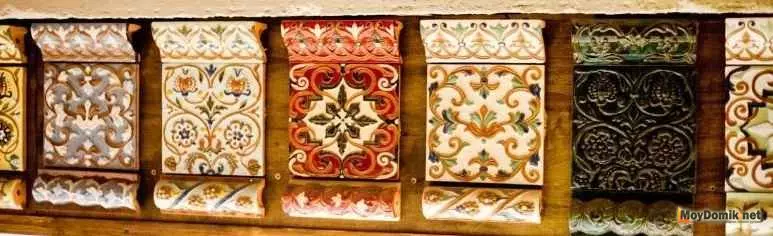
Facing the furnaces and fireplaces of tiles is an ancient tradition that gradually conquers lost positions. Not only Russian, Ukrainian and Belarusian, but also foreign manufacturers of tiles came to the market. Old recipes are reborn and new ones are created.
However, the manufacture of tiles is still a very time-consuming process, most of which is performed by the wizard's hands. Precisely because each fireplace and stove soles
It is a unique piece sample. As a single product, it has a high
The cost is that the most domestic consumers scare away.
Tiens for the furnace and the fireplace do it yourself
How to make tiles do it yourself
The master class on the manufacture of tiles will be interesting to those who decided to take the case on their own. The work is not complicated, but painstaking and very exciting. Knowledge of the nuances of the execution of each operation will avoid disappointment and get a high-quality product.Preparation for work includes: acquisition of plaster
Putty for the manufacture of shape and special clay for the product. Of
Devices will need knives or stacks and firing muffle furnace. Will not be
superfluous step-by-step instruction, which will make it possible to make a tile in accordance
With the traditions of Russian masters.
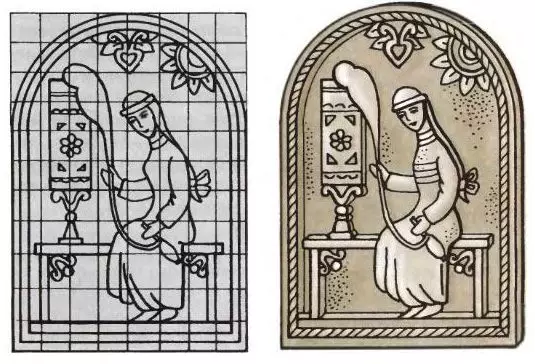
1 stage - drawing up a plan (sketches, shape, drawing)
The manufacture of tiles is preceded by this type of activity.
as planning. It includes drawing sketch, relying on which
It will be possible to calculate the required number of tips, based on
Furnace size. And also determine how many parts (elements), and what
The configuration should be that the facing of the furnace to the tiles was performed.
nice.
In addition, it is thought out in detail the shape of the tie, the simplest is the square or rectangle. With their manufacture, there is a minimum deviation from the specified sizes and customized smooth surfaces to each other is much easier.
Figure (pattern) or relief. This question is also important to solve until
The start of work, since the configuration of the template depends on it.
Stage 2 - clay for tiles - selection and preparation of raw materials
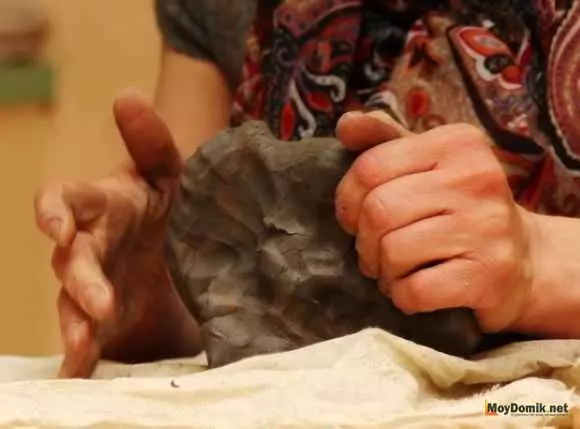
Clay for the isracted by work from the preparation of clay, because it should stand, and during this time you can prepare a form for a tie.
Pressing clay to modeling of tiles
- Plastic pottery clay is suitable for tiles.The ability to form a formation (modeling), shape and high strength
After firing makes it perfect raw materials;
- Next, small balls are formed from it. Size balls
Small, most importantly, the clay is well descended. Accordingly, the less
Balls, the faster the drying process will pass. Drying is held in the warm season
or in the drown room.
- Dried balls are crushed. The resulting composition
Sierted. To do this, you can use fine sieve with wire weaving;
- Go to the process of causticing clay. For this received
Powder is filled with water, thoroughly mixed and defended. Clay need
Rinse in a large amount of water, recommended in the ratio of 1:10. Thereafter
The water is neatly drained, trying not to disturb the bottom layer. In fact, this is I.
There is a necessary material for work, purified from third-party impurities. Availability
impurities negatively affects the quality of the tile. The fact is that tiles
The furnaces accumulate warmly, and slightly expand. And third-party
The material may have an extension coefficient other than clay, and in the process
Heating will lead to cracking of the tile tile. Now it remains
bring a standing clay to the desired consistency;
Council. Masters recommend this method of cleaning clay from
impurities: in the wall of the capacitance intended for clay settles, drill
in a row (vertically) several holes that are clogged with chopicks
(wooden plugs). Next, as clay will be settled,
Water will be brighten. After driving the first chopper, you can lower part of the water. Then, when
The next layer will be brightened - it's time to remove the second chopper and so on.
- Pushed clay leave in the sun to enlarge
Fluid evaporation rate. So that the top layer does not dry, clay need
Periodically mix. At the same time, the mixture will become homogeneous and more plastic.
Note. Masters are added to the clay powder various
Additives: Kaolin, Shamot, Spad. This will allow clay new refractory (heat-resistant) properties.
Article on the topic: Technology laying electric heating floor under the tile do it yourself (video)
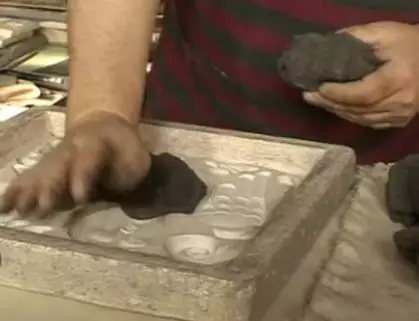
3 Stage - Making Template for Tie
To make a gypsum cast for future tiles need
First make a pattern. Its making is that the reservoir
clays with a thickness of 20-30 mm. The drawing is applied, which is supposed to get
on the front of the product.
There are various types of tiles: smooth, embossed. On the
Smooth tiles can be applied with drawing, embossed - paint. Consider it
Forming pattern. The figure shows the process of making a square template.

Making template for tie
Note. Sizes and shape of the tire should be chosen based on
From the convenience of mounting and oven grooves.
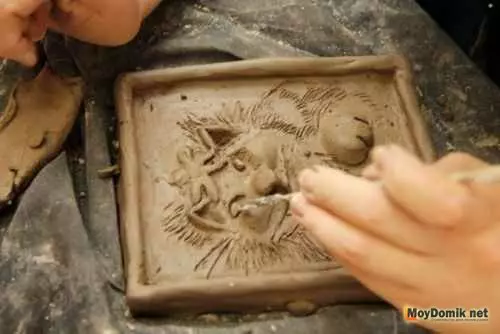
The formation of the pattern was used the drawing is simple, for example, geometric, it can be formed with fingers (cut out). With a more complex pattern, you need to use the stack (tool).
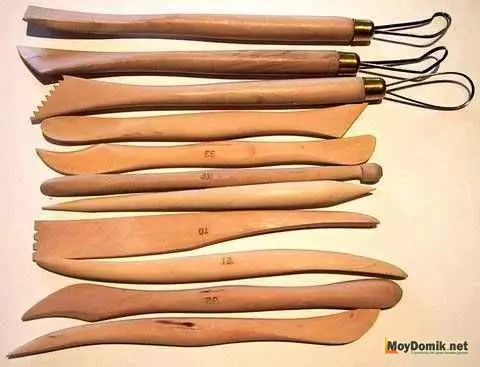
Stack for working with gloves to work with clay is a wooden device impregnated with olifa. Stacks knives are needed to form a picture, stacks-grooves for applying strips, stacks-loops to remove extra
clay. Stacks can be purchased or done independently from wood, and loops
From wire (excellent version of the spring of alarm clock) or skin.
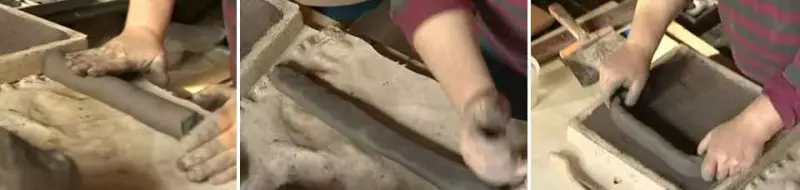
The rollers are formed by laying out the side of the billet.
Note. Forming a pattern of clay needs to remember that
The finished product should be easy to get rid of the template, so too small
Details or straight corners are better not to do. Recommended profiles are shown in Fig.
(No. 4 cm above). Deepening when removing clay and the pattern of pattern should be done so
In order in the section it turned out an open cone. For clarity, look at the children's
oracter, it is made in this way.
The pattern diagram of the display of the template is in choosing excess clay or making the missing (with a random cut, sometimes it is necessary to add clays so that the pattern does not suffer) and giving the surface of smoothness. For this
Used wet, soft rag.
Professionals can make templates for each individual tie. And laid in place, they will form a large drawing on the furnace.
Due to the complexity of handmade, the tiles for the furnace is very
expensive.
4 Stage - Making Form for Tie
The referred pattern is placed in the formwork and moisturize withpulverizer. Light gloss on the surface will tell how much moisture
It will be sufficient.
How to prepare a gypsum solution
The composition is simple: plaster and water that are kneaded in
Proportions 7:10. At the same time, the gypsum falls asleep into the water, and not vice versa.
Council. In view of the fact that the gypsum solution quickly loses
The required fluidity (viscosity), it is better to prepare it in half the rubber ball.
It is so easier to mix the components to a homogeneous mass.
Newcomers are recommended to replace the gypsum solution with a putty.
It saves the fluidity longer.

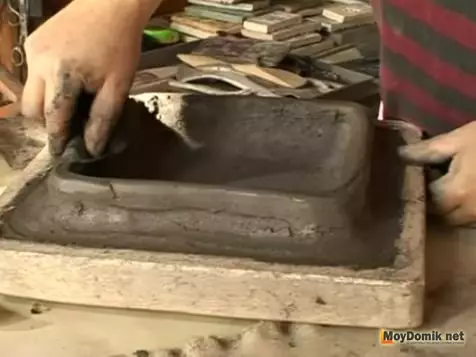
The fill of the gypsum into the formwork prepared gypsum is poured on the template with a thin layer. It is important here to ensure that the solution filled all the sections. After all, at this stage, the appearance of the future of the tie is formed.
Further, the shape is filled with plaster completely.
Masters do not advise making forms for tiles for the wrong
Parties (RMSP). It is better to form it with your hands, so grip with the front part
Products will be more durable.
Grappate plaster after 7-10 minutes, and after 20 completely
hardens. After that, the formwork is removed, and the shape along with the template
exposed to dry. Dry better at room temperature. This will increase the time
Drying, but will reduce the likelihood of damage in the template.
It remains only to separate the finished shape from the template. To do
It is easy, since clay when drying decreases in size (compressing). Nevertheless
Less, it should be checked that there are no clay crumbs in the form. Therefore,
It is better to wash it and dry. Properly made gypsum form provides
High-quality molding for about two hundred tiles. At the same time, keep in mind that
Their manufacture using only one form will take considerable time.
To increase productivity, you need to make several gypsum forms and
Making a larger amount of tile tiles at the same time.
If this procedure seems too complicated, then we advise
Get acquainted with how to make a tile without making a form.
Production of a Sprinkle with a Smooth Surface without Form - Video
ContinuedIn order not to spend time on the manufacture of shape,
Masters advise the use of conventional kitchen containers. At the same time plastic
The container is good in that it is better to lay clay. Finished tires she
gives the necessary tough form, but it is more difficult to remove the tile. And from Siliconova
Forms product easier to pull out.
Now that the form is ready to proceed to the manufacture
Tiles for the furnace and fireplace.
4 Stage - Production of Tiles at home
The technology is briefly shown in the figure.

Production of tiles at home
For training we offer step-by-step instructions, how to make tiles with your own hands:
- Prepare shape. Since the form is not filled with one
It may remain clay particles and just accumulate dust from downtime.
Before you begin to fill it with clay, form you need to clean - rinse
and dry. The smallest foreign object in the form will inevitably affect
front surface of the tie.
Article on the topic: What a shower consists of a shower
Form clay forms are tightly stuffed with clay. Filling the form, you should know that the clay is placed in her in small parts. And laying starts from
center form.
At first, the clay of the thin layer is distributed over the entire area of the form.
At the same time, it must be tightly tamped with his fingers. Thus are filled
empties that create a drawing of the front part.
It is easier for beginners to produce chimneys with a smooth surface, and then apply a drawing on the tile or simply color (background). Even left without decor a smooth tile will look great on the finished furnace or fireplace.
Putting a clay shape - video
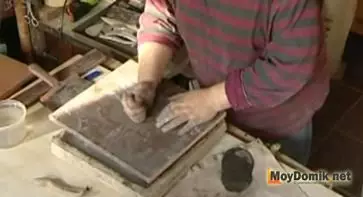
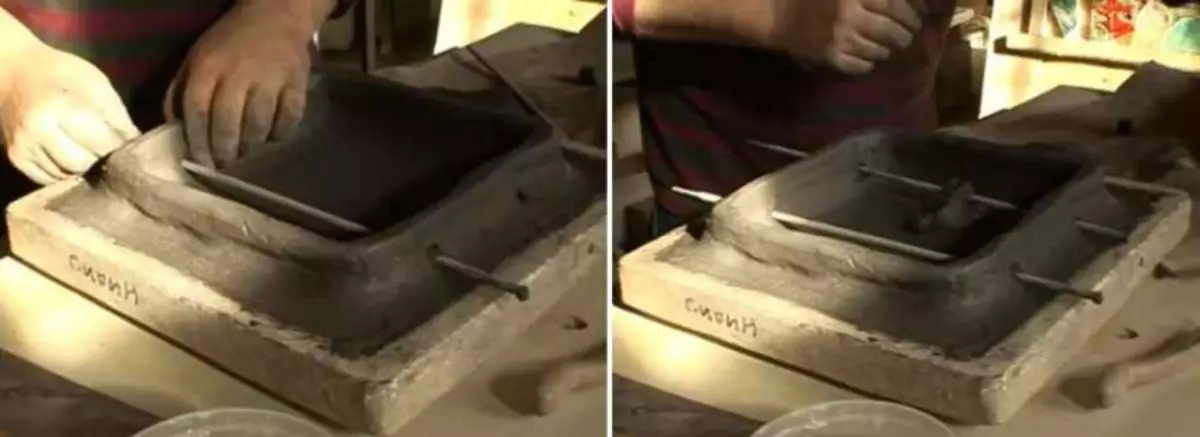
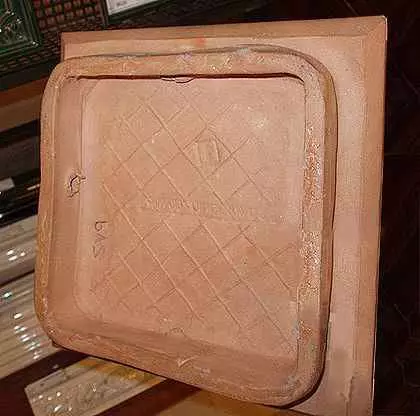
- Alignment of the back of the tile will give the opportunity to remove
excess clay and prepare a platform for the formation of RuMP (protrusion
Forms on the back of the tile). Rumpa is made separately and
Located on the surface of the tie. To make it enough to roll four
or two bar of the same cross section. Then pick up a bar, giving
It's necessary shape, and install on the back (rear) side of the tile.
Formation (modeling) Rumpey Tsel
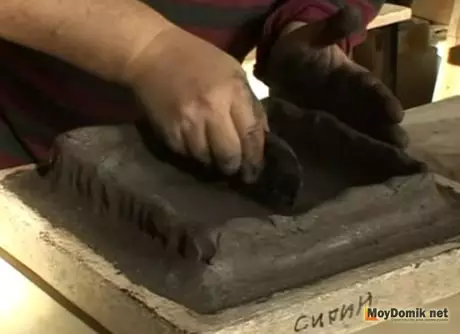
Pressing RMSP to the base Bulk must be reliably pressed to the base. To make it smoothly use the stack.
Leveling RuMPA is insequence one important nuance concerning Rumpa. Its upper part must have the same height and be aligned on the plane. Thus, the masonry of the walls on the wall will be smooth, without protruding tiles.
How to make RuMPU tie - video
Alignment RuMPA tiles (pressing) Align the plane can be cut off with a stack (knife) and giving the RUMPU plywood.
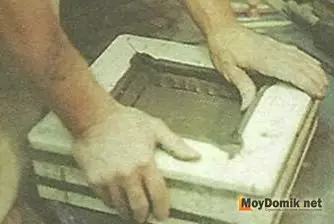
Manufacture of rumba tape by connecting two forms. The masters do not advise the RUMPA by connecting two forms filled with clay, as shown in the photo. Of course, this will accelerate the work and give Rumpe the desired configuration, but in this case the fastening of the tie will not be very reliable.
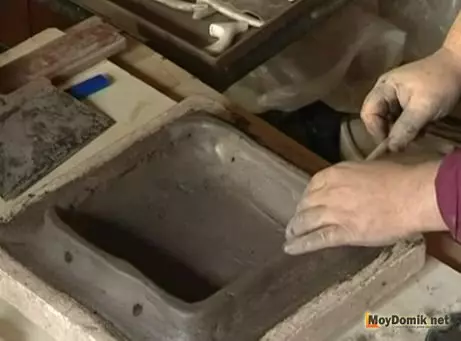
Production of holes for fastening the tapeless tiles are characterized by a special way of fastening. They are binding to a wire with an invalible side. Those., First the tiles are laid out, and then the furnace is built. Consequently, at the stage of formation of RMSP, it is necessary to provide holes for fastening the tile.
If the tiles is made by forming using the form
For RMS, then the necessary holes are drilled after drying it.
In view of the plasticity of clay, drilled holes can
Dimensions after the tie is taken out of the form and turn over the front side
For drying. Therefore, the hard frame should be installed (thick wire or
Sticks) for them and consolidate his clay.
Formation of holes for fastening the tie
After that, the tiles can be removed from the form and send to dry.

Removal of a mold
Handling mounting holes and removal from the form - video
Vintage tiles always carry the author's imprint in the form of a print or signature on the product.
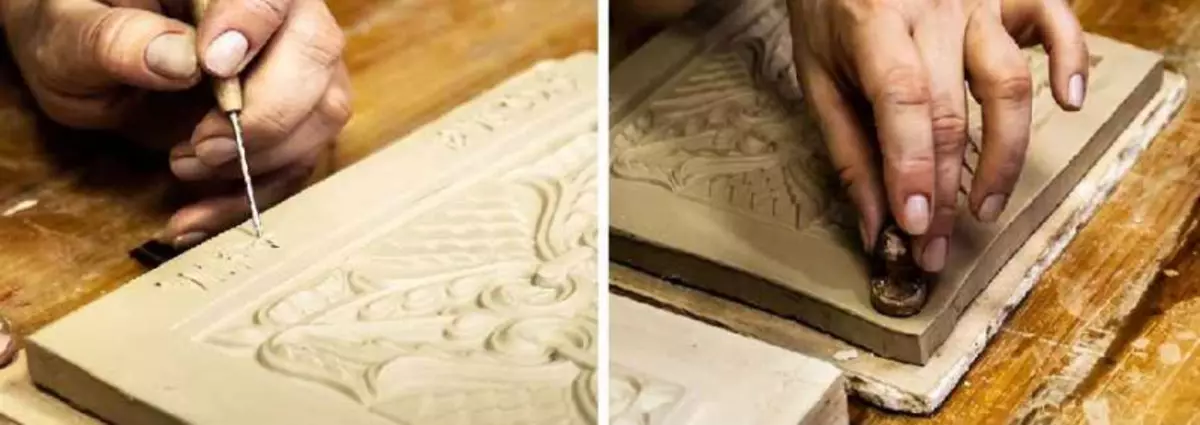
Application of the stamp, signatures on the tie
A stamp, printing on the tirelessness, if the author's stamp is located with the wrong part of the tie, made it manually. If with a facial, then most often such a tile tile is made by using a form for the front part and for RMSP.
Material prepared for site www.moydomik.net
Next, the product is removed from the form when the clay has already dried
But still saves plasticity. Masters call this condition to the skin-rig.
As clay gives some shrinkage when drying and when removing the product
There will be no problems.
Additional Typrocessing - Video
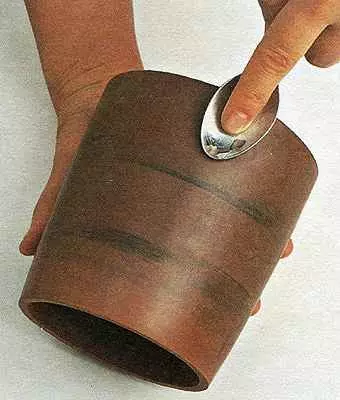
The rugged surface surface is exposed to a rug. This is the name of the polishing of the tape with a solid smooth item. In practice, for this use
Spoon, glass bubble, pebbles. A smooth surface such processing will give
shine. For relief surfaces, this procedure can be carried out for those
Sections on which there are no protruding, convex elements of the pattern. After such treatment, the tiles dried.
Note. So that work does not stop for 1-2 weeks due to
The broken tiles is better to prepare the repair kit. In stock must
Being all the details of the future facing of the fireplace or the oven at least one thing.
Yes, and during the operation of the furnace, this insurance margin can help.
5 Stage - Creative (primary) firing
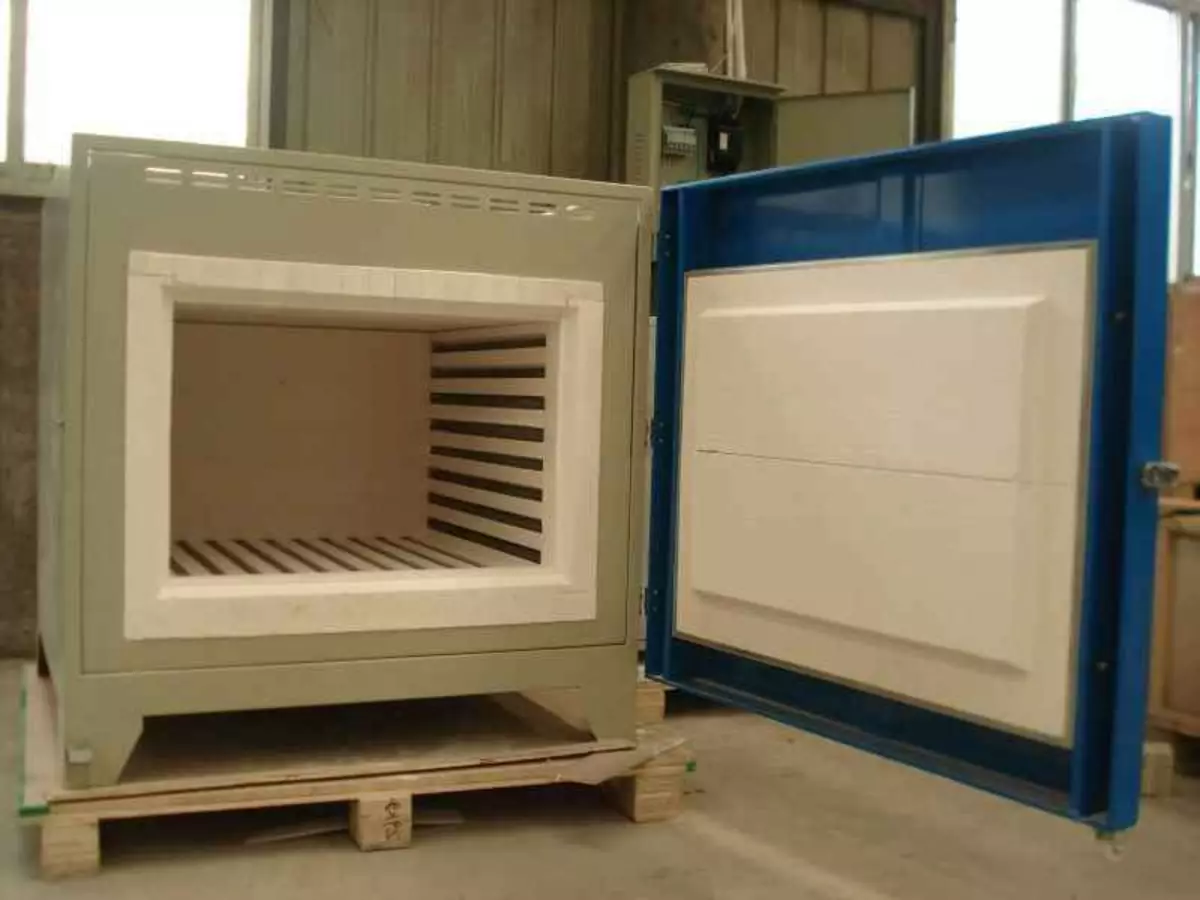
The muffle furnace for drying is based on the fires for the fireplace in the oven with a special mode. The task of the master at this stage is to dry clay, and not bake it up to the state of the stone.
An important point, in the manufacture of the tile is the choice of the furnace, because
Heating should be uniform on all sides. Firing temperature - 900-950 ° C,
Time - 3-4 hours.
Note. The burned product must be left to the furnace to
Full cooling.
The dried product is not yet a tie. In the Language of Masters
It is called "Resident" from the name of the firing type.
6 Stage - fitting Different
In view of the clay debris, the output is harvested forTiles of different sizes. It cannot be said that the dimensions of the tiles will be strong
They differ from each other, but fit them to each other can not be avoided. it
A normal phenomenon that is caused by several factors: feature
clay shrinkage, inhomogeneity of filling form clay, uneven internal
Voltage under firing. The color of the blanks will also be different. But, since
The further staining of the product is not critical.
Article on the topic: Wooden floor laying technology in modern conditions
Insoles made in production, have the same
Geometry and less disengagement in color. Dimensions are regulated by GOST 3742-47.
The permissible value of the deviation is 0.5-1 mm.
In the case when ceramics (tiles, tile) are manufactured
Do with your own hands, the procedure is necessary for the feeding (valve), removal
Top layer RMSP for adjusting height, combing side faces.
Fit tie - video
Note. Do not seek perfect fit
surfaces of neighboring tiles, since the presence of gaps will allow them to move
When expanding. In addition, the final sorting of tiles occurs already
After painting. More carefully seen decorative tiles - corner and
Frontal. Since they are performed in a single instance.
7 Stage - drawing drawing (painting of tiles, Angoing)
As almost all ceramics, tiles can be painted using such methods:Cold painted
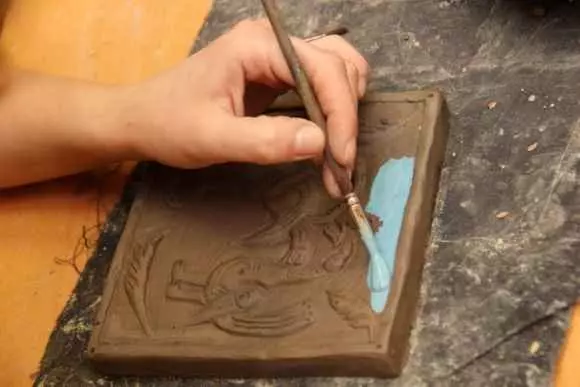
The painting of the sacrings is created by conventional oil paints. Before the coating of the tie, you need to cover with natural oil, dried for 1-2
day and then paint.
After drying the paints to obtain a more beautiful surface and giving the paint of resistance, the tiles can be covered with oil varnish. The method is good because it does not require additional roasting.
For those who make tiles for the furnace with their own hands - this is the least labor cost. At the same time, different parts of the pattern can be applied to different tie. When laying tiles
It turns out a large drawing on the entire surface of the furnace.
Painted by Color Angobami (Angobia)
Angob is a decorative coating of liquid clay (claysuspension), which cover ceramic and pottery in front of the firing,
To get a smooth surface or to give the desired color.
Angob for painting tiles can be obtained in two ways.
First, choose different types of clay. Secondly, smoked
White clay, painting pigments. This design technique is divided into
Two subspecies:
- The application of clay brought to the consistency of thick sour cream;
- Perching the tile into the water, and then to the White Angob. After that,
How white background will dry (but it will not be completely dry) on it with color Angobami
Figure is applied.
Anga of Tselsov - Video
Note. If the further glazing of the tile is not
It is planned, the masters are recommended to add 10-20% flux to Angob. Flux is
Silicate glass, informing paint gloss. Glass powder is manufactured
Alone by the time of the glass in the tank. To prevent sputtering
Particles of work are performed in glasses, gloves, and the container with the pestle is placed in
Durable transparent polyethylene package. Large particles are removed by
Sift powder through a sieve. Good for these purposes compensated
stocking, strained for the basis, for example, on the hoop for embroidery.
Figure will give a smooth or relief tite of unique
Beauty. As the subject, the motives can be used when choosing a picture.
who transmit Dutch, Spanish or Russian tiles.
To secure the applied pattern of the tiles to be subjected
re-burning.
8 Stage - Glazing of Tiles
The tile tile for fireplaces and furnaces is good, what for herSmooth surface easy to care for. It is achieved smoothness by glazing.
For this, the tie is dipping or watering with icing. Manipulations are convenient
Conduct, holding the product for RuMPU or putting it on the stand, bent
From durable wire. You can glaze both already painted tiles and
Resident (tie, taking place only primary firing). The surface of the tire must
To be covered with glaze by 1-1.5 mm. After drying the layer, the tiles need again
Burn in the oven. Firing follows in the bottom chamber of the muffle furnace, where the temperature
Below, for 2-3 days.
Council. Perch or watering the surface of the tire is needed
try to perform this action in one reception. Otherwise, will remain
Divorces.
For the manufacture of glaze you need to prepare brewed
Starch Clauster with a pushed flux (glass). Under action is high
The starch temperatures will penetrate the pores of the tire and for the baked forms
Surfaces thin glazing film.
9 Stage - Final Foundation
The final firing is performed after the glaze if
This is not provided, then after applying the pattern. If the tick is left -
Terracotta, then after primary drying and fitting sizes.
Council. After burning the product remains in the furnace until it is complete
cooling. Otherwise, a grid of small cracks will appear on the glaze.
After this stage, the tie will acquire its color. Complete
The process of making tiles of them with sorting and a complete set (furnish of the furnace or
the fireplace of the tiles involves a certain number of elements that
It is calculated based on the dimensions of the heating device).

The resulting stage will be a facing of a furnace with tiles or
fireplace.