Photo
Many homes of the Soviet buildings are not provided for a balcony on the first floor. And it is a big minus for apartment owners located below. To complete the loggia - the unless dream of every owner of the "recessed" apartment on the first floor. But at present it is not such an unnecessary. The balcony device on the first floor is a task that is solved quite easily.
The first thing to be done to legally complete the loggia is to get a building permit.
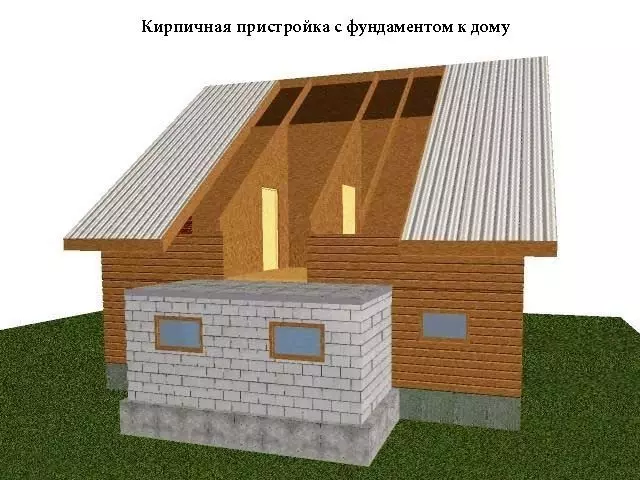
After time, many rules and laws have changed and the real ability to either complete the balcony on the foundation, or make the attached option. Possessing small construction skills and knowledge of the main stages and features of such construction, you can easily carry out a dream and add the necessary meters to the area of your apartment.
Suspended option
The first thing to be done to legally complete the loggia is to get a building permit. Any kind of redevelopment or reorganization of the apartment requires the coordination and receipt of permits.
Unauthorized actions for construction, which lead to the modification of residential premises, including the device of loggias, redevelopment, construction of the attic, arrangement of canopies, and so on, are prohibited by law.
The procedure for approval of various necessary documentation is quite a long time.
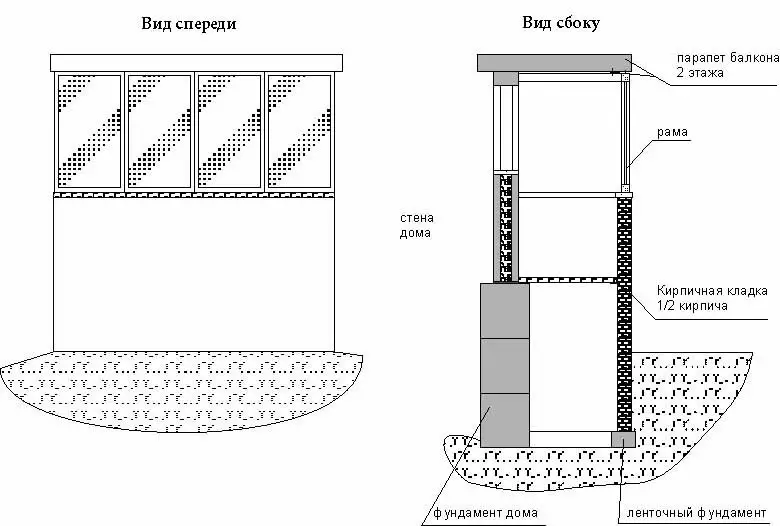
For the device of the attached balcony with the foundation, construction begins precisely from its device. The foundation is laid at a depth, exceeding the depth value to which the soil is freezing.
But if you managed, you can safely go to the device.
To easily obtain permits, you can contact the specialists who prepare and coordinate project documentation.
The suspended balcony is a glazing mounted on the suspension design of a welded character. The production of construction is most often performed by specialists in production. It includes two parts - parapet and base.
The basis of such a design is performed from the corners (metallic) and fixes to the wall of the house (carrier) with the help of anchor bolts. For the manufacture of parapets, corners are also used, but another value. Parapet is welded to the base and attached to the house wall.
On the base of the design, lags made from a bar are fixed. On top it is placed in a draft plywood floor.
A metal sheet is installed for the welded construction under the base to eliminate the possibility of arson. From the outside, the suspended balcony around the perimeter is discharged by a professional flooring. After completion of the construction installation work, the balcony is glazed and other finishing works.
Start of construction
An extension can be located opposite the window in one room or in several.
For the device of the attached balcony with the foundation, construction begins precisely from its device. The foundation is laid at a depth, exceeding the depth value to which the soil is freezing.
Article on the topic: Original tray from parquet board with their own hands (photo, master class)
Another important point is an indicator of groundwater level. Upon exceeding 1.5 m, the foundation laying is made no more than 50 cm. If the ground is a bulk, the foundation is located at a depth of the groundwater level.
Depending on the layout laying, the project is performed. An extension can be located opposite the window in one room or in several. The width of the distribution can be non-standard and either exceed, or be less than the usual balcony.
One of the walls of the balcony will be the wall of the house, which is why there is a need for a sufficiently dense adjoining of the foundation of the construction to the house foundation. In order to make the markup of the future foundation, the following tools are used:

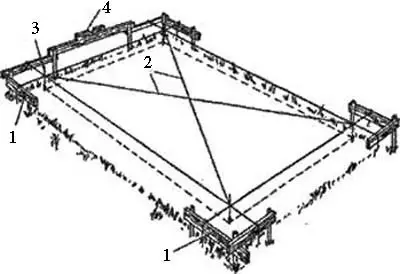
Markup scheme under the foundation: 1) Out of boards; 2) cord; 3) plumbing; 4) Level.
- pegs;
- boards;
- cord;
- nails;
- Corolnic;
- paint.
At the same time, you can also purchase a tool for arrangement in general:
- level;
- roulette;
- drill;
- screwdriver;
- hammer and nails;
- lacing;
- hacksaw.
Work on the markup
Performed in the following order:
- First place a place intended for the foundation using the cord and the square.
- Check the markup by comparing the angles and diagonals (their length) in the rectangle. It uses the coal.
- Wall axes must be noted using pegs, and nourish the boards to them above the soil level.
- On the boards you need to secure the cord and carry out its tension, observing the accuracy of the axes.
- The next step - on the wall of the house it is necessary to apply a pickup using the indelible paint.
- Score nails in places of connection.
- Remove the cord and proceed to the execution of earthworks.

Well, if you finish the foundation (from the outside) in the same style as the finish of the house. It can be a decorative plaster or cladding with a stone tile.
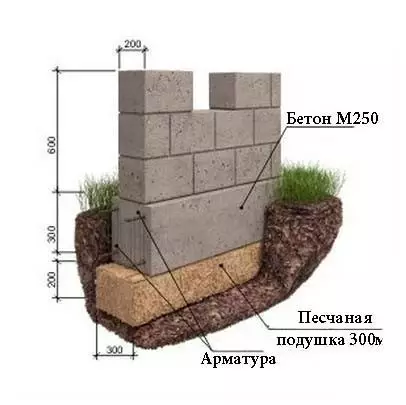
Now consider some nuances of the foundation device. In order to build a balcony on the first floor, the standard sample reinforced concrete blocks are most often used.
An extension, more precisely, its foundation does not take on heavy loads, so you can use quite narrow blocks with a size of 2400x60x30. The foundation height is the same with the height of the house foundation.
Well, if you finish the foundation (from the outside) in the same style as the finish of the house. It can be a decorative plaster or cladding with a stone tile.
If there is a need to isolate the loggia from entering groundwater, then the rubReroid (or only and only) in two layers can be used as waterproofing before the overlapping of the base part of the extension can be used.
But for the balcony with the presence of a basement, waterproofing is required in two stages. The first layer will be located 20 cm above the soil level or the upper part of the scene (if the foundation is brick or stone), the second layer is immediately before the overlap.
Article on the topic: Methods of appliances and hanging rafters
If you are planning a wooden flooring device on the balcony, then you note that the upper layer of waterproofing should be located 20 cm below the wooden elements.
Overlapping
Most often in order to overlap the loggia on the first floor, reinforced concrete plates of a standard sample are used, the length of which varies from 3 to 6 m, and the width is from 120 to 180 cm.
This overlap plays both the role of the floor in the extension. Installation of the reinforced concrete plate occurs along the wall of the house.
- Do not forget about such a nuance. Carrying out the installation of reinforced concrete slabs, stacking in such a way that the reinforcement is in the right place. Where the stove is experiencing the greatest degree of tension during stretching: in the floors - from the bottom, in consoles - from above.
As for the construction of walls, the size of the chain masonry is most often used. It reliably ensures the dressing of the seams and increases the degree of strength of the balcony.
The attachment balcony must be made with a reliable wall thickness in order to easily withstand the load of the attached balcony on the second floor.
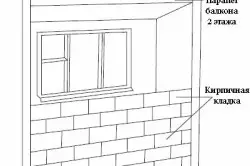
The most suitable option for this will be a brickwork, the thickness of which is at least 25 cm. And the height of such a wall is not recommended to do less than the location of the windows plates at home.
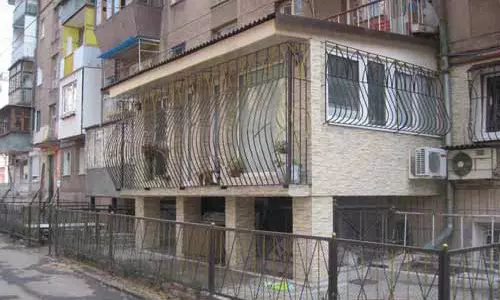
As for the height of the side walls, it may be different. The most optimal option will be the height equal to the height of the entire extension. By this you get rid of yourself from discontent with neighbors, if they want to equip the balcony over your extension.
The facial wall remains free for future glazing. Such a tuning balcony reminds on the appearance of the loggia. It is this design that is best for use as overlapping of reinforced concrete plates of a standard sample.
If you want to perform glazing and side sides, then for the overlap, it is necessary to apply wood, as well as the material for the roof.
In order to perform the outer trim of the balcony walls located on the sides and in the front part, you need to use the material that does not violate the style of the facing of the entire building.
As for the construction of walls, the size of the chain masonry is most often used. It reliably ensures the dressing of the seams and increases the degree of strength of the balcony. If the neighbors are solved on top to build a balcony over you, then such a laying will perform a function of a reliable base.
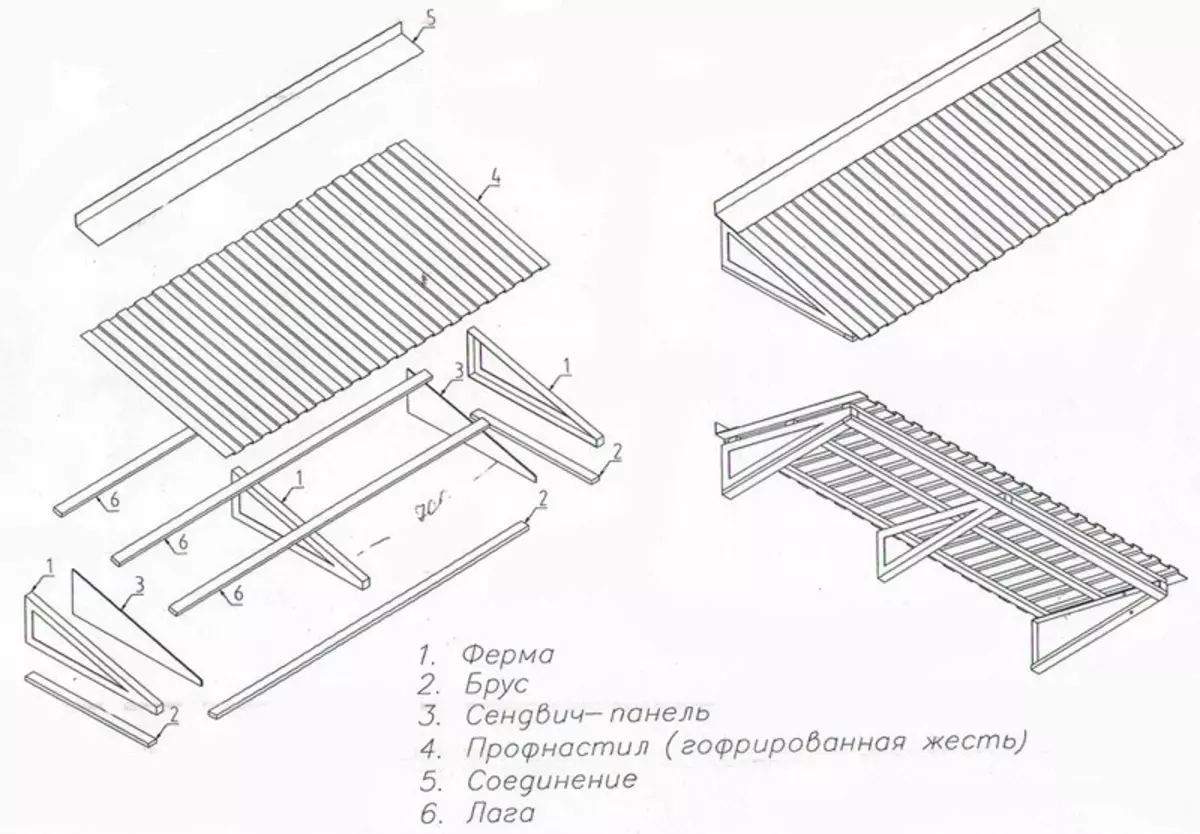
Arrangement of roofing

When the roof device needs to make a good stock for water. Otherwise, water will accumulate on the roof of the balcony.
What materials can be applied as roofing during the arrangement of the balcony-extension? And how to properly carry out roofing work?
Article on the topic: How it is more convenient and faster to transfer the plasterboard?
In order to carry out roofing work, it is possible to use runneroid (two layers), combined with bitumen mastic (hot), or use a ceramzite concrete as a roll roof, which in addition to its direct function also performs the function of the insulation.
For the roof of the sheet material, it is necessary to build a wooden frame, without forgetting about the slope to the outside.
When the roof device needs to make a good stock for water. Otherwise, water will accumulate on the roof.
In order to implement it, do not forget about the slope to the outside. Where the roofing material comes in contact with the wall of the house, the roof is bent and firmly fixed on the wall surface at an altitude of about 10 cm (can be more).
For insulation, the balcony-extension ceiling can be used mineral wool laid in space between wooden parts of the roof. Instead of mineral wool, clamzit can be used or other materials with thermal insulation properties.
An important stage in the construction of the balcony is to install a balcony door and a window. This is the most difficult part of the construction of the balcony-extension.
Obstacle at this stage can perform radiators of heating with pipes that are vested from them performing the function of heat supply of the room. Take care in advance about solving this problem.
In order to exit the attached balcony, you need to dismantle the window and the windowsill. Then disassemble a part of the house wall for the door device from the window sill to the floor.
The disassembled part corresponds to the width of the door to the balcony along with the box. But do not forget that the placement of the balcony door in the opening should be quite dense. After installation, it is necessary to carry out work on the sealing (renovation) of the gaps, and on top of the gap places to install a nickname.
Another nuance. Opening a balcony door in any case should be carried out by the room. From the type of extension it does not depend.
Finishing work
The final work can be attributed to the installation of the window sill in the room, lowtening on the balcony, thresholds made of wood and from the apartment, and from the balcony. After that, you can proceed to the last stage of construction - glazing and interior decoration.
Do not count on the fact that the extension on the first floor will take at least a minimum of time.
From your skill and desire, as well as the quality of the construction of the balcony, will depend on the time spent on construction. In order to build a balcony, on average, you will need about one month, no less.
Do not despair, because if you are the happy owner of the apartment without a balcony, it means that you have already been waiting for enough long. And work on the construction of the balcony, which is spent only one month, will not give you great chagrins.