
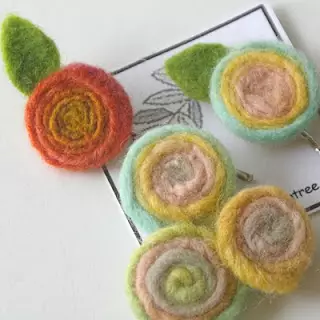
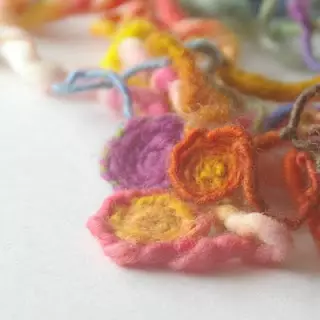
Our new master class is devoted to creating colors from woolen threads. In fact, flowers from woolen threads are obtained very bright and expressive. They can be attached to the invisibility or gum and beautifully decorate the hairstyle. You can wear onto the pin and use how the brooch. Those colors can decorate the finished clothes, giving it the charm of your individuality. By adding a sheet from felt, you can get an exclusive button. There are actually a lot of such usage options if you think a little, you will definitely find some more.
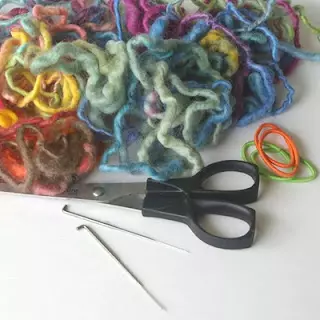
Required materials and tools:
- pieces of woolen threads of different colors;
- scissors;
- needle for felt;
- Rubber or invisibility for hair, pin, the base for the button - depends on where you plan to use your colors woolen threads;
- Moulin or ordinary thread for fixing the edge;
- Green felt for leaves.
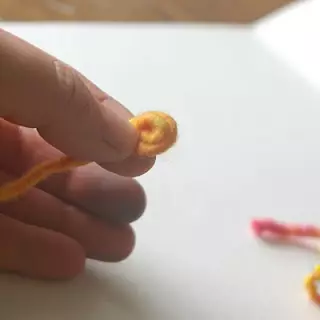
Start of flower
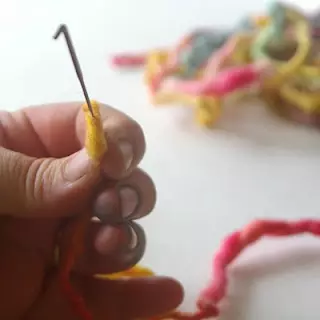
To make the middle flower, it is necessary to use a woolen thread of length somewhere around 45 cm. Length can vary depending on the desired size of the finished flower. Start a spiral by placing yarn between two fingers, as shown in the photo.
Collapse Spiral
Using the needle for felt, gently insert it into the inside of the spiral. Caution! Do not bend the needle, and it can break. Take care of your fingers!
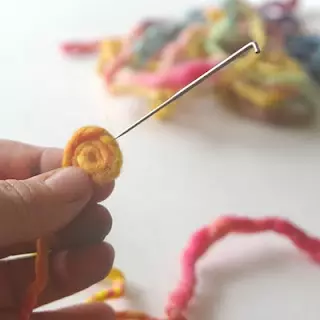
Try tightly fold the spiral, inserting and taking out the needle for felt. All the time you will hear a specific sound when you take out the needle. So it should be. This fiber will be adopted with each other. That is, you need to ensure that the arc spirals keep tightly for each other and did not bloom, even if you do not keep a spiral with your hands.
Article on the topic: Application "Owl" from leaves, fabrics and colored paper with templates
Continue in the same vein to keep the spiral with your fingers and fasten it with the needle until the flower reaches the desired size.
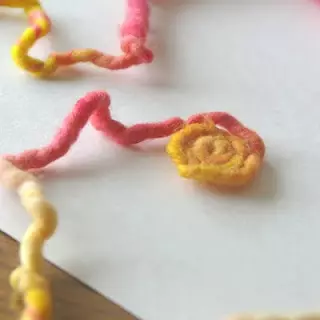
Completion of Spiral
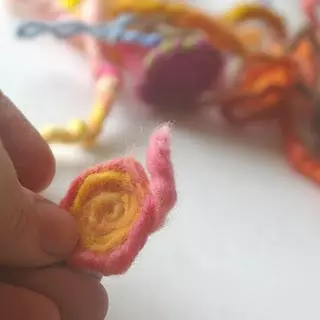
When you get the flower of the required size, use the needle as well as in the previous steps, with the only difference that you will need to pierce the entire flower to the center, fastening the fibers. Once again, go through the needle around the entire helix. Do not allow the needle to pass through, it will leave the track on the outside of the flower. To secure the tail of the thread, output it to the opposite direction of the product and secure with the needle for felt. Act carefully not to pierce the flower through. Use the needle to give the flower a neat shape. When you complete the work, you will get a spiral that will not be blown and look like a single integer.Decorations using a flower
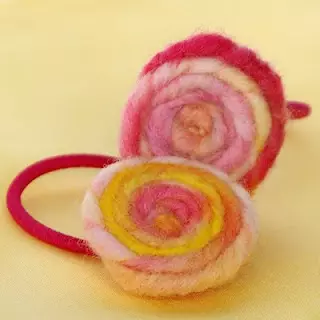
- Hair decoration: reliably enter the flower to the rubber band.
- Hairpins: Use glue to stick the flower to the invisible.
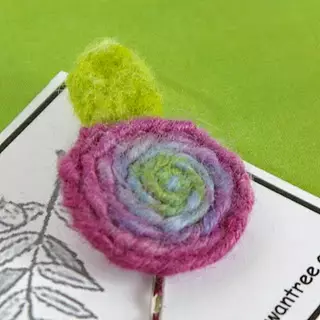
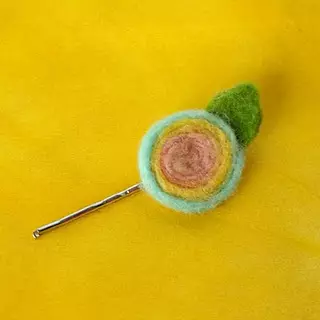
- Brooka: Slide the flower of woolen threads on the pin.
- Buttons: Use green felt for the manufacture sheet. From above leafy, position the flower and the trick of it.
- You can use as a button or sew to clothing as decoration.
Our amazing wool thread flowers are ready! We hope that you like our idea and you will gladly use such flowers, decorating clothes or hair. A, maybe find them a completely different application.
If you liked the master class, then leave a couple of grateful lines to the author of the article in the comments. The simplest "thank you" will give the author of the desire to please us with new articles.
Encourage the author!