
The thing made solely independently will always cause real admiration. Such items will help create an unforgettable cozy and comfortable atmosphere in the house. The main advantage can also be the fact that these are inexpensive items collected from prisoners, which cannot be said about the design accessories. Make the original lamp on the wall with your own hands is not only a fascinating process, but also the opportunity to make life brighter and original.
Light of packages from juice
In the house there is a lot of unnecessary things that thoroughly throw away and cannot be used - most thinks, but this is a delusion. From such things you can easily create unique lamps with your own hands, the master classes presented here will help this. One of the simple and original options is a unique wall lamp from tetrapak packages. The first frequency calls it - "Tetrallyster".
For the production of the lamp will be needed:
- packages from juice;
- scissors;
- line;
- glue.

Manufacturing instructions:
1. The first thing the package bursts on the seam and cuts on a strip of a width of about 2-4 cm.

2. From these strips, triangles or hexagons are folded (at your request), while the foil side of the cardboard must be out. Such elements should be quite a lot, you will need not one package from juice.

3. Further, with the help of these parts and Origami technology, you can create amazing forms. For this, the finished elements glue the parties among themselves in a circle, the design of six triangles should be obtained.

4. We are preparing a few more such billets and fasten them among themselves as parties by the same principle (scrub). At the output there should be a ball. Do not forget to leave a hole in the design for the passage of the wire with the cartridge and the light bulb.
Article on the topic: How to make corners for photographs: 2 simple ways (ideas +35 photos)

5. The finished product remains only to suspend and enjoy the unusual game of light-shadow.

Optionally, you can make a non-round lamp, but a product of any other shape, be it a rectangle, a triangle, a square or something more unusual.

On video: Tetrapak lamp.
Unique model of MDF
This option is probably one of the most interesting. Such a lamp will give the room a special entourage. A distinctive feature of this idea from all other - longitudinal cuts in front.

The design itself is assembled from two parts - the rear wall with two narrow side parts and the front of the design with two longitudinal cuts. Two side parts are installed on the front panel, which should be wider than the sidewalls of the rear wall. There are also three luminescent lamps and power cables.

The product is manufactured from the MDF MDF Plate. The thickness of the sheet should be 19 mm. It is allowed to use affordable materials with another thickness, but then the project needs to make certain adjustments. The slab of the desired size can be purchased in the construction market or in the store.
Required tools and materials:
- Lobzik, grinding machine;
- Drill, screwdriver;
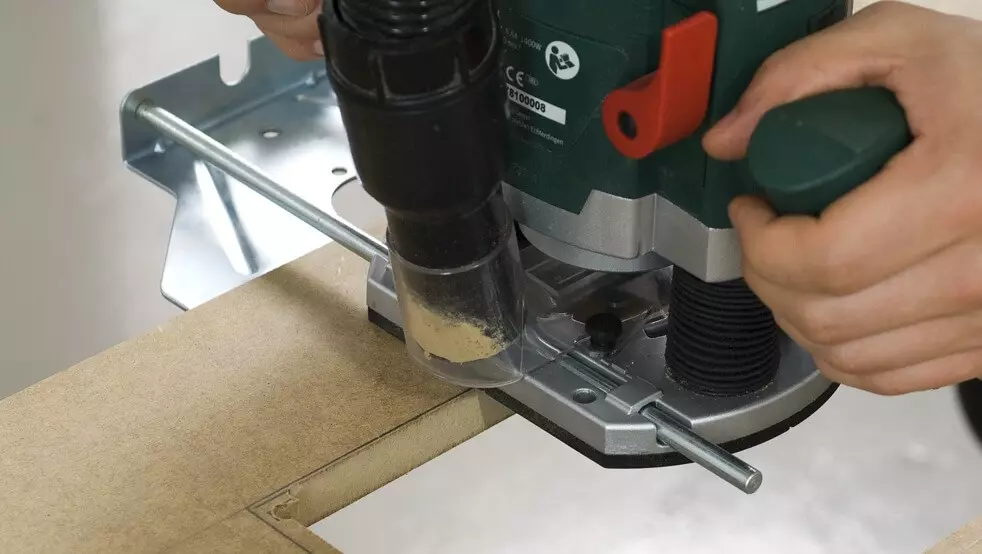
- vertical milling
- drills for wood;
- wooden dowels with a diameter of 8 mm;
- roulette or folding meter;
- grinding skin with graininess 120-140;
- glue for wood and clamps;
- Putty on wood and roller.
Manufacturing instructions:
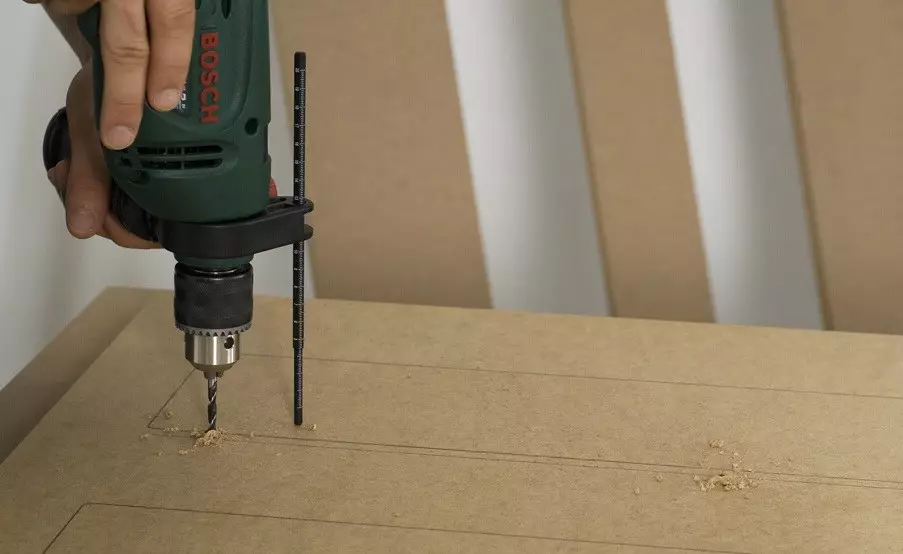
1. The first thing is cut out the opening in the front panel of the lamp. To do this, it is necessary to place future cuts. With the help of a drill and drill in the corners, the holes drill so that the edge of the hole only reached the labeled line, but did not enter it.

2. Next, take the jigsaw and insert into one of the holes. Now you can start cut out the opening of the lines. Corners can be rounded, and you can leave and straight - everyone is free to do it to your taste.
Article on the topic: Creating a unique collage from photos: execution options
3. It is necessary to do holes for the holders of acrylic walls. For this, the front part is placed on the back and align as if these two details were already installed. Cutout contours are transferred to the rear wall.
On the back side of the front panel of the lamp and on the front side of the rear panel drawn line 8 mm lower than cutouts. For each of the lines, five holes are drilled - the depth should be 210 mm. Then the holders for the walls from acrylic will be installed in them. The diameter is selected by the diameter of the holder.
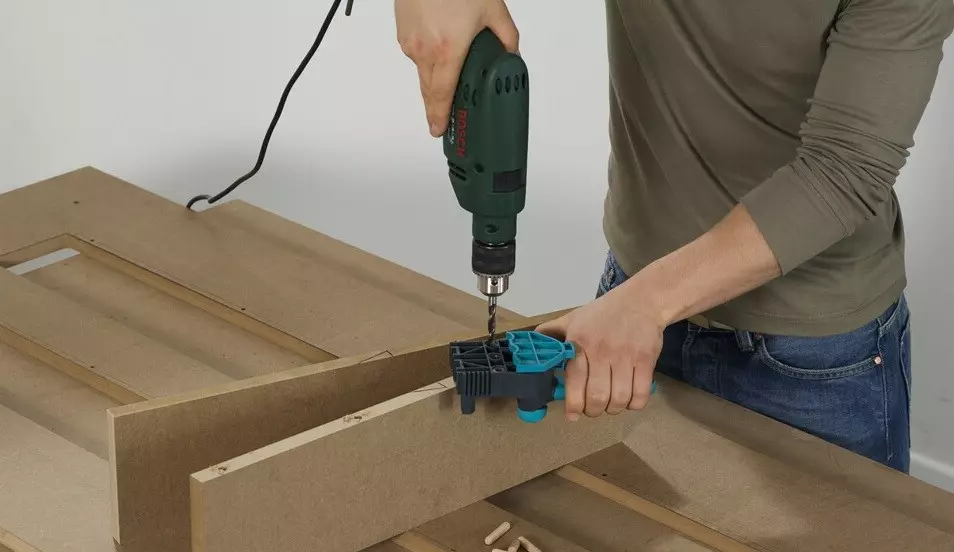
4. Now it remains to drill holes under the dowel. Side parts are installed on the front panel as they will be fixed. For the hole markup, it is better to use templates - without them it is easy to make a mistake. Using a 8 mm drill, three holes are made in the end parts of the lateral parts.
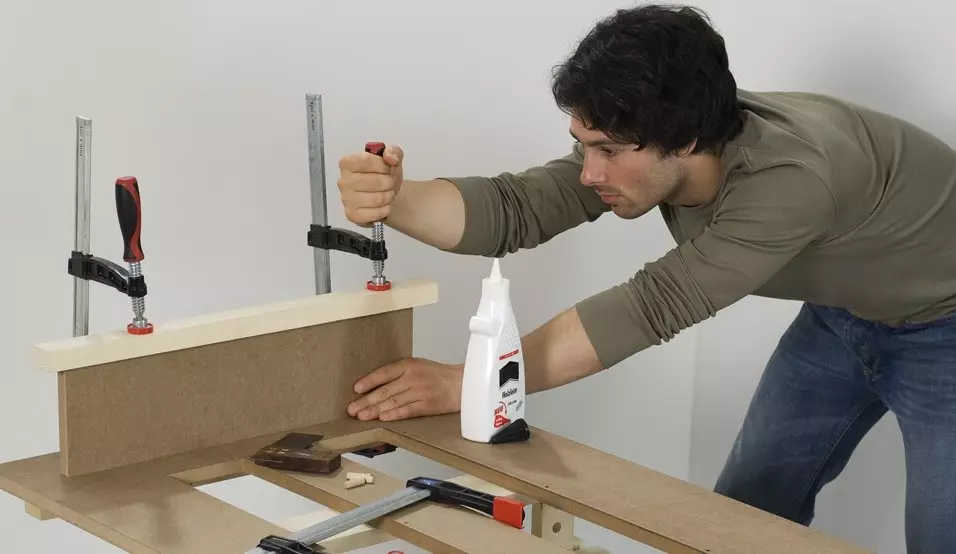
5. The front panel glued with sidewalls. To do this, glue is applied to the holes under the dowel. The glue must be applied on the surface of the details. Then insert the dowels. Next, the design is fastened, the compounds are tightened by clamps.
6. Now you need to connect the front panel with the sidewalls installed with the rear. Initially, narrow sidewalls are screwed to the rear wall. With the help of dowels, rear design detail to the wall. It remains only to install the front of the design to the rear. The front part is aligned and with the help of screws attach it.

7. Cosmetics are performed - everything is grouped, then the holes for the self-tapping screw and the connections are sweeping.
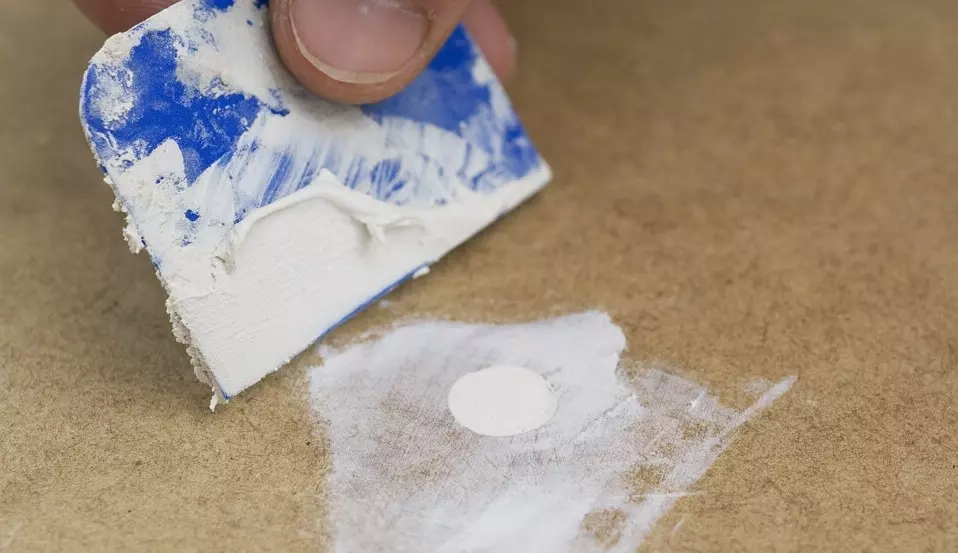
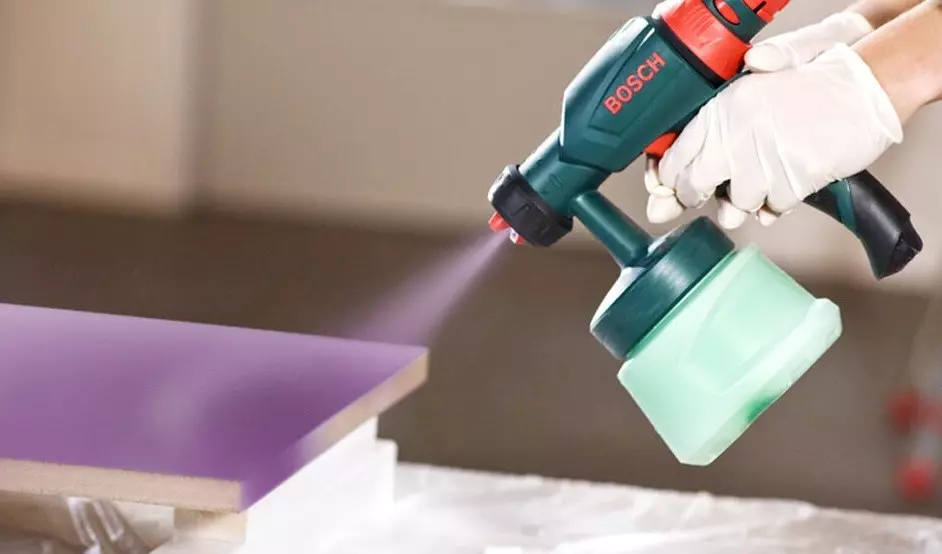
8. Next is performed by putting the surface of the primer. And finally, the product is painted. Better to make a canister.
Now there are a lot of ideas for the manufacture of interior elements. Mastercars help make one or another item. Choose the product you need and create it - everything will work out, and it will be the most original and unique design.
Article on the topic: Original paintings and panels from wallpaper do it yourself
Other options for lamps (2 video)
Interesting ideas (35 photos)


")


")


")


