
For a bathroom of a small size, where in the account literally every cm space, the construction of a pallet for the shower will become a good solution. First, you can make a pallet of this size and shape, which allows the sanulace area. Secondly, the absence of the shower walls will leave more free space, and while taking a shower, there will be a waterproof curtain to protect the bathroom from splashes. Thirdly, if you allow overlapping in the apartment, or the shower tray is arranged in the bath, you can allow you to make a model of the pallet without a barrier with your own hands (Fig. 1).
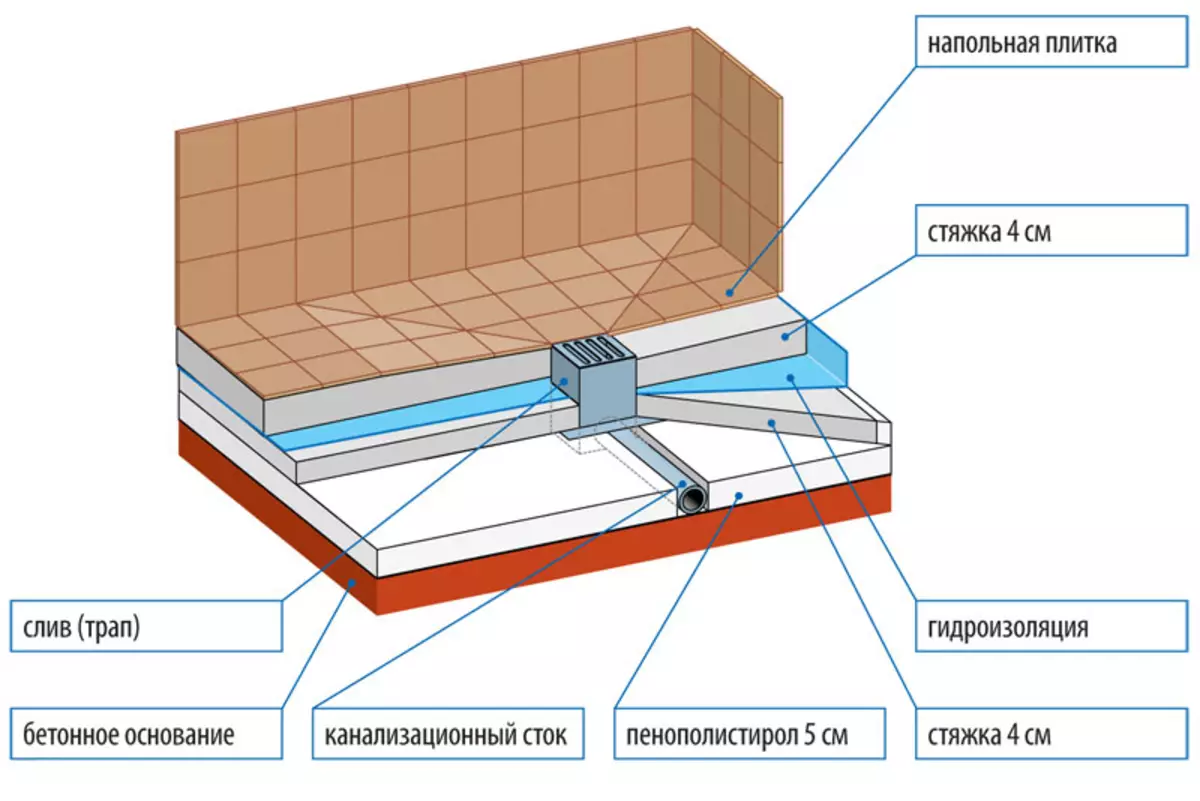
Figure 1. Installation scheme of built-in route.
The durability of the pallet made with the use of concrete and ceramic tile exceeds the service life of acrylic and metal pallets.
Preparation for work
When the soul pallet device, it will be necessary to raise a part of the floor in the bathroom in order to install a drain ladder and bring the pipe to the sewer system. This requires concrete work and related materials:
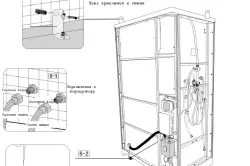
Assembly and shower assembly circuit.
- cement;
- sand;
- waterproofing material (polyethylene, rubberoid or other);
- bitumen mastic;
- drain ladder, pipe sewer desired length;
- boards;
- nails or screws on wood for formwork devices from boards;
- Lighthouses plastering, Mon 27x28 profile or wooden slats;
- ceramic tiles;
- waterproof glue for tiles, white;
- trowel;
- spatula gear;
- Drill with a nozzle-mixer for the kneading solution.
Figure 2. The installation diagram of the shower pallet.
It is necessary to prepare the surface of the rough floor for the device of the shower pallet: to dismantle the available coating, clean the surface from the garbage and coat the floor and part of the wall at the bottom of the bitumen mastic. It is necessary in order to prevent the capillary absorption of moisture into the overlap (Fig. 2).
In case the shower tray is arranged with their own hands in the wedge compartment of the bath or in a wooden house, the weight of the concrete system should be taken into account and take care of the appropriate foundation for the pallet. From the wooden walls of the shower tray isolate with a double layer of rubberoid with such a calculation so that its width is greater than the estimated height of the pallet along with the board.
Sewer tube in the downtown bathroom is usually at the floor level.
In order for water from the pallet to leave without delay, the tap tube from the ladder to sewage should pass with a slope of about 3 o in the direction of the sewage.
For this, it will be necessary to pour a new screed to the area, which will take the pallet, or completely lift the floor in the bathroom, if there is an opportunity and desire.
Article on the topic: Cross-embroidery Cats: Cats British, Roof sets, Redhead and black pictures, Photo of the lunar lazy cat
Montage of the soul pallet
Figure 3. Scheme of a shower pallet with their own hands.
- On the prepared surface, the waterproofing material - polyethylene 200 μm or butyl rubber film was disseminated.
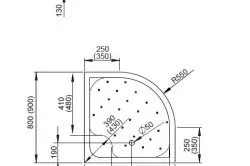
- Set the drain gear in a convenient place of the shower pallet with such a calculation so that the pipe has had a slope towards the sewage at least 1 cm / m. The distance from the walls and sides of the pallet to the ladle is better to choose a multiple sizes of tiles for finishing - it will save from the need to cut the tile, configuring it when laying.
- If the screed is filling only on the pallet area, it is necessary to make formwork from the board of the desired form and size (Fig. 3);
- Pour the primary screed into the formwork so that the creation of the drain route is completely immersed in the screed. The screed solution is prepared from cement and sand in proportions 1: 3, respectively. Mix mix carefully first in a dry form, then add water until the consistency of thick sour cream is achieved. This layer of screed can not be carefully aligned. Spilled tie to grabbing during the day before continuing work on the pallet device.
- Install additional formwork boards so as to get the pallet board so that the water does not spread out of its limits. The height and thickness of the sides are chosen arbitrarily. Prepare a portion of the solution and pour into the formwork. Leave to set for a day.
- Disassemble a formwork. In the trapp housing, install the upper sealing sleeve. Install plaster beacons in such a way as to get a small slope of the bottom of the bottom of the pan in the direction of the drain hole. The slope is chosen arbitrarily, given the convenience and safety of the user. Apply a cell solution, aligning in beacons, with such a calculation so that the rod neck is 1-2 mm below the level of the finish coating. Give concrete to grab and remove lighthouses. Align the grooves left after the removal of the beaches. Leave the finished shower tray for several days to set and dry the monolith of concrete.
- The surface of the pallet and adjacent walls are covered with primer. Then the layer of waterproofing composition or mastic is applied. Especially thoroughly, all the joints and corners of the pallet bowl should be processed.
Scheme of installation of a shower pallet.
Over the waterproofing, you can apply a layer of waterproof concrete contact for better adhesion of tiled adhesive.
Article on the topic: Idea for a small balcony (photo)
Tilted tiled glue first on the floor of a shower pallet. The laying of the tile is better to produce, ranging from the plum hole so that the trim tiles are in the walls of the pallet. The seam thickness between the tiles should not exceed 2 mm.
Similarly, lay the tile on the side of the pallet and the walls of the room.
After soaring glue at least 3 hours, he to lure all the seams between the tiles using the rubber spatula with the same glue. Wet rag remove excess glue and clean the surface of the tile. To complete glue grip, you need from day to three. After that, you can take a shower.
How to save on concrete
If the purchase of ready-made mixtures or sand and cement for the preparation of a solution in the amount required for the manufacture of a monolithic pallet is not possible, it is easy to build a brick shower tray with a subsequent cladding tile.Required:
- Silicate or red brick - about 40 pcs. for pallet 100x100 cm;
- Cement and sand for a masonry solution.
Other materials and tools, as for the method of manufacturing a monolithic pallet.
Preparation of the base and waterproofing treatment is carried out similarly to the previous method:
Figure 4. Circuit assembly scheme.
- The base of the pallet is laid out of the brick using a masonry solution from cement and sand 1: 3 (Fig. 4).
- In the same way, the side of the pallet is laid out of the brick. Brick can be plagged or a long edge. This makes it possible to vary the height and thickness of the board.
- After a few days, after drying the masonry, a layer of bitumen mastic or other waterproofing composition is applied to all surfaces of the pallet. A layer of concrete contact is applied on top of the waterproofing, at the bottom of the pallet using a cement-sand solution, the required slope is formed, the side is placed in the same solution.
- After grappling the cement mixture, you can make a shower pallet with ceramic tiles or mosaic from the tile, as described above.
Shower pallet without barrier
If the mounting of the pallet is made with their own hands during the coarons of the bathroom, you can build a shower tray without making it on the board, in a bathroom in a bathroom . To do this, it is required to rise in the level of the floor on the entire area of the bathroom on average 15 cm from the initial, given the necessary slope of the pipe from the drain ladder to the sewage and the bias of the pan of the tray hole. In addition to the materials specified for the side of the pallet with sides, you will need:
- hydraulic level for beating horizontal;
- Construction level for installing beacons.
Article on the topic: How to independently make a ceiling with beams
The main steps for the preparation of the surface are similar to those indicated above. After applying the waterproofing layer across the entire floor of the bathroom and the installation of the primary tie of the floor with the installation of the ladder, it is necessary to give concrete time for setting for several days. Then perform the following steps.
- To beat the horizontal, apply a label on the wall and attach one hydraulic vessel to it. The second vessel is accommodated by another wall and, having achieved a coincidence of labels on the vessels, apply a label on the wall. In the same way, apply several tags around the perimeter of the room. Tags to connect with a long line, noting the horizontal.
- The level of clean floor is determined, taking into account the fact that the floor in the bottom of the pallet will have a bias toward the throat of a drain route. To do this, from the level of the flooded screed to postpone the distance that will be needed for the slope device. The label on the wall will mark the level of clean floor of the bathroom without taking into account the finish coating - zero level. Thunderstand the distance from the tag to the horizontal line.
- To postpone from horizontally down this distance around the perimeter of the room several times. Tags to connect, denoting the zero floor level.
- Set the first lighthouse so that its upper part exactly coincides with the zero line. It is possible to strengthen the beacon with a thick solution or a gypsum mixture. The remaining lighthouses set, aligning them along the construction level.
- Set lighthouses in a pan with a slope toward a plum.
- Apply a solution for beacons first in a pan of the pallet, then over the entire floor area, tightening it in the direction from a long corner to the output. After setting the solution, after a day, remove the beacons and level the surface. Leave the floor to graze the screed for a few days.
Then the entire surface of the floor is treated with waterproofing compositions and concrete contact. Next, the flooring is made, as indicated above.
This option for designing a shower pallet is used in the countries of Scandinavia and is convenient because even the pallet side is not interfered when moving along the bathroom.
When the device of any variant of the pallet can be supplemented with its walls of impact-resistant glass or plastic, creating a shower room, or limited to the curtain from the film.