
One way will increase the living space - remove the doors. But it is not always possible or the desire to destroy the walls. Then the former doorway is drawn up in the form of an arch. Another option to use arched openings is to divide the long corridor on the zone, breaking too simple geometry. When repairing on its own, the plasterboard arches are most often made: they are easiest to make them the easiest.
Types of Arok.
Interroom or corridor arches can have a different form. They differ in the main form of the upper part and sometimes - a way to connect with vertical parts. Their main types are presented in the photo.
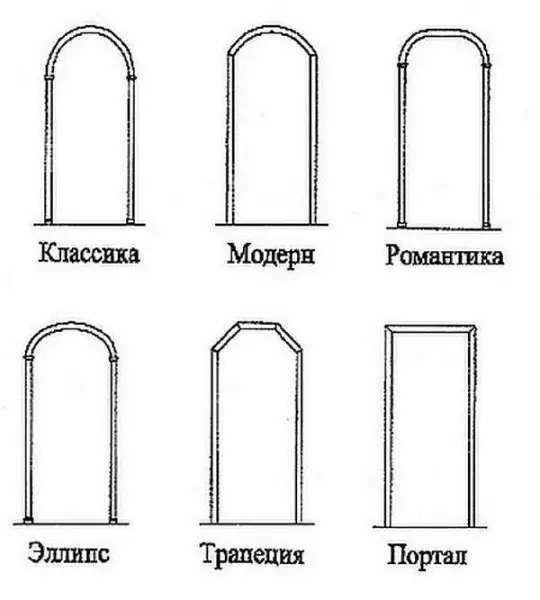
Types of arches of interroom and corridor
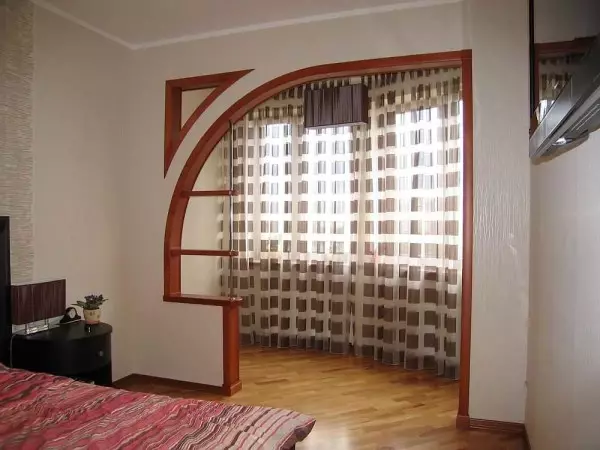
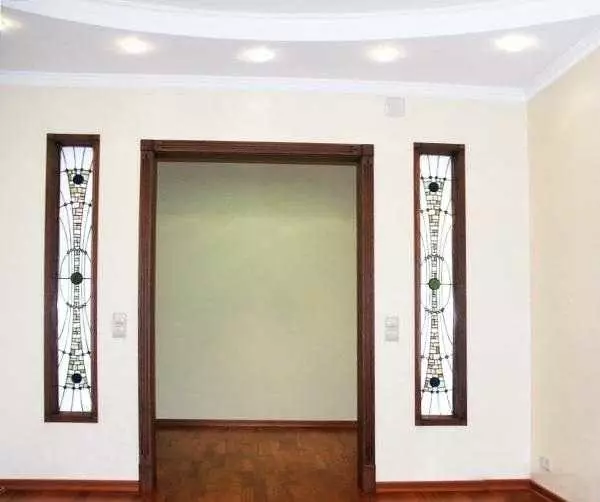
In this group there is no one of the most popular recent - half a day. They have a rounded corner only on the one hand, on the other it remains direct. Hence the name - half a day. It looks good in modern inverters: minimalism, high-tech, maybe in Art Deco.
One of the semi-colors in the interior
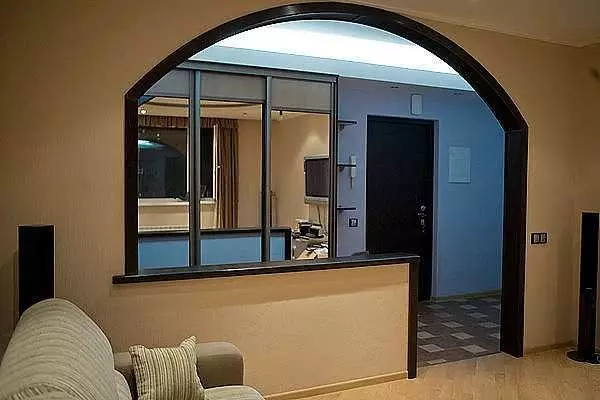
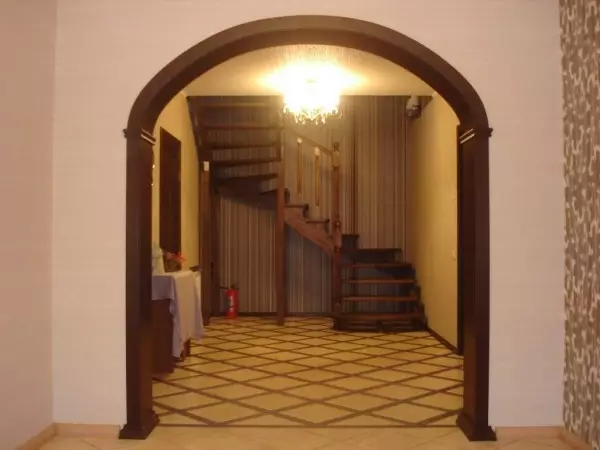
The classic is distinguished by the right form of the vertex. It is strictly harder, the radius of which is equal to half the width of the doorway. This species looks good at the height of the opening of at least 2.5 m. It fits well in any interior, but it looks best in in a long corridor, or instead of the entrance door in the kitchen.
For the classic arch requires a height of at least 2.5 m
Arched opening in the style of "Modern" is distinguished by a small radius of curvature and a sharp transition at the place of a joint with vertical components of the opening. It looks good if the walls and ceiling have a more or less simple design. It looks great on the site of the former balcony door, good at the entrance to the office.
Arch in the style of modern on the site of the former balcony door
The arch of the style "Romance" is more likely rounded angles (mostly the master so called it). It looks good with great width and not the highest altitude.
The form "Romance" is good with great width and low height
The form "Ellipse" "is very close to" romance ". It differs only greater curvature in the middle. Also suitable for low and wide opening. Looks just a little softer.
Suitable for opening a large width and not very high height
The trapezium is a non-standard design consisting of broken lines. It is difficult to play in the interior, therefore it is used infrequently: for some non-standard designs.
One of the design options - a trapezium
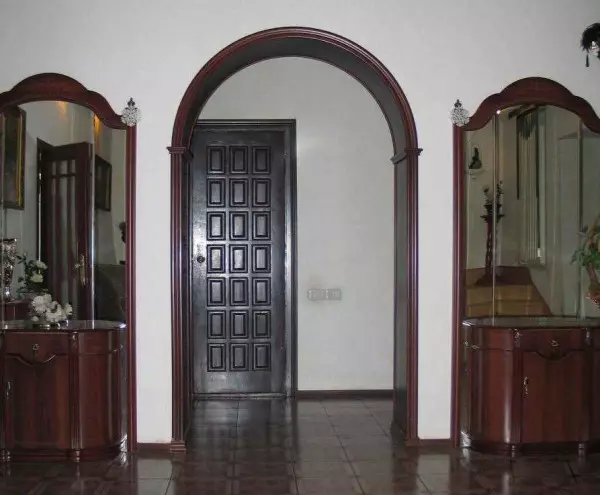
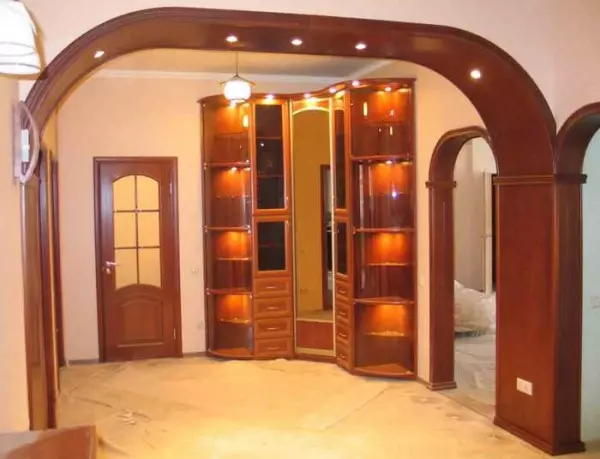
Very similar to the usual opening, yes it is essentially it is, only without the door canvase. For greater originality, it is often accompanied by wooden carved elements in the form of columns on the sides. In this form, it is good for classic interiors, as well as ethno-style - Greek or Roman, depending on the type of columns.
Portal with a framed of a tree
For decoration in modern styles, another approx - next to the main arch, have smaller portals. This technique allows you to "beat" a simple form.
Article on the topic: How to clean the pool or water from flowering water or mechanical pollution
More option Arch "Portal"
Before you begin to make the Arch, you need to decide on its parameters. Select the type and then the parameters: where it will start, and which radius of curvature will be. This can be really steep bending, and can only some rounding corners.

Rounded corners in standard doorways look better than steep arched bends
To understand how the form you selected look, you can cut a pattern from cardboard and attach it on the doorway. Rate effect. If everything suits you, you can make a blank on this template. But only one - for one side of the opening. The second should be done at the place, otherwise it will be crooked.
Step-by-step instructions with photos: the fastest way
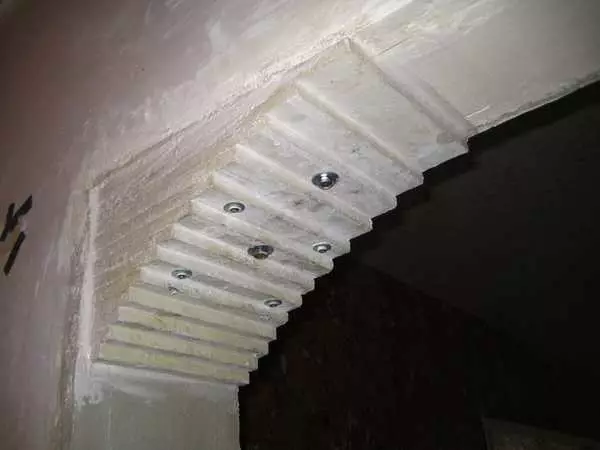
Arches from plasterboard do with their own hands in different ways. This one takes a minimum period of time. Deciding with the form proceeding to the installation. On the prepared opening - purified from the peeling plaster and relatively aligned, in size for the future arch, the framework of the framework. It is made from the profile for drywall or a dry wooden bar of a suitable size. Sometimes, if the wall is narrow, you can only pick up wood.
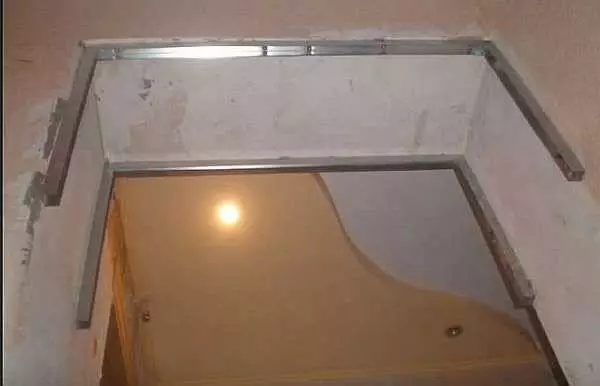
On the selected dimensions, a frame from the profile is screwed
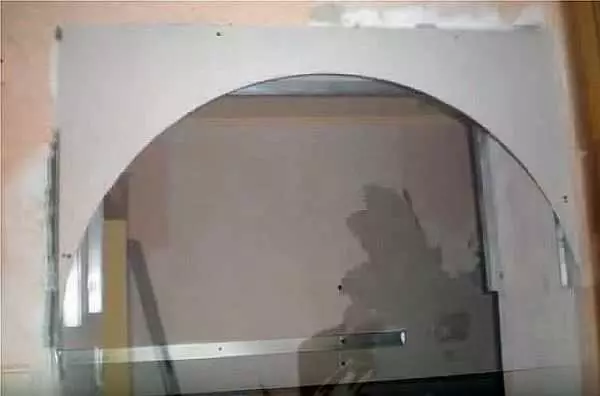
To begin with, we cut a rectangle from drywall in size to the sizes of the future arch, we find it middle, mark, after which we are temporarily screwed into place. We retreat from the edge of 12.5 mm - the thickness of the sheet of plasterboard. If the adjacent walls are already plastered, add a couple more millimeters on putty - so that you can align the surface.
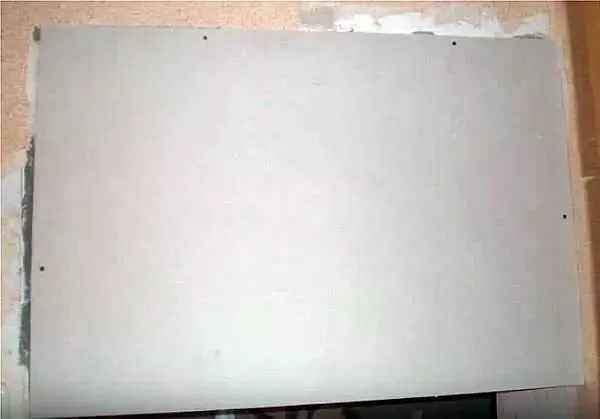
Screwed plasterboard into place
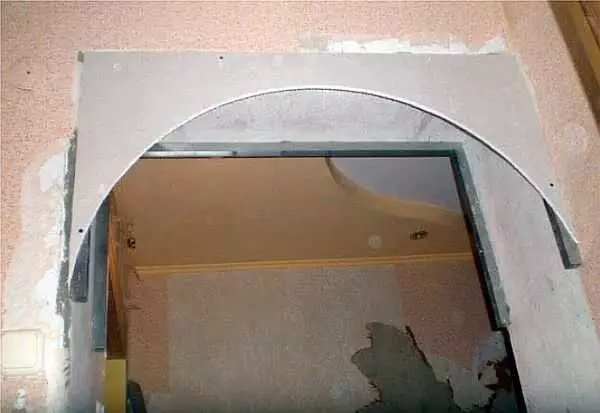
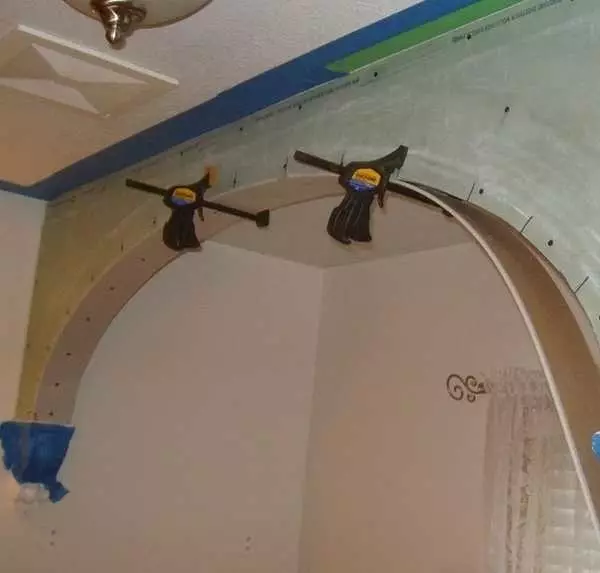
Now we take a piece of profile or a hard corner, from one edge laying half the width of the opening. At this place in the corner we do a hole, insert the carnations into it. This nail stick to the middle of the doorway marked earlier on the sheet. It turns out a kind of circuit, with which it is easy to draw the perfect line.
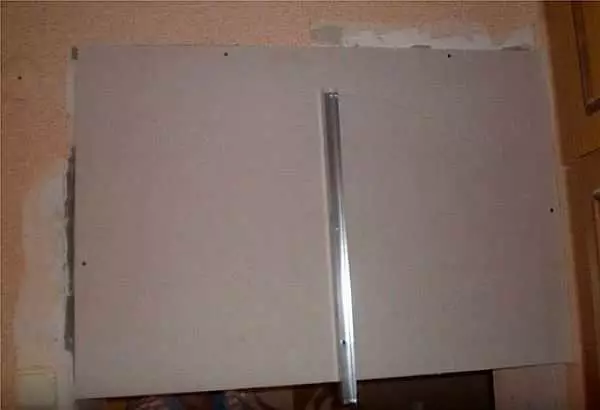
Devices for delineation of arc
Changing the fastening height can be obtained more or less than a high arch. If you need a more common curve, increase the length of the "Circular".
With a corner of black arc
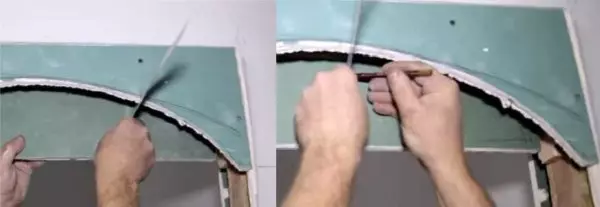
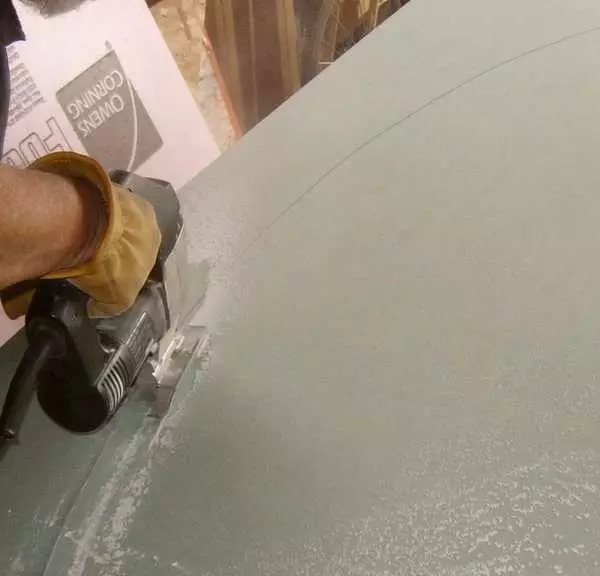
Removing the sheet, on the outlined contour arc cut out. This can be made with a special sawmaker on plasterboard, saw for metal - with a small tooth for a more level edge, an electroll (there will be a lot of dust). If the slice was not very smooth, aligned with the sandpaper fixed on the grater. This adaptation is achieved by the perfectly smooth curve of the form we need. The carved fragment of the arch - the side wall - again secure in place.
Cut fragment fixing
If everything is exactly, no distortion or irregularities, on the other hand, we attach the same sheet of plasterboard, as a few steps earlier - a rectangle or square - depending on the form. It must be fixed strictly vertically. Now transfer the shape of the arch on it. We take the square, a straight angle and one side we are pressed to the plasterboard, on which we carry the arch, the second side - to the sum. Having put the carbon perpendicular to the pencil point. We make such points throughout the arc. The more often they will be made, the easier it will draw a line and more accurate will be the coincidence - the less will have to begden.
Article on the topic: Film Warm floor under the tile: step-by-step installation
We carry the shape of the arches to another sheet of drywall
Why is it so difficult, and not just make a copy of the first sheet? Because few of the openings are symmetrical. As a result, install the second sheet so that the arches lines coincide very problematic.
Noting all the points, leaf removed, draw the line, drink it on it. Mount to your previous place. Now we take the smoothness with emery paper and now there are both edges before the complete coincidence. One moment - the ironing should be wider than the opening so that both walls of the arch be captured in one pass.
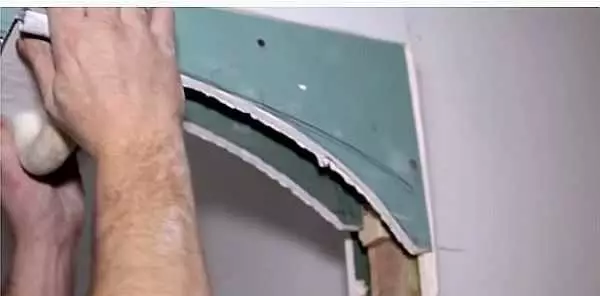
While both walls at the same time
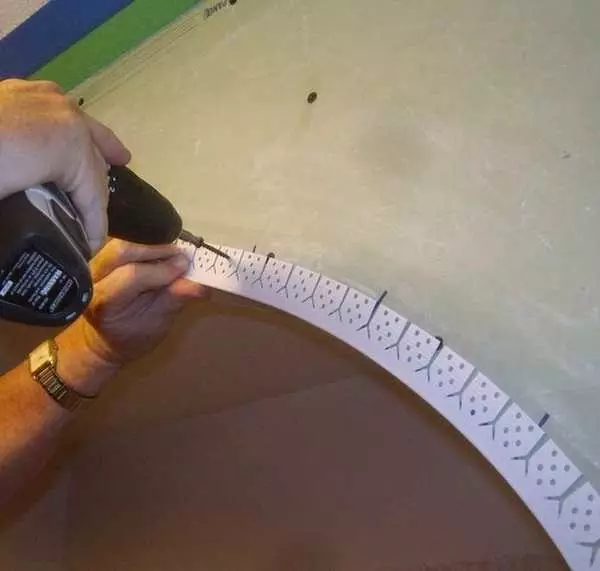
We measure the length of the arc, cut out a piece of the profile of the same length, we make notches on the walls every 3-4 cm. This tape will need to fasten along the arch of the arch from one side.
How to chop profile for arch
Breppy on the self-tapping screw, neatly, pressing the profile and holding it with Bru, and not with his fingers: to get a screw in the fingers elementary. By the way, you need to work with a chopped profile in gloves. If without - the hands cut exactly.
Cropped outcropped profile, along the way, giving it the shape of the arch
By the way, the back of the profile can be placed on the edge - it is easier to work, and the junction will still have to be embedded. Similarly, screw the strip to the other side.
This is the bottom view - on the sides are attached profile.
There is a second method of fastening the profile - to plant it on a rapidly grappling universal glue, such as liquid nails. This method is acceptable if the width of the opening is small. With a large thickness of the arch, the glue may not withstand the masses of the plasterboard, which will be attached from the bottom.
The next step is krepaim jumpers. First, the depth of the arch will be lost, 1-1.5 cm is deducted from it. This will be the length of the jumpers. Cut pieces of a profile of such a length.
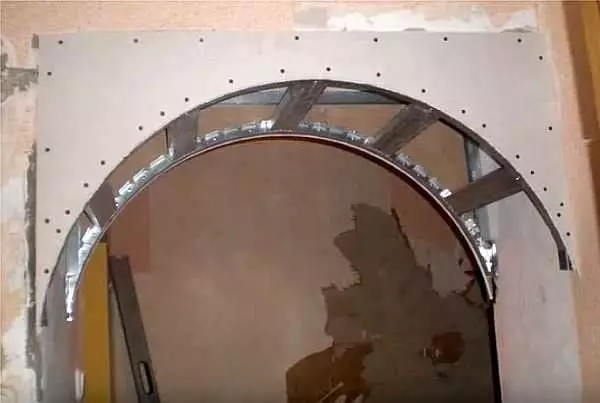
Jumpers are cut from the same profile
In places of attachment, the jumpers are cut off "petals", the trained fragment is installed and fixed. It should not be restricted into the walls, is approximately 5 mm from the back. The jumpers are needed that the design is more rigid, otherwise she "walks" when pressed.
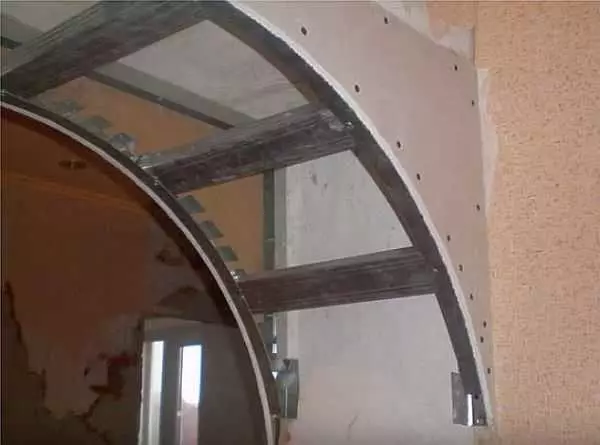
Mounting jumpers
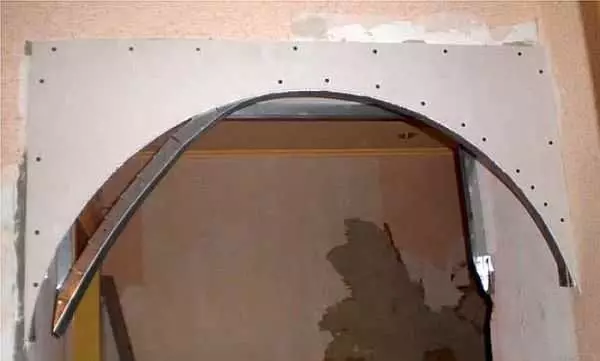
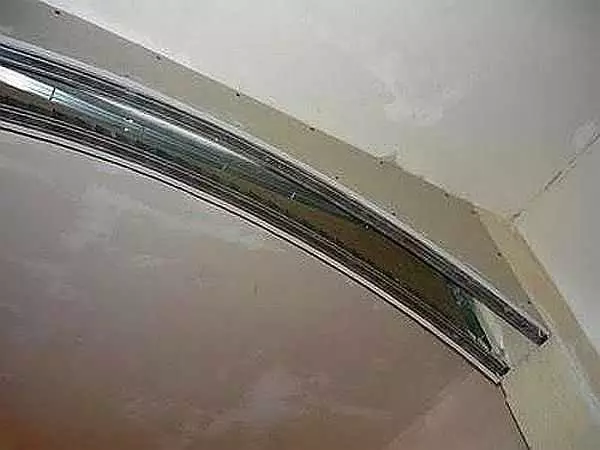
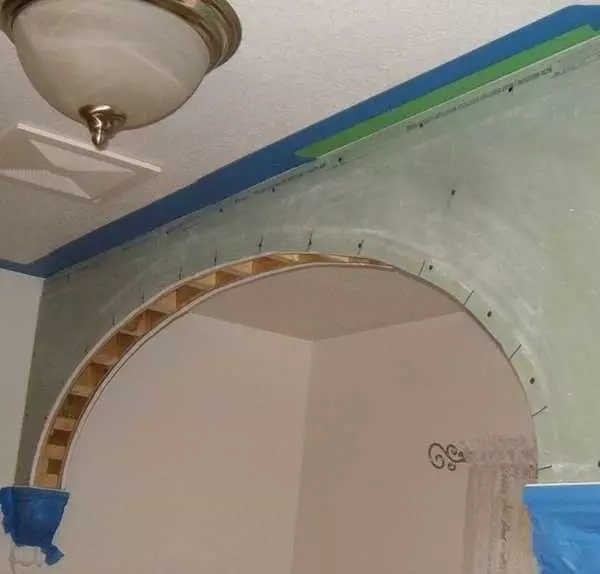
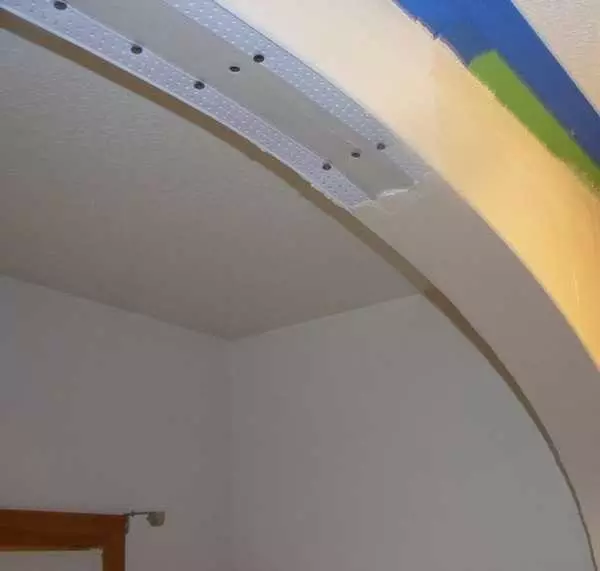
Next of the plasterboard it is necessary to cut a rectangle that will close the design below. Its width is simply determined - from the outer edge of one sheet of GLC, to the outer edge of the second sheet. Length is measured by a flexible tape (tailoring) or tape measure with an assistant. This leaf is attic self-drawing to the frame of the arch. The sheet has to bend, and how to do it just below - closer to the end of the article.
Attach the hypostertone strip to the arch
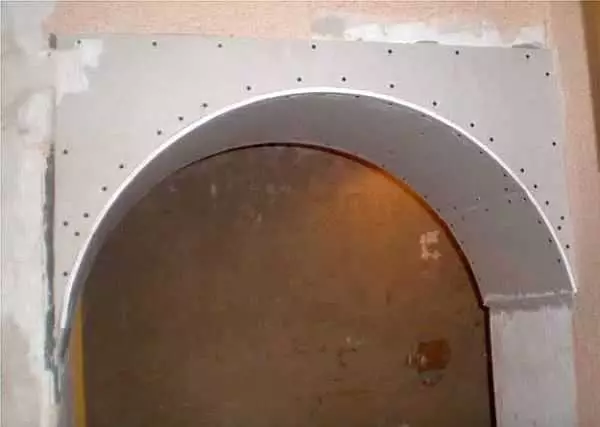
Next, the finishing works remain: a special corner is fastened to an angle, everything is put on the usual technology: first starting joints and angles, then the finish.
Arched opening of drywall: second way (photo report)
This method is good if the thickness of the partition is small: try to cover the profiles, if the gap between them is a few centimeters, and then pull the jumpers. It all starts: the first wall of the arch is cut, attached and transferred to the second sheet.
First I also cut the sidewall
After the width of the gap between the two sheets, wooden crossbars are cut out, which are attached along the edge of the arches on the self-tapping screw.
Article on the topic: Build a quality wooden frame garage
Paste carved width wooden bars
The carved drywall strip is fixed, starting with one of the sides. To make it more convenient, it is possible to fix clamps, the benefit of the thickness of the simpleness is small. When attaching the band, you can navigate on the self-tapping screws that bruks were screwed. So accurately get into the crossbar.
With the help of clamps, the strip can be fixed
Then it remains only on the corner to consolidate a special perforated corner and charm the irregularities.
A corner is attached along the arch, everything is putting
Putty allows you to hide all flaws
It is also more convenient to smoothly put the dry putty to the entire plane of the sandpaper, fixed on the grater. It is unpleasant that at the same time dust fun in the eye, so it is almost impossible to work without glasses.
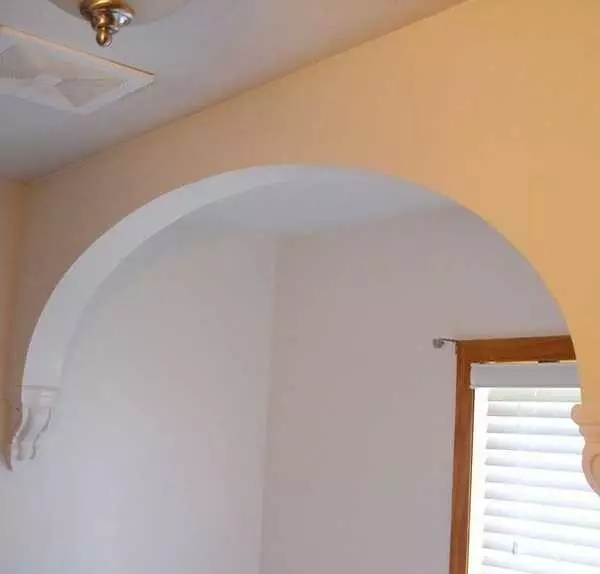
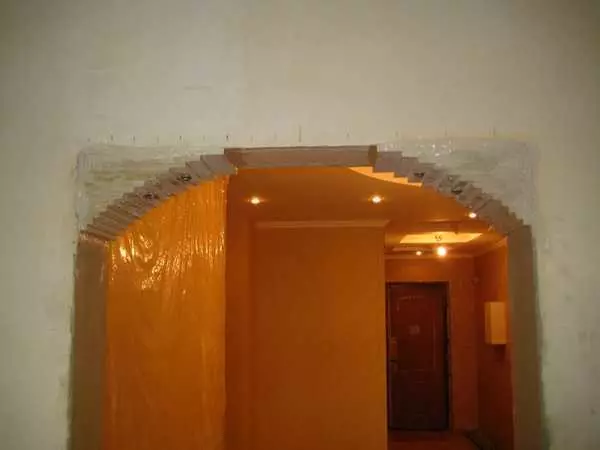
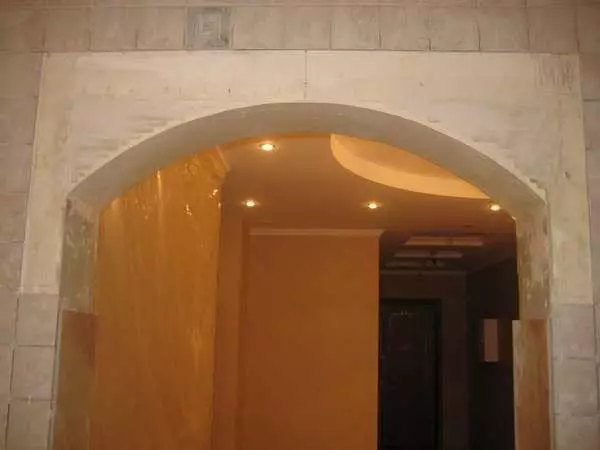
Arch made of drywall do it yourself ready
How to make an arch instead of the door: the way the third is a typical technique
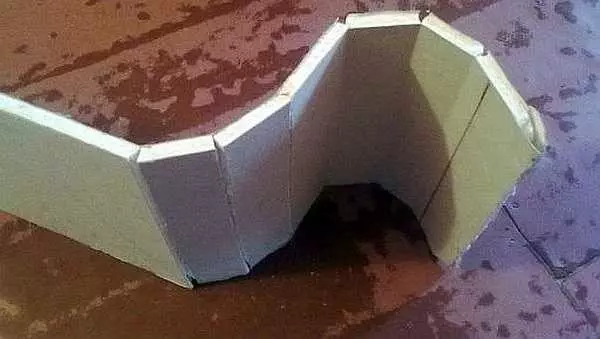
Another way to make arches from drywall do it yourself - a set. The arch is broken into segments and collect from pieces that create a close to the desired curvature.
The arch is collected from plates sliced from drywall
Fasten them on a putty, diluted with a mixture of PVA with water. It dries such a knee quickly, therefore, we first cut the plates and try on. You can be folded on the table, only the arch will be turned upside down, but how surely the plates are assembled will allow.
View of the opening arches on the side
Then the plates begin to mount to the impex, for reliability, periodically strengthening with self-draws. Under the heads put the washers - so as not to sell the cardboard. Remove excess putty immediately. If it grabs, tear off unreal. The finished surface is primer to improve adhesion (clutch), and then put sand, aligning the arch. To make it easier to output, you can use the template attached from both sides.
Cashpool archite looks like
It is not easy to do steep in this technology, but for rounded corners and seven marters - a great way to do without profiles.
How to bend plasterboard
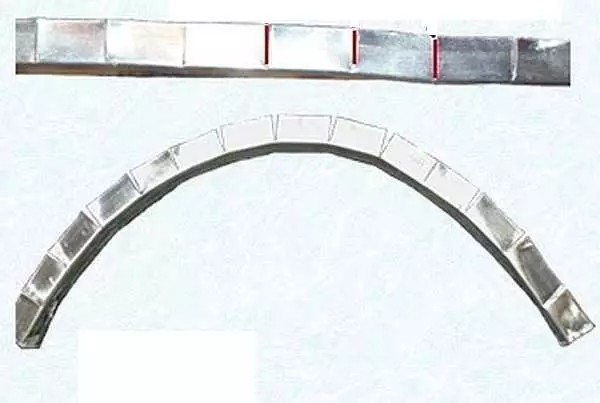
One important detail: Standard wall plasterboard beeps badly. For curved surfaces, thin - 6 and 6 mm thickness were made specifically. This bent part is easier to do from it. With a small curvature, such a thin sheet may be easily reached without trustees. If the subtle GVL buy no desire, there are two ways to bend standard.
First - Take a needle roller and hire a carved cut on one side. It is necessary to roll with effort to break the plaster. Then the sheet is water with water and leave for two or three hours. After such procedures, he must be neglected. You take it fix on the one hand, and gradually pressing the arches to the frame, bend, screwing gradually at the edges of the self-draws. The method is not bad, just with a lack of experience and insufficient processing of plaster sheets can burst. We will have to do or then mask the gap, or start first.

Roller with needles rolled the strip
Second The method bend plasterboard: On the one hand, to make a knife with a knife about every 4-5 cm. Shells should cut the paper. Such a lane is also gradually fasten, breaking as necessary plaster. It bursts on the lines of the cut from light pressed.
Notches on one side allow you to easily break the plaster