

Most tenants want to make a visor over their balcony on their own, but do not know how the visors do not have any visors, which is caused by their initial absence in the project at home. Without a doubt, this big defects with a side of architects and builders, since the visor is simply necessary to protect the balcony from direct sunlight and precipitation. To provide a balcony with functionality and comfort, you should install a visor or a roof that will protect the balcony from any weather conditions. The visor on the balcony can be made with your own hands or seek help for professionals to help choose the right material and mount the visor.
Visor over the last floor balcony: types and forms
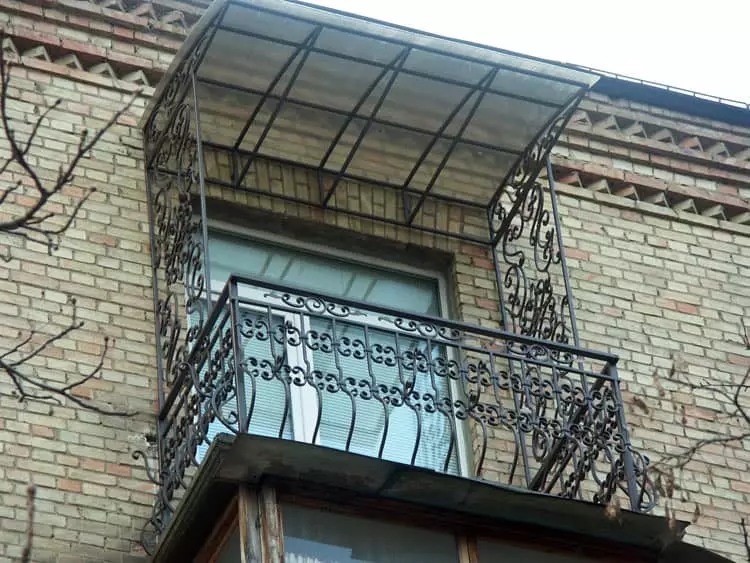
The balcony visor of the last floor performs a number of a variety of functions. It is used not only as a decorative element, but performs a protective function from precipitation, wind, sun, garbage. The balcony visor is an element that is simply necessary for the functional and comfortable setting of the balcony.
Varieties of visors in shape:
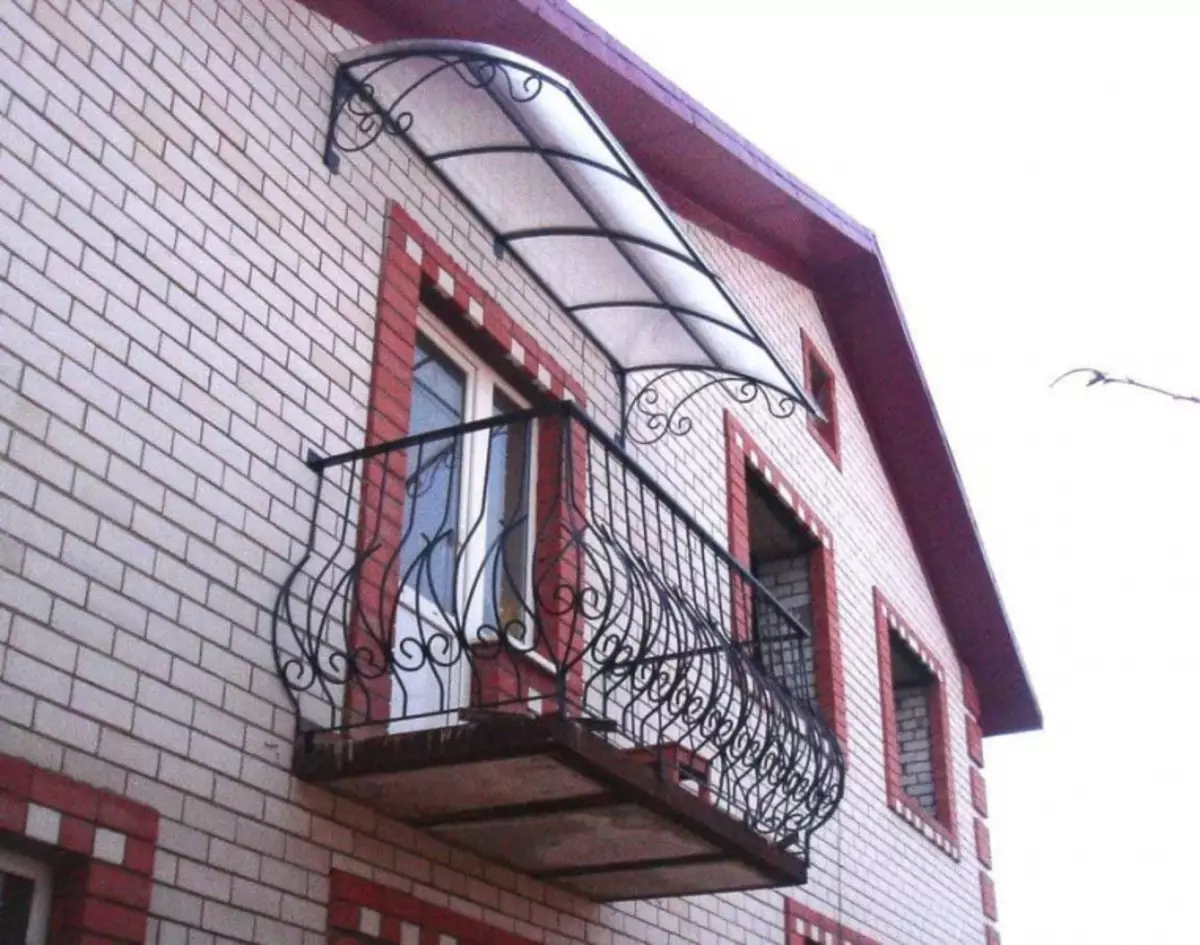
- Doming visor. Performs protective and decorative functions.
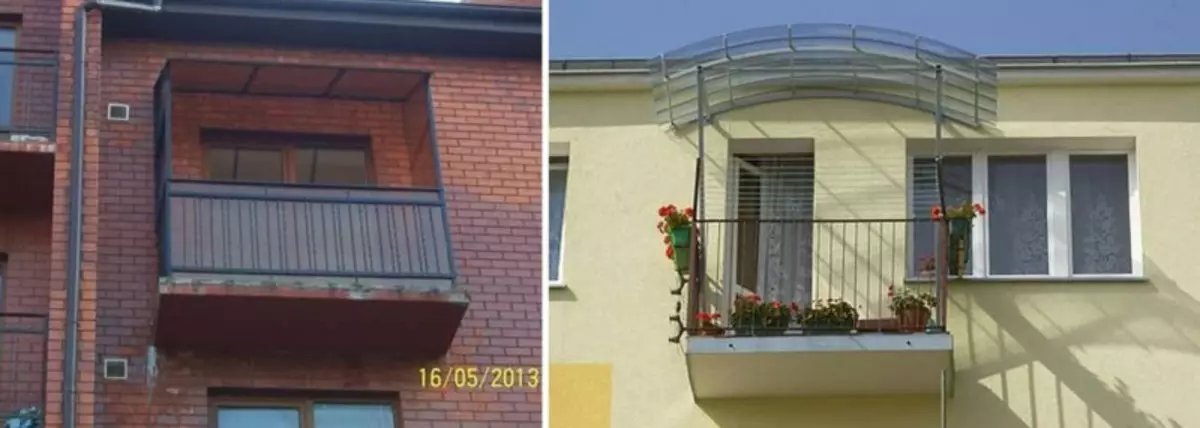
- Marquis. Such a visor is very convenient, garbage does not accumulate on it, and in the winter-spring period, icicles are not formed.
- Arch visor. The surface has such a visor straight with some bias. It has a classic, attractive design.
- Double cornice. It is convenient and easy to clean. Well protects the balcony from the wind.
Select the shape of a visor for the balcony will not be difficult, because options are quite enough
Materials for the visor should sew the highest quality. It is from them that it depends on which functional load will be carried by a visor.
Basic materials for the visor:
- Metal professional flooring. This material is ideal for the conference of the visor. It is resistant to corrosion, resistant to mechanical damage, steady of any weather conditions. Due to the low weight, it is easily installed, has a wide range of colors.
- Slate. This is a traditional material that is used when coating the roofs. It is ideal for a visor building. Slate resistant to frost, heat, sharp drop in temperature. He has low thermal conductivity, which is an advantage in hot weather. The strength and reliability of slate is proved by time, although it is recognized as not very attractive outwardly, but it can be easily brought into the proper form, painting suitable paint.
- Ondulin. This is a reliable and durable modern material. It is easy, resistant to temperature differences, as well as to the effects of fungi and mold. Ondulin can serve a long service. Its advantage is the absence of asbestos, which is undesirable to use with the construction of housing structures.
Article on the topic: How to return the purchased wallpaper back to the store
Deciding with the shape and size of the visor, you can start it
When making a decision to make a visor for a balcony, it is very important to pay attention to the choice of material. It should be durable and resistant to any weather conditions in order to serve as longer as possible.
Installation Balcony With a visor on the top floor (video)
Polycarbonate visor: Material Benefits
By choosing an option to install a visor from polycarbonate, you can be confident as a given material that has a number of positive characteristics that make it unique. Polycarbonate allows you to build a solid and practical design with beautiful decorative qualities.
The advantages of polycarbonate in front of other materials:
- Resistance to temperature drops. Material retains its structure and color.
- Strength. The material is not afraid of a gusty wind and hail.
- Flexibility. Visor can give any desired shape.
- Ease. The material has a small weight, which simplifies its lifting and installation.
- Color variability. The customer can choose the color suitable for a particular balcony.
- Fire resistance. The material is resistant to fire, can melt, but does not burn.
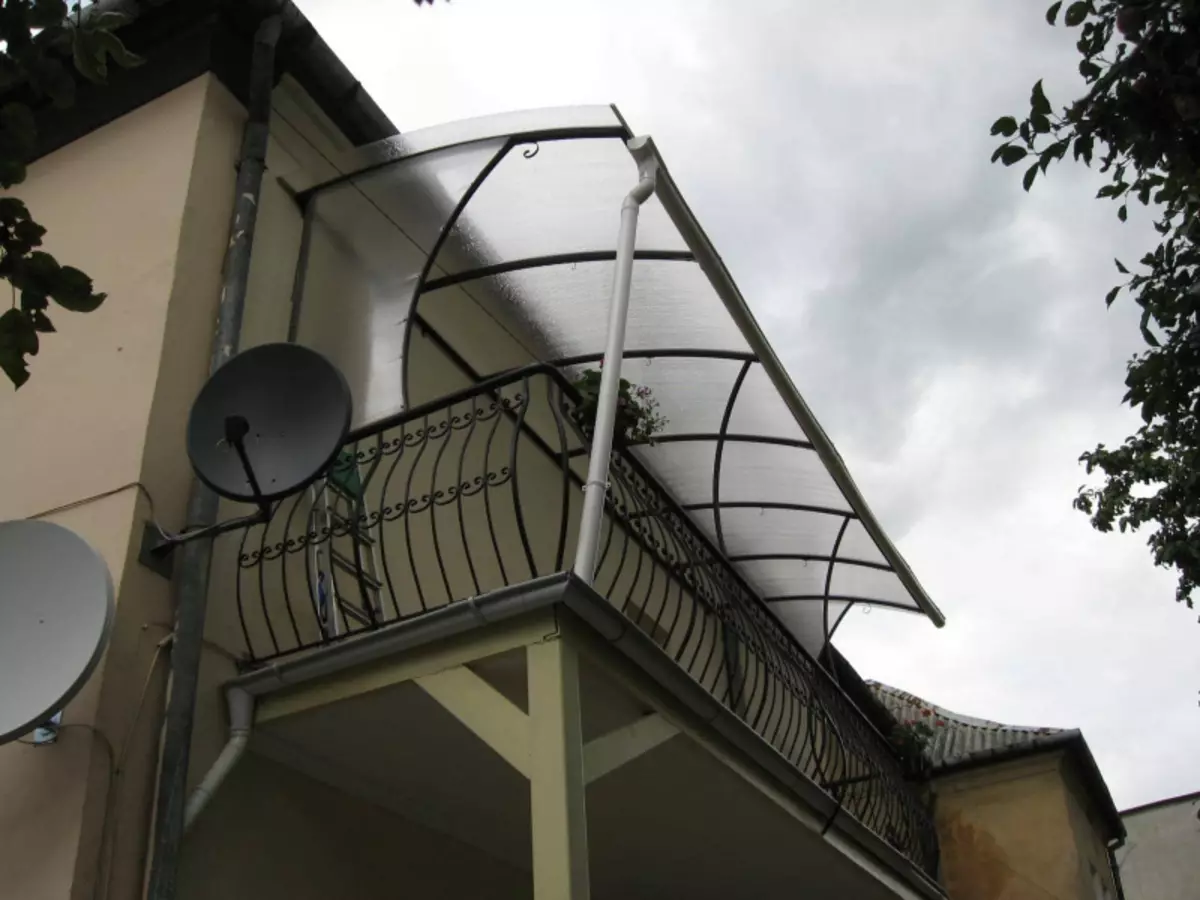
Polycarbonate - unique material, it is perfect for the visor of your balcony
Polycarbonate has a number of positive characteristics. It is easy to design and install, is durable to use and stylish in design.
Visor on the balcony do it yourself
In order to successfully mount the visor on the balcony with your own hands, you must strictly follow the instructions. Before moving to action, you need to draw up a drawing, it will simplify and facilitate the task. The visor can be made arched, duplex or even.
Spectacle mount steps with their own hands:
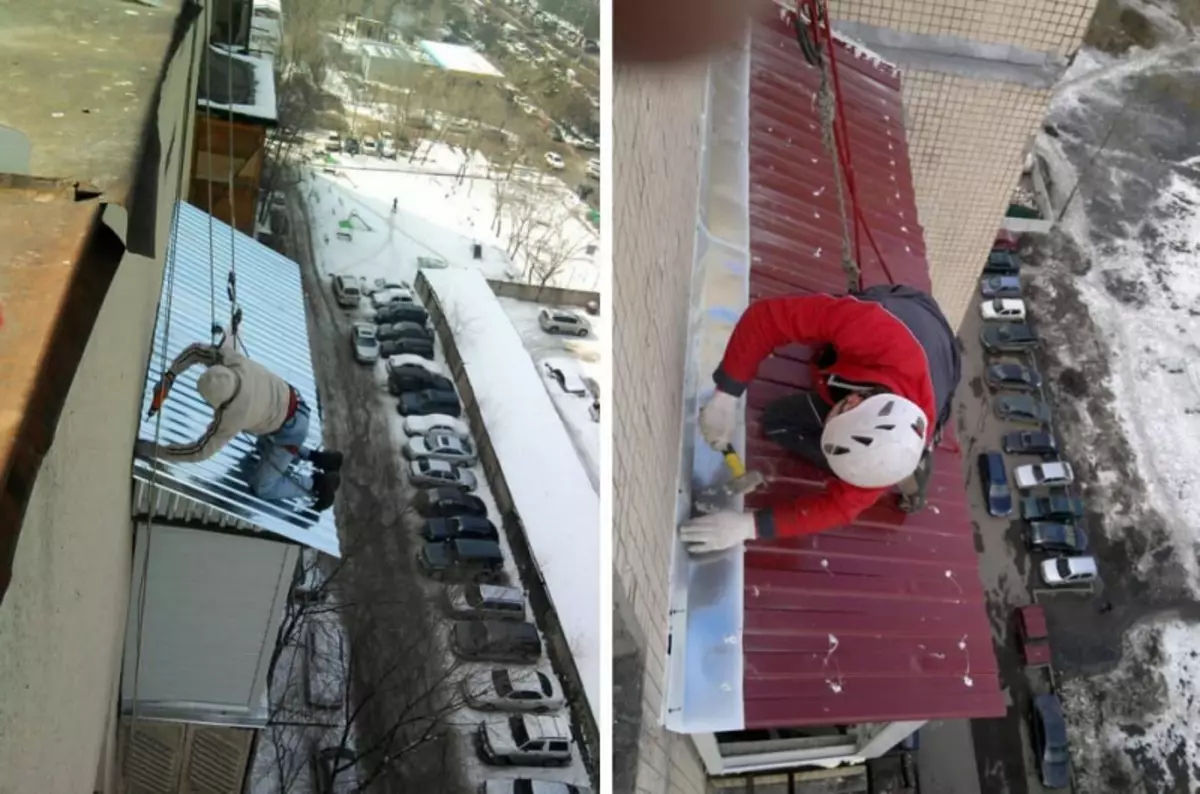
- Make a frame. To do this, you can use a metal angle and pipes. The width of the angle and the diameter of the pipes must be medium size, in order not to lose design, but also not to make it too easy. External corners of the design must be supported by supports. After the frame will be ready, it is fixed with anchors to the wall above the balcony. When installing should be careful, given the limitations of the balcony space.
- Make roofing material. First you need to raise the flooring on the top floor. It is best to raise metal sheets or slate with the help of ropes, while tracing behind the lifting step so as not to hurt the bottom balconies. The flooring sheets should be attached to the frame with bolts and screws. The formed joints should be carefully embedded with a sealant.
Article on the topic: How to properly glue the mirror to the wall in the bathroom

Install the visor for the balcony will not be much difficulty, so it can be done on your own
In order to avoid an accident, all construction procedures should be carried out in dry weather, following the safety technique.
When using professional flooring, it is important not to forget to lay a noise insulating gasket in order for the surface to not publish annoying sounds during the rain.
The manufacture of a visor with your own hands is a convenient and cost-effective solution, when taking it to which you need to carefully read the recommendations and instructions of professionals on the choice of materials and installation of the structure.
Visor over the last floor balcony: norm and legislation
Having decided to establish a balcony independently or with the help of construction organizations, it is necessary to make sure that the legitimacy of the construction and regulatory provisions on the visor's content in proper form.
Before installing a visor for a balcony, you need to get the permission of the management organization of your home
With a self-installing visor, it is important to remember that employees for the organization of the housing stock are obliged to systematically check the correct use of balconies and loggias. In case employees notice the unauthorized attitude of the visor, they can contact the owner of the balcony with the requirement to remove the illegal visor.
Before deciding to raise a visor, you need to familiarize yourself with the legality of this procedure and get permission to avoid trouble.
Visor repair: do the right
Most often, the repair of visors is necessary in disruption. It may entail the formation of dampness and the appearance of fungi and mold. This defect is easily repaired by means of such materials as rubyroid, bikrost, uniflex, isobox.
Types of material for repair:
- Lining;
- Roofing.
This type of repair work is not very simple performed, so it makes sense to seek help to professionals.
Visor repair is best trusted by professionals, as they have a lot of experience and have all the necessary equipment for this
Article on the topic: How to cut a tree - is it possible to do it yourself and where to go?
Stages of repair work:
- Prepare the surface of the visor. Before making repairs, it is necessary to clean it from garbage, dust, old coating. After cleaning, you need to handle the surface with bitumen mastic.
- Direct the lower layer of rubberoid using a gas or gasoline burner.
- Fix the roofing layer with a special grainy sprinkling.
- Loading the kernel joints with an additional layer of mastic. Installing tin visors in the places of the root Ruberoid to the wall.
Roof repair Ruberoid is possible under all weather conditions and season. The material does not give the roof to flow, rust, rot, burn, noise during the rain.
Secrets of the right visor setting on the balcony (video)
The visor on the balcony is an important protective and decorative element. When deciding in its installation, it is necessary to study a number of issues that will help successfully install a visor on the balcony. The first thing should be taken into account that it is necessary to obtain permission to be obtained in the appropriate organization, otherwise the installation will be illegal. After that, it is necessary to engage in the choice of high-quality material, the long-term visor service depends on it. When installing, it is important to follow the instructions and safety rules, given the limitations of the balcony space.