
Thinking on the kitchen, pay attention to how to make a ceiling. It should be beautiful and perfectly combined with all the interior of the room. In addition, it should be easily cleansed, because in the kitchen, even with good ventilation, soot and dirt is still going. A very good option for ceilings in the kitchen will be plasterboard.
The advantage of the plasterboard ceiling is that it is easily clean, and is easily installed.
Plasterboard is a plaster lined with cardboard. Gypsum structures are quite heavy and look not very attractive. To make them visually alleviate and give them a more aesthetic look, a cardboard is used. After mounting the plasterboard it, it must be painted or caught with wallpaper. The appearance of plasterboard ceilings in the kitchen depends on the owners preferences. It is important to create not just a beautiful design, but to make it harmonize with all the elements of the decor and pleased with its paints.
Ceiling of plasterboard in the kitchen and its features
There are many options for how do you make the ceiling in the kitchen with your own hands, decides it with a design of plasterboard. All of them will look very beautiful. However, plasterboard deserved the title of an ideal option for the design of the kitchen ceiling not only with its aesthetic parameters, but also due to many positive qualities.
First, with the help of drywall, all irregularities on the ceiling are perfectly hidden, allowing you to hide under it, for example, all unattractive wiring. Secondly, such a ceiling can withstand various types of exposure, even the fire.

Hypotocarton structure: (1-gypsum, 2-cardboard).
In addition, it absorbs very well. It is not terrible water, it is easy to clean, without demanding a lot of care. Another important advantage of plasterboard ceilings in the kitchen is the ability to make lighting with spotlights, lighting or, on the contrary, the darkening of the necessary sections.
Article on the topic: how to install the interroom door properly (photo and video)
Such a ceiling in the kitchen can be made with your own hands in different ways: flat or with protrusions in two levels, or even more. With all the positive nuances of the installation of a plasterboard ceiling, do not forget about one drawback: it takes several centimeters from the height of the premises, which is why it is undesirable to use it when repairing in a small kitchen. Another disadvantage can be called the complexity of installation with your own hands. Plasterboard sheets are pretty heavy, so if you are mounted the ceiling yourself, you will need help at least one person.
Basic tools and materials
Support such tools:
- roulette;
- pencil;
- screwdriver;
- Perforator;
- Laser level (do not suck and acquire, it will help you well).
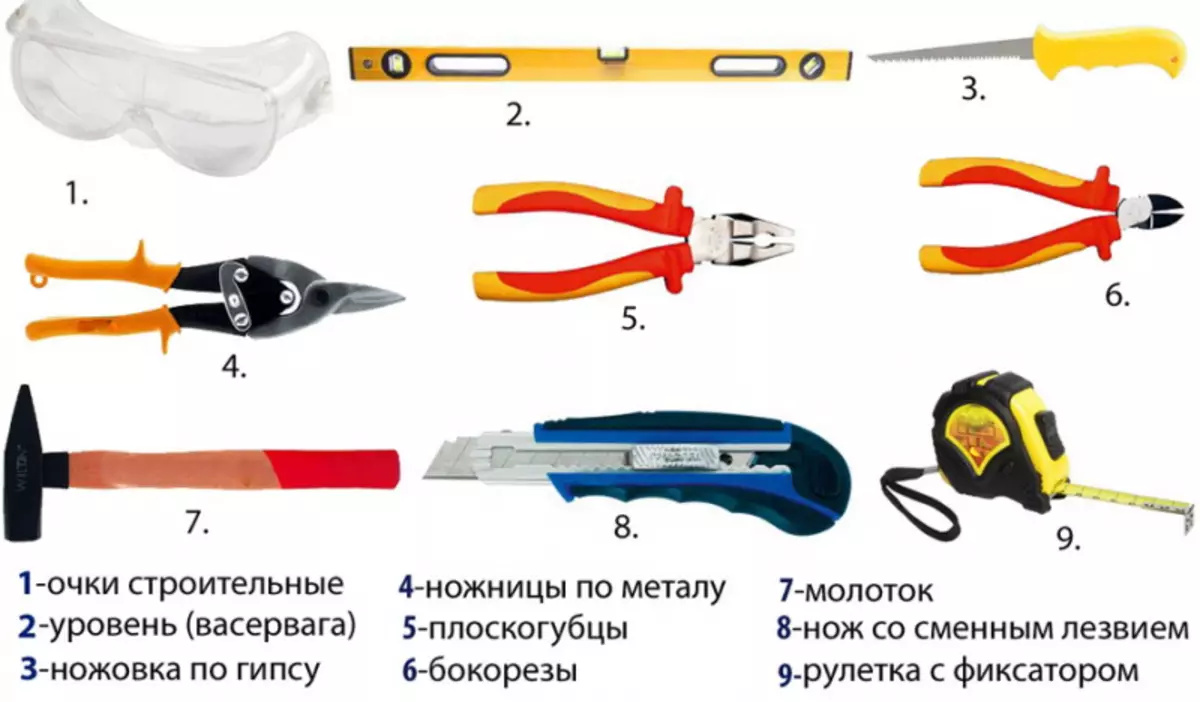
Tools for mounting plasterboard.
According to the materials, first of all it is worth mentioning the suspensions that are fastened to the base. To firmly attach them, it is necessary to use special anchor wedges or metal dowel-nails. The main thing is in no case to mount plastic suspensions with plastic dowels - it is fraught with the fact that over time the fasteners will prove and the whole design will break.
Further, the guides (profiles) of 7 cm wide are fastened to the suspension. Then the sheet cabiton sheets are then mounted. Their standard width is 12.5 mm, but sometimes you can advise the sheets with a width of 9.5 mm. There are many disputes on this topic. But it is still better to stop your choice on a sheet with a thickness of 12.5 mm, since it will be stronger, it will also be more resistance to the bending, which, accordingly, reduces the probability of sagging. If necessary, you can pick up moisture-resistant and refractory sheets of plasterboard.
Single-level ceiling in the kitchen from GLC do it yourself
If you decide to install such a ceiling yourself, learn the information below. At the very beginning, it is necessary to find the lowest point of the ceiling in your kitchen, make a mark at this level, after which you measure the perimeter of the future ceiling from GLC. Take advantage of this building level and marker thread. According to the marked line, you first need to consolidate the UD profile, after which it is important to calculate the entire CD profile (it is important to do it along and across). It is necessary that the distance between the plates amounted to 50-60 cm. CD profile is attached to the ceiling with mounting plates and dowel-nails. The distance between them should be, as between profiles.
Article on the topic: Lightproof curtains: species and features
After these preparatory work will be left only to fix the sheets of plasterboard sheets with their own hands. Use for this screw, leaving nothing more than 20 cm between them. To give the required size, use the knife or cutter. After we have the entire ceiling of plasterboard, close all the seams with putty. The first layer of putty needs to be made on the seams, go to the sickle bandage and sharpen again.
Consider that after this ceiling of plasterboard in the kitchen is ready. It remains for the small one - to separate it with your own hands: paint on the right color or caught with wallpaper.