
The polymer clay is known to the creative world since 1930. This material that is suppulted as plasticine, but the products are as a result of solid, so they can delight their owners for a long time. This requires either thermal treatment (baking), or leaving at room temperature. We offer to familiarize yourself with master classes that will describe how to create a bouquet of polymer clay.
Accent on peonies

We need:
- Polymer clay self-sharpening white, red and green;
- Shape from acrylic to create leaves;
- Floral tape;
- base for boutonniere;
- Pins with transparent heads;
- Special flopproof (although you can take the usual, simply cover it with a teep ribbon);
- satin tape;
- PVA glue.
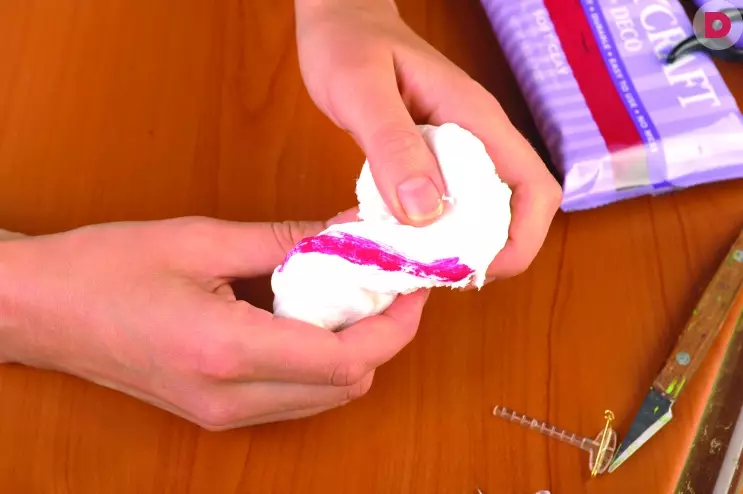
To begin with, we knew a piece of white clay and small-red. After mixing them, to get pink color.
We divide the resulting piece on the 20 parts of 1 cm and 12 parts - 1.5 cm.
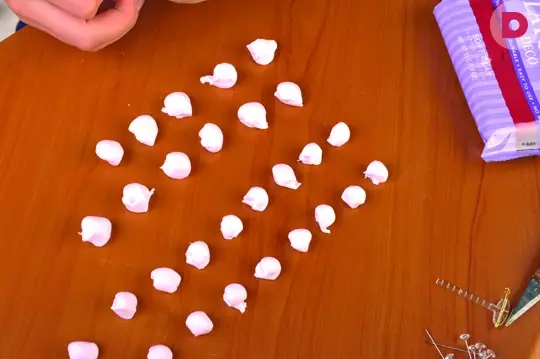
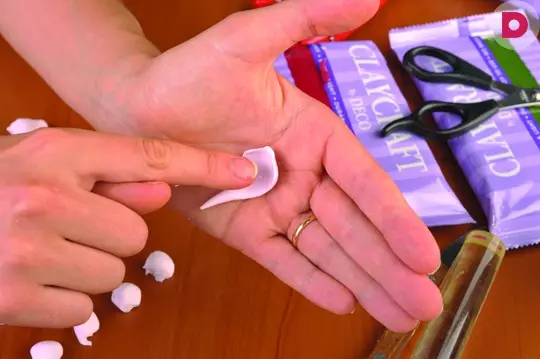
We proceed to the formation of petals. For this, from each piece we form a droplet, then sprinkle a thick edge, stretching from the center to the edges and giving a concave form.
Now it is necessary to connect the petals into the pair of the principle large to large, small to the small. At the same time they are attached with a little displacement by side. How correctly, look in the photo below.
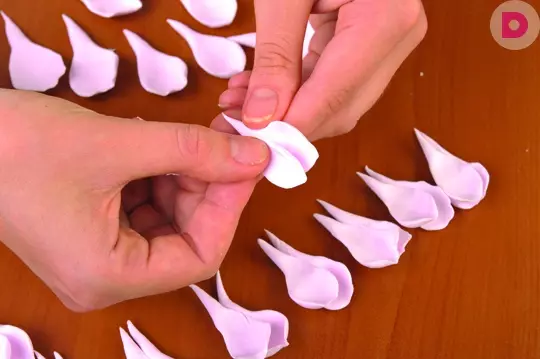
Now the blanks of petals are smaller combined into the fan. After that twist the spiral.
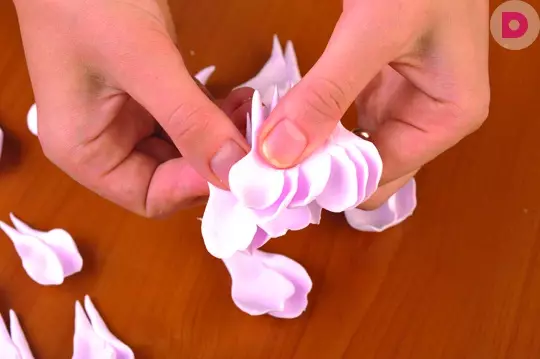
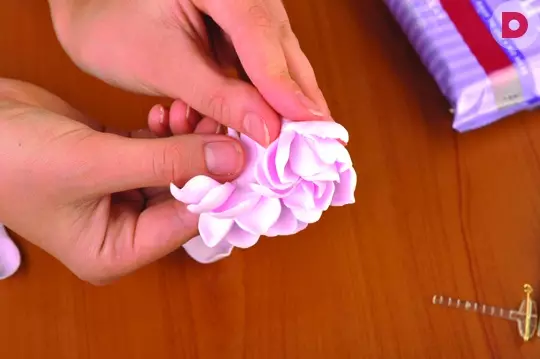
Couples from large petals we attach around the generated bud.
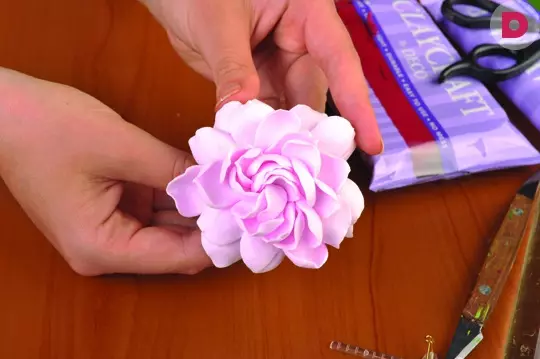
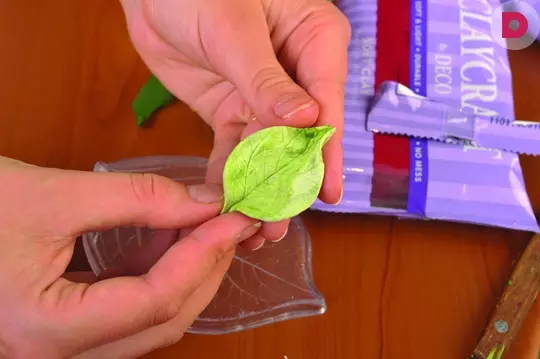
Put the flower to dry. In the meantime, we will deal with leaves. Connect green plastic and white to get a salad shade. Then I will add a little green, but mix not until the end, so as to get an inclusion. We form a drop you already familiar to us and apply to the form. Then neatly disconnect the workpiece.
Article on the topic: Takes for a girl with a crochet with a scheme and with a description for the summer
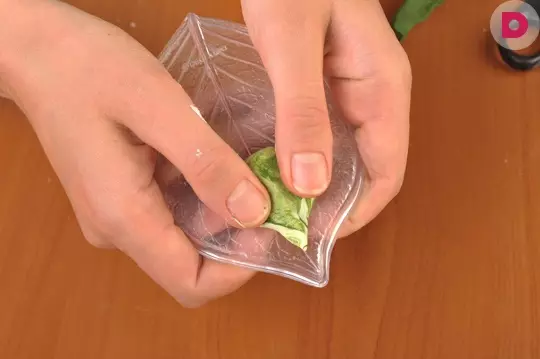
Give the floor to the sheet, cailing both tips. We make several pieces of different sizes.
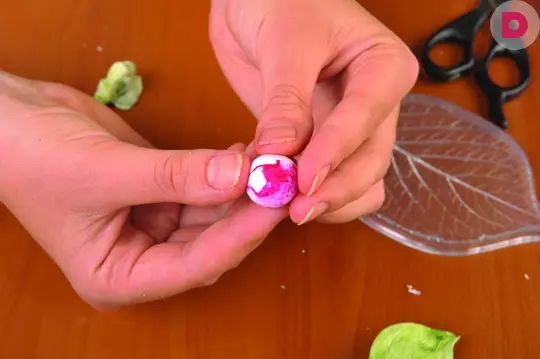
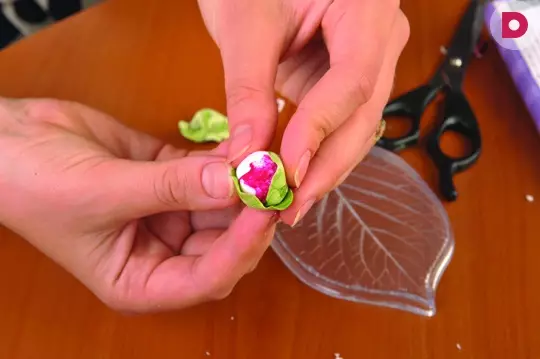
Now it is necessary to make closed peony buds. To do this, we take the remains of the pink plastic and add red into it, and just as for leaves, do not interfere until the end. Roll the ball in diameter about 2 cm.
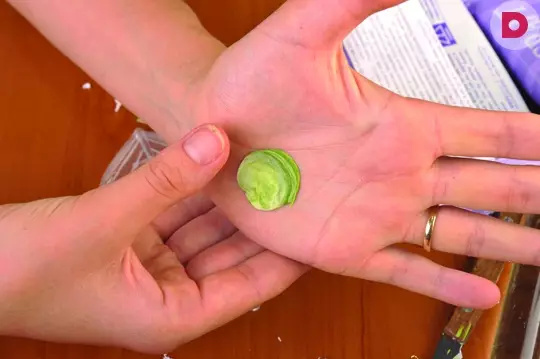
Of the remaining clay of the green color we form two or three layers. We glue with a pink ball.
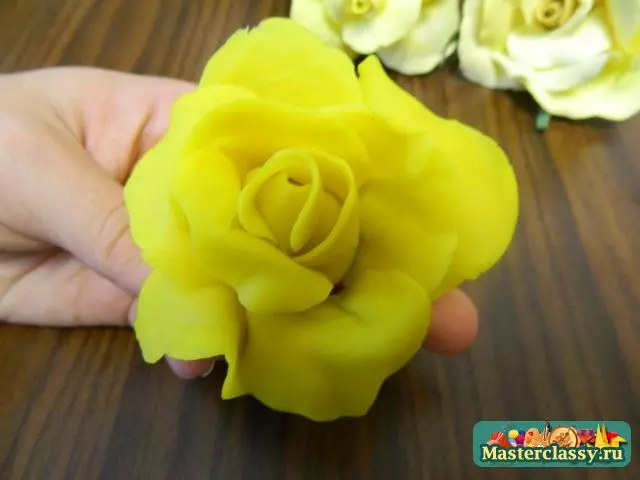
How to make a rose of polymer clay, you can see in the video below:
With the help of PVA glue, we attach the blanks to the wire and let the day dry.
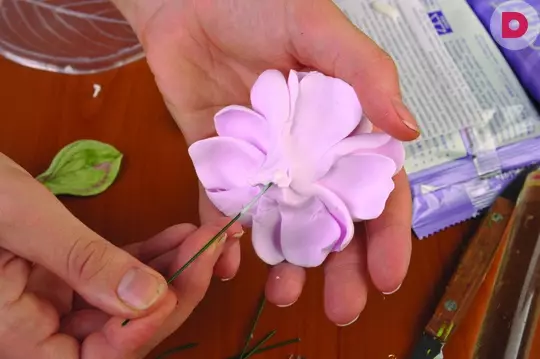
The number of folders and buds are chosen by adhering to the odd. It all depends only on your desire and fantasy.
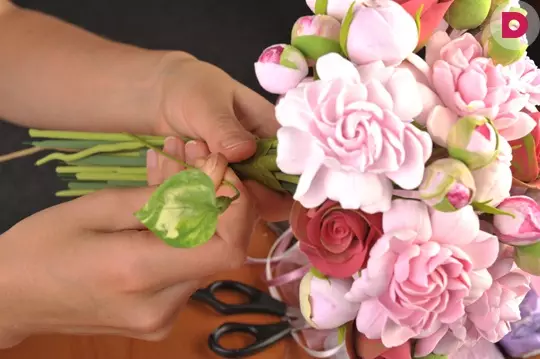
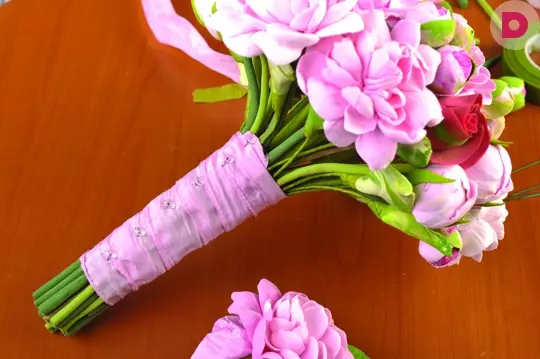
We collect a bouquet when it is ready, the stems together can be wrapped with flora, and on top of a satin ribbon in tone.
Roses and blueberries
We will need:
- plastic (polymer clay) yellow, blue and white;
- Floral wire and ribbon;
- Kashpo, basket, etc.;
- Foam base.
From yellow plastics (we can interoperate a little white, for a more tender color) we form first balls of different sizes, and then we roll off the petals from the center to the edge. And you can make it a pin with a finger, but you can take a special tool with a ball at the end. When all the petals are ready, they roll the droplet from the same plastle and begin to apply petals to it, starting with small ones. We put the petals in the brassiness to each other.
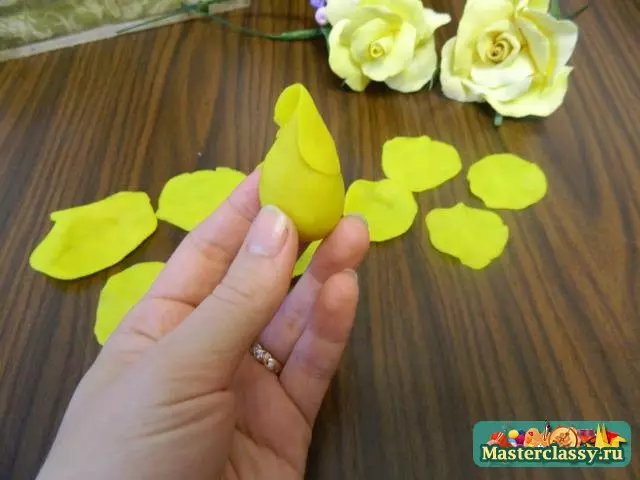
Moreover, starting from the second row, reject the upper edge outward.
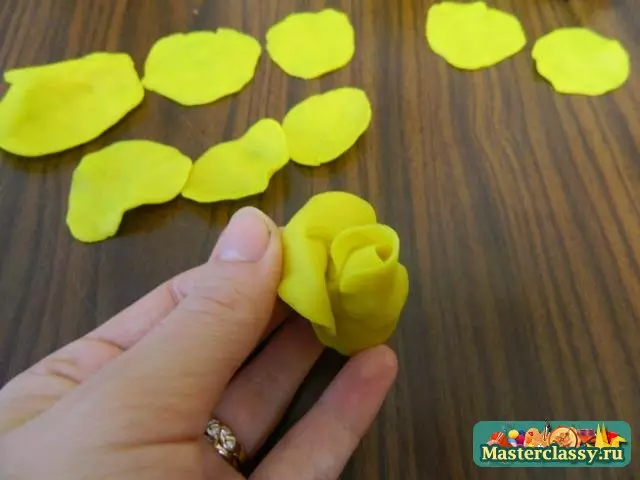
In the base of the flower sticking the wire and retain to the side so that the plastic grabbing. If you have chosen a baked clay, then wear first on a skeleton, stuck into the ball from the foil and send to the oven. Time and temperature See on the plastic packaging.
Article on the topic: Butterfly tie with their own hands from satin tape female and for a boy
Now let's get on blueberry berries. We take the blue plastic a few pieces, interfere in them a different amount of white. Then roll balls from them. To give naturalness, slightly compress the ball and on top of the rod from the handle put a sneaker. We ride each berry on the wire and form a twig, wrapped it with flora.
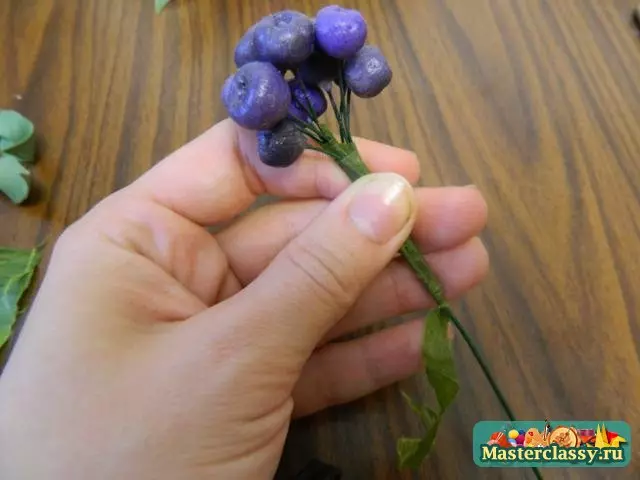
We make leaves on the same principle as in the previous example. The only thing you can take a pure color and roll over your palm.
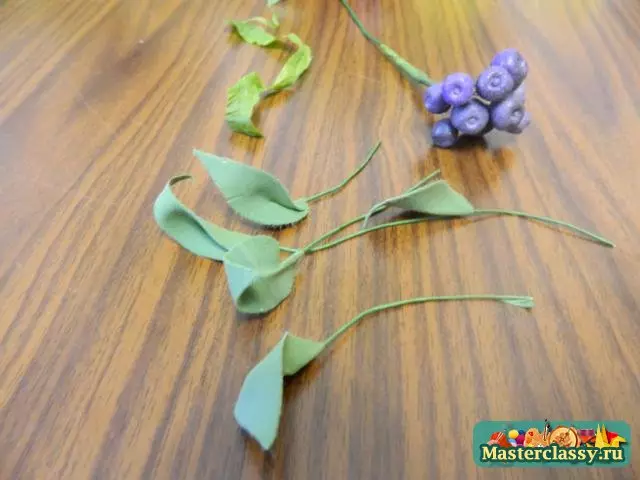
We attach them to the blueberry branch. Moreover, as we see in the photo, below the berry on the branch is not only blue, but also white, imitating immature.

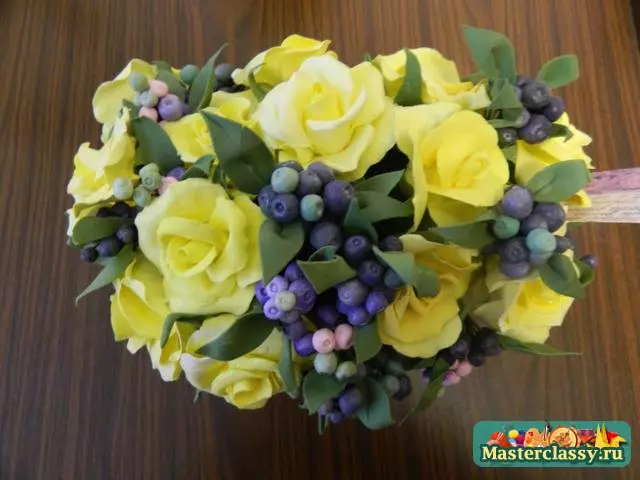
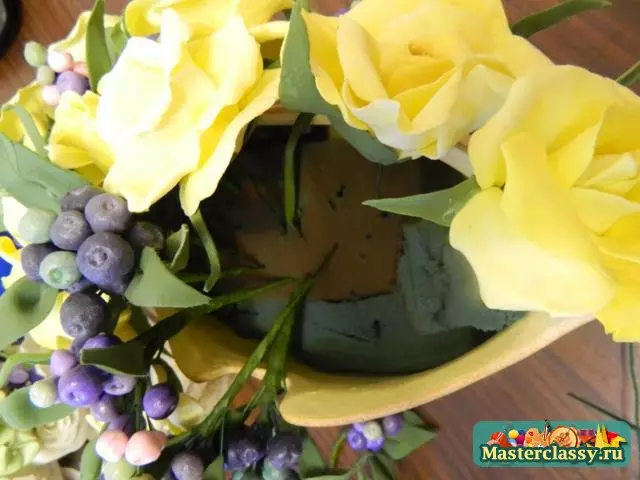
Now we put in the porridge or other capacity the base of foam. And begin, sticking the billets of colors and berries in it, form a bouquet.

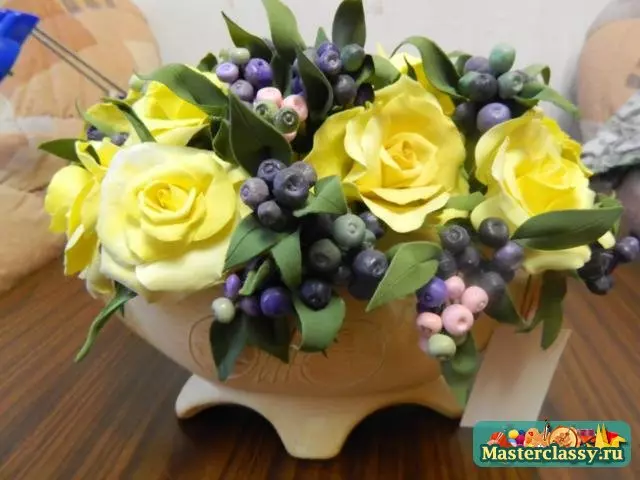
As you can see, the principle of working with polymer clay is quite simple. And do it yourself, the flowers will be able to make flowers and a beginner master, and an experienced needlewoman. And you have learned to make individual flowers, you can make an amazing beauty of bouquets, which at first glance can not be distinguished from living colors. Such compositions may approach the interior decorations, from which only dust will be swept away, as a wedding bouquet and boutonniere groom, just a bouquet as a gift. Below will be given a selection of video of some colors options.