
Winnie Pooh is considered one of the favorite heroes of cartoons in children. So that this is recommended to the child? For example, advise making the Winnie Pooh eating with your own hands. It can be created from any girlfriend: be it clay, plasticine, paper, salt dough, balloons. Let's tell about some of the ways.
Pretty plasticine
Now step by step tell how to create a Winnie Pooh from plasticine.
This will require:
- Plasticine. Various colors are needed;
- Stack;
- Plank for modeling;
- Toothpick.
So, for business.
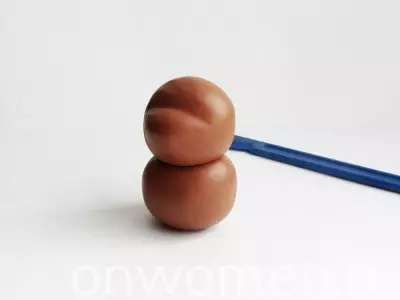
We smear plasticine to a soft mass, ready for modeling. After that, we will make two balls of brown two tones. From a light brown ball get a sausage. We divide it into two halves. The obtained parts form in a spherical appearance and combine. Already turned out to be a head and torso Winnie Pooh. It is necessary to give the right head. Here we will need stack. Taking her in hand, press the ball from above, as shown in the picture:
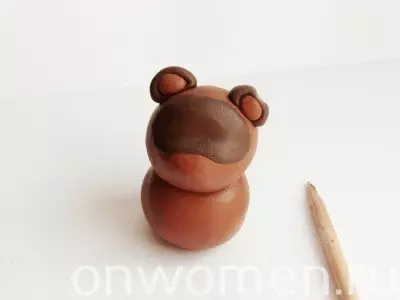
Next we take dark brown plasticine. From it should be sausage, give it the look of the arch and flatten. Attach the obtained to do above the muzzle. Take the balls and make ears. We use both dark brown and light. We attach your ears to your head, do not forget to press the toothpick.
Next we take dark brown plasticine. From it should be sausage, give it the look of the arch and flatten. Attach the obtained to do above the muzzle. Take the balls and make ears. We use both dark brown and light. We attach your ears to your head, do not forget to press the toothpick.
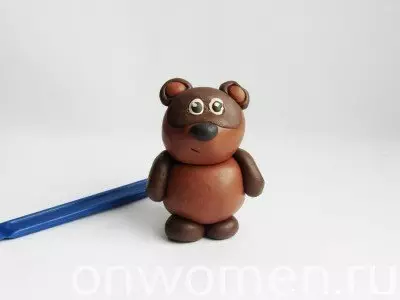
Let's make a deepening for future eyes. We use white plasticine, form small pellets. Top of attaching black mugs-pupils. From the same color we make nose. All parts are fixed on their "legitimate" places. The next step is the paws. They will be dark brown. We scratch four oblong droplets and attach to the body. The last thing is left - mouth and footprints. This will help the stack. Improve the latest strokes and voila with light movements - ready cute Winnie Pooh.
Article on the topic: Summer blouses in crochet: Schemes and descriptions of knitting easy openwork Cape with photos and video
Do not forget that such a craft can also be made from felt, from polymer clay and even from balloons.
Dough not only for the kitchen
What we will proceed to now, so it's to the modeling. Namely to the modeling of salt dough. It is believed that this kind of needlework is well developing motility of hands, and also awakens creative ideas, opportunities and talents. First of all, it is necessary to mix the dough.
To do this, we need flour, salt and 1 cup of cold water. The proportion of flour and salt - 2 to 1.
We are ready dough. Now take the rest you need for the modeling, namely:
- Egg from Kinder Surprise;
- Plank for modeling;
- Stack;
- Tassels;
- Paints.
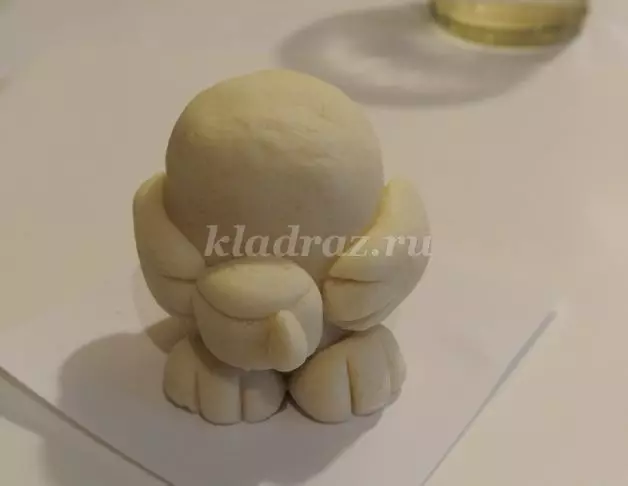
Once everything is ready, we can proceed. Take the resulting dough, lubricate with water and turn them with a plastic egg. It is important that the test plate is round and not very thick. Then we form a sausage, the thickness of which is approximately 1 cm. We divide on eight equal pieces.
After, from each part rolling the ball. Plastic egg wrapped with a dough put on the board. At the bottom we attach two balls that are legs. Krepim handles from above, only the two balls obtained form in sausages. Another balls - a pot with honey. As everyone knows, this is a favorite delicacy of Winnie Pooh. Krepim the winged pot between the paws, which are from above.
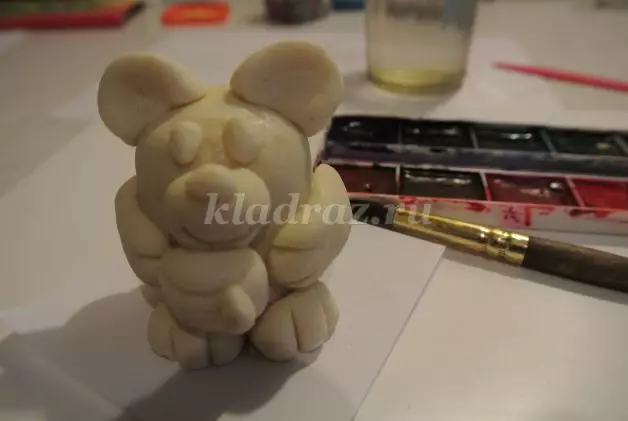
The stack joins the case. Using it cut the necessary parts - fingers, honey cover. You can add something at your discretion. For example, a drop of honey flowing out of the pot.
It remains to form a muzzle and ears. Here we include your imagination, imagine what Vinnie Fords and ears at Winnie. When there is confidence that everything is done correctly, attach to the body. From small parts there is a mouth that cut the stack. Well, do not forget about round, small eyes and spout. These are all ordinary small balls. Remember that, attaching every detail, add water. Water in this case is glue.
Article on the topic: Sweater knitting needles for beginners
That's what should happen:
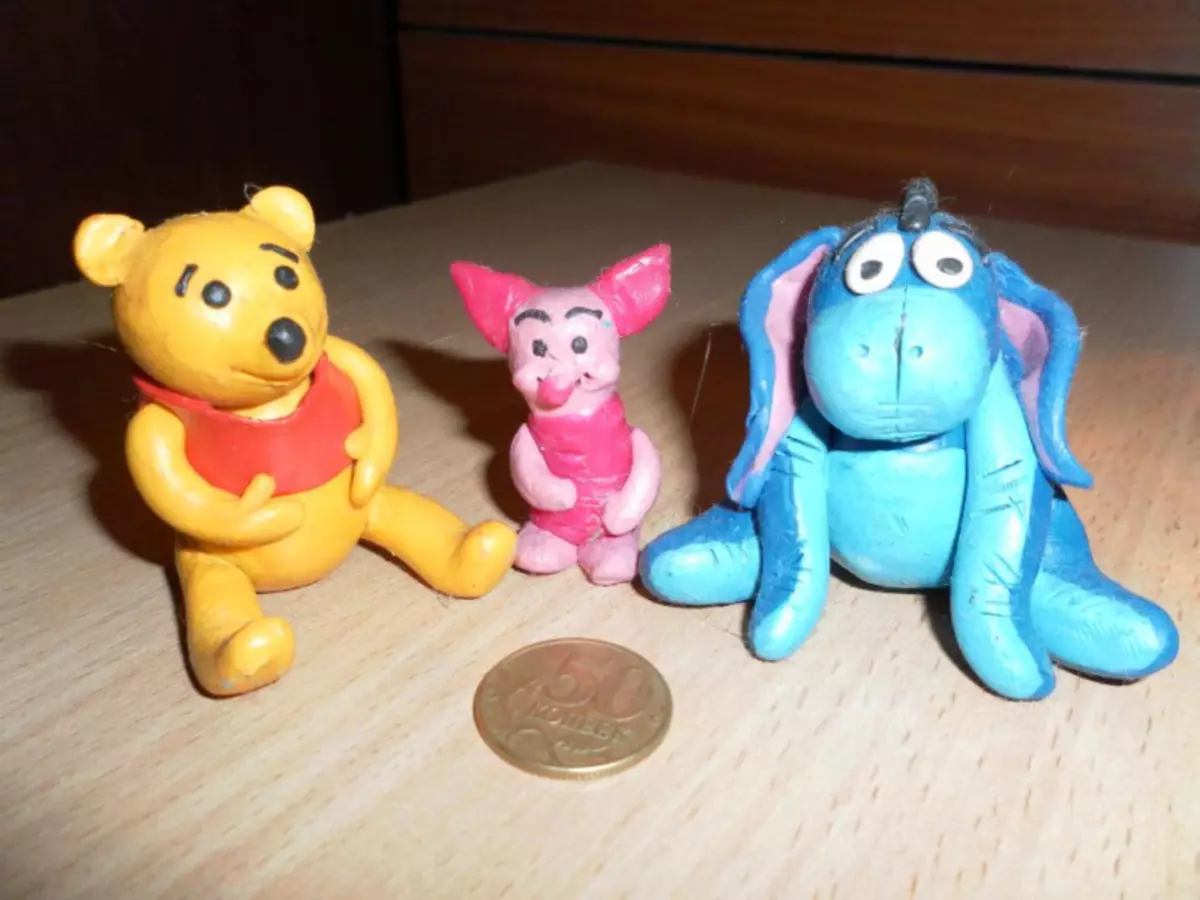
At the very end, perhaps the most interesting part remained. It is necessary to paint the Winnie Pooh. How to do it - to solve everyone. We take paint, turn on the "imagination" button and create. It turned out such a teddy bear:
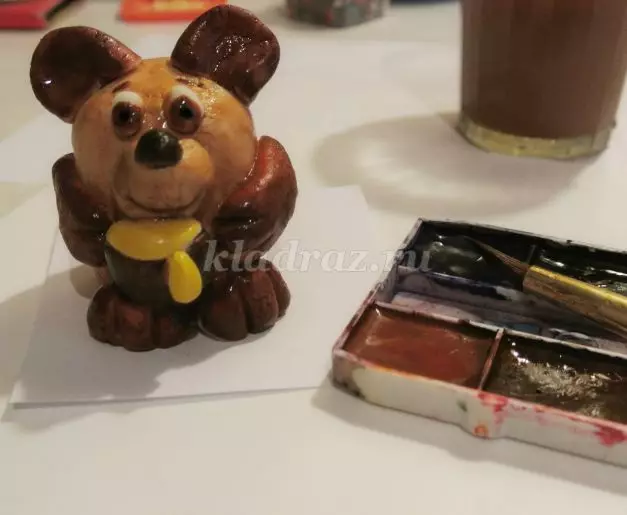
And then inspire your creation for subsequent masterpieces!
Everyone loves soft toys
It's no secret that soft toys like people. It is absolutely not important as an age, they are so dying. Sometimes I want to buy a toy not for someone, but for myself. But you can not buy it, but sew. It is not as difficult as it seems. If you have never taken into your hands a needle and thread, then it does not matter. Today we will tell you how to sew a soft bent of Winnie Pooh.
First of all, you need to take everything you need:
- Pattern;
- The material from which the toy will be sewn (better use fur with a pile, preferably with a short one. Or felt);
- Padding material;
- Needle;
- Threads;
- Scissors;
- Wire.
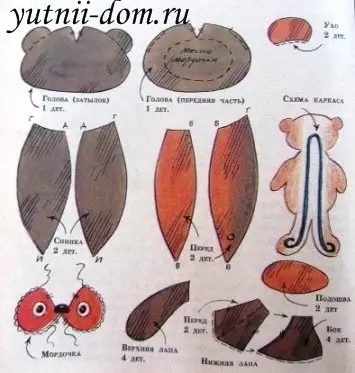
Once everything is ready for work, you begin with patterns. Cut important details, sew their irons. Seam use through the edge. Dotted lines marked extaction. They are sewn at the beginning. The front and rear of the head are stitched after. In the lower area, leave a small hole. Billets can be turned out, we flash the area of the toy where the ears and head are connected. Folded with a selected material.
Part of the face, previously cut, bends on dotted lines, stacks sew. Put the resulting material material and sew to the head. From the skin cut your eyes, nose. Do not forget to sew a mouth. On the pattern there are letters - B and V. The front parts are stitched so that these letters connect. Sooh is located in the middle. Go to your back. Billets are connected, we leave the hole in the neck. Turn the part, insert the framework insert the frame and clog the filler. With the help of a secret seam, a head is sewn.
Article on the topic: Iquiban from leaves do it yourself for children with photos and videos
We sew pair pairs, stuffing with the material and sew to the body. In the lower limbs you need to insert the ends of the frame, only then sew to the toy. And here he is the result. Now such Winnie Pooh will delight your eyes. You can give a toy. Doubly will be pleased, because done with their own hands.