
The tree is the material that has long been used to clamp a bath and sauna. It is there that the tree best reveals its properties - the ability to create a microclimate and hold the heat perfectly.
It is truth to say, alternatives to wood, for use in a wet and hot room, simply does not exist. Accordingly, it is better to sew a bath from the inside with a wooden clapboard. Below is the technology of a phased sheathing bath with clapboard inside.
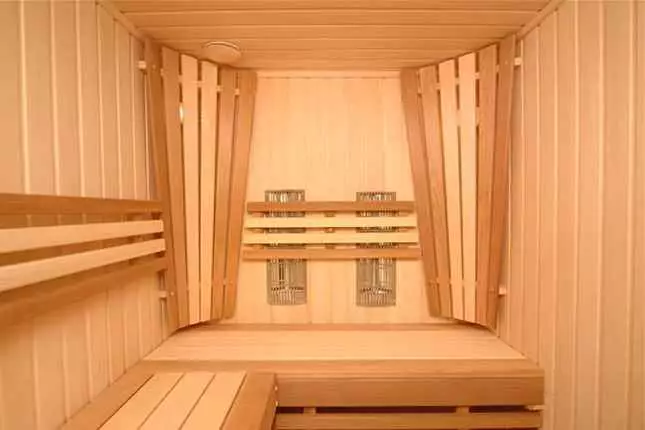
Wooden Wooden Wood Cover Inside
The trigger finish of the bath or sauna has its own characteristics that need to be taken into account at the stage of the selection of wood.
Choosing the wall paneling for a bantas cladding needs to be taken into account:
- high temperature;
- temperature fluctuations (drops);
- humidity level;
- budget.
Which lining to choose for a bath
The selection criteria are determined by the characteristics and properties of the lumber:1. Type of boards
For decoration by steam wooden lining, it is better to give preference to the Euro woman.
- First, because it has a large size of the "groove-crest" system (the length of the ridge reaches 8 mm).
- Secondly, because it is guaranteed to have compensatory slits on the back of the lamella, which contributes to the ventilation of the coating and preemptive the possible cracking of the lamellas.
- Thirdly, because the Euro woman has already been previously processed by means for
Wood protection that can be used in the bath.
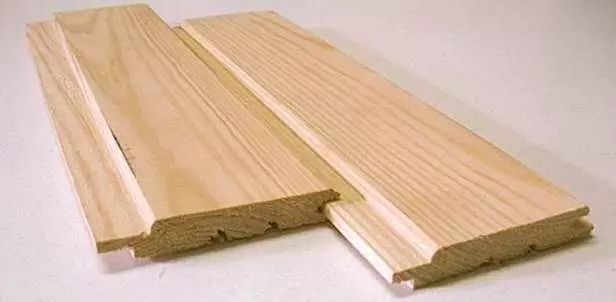
Eurovant Mark for Bath
2. Grade clapboard
For steam room, only the first or higher (elite) variety is suitable forWoods in which there are no bitches, leaky, etc. Note that even
Live knots may gradually fall out under the influence of temperature drops.
3. Wood breed
To understand what lining for the bath is better, you need to know
Features of each breed. We will not review all breeds available on
Market, but focus on those who recommend professionals.
Wood triggery can be made of wood
deciduous and coniferous rocks. The choice depends on the purpose of the bathroom:
Pair, pre-banker, washing, shower, as well as from the properties of the wood itself.
The most popular material for the steam room in the bath or sauna
It is the lining of hardwood. Their common advantage can be called
that wood does not heat up in the sauna, and cannot lead to a burn when touched,
and also resistant to moisture.
Lighting Lipa for Bath
The most popular for the sauna and the bath is lining out linden.The advantages of this wood are the ability to create a special microclimate. FROM
a utilitarian point of view undoubtedly the argument in favor of lime lining will be
Breed strength, dry-range resistance, as well as beautiful color and structure
Woods. Lipa is considered an energy donor.
Wallating from aspen for a bath
The second, in popularity, the place for the bath occupies aspen
lining. Wood aspen is beautiful, soft, easy to work with it. Feature
The breed is that over time, the lining of the aspen becomes only stronger.
Osina is also good because it provides easy care for the wagon in the steam room. Her
It is enough to stupid, when it starts to darken. And folk belief
It says that the aspen pulls the negative energy from the person.
Camping Olhi for Bath
In third place was the lining of Olha. With medicalOlha's point of view is good because it contains tanning substances. Wood this
The hygroscopic breed is distinguished by a low thermal conductivity coefficient. but
High value interferes with its widespread distribution.
Note. Lindening linden, aspen, alder usually sold
short slices. Commercial length up to 3 m. This should be considered, planning
Finishing the bath and making the calculation of the material.
Bathing Oak Lining
The most expensive and difficult to process material is considered
Wallowing oak for a bath. But it does not rot, does not lose its properties and maybe
Installed in the sauna without the slightest processing. Unfortunately, all this
Available not all due to the high cost of oak lining.
A similar situation with clapboard from ash - very expensive and
Rare lumber for plating a bath.
The general lack of lining cladding in the fact that it
Over time, loses color and needs protection.
Coniferous rocks are rarely used in steam room. Because
resin, which highlights the coniferous rocks (pine, spruce), makes it practically
Unsuitable for consumption in steam room. They are more suitable for washing and
Pre-banker. This is facilitated by such indicators as resistance to moisture and
low price. In addition, the coniferous lining is easier in processing, has a beautiful
The structure and rich palette of shades, allows you to build rounded shapes and
Does not need additional processing (except for reference). Often
A pleasant coniferous aroma also becomes an argument in favor of the wagon of the needles.
Article on the topic: Photothel and photos: what to pay attention to when buying
Bath clapper with her hands
Methods fastening clapboard
First of all, you need to choose the method of fastening the clapboard.Definite answer, how to fix the clapboard in the bath, horizontally or
vertically (along or across), no. Each Master defends her point
vision. But summarizing their statements and user reviews, you can draw conclusions
Regarding ways to lay lining.
Vertical mounting of the wallboard in the bath
Laying the lining along got more distribution due to
comparative simplicity, convenience and high speed, and due to this and
Less installation cost. Moisture (condensate) easily runs up vertically
Located lamellas. But, by the way, also easily and rises up
Microcapillars from which wood consists. With this mount system
"Paz-Comb" is more protected from water from entering water.
The vertical mounting of the lining allows you to accumulate heat inside the steam room more, again, because the horizontal mounting of the crawl timber interferes with the free air movement. Experts note that the vertical cover is justified for the sauna with their regime
Dry steam.
Vertical mounting of the wallboard in the bath
Horizontal Fastening Lining In Ban
Laying the wallboard across has advantages in view of what
The board is mounted thoroughly, which means that water getting is also unlikely, like
With vertical. With the horizontal mounting of the wallboard is equipped with a vertical
frame (cut), which contributes to the natural circulation of air between
panels and wall.
Another argument in favor of horizontal laying of lining in
Ban (steam room) - Easy to replace the boards at the bottom. The fact is that the floor in the bath is not
Just wet, and wet place. Naturally, the bottom boards are subject to more
rapid rotting than the top. Replace multiple bottom boards easier than
Cut the lower part in all vertically located. In addition, drying from
Permanent temperature difference is more noticeable on the vertical mount.
The horizontal way of fastening the wallboard is better to choose those who have a classic
wet russian bath.
Horizontal Fastening Lining In Ban
Based on the above, everyone can decide for itself,
How to mount the lining in the bath - vertically or horizontally.
Crucifier under the lining in the bath
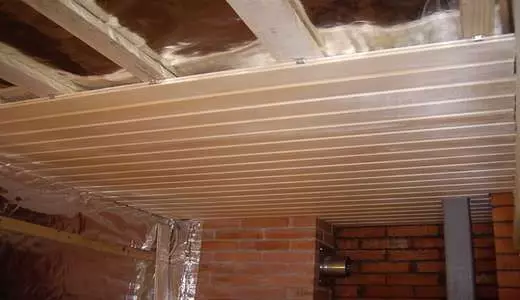
The label under the lining in the sauna bunkotelka clap involves the device of the crate. This is due to the fact that the presence of the crate makes it possible to warm the sauna.
If there is no such need, there is a free circus between the frame, condensate flows, the probability of rotting of the lining, the appearance of fungus and mold on the walls is reduced.
The lamp under the bathing for the bath is made only from the bar, which is covered with primer. The use of galvanized profiles for plasterboard is unacceptable.
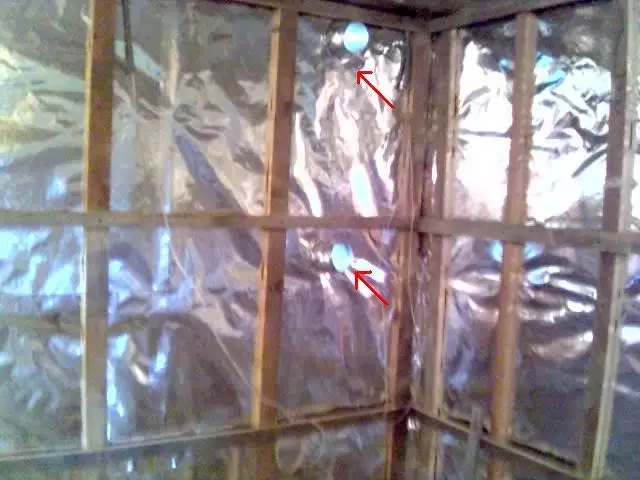
The bag in the bath makes it possible to organize the wiring of the electric pipe in the steam room. For example, under the lamps.
Note. To protect against moisture, the wires are stacked in a metal corrugation.
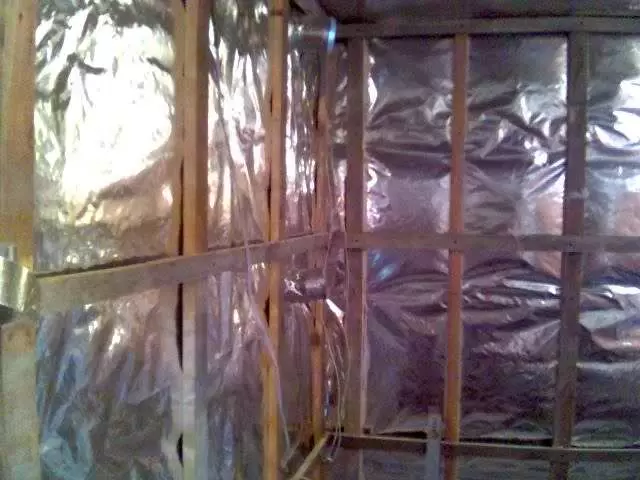
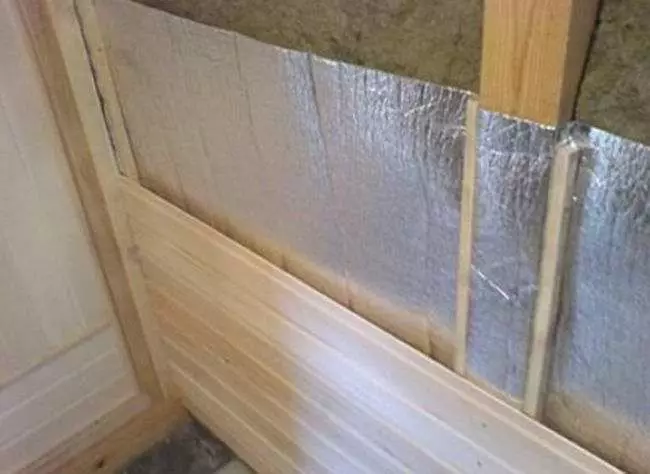
Wall insulation Baths from the inside under the clapboard
The inner insulation of the bath consists of several layers.
Insulation in such a wet room needs a special attachment.
The insulation of the walls of the bath from the inside under the vehicle began on the wall laid waterproofing. It can be nailed to the wall or fix the crates of the crate.
Watu stacked between the bars of the crate. By the way, cut out with a 10 mm ink. Vata tightly takes place between the frame bar and will be securely recorded. On top of the wool fit the foil vapor barrier film, which reflects heat. Parosolation is fixed by a stapler to the bars of the crates.
The film is stacked by the mustache and is necessarily punctured by aluminum scotch. Next, narrow rails are stuffed, the so-called counterbuilding. For control, boards are used to 20 mm thick. Purpose of the control - ensure the ventilation gap between the clap and
vaporizoation.
An easier option to use foil basalt
Watu, which is placed foil to the clapboard (also with a gap).
Ventilation device in the bath
An important condition for full functioning is ventilation in the bath.
The ventilation device in the Banpauetoe, setting the crate and laying the insulation, do not forget to outline the place for the ventilation holes.
As an air duct, it is preferable to use an aluminum corrugation with a diameter of 100 mm. We remind you that for efficient ventilation in the bath you need to place one hole under the ceiling, and the second at a height of 150-300 mm from the floor. Preferably next to the stove.
Note. Place the ventilation holes need in the available places in order to be able to adjust the air intake.
In the sauna only the non-combustible thermal insulation material is used. That is why the use of foam plastic is excluded. It is better to give preference to basalt cotton.
Installation of lining in steam room
Fastening the lining in the bath is made exclusively hidden
method. Experts explain this three factors:
- First, the metica, twisted, is heated and there is
The risk of getting unpleasant sensations during touch to the place of attachment.
- Secondly, rough hardware can give rust and spoil
The surface of the lining.
- Thirdly, such a fastener looks somewhat primitive and
affects the appearance of the room.
Fastening the lining hidden (secret) method of hidden fastening methods includes the use of nails, kleimers or self-tapping screws. Regarding the screws, it should be noted additionally that the self-tapping screw can be spinning with the front side of the board, but it must be closed with a wooden plug.
Such a method is quite time-consuming, so users advise to mount the wooden lining with their own hands using nails and kleimers.
How to shepherd ceiling in a bath with clapboard
Finishing steam room, as, however, and other bathrooms,
Starts with the ceiling. This is due to the fact that the ceiling is left large
Thermal gaps, and wall slats must be restricted into the ceiling.
Article on the topic: Sourling 3D Several Hands: Step-by-step instructions, Materials (photos and video)
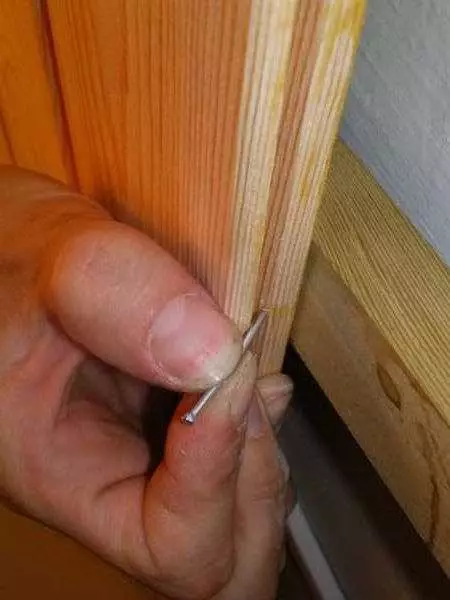
Ceiling lining in the bath canoscopeing wooden lining on the ceiling begins on the side of the entrance and is carried out only on nails or kleimer. And the point here is not even in the visual effect, but in the fact that the finishing nail is not able to withstand the weight of the ceiling of the clapboard.
The boards that are nailed to the latter is difficult to "plant" on the kleimer or drive a nail into the groove. In this case, use the finishing (secret) nail that does not have a hat. In order not to damage the facial surface of the lining, the nail should be achieved by Dobochnik. And the location of the nail is inspired by sandpaper in order to avoid the appearance of roughness and, as
Corollary.
It is important that the ends of the lining place at a distance of 40-50
mm from the wall of the bath. This is due to the fact that under the ceiling a higher temperature
And the slats more "play". As well as need to leave ventilation
Clearance for air circulation over the wall.
How to sheathe walls in a bath of clapboard
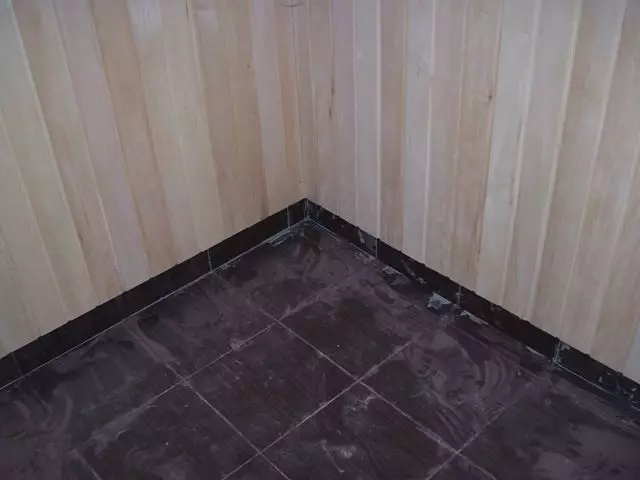
The gap between the floor and the lower edge of the walls of the walls of the walls begins with the angle of the room (steam room, sauna) and is implemented similarly to the installation of the clapboard on the ceiling.
When installing, it should be noted that water can climb the wood to a height to half a meter with a vertical attachment and half below, with a horizontal one. Therefore, on
height 10-30 mm. From the floor leave the gap, which will save the lower boards from rotting.
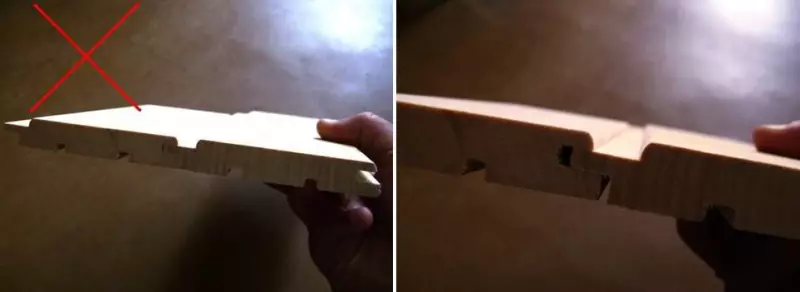
How to lock the wooden carcing lamella to the wooden lining until it is done, it is impossible in the sauna. The tree swells-swells from moisture and temperature, so there must be a compensation clearance for the "movement" of wood.
The consequences of the wrong attachment (deformation, discrepancy) are shown in the photo.
How to make a gap between the clapboard?
Execution technology: The subsequent board is driven into
Previous until the stop. Then along the lines of the seam made several marks
(Preferably not a pencil, but an acute subject). Then the board is moving
relatively previous and scheduled marks. Since lamella is moving on
Eye, then each subsequent board must be checked.

The coincidence of the lining on the ceiling and walls. Installation of lining on the wall will look more beautiful if you hold out the docking of the boards on the ceiling and the wall.
The top ends of the boards are adjacent to the ceiling closely.
Mounting plinths for lining and decor elements
Plinth, corners, other fittings for finishing the sauna"Sat" for glue. For their attachment, exclusively finish nails are used with
Subsequent grinding place of installation.
How to shepherd by clapboard doorway
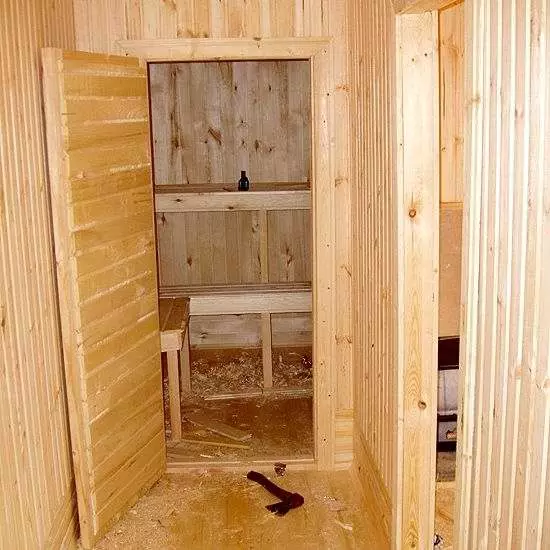
The covering of the wall-in-law of the door sweat is paid special attention. Sucks in them are separated by cladding, cut to the desired length. And the arrivals themselves
Frames in platbands.
How to shepherd slope slopes on windows
Directly into the paired windows are rarely placed, more often they are made in a pre-banker or washing. In any case, it will not be superfluous to know how to make a slope from the lining.
In order to simplify the installation of the clapboard, professionals advise the slope in the window opening using the starting plank to the plastic lining. Then the wooden lamella with one end is inserted into the bar, and the second is attached to the crawl bruis. Such a method
Frames are ideal in its simplicity, and is suitable for those who install metal-plastic windows into the bath. But it should be remembered that the thickness of the starting profile is 10 mm.
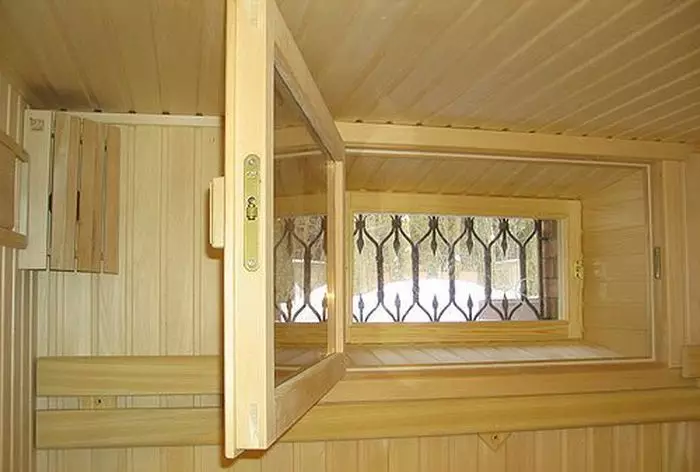
Covering of slopes on a marking option of installation - installation of a frame for sloping, covering its clapboard and subsequent design of the place of closing the lining to the window
Decorative planks.
This method of decoration of slopes with clap is better to apply those who have wooden windows in the bath.
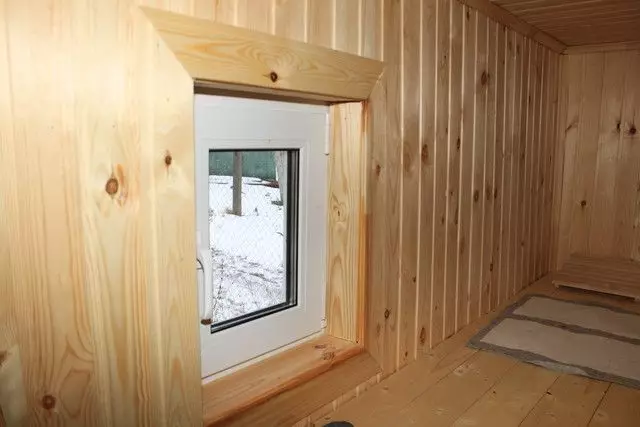
Wooden nicknapper for the Wall Molds The thickness of the wall is small and the slope turned out not to be wide, then you can bind it with a wooden olchetler for the lining.
Material prepared for site www.moydomik.net
Washing finish in a bath of clapboard
Installation of lining in the washer is carried out similarly to installation insteam room, but it should be remembered that the bottom boards or ends of the boards with vertical
Styling must be at a distance of at least 30 mm. from gender.
Users noted that in the interior of the washing
Plastic panels and PVC lining are well proven. Decor under a tree
allows you to create the desired design and at the same time ensure long-term operation
Finishes. Ceramic tile and tile also looks great in the washing.
How to shepherd baker's banner
The pre-banker is designed to leave its own
Things and stay after the guy. In more modern versions of Bani Pregnant
Performs a recreation room feature in which furniture and equipment are installed.
In view of the fact that this room is not much different from any other in the house,
And the installation of the lining is not different features.
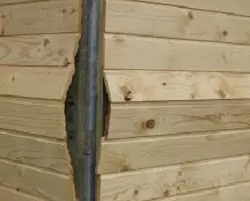
Installation of lining near the firebox for the bath
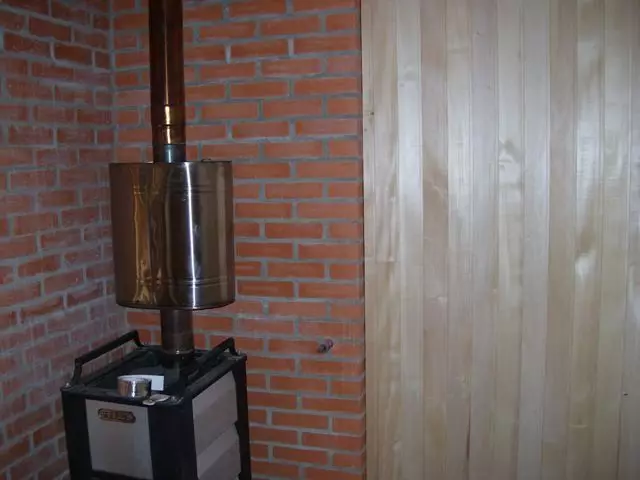
Installation of lining near the firebox for bathingness of flammability, the lining near the furnace furnace is not mounted. Flooring is better to separate brick, stone, in extreme cases, sheet metal or other non-combustible materials.
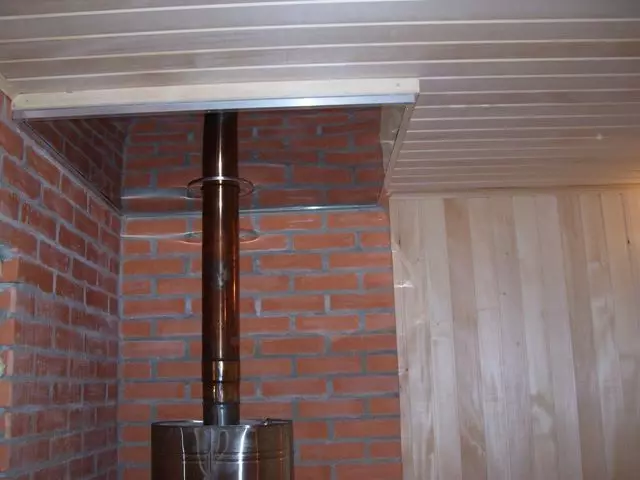
The protective screen on the ceiling near the firebox for the bathanube notes that the ceiling is also not allowed to adjoin the chimney pipe to the lining. Therefore, on the ceiling
Installed stainless steel screen. Behind the screen pipe should be wrapped
Basalt wool.
Installation of lining near Kamenka for a bath
But Kamenka (the place where traditional Russians are foldedBaths stones) It is not only possible to separate the wall paneling. Moreover, preferences
It is worth sending lickening classes. Due to the fact that the tree is heated
Less than the stone, the wooden decoration of the heater will save the Sauna users.
from thermal burn.
Article on the topic: Repair in the bathroom combined with toilet: photo instruction
Now you are familiar with how the installation of the lining in
Separate rooms of the bath, you know how to mount the lining in the bath right. BUT
it means there are no obstacles for performing a decoration of a wooden bath
Wallowing with your own hands.
What to handle the lining in the bath
Mounted lining need to be processed. Specialists and users who take care not only about aesthetic, but also on the eco-friendly component of the inner cladding advise to use for the finishing finish
A steam room in the bath special compositions on a water basis or on the basis of wax. Impregnation will create additional protection of wood from moisture. At the same time, the lining in the steam room must be covered only once, and in the washing and pre-banker you can go twice.
Grille on the lamps in the bath
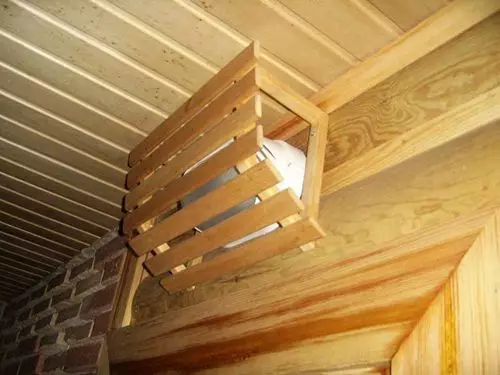
The lamp on the lamps in the sauna bucket had a complete view, the ceiling lights should be installed, which can be closed with beautiful lattices made.
do it yourself from cropping lining, as well as install valves for ventilation
holes.
Bath trim under shrinkage clapboard
Shed Bani, wooden bath from a rounded log orThe profiled bar can give shrinkage for 3-10 years. It depends on the
Wood material and device method. Naturally, wait for so long for
in order to perform an internal finish and start exploiting
Ready. What to do in this case?
Sliding love under the lining
Sliding doomle under the carbuchelice eliminate the likely implications of shrinkage need to make moving fasteners for the crate. To do this, when the framework of the frame (crates) under the lining, you need to use sliding guides.
At the same time, vertical rails need to be confused. The bottom of the horizontal rails is also. But the upper part is fixed as shown in the figure. This method
Suitable for horizontal fastening of wooden lining.

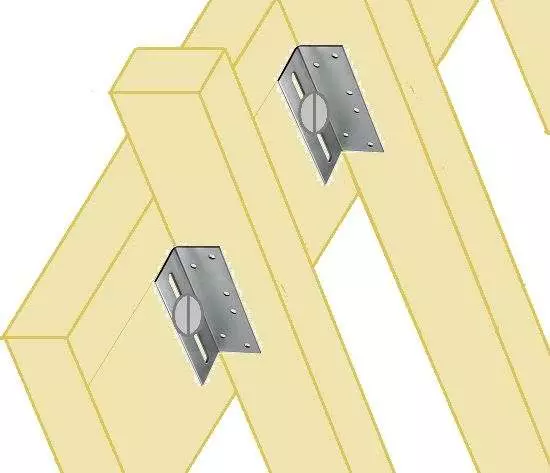
Sliding support for rafted KUCISP. The use of steel perforated sliding support for the Kucis rafters (sliding) is indispensable to eliminate the possible shrinkage of the bath and a house of wood.
Such a support can be used both when the harrowing roof system, and for the installation of the crate for the interior of the bathroom baths.
The easiest way to make a frame (clamp) under shrinkage -
Cut the slot at the top of the vertical rail, then when shrinking the structure
Rake, together with paneling panels, shifted down. Complexity
this method is that the board at the point of the cut is weakened, and as a result,
May lead to the destruction of the whole design.
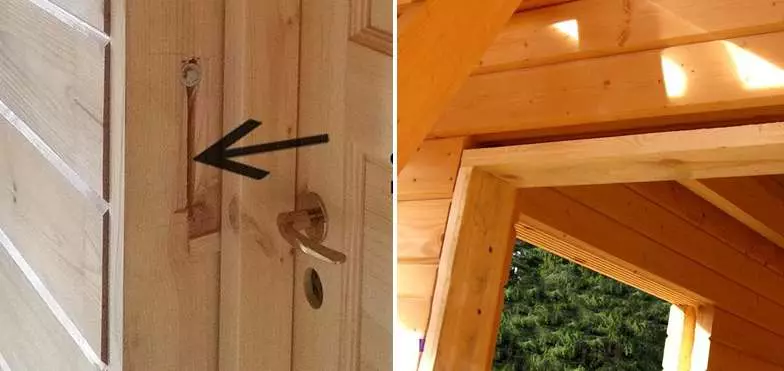
The sliding mounting device on the door of the baniiteo and the same rule refers to all elements of the design.
The device sliding door mounting (in the doorway) is shown in the photo.
Note. When finishing with a clapboard, which can give
Shrinkage must be leaving the gap between the upper slats (with horizontal
Finishing with clapboard) and a ceiling of 10-20 mm. (ideally, on the calculated value
shrinkage). Ceiling plinth for lining is also not recommended to use or
Sick it only to the ceiling. It is better to postpone the finish decorative finish
For a year (when the bath (the house) is a little falls). After all, the most intense shrinkage
Wooden log house gives in the first year of operation.
How to shelter the bath with lining inexpensively and save on
FinishFew people seeking to throw out money. Icy
The owner predicts that he will cost the trim of a bath with a clapboard,
will be estimated, weighing the pros and cons of alternatives. And only after
This will take a final decision.
Tips, how to keep the trim of baths
- Use different wood breeds. For example, in
Preferably and washing to give preference to cheaper coniferous lining
breed. Also in the pair you can combine deciduous and coniferous lining.
For example, the places where the body and wood contact will occur (the wall is near
shelves, sun beds, heater) use solid wood lining clap
breed. In other places apply coniferous;
- in the washing machine to use alternatives, for example,
plastic lining or tile;
- Variate not only breeds, but also wood varieties.
For example, in the double room to buy the lining of the highest grade, in the pre-larger
varieties. In the pre-tribades, the operating conditions are more humane, and the presence of bitch and
The difference in color and colors will give the room a certain color;
- Combined trunk finish (combination of panels of different
Length). Commercial Length Length varies from 1.5 to 3 m. Than
Longly lamella, the more expensive they are. Can be significantly saved if finished
Bath combine the lining of various lengths;
- insulation. Of course, initial insulation costs
Baths will have to suffer. But, in the process of operation, you can considerably
Estimate the benefit of insulation when the cost of heating the bath will be reduced;
- Cost of work with clapboard. Professionals are expensive
your work, and those who prescribe a low price cannot guarantee a decent
Quality, and it is still unknown how much remake (reconstruction) will cost.
Although, it's all subjectively. Therefore, the easiest and most reliable way - to do
Installation of lining in the bath with your own hands. And this step-by-step instruction on the trim
Wooden lining, will be a good help for beginners in construction.
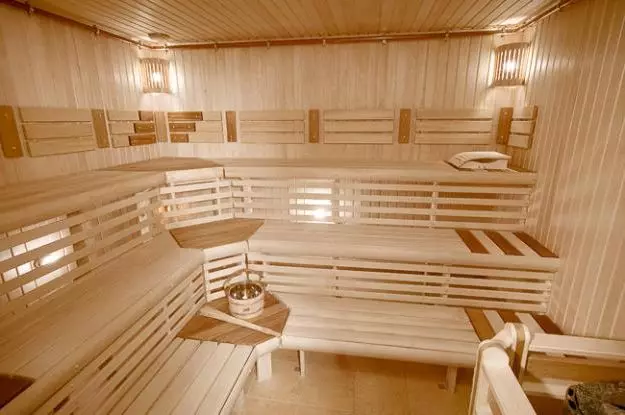
Stock Foto Ban, clapped
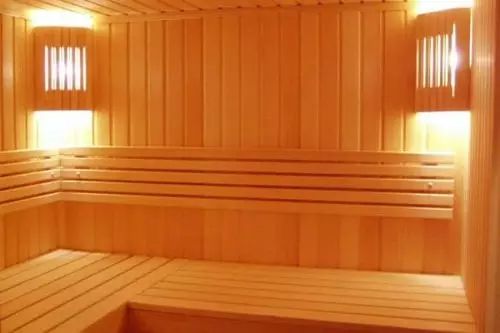
Wagged
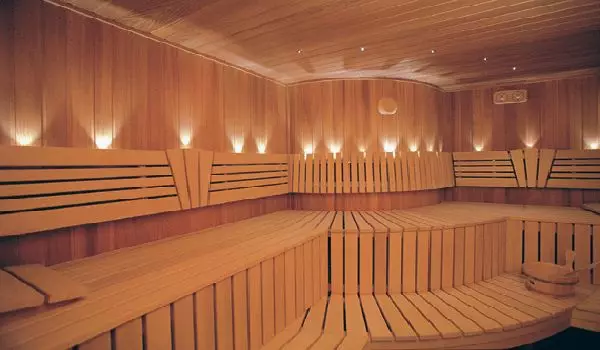
Beautiful sauna with decoration wooden lining
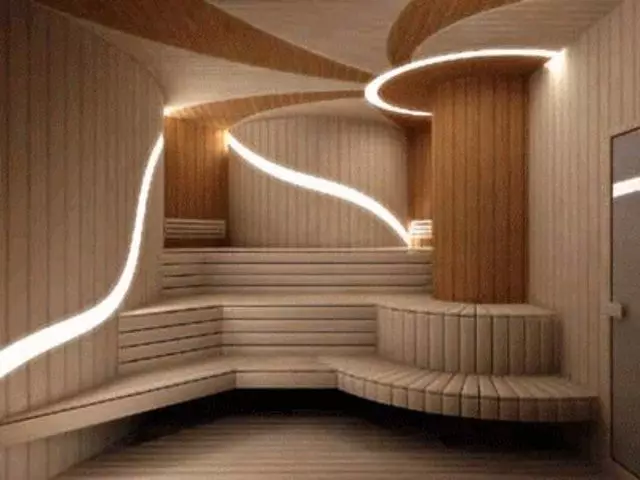
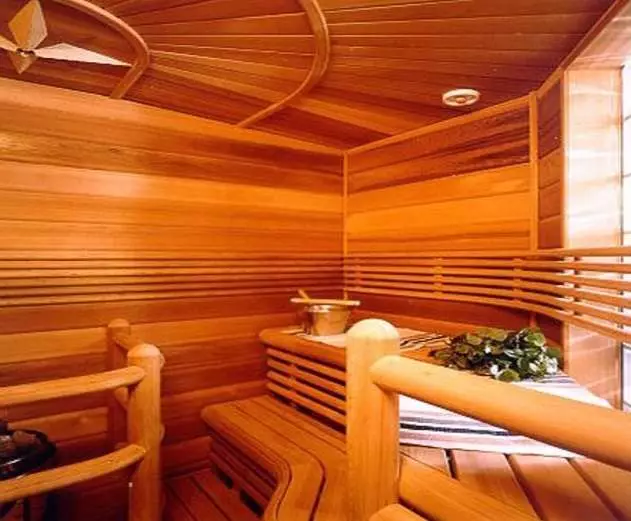
Original sauna, wooden lining
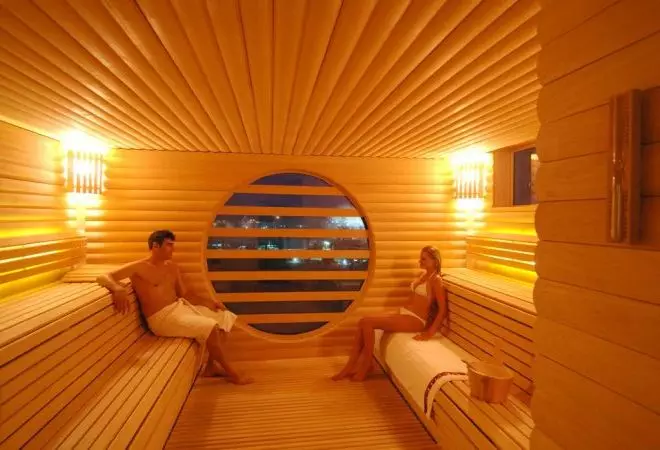
Wooden Wooden Bath