
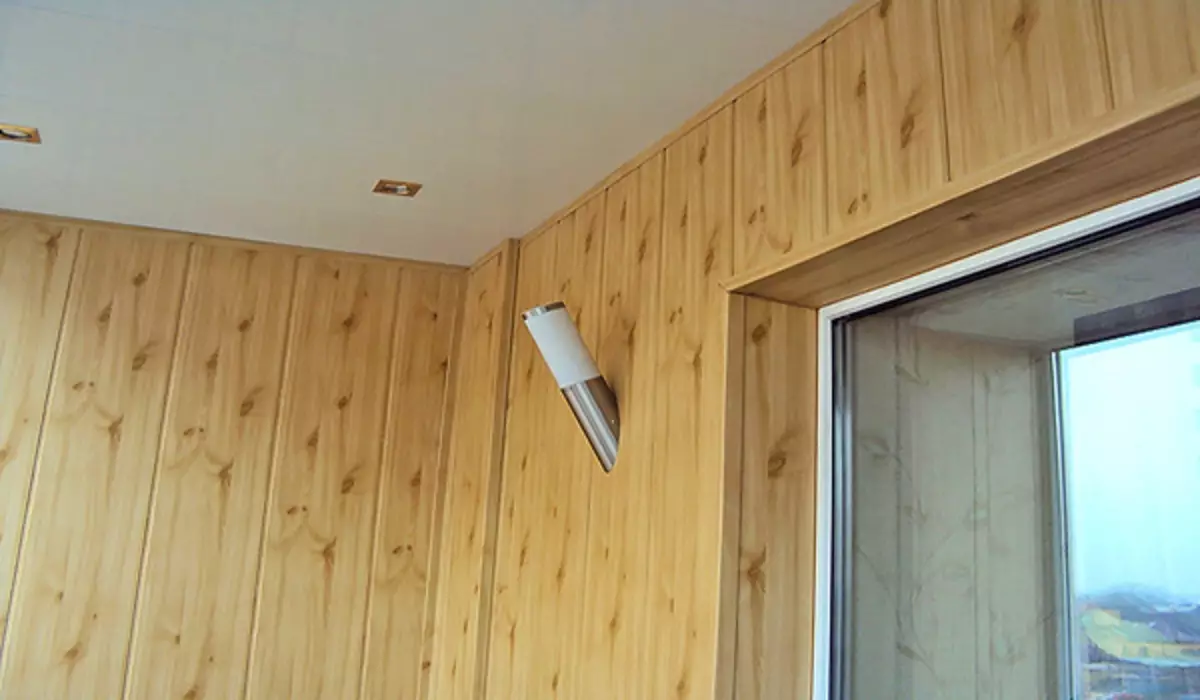
Among all the options for wall cladding, one of the most accessible and at the same time makes the interior respectable, is the decoration of walls by the MDF panels. After all, indeed, in order to, for example, simply paint the wall, you need to spend many preparatory work that there are considerable money, and it is far from the fact that the outer look of the wall will be attractive after that.
Another thing is finishing wall panels under the tree. In this case, you immediately know how the wall will look after the completion of the cladding, and is more confident that there will be no flaws that will spoil all the perception of the interior as a whole. But even with such an optimistic beginning, I have to tell you that this material, like any other, has its advantages and disadvantages.
Advantages and disadvantages of MDF
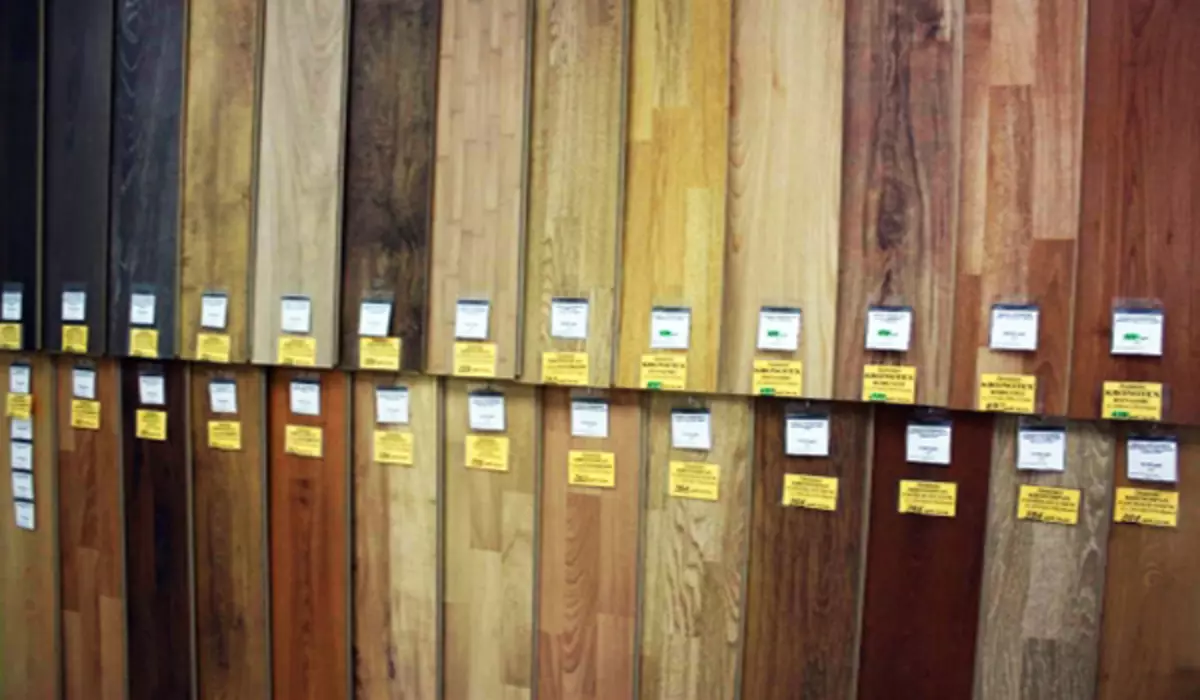
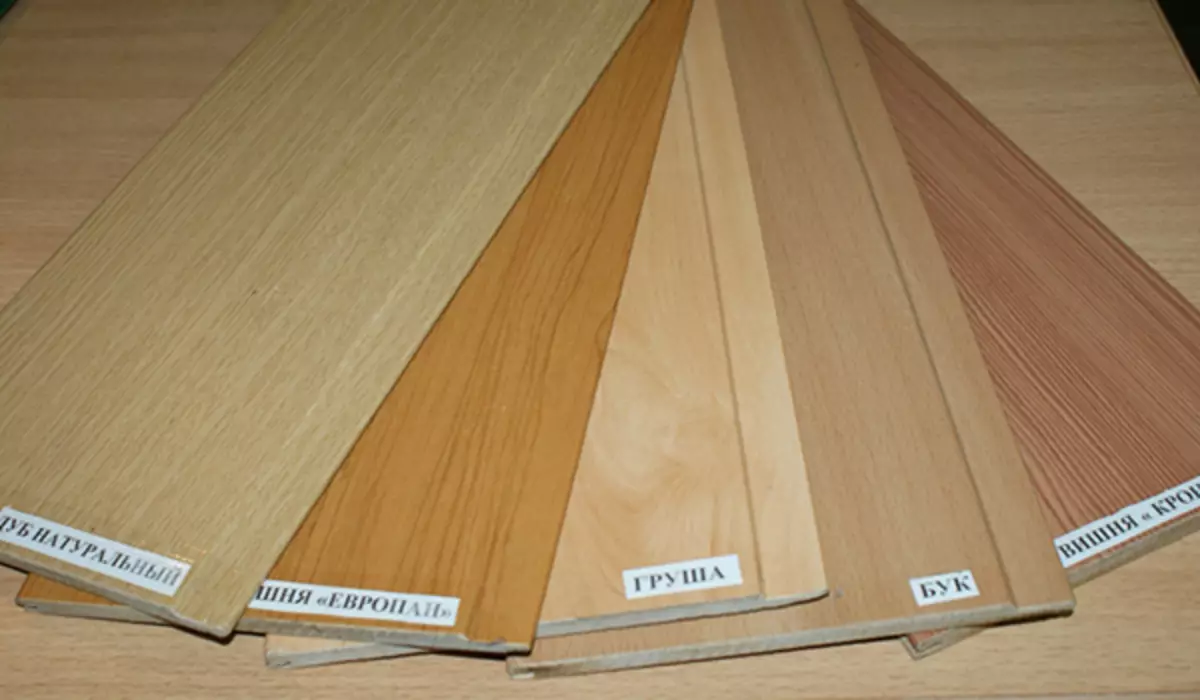
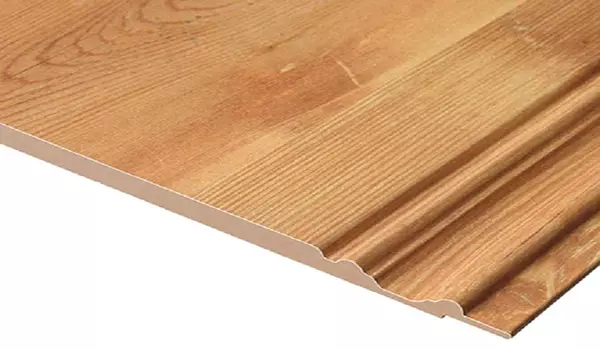
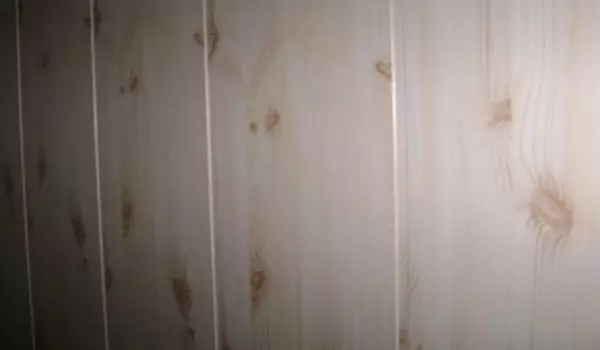
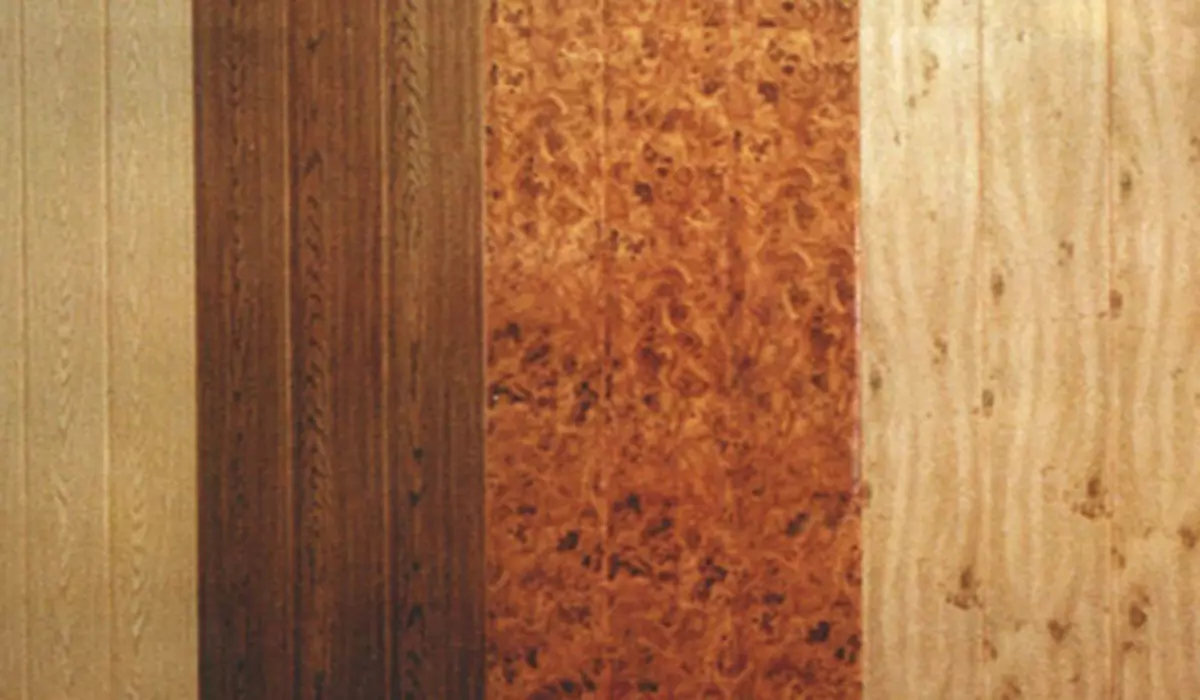
Let's start with good. In construction stores, the MDF panel are presented very widely. That is, the choice of this material is large, and it can be chosen for almost any interior. Any colors and textures have these panels, they can be stylized even under natural stone.
In addition, this material can be painted in any colors directly during repair. It also happens laminated and veneered with natural wood. All colors and shades can be freely combined with each other, thus creating any drawings on the wall surface.
The most weighty, in my opinion, the advantage of MDF panels is the ease and simplicity of installation, this material for the walls of the walls. This work will seem simple even for those who have never engaged in repair work. For mounting, only the basic skills of working with the tool are needed.
During the work process, very little dirt and dust remains, especially if you compare with what happens after such a wall processing like plaster. Maximum that will remain, these are small sawdust and accompanying the same small garbage that is easy to remove the usual broom.
The wall before the trim does not need to be specifically prepared, even if it is seriously deformed. The panels are attached to the frame, which is previously aligned by level, creating the required plane.
Under the panels you can hide all wiring, and associated cables, such as television antenna or telephone and Internet wires and they will not be confused. A good plus, especially if through these wires has already been closed. Also in the frame under the panels can be installed thermal insulation.
Even without special materials of the MDF panel, they have excellent thermal and sound insulation. Therefore, I recommend using such a trim in the cabinets, corridors and halls.
Article on the topic: Why do not be smeared flieslinic wallpaper
In essence, it is one of the most affordable materials for the walls of the walls. This is achieved not even at the expense of the value of the material itself, and due to the fact that the robot on the installation can be carried out with his own hands, in order to establish heat insulation that in repair work, it is considered as a separate work and the price for it is exhibited as separately. There is a clean savings.
It's easy to care for this trim. It is easy to occasionally wipe it from dust dry or a little damp cloth. If this is not done, then the dust will turn into dirt over time and enter the coating.
Disadvantages of MDF panels
The technology of manufacturing the production of MDF, provides for the hot pressing of fine chips. Its fastening occurs with the use of urea resins, which are not as harmful as formaldehyde, used, in the chipboard, but still useful for health, these substances will not call.
Moisture resistance of small chip panels, to put it mildly, lame. At least everywhere and write that they can be used in wet rooms of the type of bathroom, they say, this material, moisture-resistant, is not true. Only a marketing stroke to increase the scope of this material.
The strength of this cladding is very low. Any more or less strong blow can break the panel, the benefit that it can be easily changed. Also hinged elements will regularly fall under their own weight, if you fix them right on the panel.
Shelves, lamps and so on need to be attached only to places of passage in the wall of wooden bars and rails. Mark their location on paper during installation.
This material is made in essence, of wood and saturated by resin. As you understand, it burns very well, so if you plan to hide under the panel wiring, then all it should be sewn into the metal corrugation, or is isolated from contact with the material, in any other way.
Tool for work
To mount the MDF, the trim will be needed:
- Perforator;
- Screwdriver;
- Self-tapping screw;
- Plastic are doing;
- Roulette;
- Electric logs;
- Chisel;
- Pleimers;
- Metal corrugation;
- A hammer;
- Thread;
- Simple pencil.
Perforator, screwdriver, self-tapping screws, dowels and glimers will be used for fastening, frame to wall, and direct installation, facing panels. Oh yeah, here you can still take a hammer, without him anywhere.
Roulette, you need, oddly enough, for the product of measurements, walls and material to be customized under these sizes. The chisel is needed, for cutting from wooden bars of a certain amount of tree, to create wedges, which will be used in the process of removing the perfect surface plane.
Article on the topic: How to get a circular saw
Electro-jig is necessary to cut off the extra material, from bars and panels themselves. If you do not have such an appliance, then the old good manual saw will come to the replacement, but consider the teeth of her should be small.
Thread and simple pencil, we need to mark the surface and mark the slicing places. Thread can be both ordinary and special construction, with the possibility of covering it with blue powder.
Of the additional tools that are not included in the list of main, the Passatias can be noted, in the people of pliers, and pliers, in case you have to extrude the incorrect nails and twisted screws.
Installation of panels - machinery
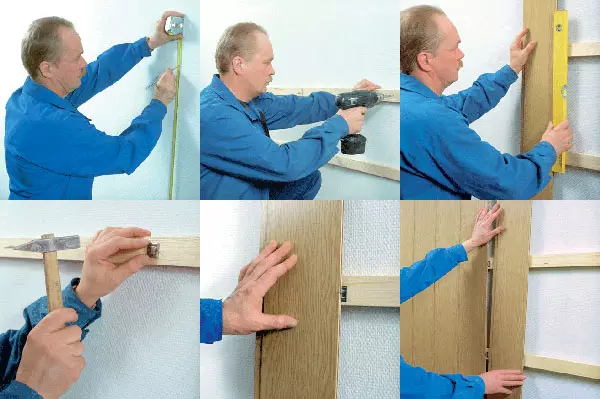
So, proceed to direct work. The first thing to be done is to determine where the most protruding part is on the wall, if, of course, the wall is twisted. It is from this place that work will begin.
How to determine this place? By the same, the principle as when aligning walls with the help of plaster. Horizontally attach the rule, and see if there is curvature and where the upper point is. To fix this place, stretch the wall in the length of the wall, securing it with self-draws.
The thread must touch the protrusion, and be in the stretched state. Next, you can attach the first rack to the wall. Better if she, and all the others, will be the same length as the wall-cutting wall, in which case they will not need to be sewed.
The first rake must be attached a little below the thread. Make the first hole just in the place where the wall stands most. To do this, take the perforator and drill the hole directly through the rail. In the niche done, insert a plastic dowel, and, putting the rail back, tightly twist the screw in it.
After that, you need to make the other holes, with a step of 60 cm. In order for the rail to save the plane, you need to put it under it, pre-harvested wedges. After that, you can fix the rail finally. Next, adhering to the level, in the same way, screw the remaining framework elements. The distance between the rails must be strictly 40 cm nor less, only in this case, the frame will be sufficiently tough.
It is important that the bottom plank is fastened at the very bottom. It is necessary in order to provide a place to attach the plinth, at the final stage of the work. The same applies to the top rail.
Once all the wooden planks in its place, we can say that the framework for mounting panels is ready. But before, proceeding with the main work, you need to determine the place for switches, sockets, lamps, etc.
To do this, mark those places where lighting devices and sockets will be. Next, isolating the wires using a metal corrugation, make them output to the appropriate places. As we said, the corrugation is needed to enhance fire safety, since the elements of the skin and in general the tree is very well lit, so contact with wires is undesirable.
Article on the topic: How to use a micrometer?
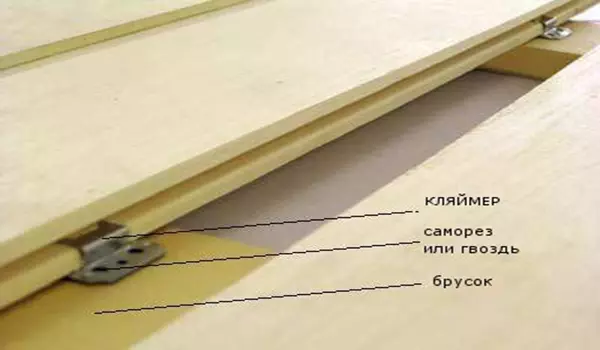
Having understood with wires, you can start mounting panels to the frame. The first element of the trim is attached to the corner of the wall or by the window. To do this, attach the panel to the wall, and from the side where the spike is located, retreating one - one and a half centimeters, screw the panel with self-draws. Do not worry, no screws from screws can not be visible in the future they will be covered with special decorative corners.
On the side of the groove, adhesives are attached to the panel. They dress up on the groove and nailed with small cloves, which usually come complete with these brackets. The first panel is fixed, all subsequent elements are not screwed to the raids. Just insert a spike in the groove, and from the groove moaning, pinch the adhesive, and so close the panels, the entire plane of the wall.
Do not forget that at a certain point, you will need to do in the panels, holes for lighting devices, sockets and switches. It is better to do it before installing, otherwise there is a high risk that the coating will be spoiled.
Cutting holes for sockets and so on, do not press much on the panel, because of this, cladding cladding may be damaged.
Having reached the end of the wall, you will most likely come across two situations or the last panel will be too wide or too narrow. In the first case, it needs to be trimmed, under the desired size and fix on the rails in the same way as the first element of the trim, only this time it is necessary to screw it to the raids from the groove side.
In the second case, you need to cut an additional element from unused panels and consolidate in the same way. I advise, it is for such cases, to buy material with a slight margin.
At the last stage, installation of plinths and corners are carried out. Plinth is screwed to the bottom rake with screws. Corner elements are attached to liquid nails. In order for the attachment of the angles to be more reliable, it is better to apply the adhesive solution at the corner to the panel and immediately tear off. After waiting for five minutes, apply and finally secure. If the composition gets outward during gluing, cut it with a knife, after it hardens.
Video "Facing walls by MDF panels. Installation technology »
In the video, it is clearly shown how it is easy and simply to finish the walls of the MDF panels. Please note how little garbage remains, after work.