
Popular clothing models are mostly knitted by famous openwork patterns, one of the main - the grid with the knitting needles. It is simply necessary because now there is a huge number of different openwork patterns. They may have a look of excellent lace, drawing of clear and even lines. Often in products you need to mix several openwork patterns at once, here it is necessary to make a mesh pattern with spokes. Since it contributes to a good connection of different patterns, it is easy to create an interesting and beautiful transition between them. As well as stack with knitting needles can become an excellent insertion or main pattern of the product. The most popular they are in the warm season, they are used in the creation of light tops, dresses and coals. Let us look more in more detail how to knit several types of grid with knitting with a diagram and description.
First option
Required tools:
- Thin, smooth yarn;
- Straight knitting needles.
To knit grids there are 2 major rules:
- The number of Nakids should be equal to the number of reflauded looping;
- Knitting density should be the same so that the product does not lead.
And now let's consider several options for openwork grids.
Knit openwork grid with a slope to the left.
The number of loops should be multiple two. We add one loop for the symmetry of the pattern, two more edge loops.
Knit 1st row. We remove the edge, then we make the nakid, then we upset 2 facial loops together. We continue to knit so much to the end of the canvas, then knit 1 facial loop and decorated with an injalial edge. Knit 2nd row. Remove the edge, then make 1 facial loop and 1 nakid. After that, until the end of the canvas, we will alternate 2 facial loops together and the nakida alternately. Then we make the edge.
Other rows continue to knit the same as the 1st and 2nd row.
Article on the topic: What and how best to put flowers in street porridge
Second way
Knit ribbed grid.

The number of looping should be multiple two, even add two loops and two hinges of the edge.
Knit 1st row. We remove the edge, then we make 1 nakid, carefully remove 1 loop to the needle without tissue, then we wait for the facial loop with the hinge removed. We continue to the edge of the canvas and make out the purl edge.
Knit 2nd row. We remove the edge, then we throw a thread on the needle and insert 2 outcomed loops together. And we continue to the edge of the canvas, after that we form the edge. We continue to knit the remaining rows just like the 1st and 2nd row.
Third way
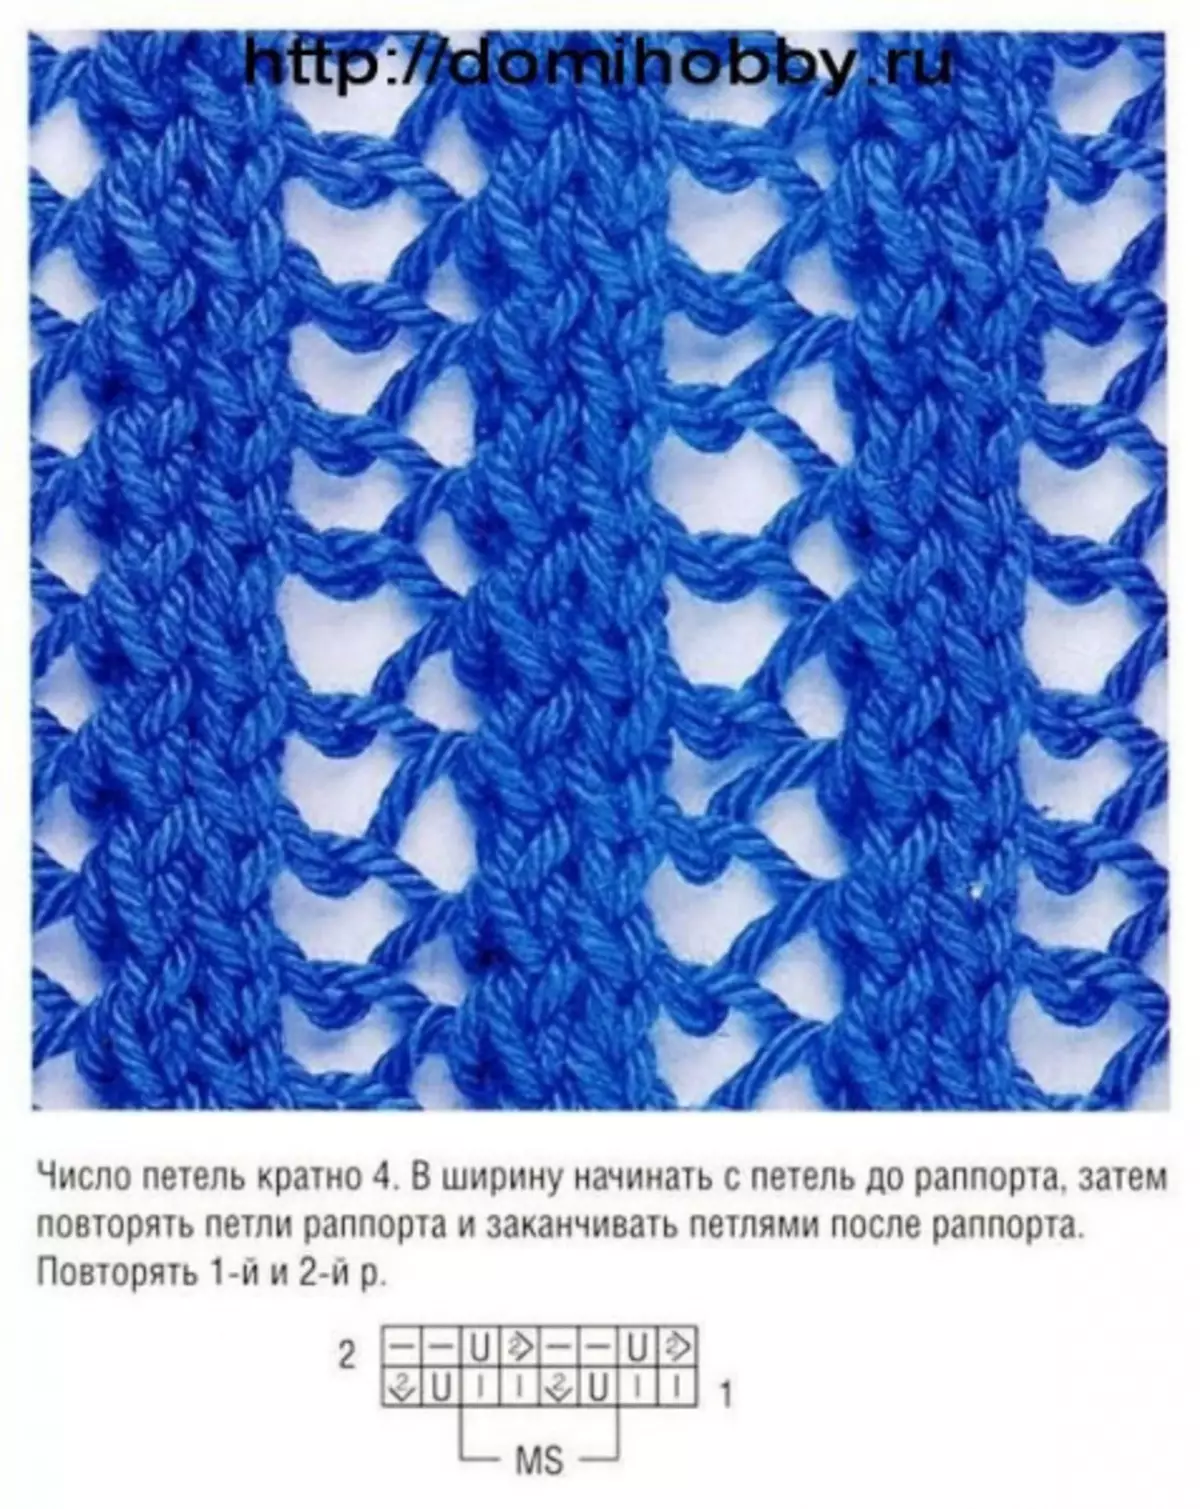
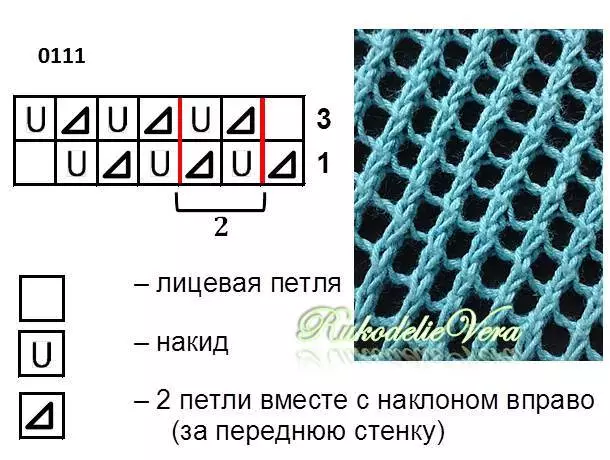
Knit the grid pattern. It is necessary that the number of loops is multiple 4, add edge loops.
Knit 1st row. Remove the edge. Then knit 1 facial loop, 1 turnover of the thread around the knitting needles, then an injalial loop and 3 facial loops with permutation together, 1 turnover of the thread around the knitting needles. We repeat knitting to the end of the canvas, then we make the edge. In the 2nd row knit only with hinges. The remaining rows continue to knit as the 1st and 2nd row.
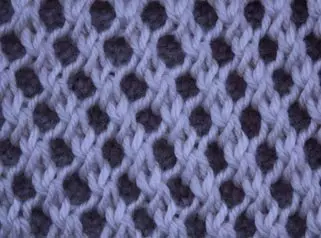
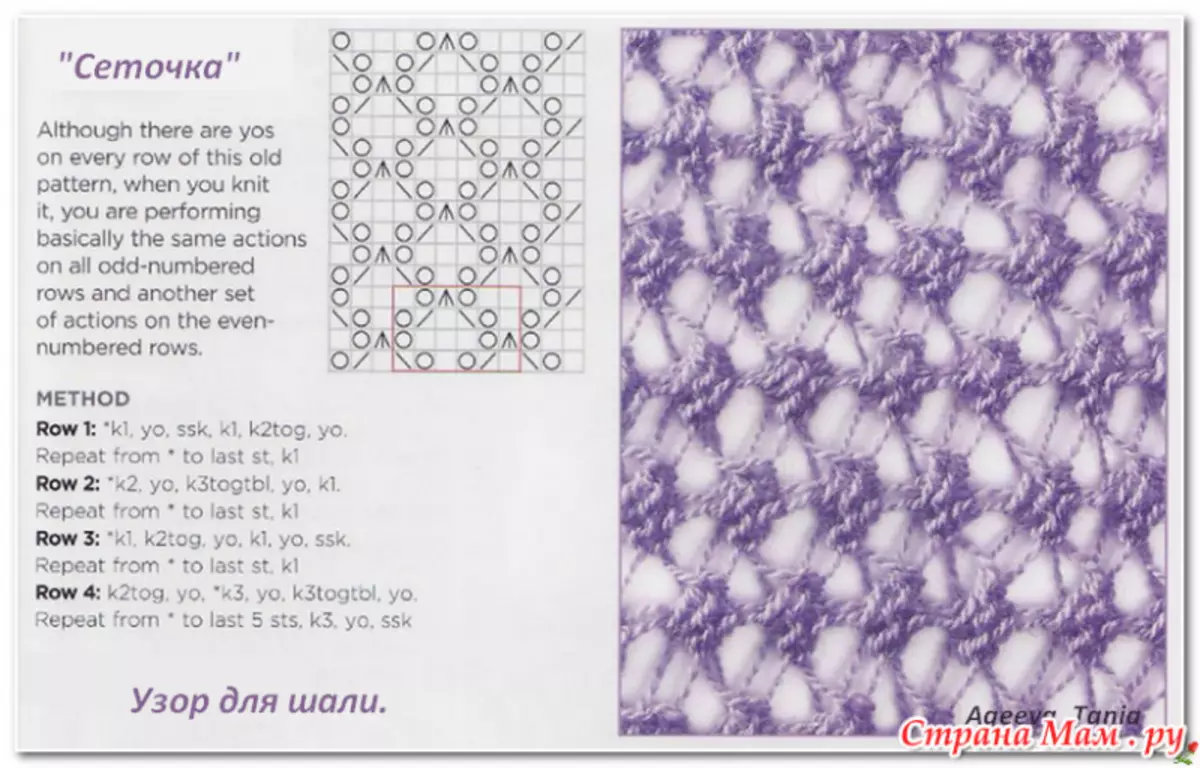
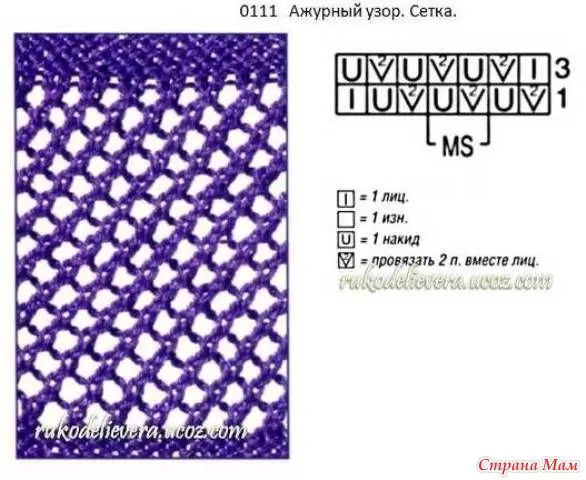
There are many different interesting options for openwork grids, several examples are indicated below.
Knit scarf
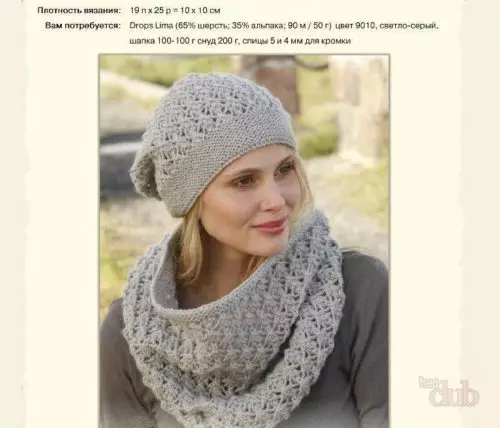
Currently, girls have a very popular form of a scarf, called stern, it is connected in a circle and he has no beginning and end. Create such an interesting detail of the wardrobe may even inexperienced master. Let's figure it out in how it knives. And if you want, you can still tie a beautiful hat into the kit, the photo below shows the required amount of yarn and knitting density.
Knitting process:
- We take circular knitting needles and recruit the desired number of loops, they must be a multiple 13 + 2 edge loops. It is necessary to knit in width, closing the first and recent hotels in the ring. The size of the scarf will depend on the amount of looping. For the model, as in the photo, it is required to dial from 184 loops and 2 more edges, it turns out, from 186 to 208 loops plus 2 edges, it is 210 kettops;
- 1st row knit off the hinges, and the second by the face with facial hinges;
- After that, alternately knit facial and invalid rows until the thoughtful height is obtained;
- Now we start knitting the openwork. Knit one nakid, then remove each fourth loop, as the facial;
- Starting rapport, you need to remove one loop, as the facial, then to stick two facial hinges together, after that throw off the removed loop on the past. Knit in this way to the end of the row.
Article on the topic: Candy tank with your own hands: Master class with instructions and video
Mesh pattern
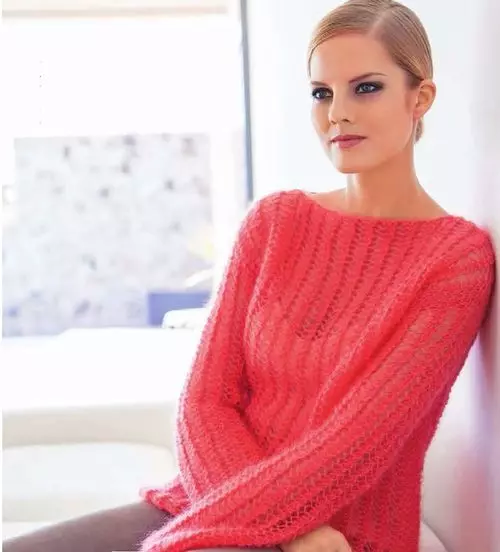
There are many options for using mesh patterns, and each is worth it to disassembled. For example, a light and attractive sweater, as in the photo below. If you wanted to add such a stylish thing to your wardrobe, let's look at how to knit it.
We will consider three sizes 36/38 - 40/42 - 44/46, the data that will be different will be given later through dashes in the same order. If only one value is, it will be identical for all sizes.
Please note that knitting must be performed twice the thread.
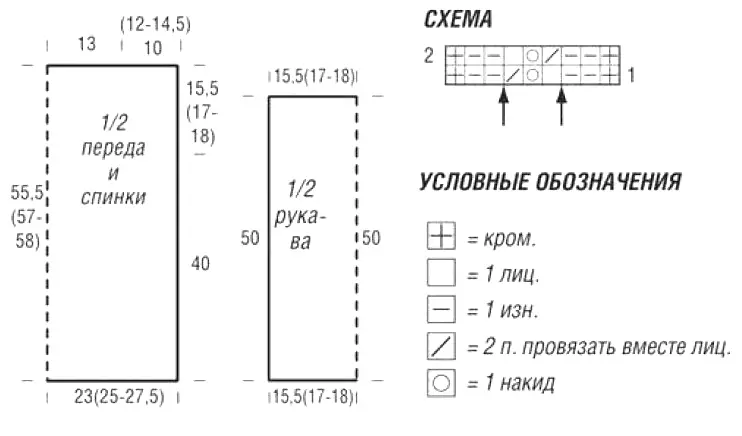
Mesh pattern will knit according to the scheme. In the right edge, the numbers are indicated by the front rows, and in the left edge - invalid. In the width, we start with the loop to the first arrows, between the arrows we repeat three loops of the Rapport, end with the loops after the second arrow. In the height we repeat the first and second row.
Knit back. We recruit 51-57-63 loops and knit the mesh pattern. When the product reaches 40 cm, that is, 88 rows from the set of the edge, mark the launch from both sides and then knit straight. After 15.5-17-18 centimeters, that is, 34-38-40 rows from the beginning of the Proucy we close all the loops. The front part knit the same as the back.
Knit sleeves. We recruit 36-39-42 loops and knit the mesh pattern. When the product reaches 50 centimeters, that is, 110 rows, from the recorded edge all the loops close.
We collect the product. We perform seams and side seams to marks. Shoulder seams for 10-12-14.5 centimeters. Then you just need to swallow the sleeves.
Video on the topic
In conclusion, a few more videos with the lessons on knitting mesh patterns with the needles, so that there are no questions left and new product ideas appeared with a new pattern.