
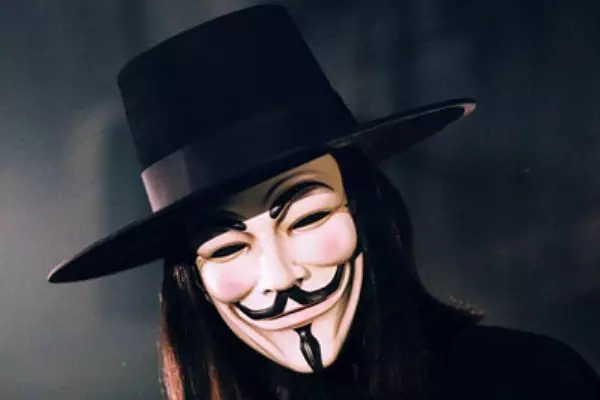
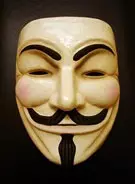
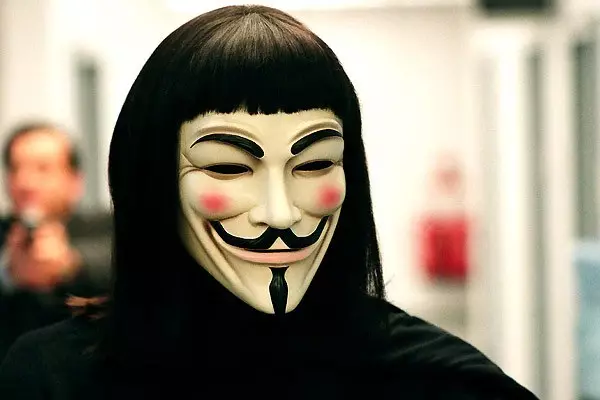
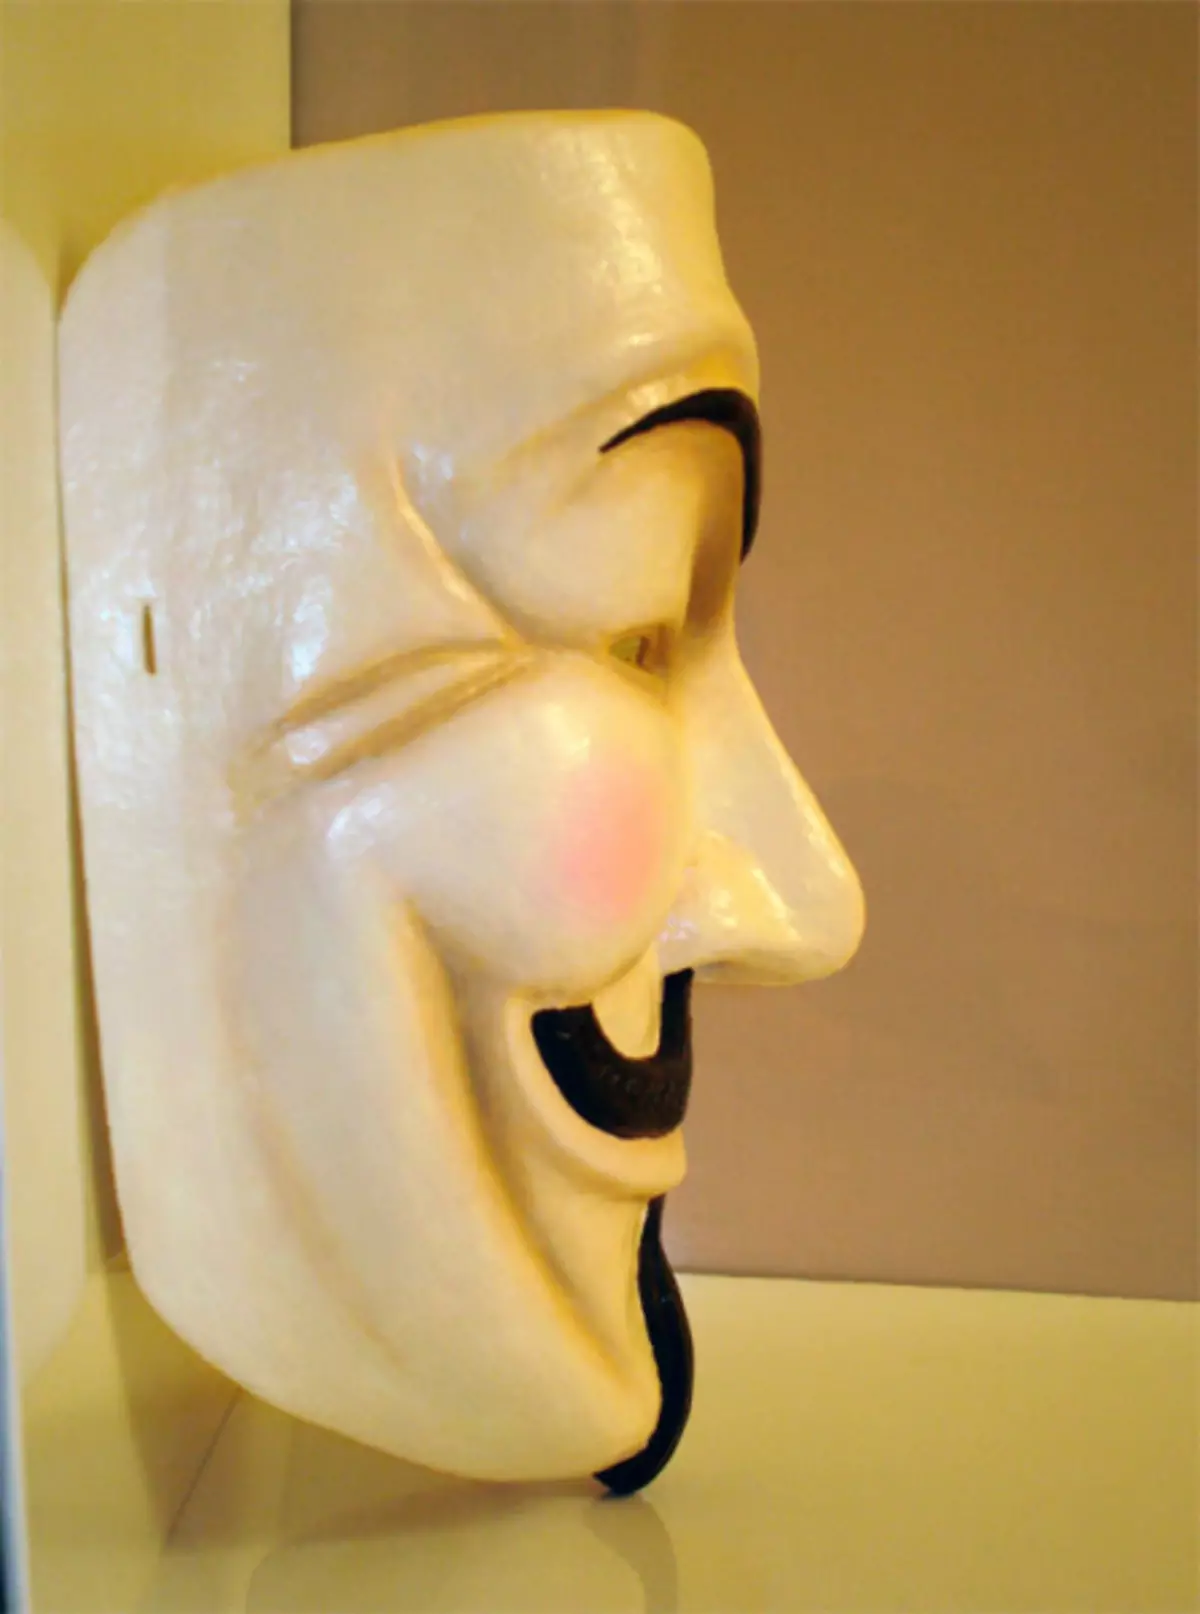
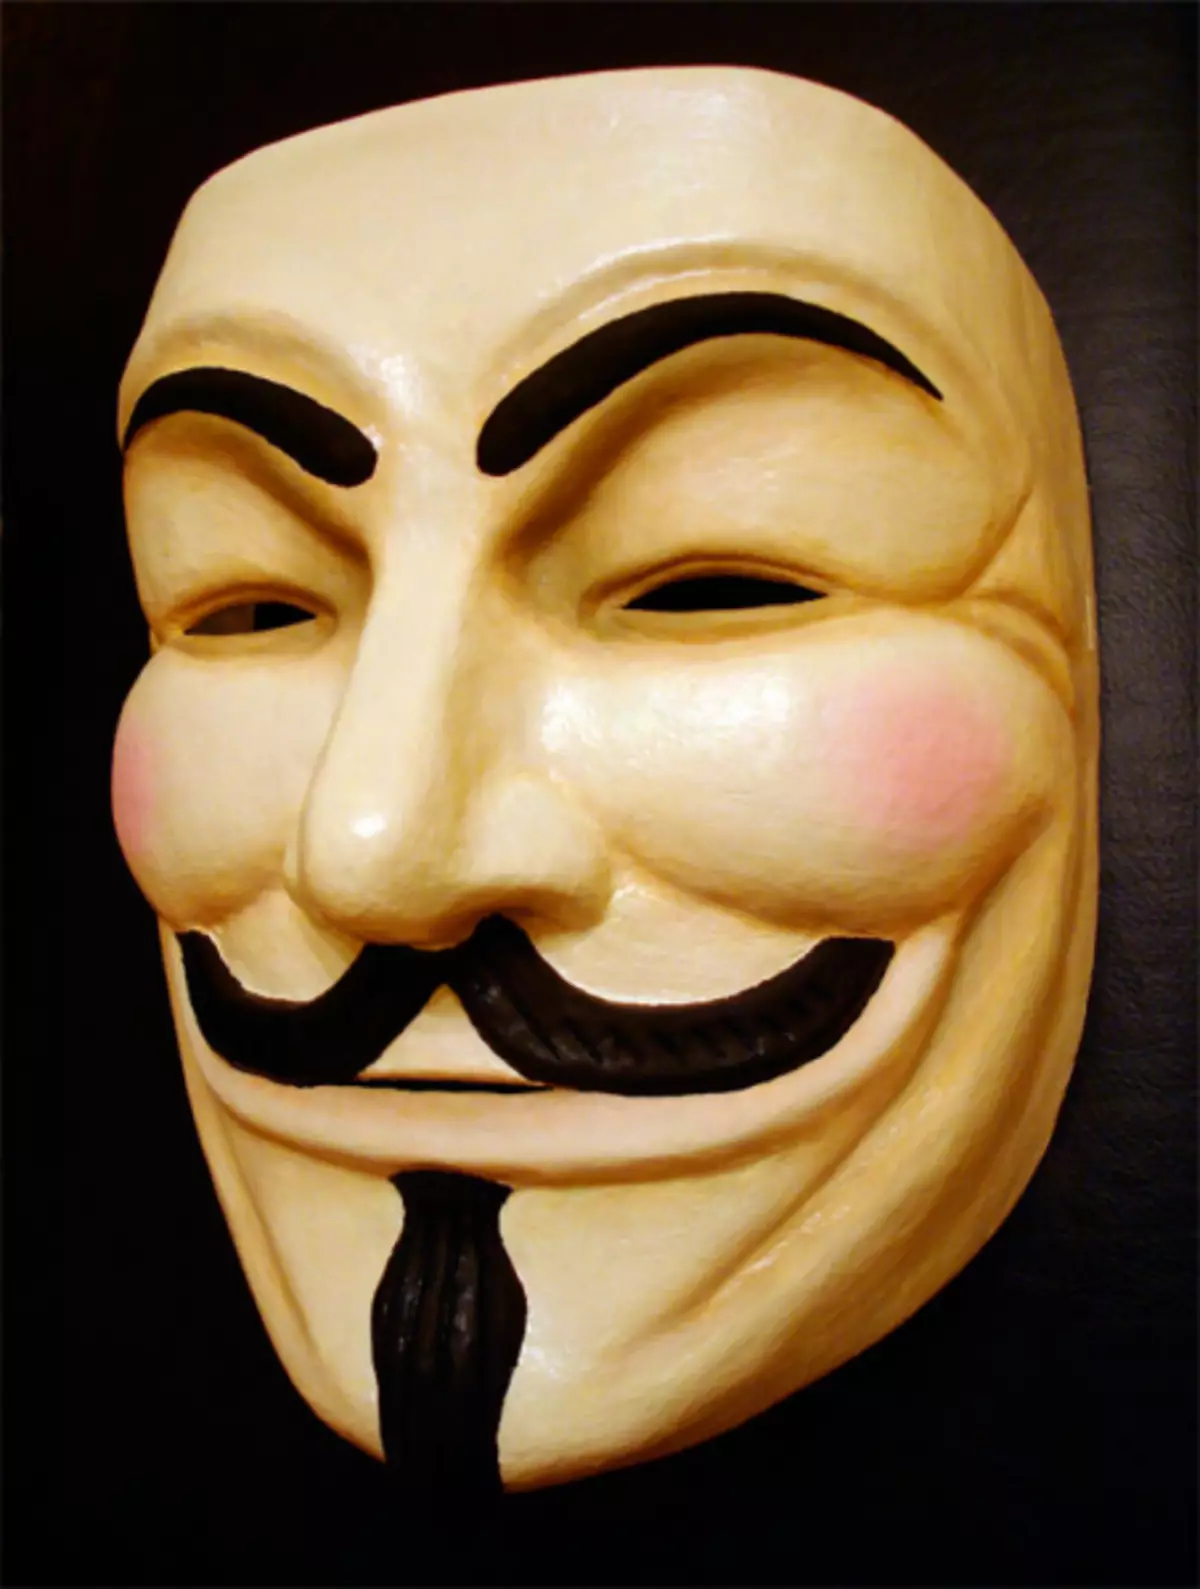
Modern youth is aimed in search of new idols and examples for imitation. One of the loved things around the world was the mask of Guy Fox. The character of the film, applied to such a mask in order to hide his true face, won great popularity. Since the open expression of his opinion is not always welcomed by society, the new generation resorts to the method of a well-known character. At the same time, the mask of Guy Fox is made with their own hands quickly and without the use of complex materials.

Now such a mask carries a certain semantic load. Understand what it means is not so difficult. Hiding the face, a person remains unrecognizable. Therefore, the mask of Guy Fox is considered an anonymity symbol.
Paper anonymous
The easiest way to get a similar mask in my arsenal is to perform it in the paper version.
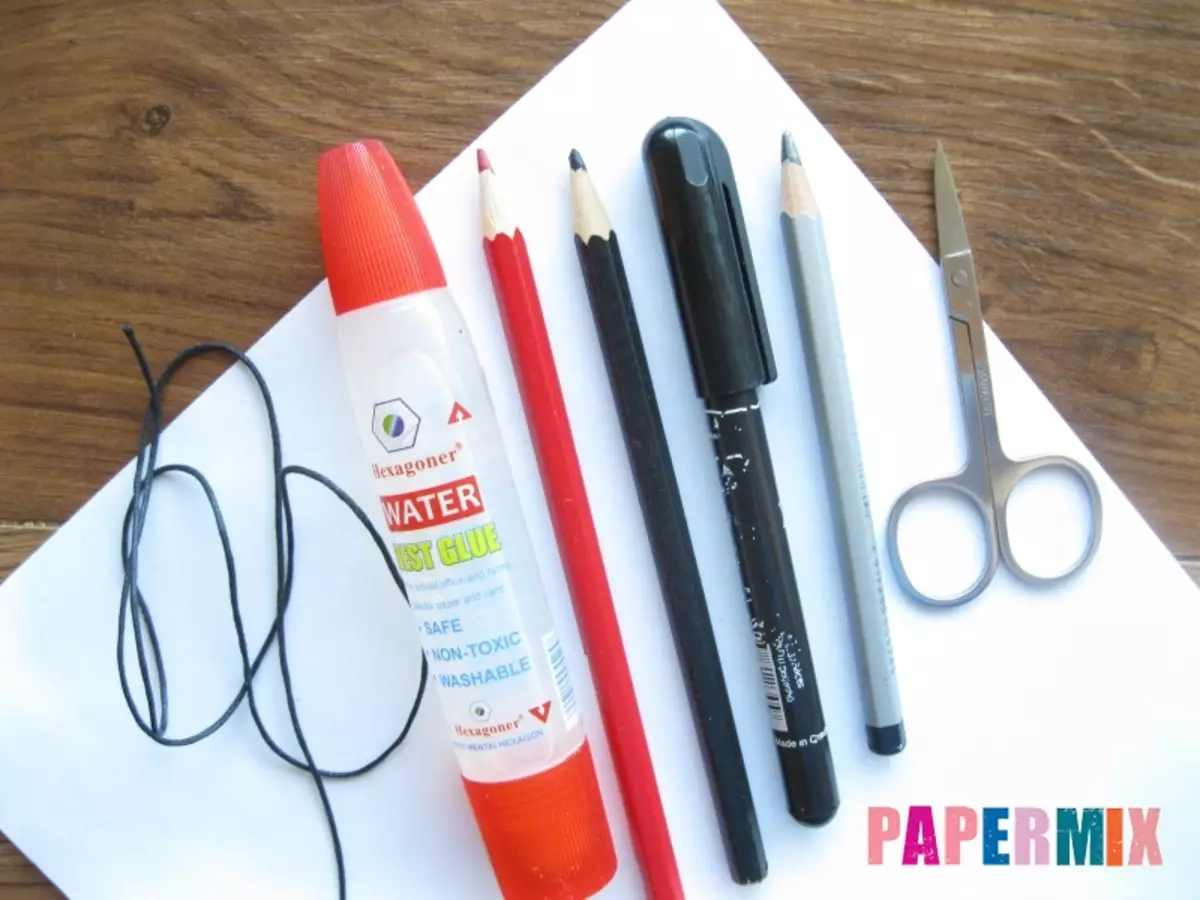
To work, you will need:
- dense paper or cardboard;
- simple pencil;
- Pencil of red and black colors (can be replaced by markers);
- Scissors are ordinary and manicure;
- Hat gum;
- glue.
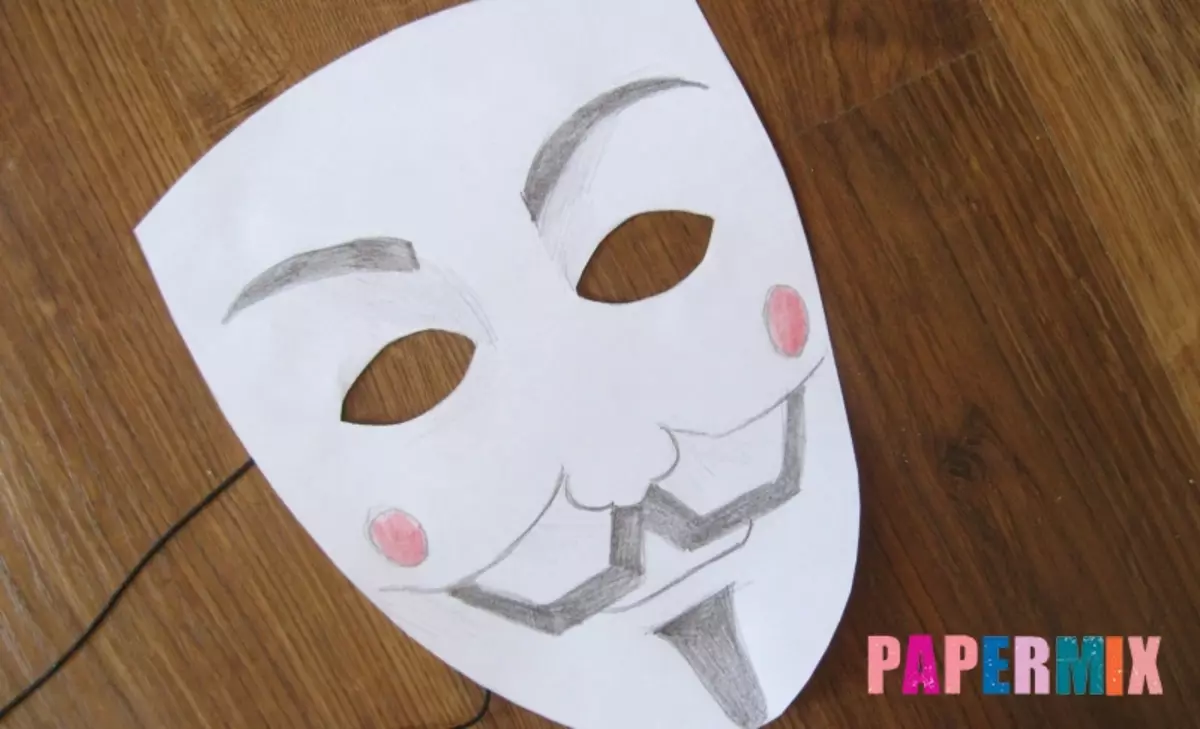
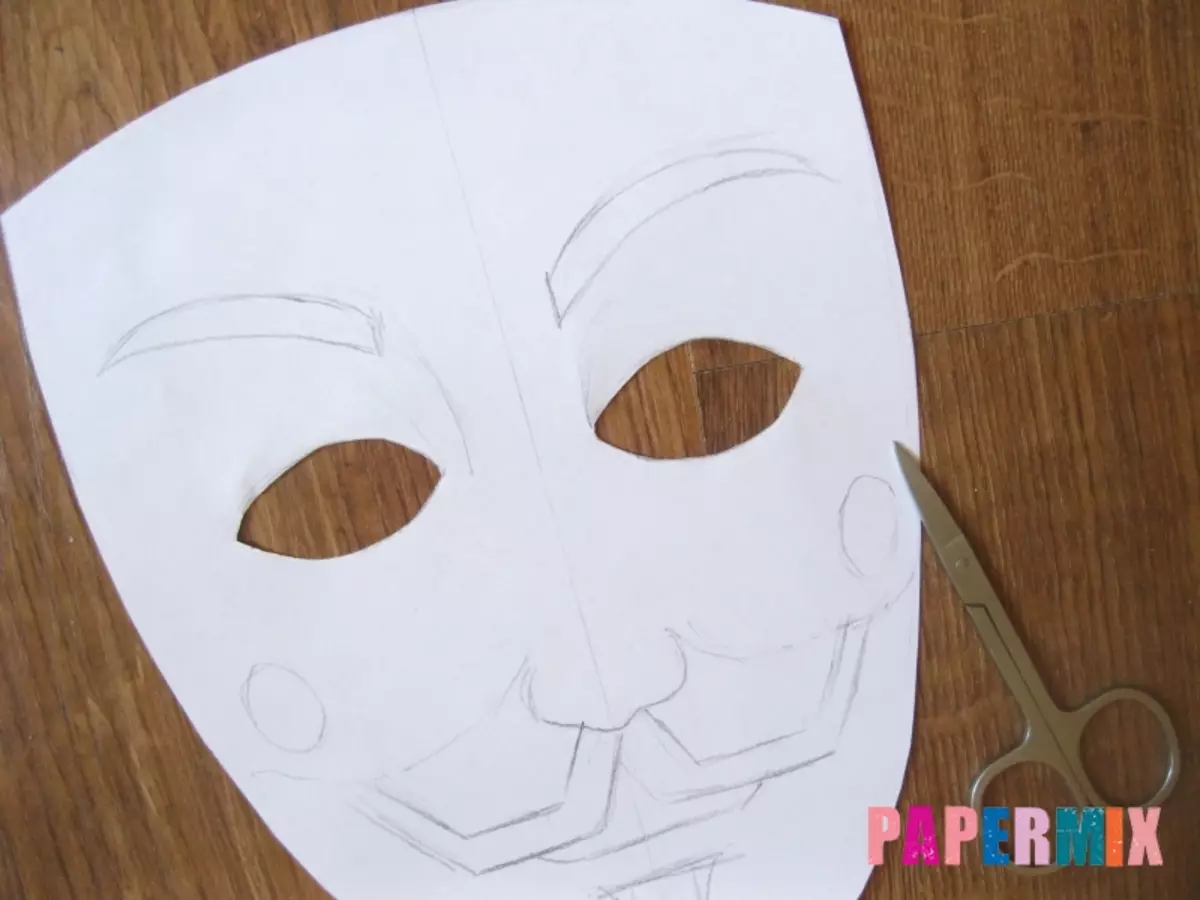
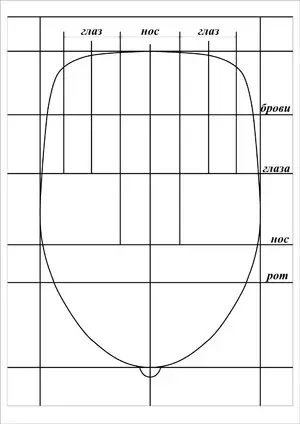
A silhouette of a face is planned on a sheet of paper.
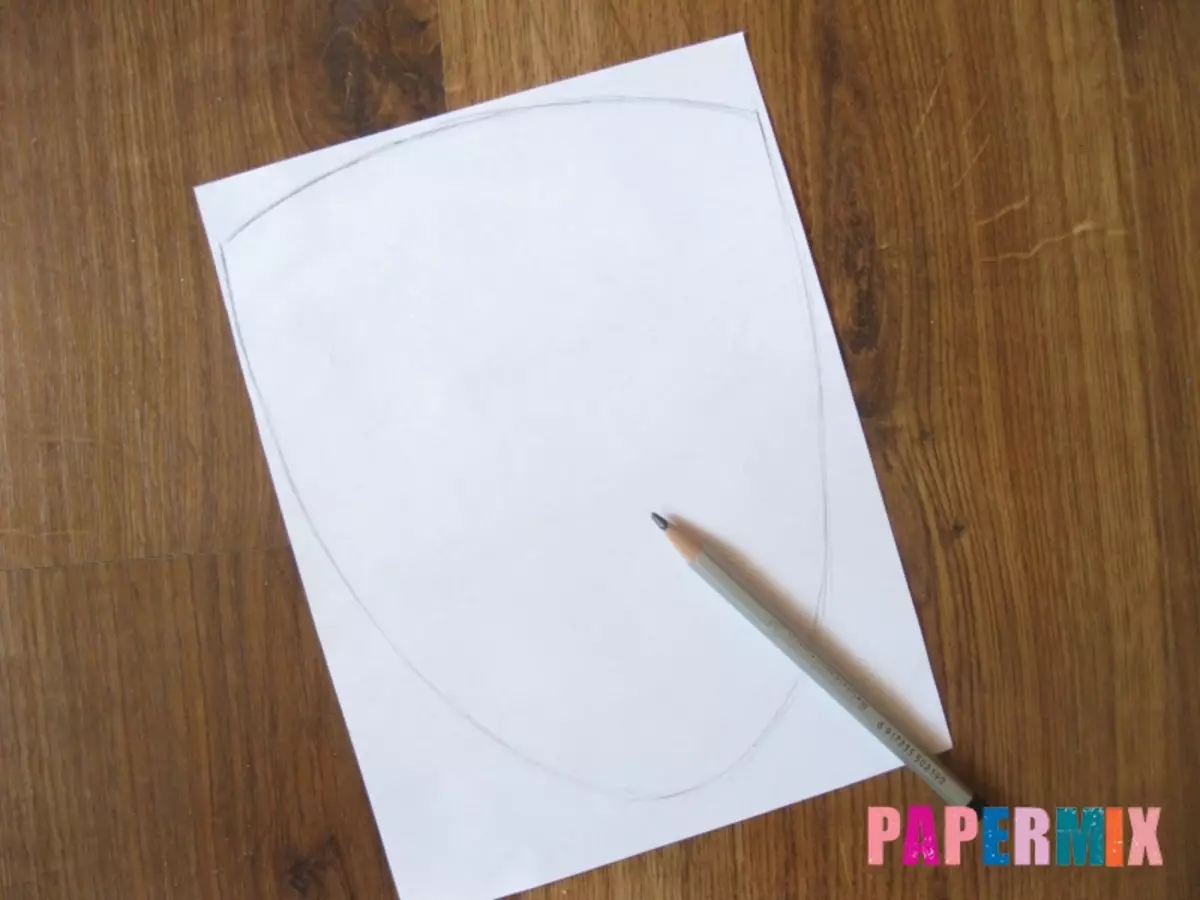
A pencil sketch of the main features is carried out. For convenience, you can divide the work perpendicular lines and, focusing on them, make a symmetric portrait.
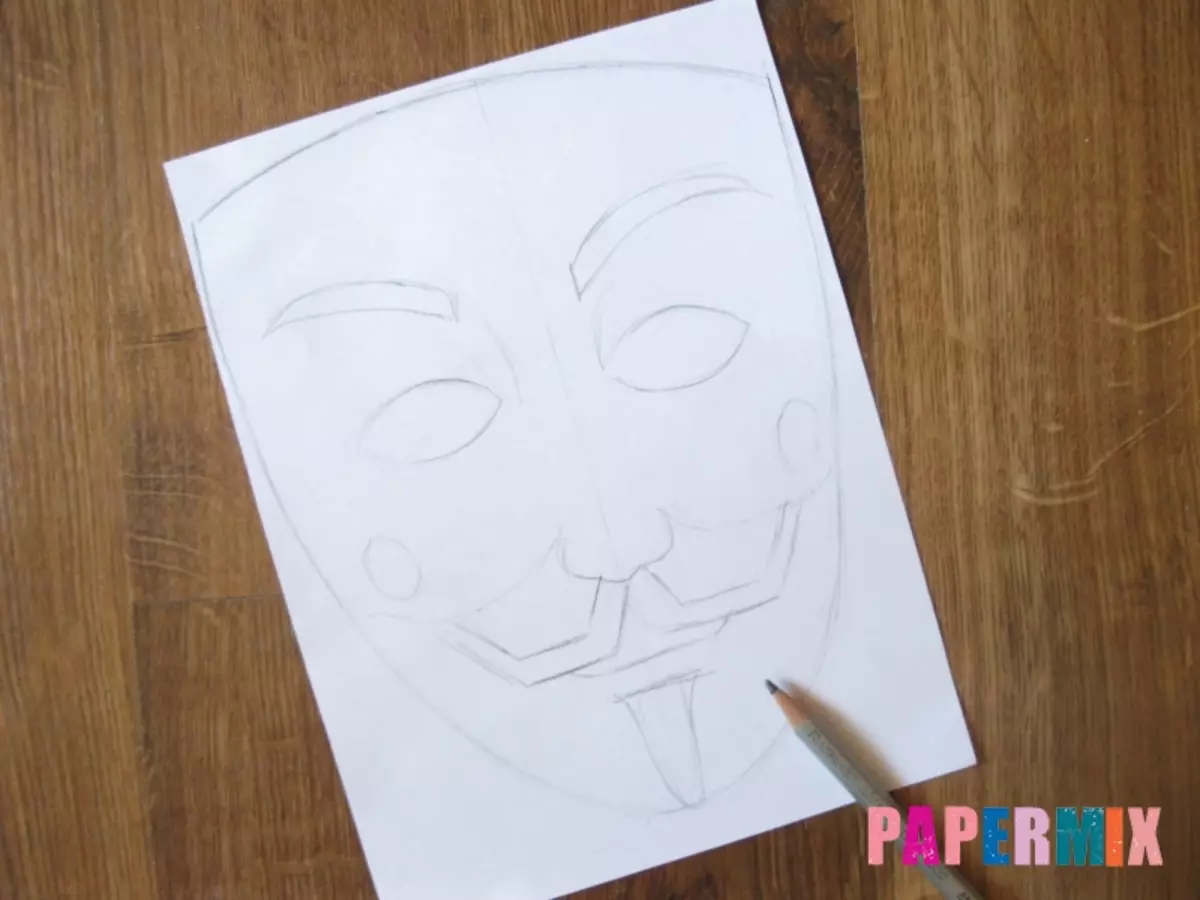
Eyes are preferably located, focusing on your own face. So the product will not deliver discomfort during operation.
A characteristic feature of the mask is the mustache and the beard of a certain form. In order to catch the similarity, you can rely on the hand-drawn original.
It can be found in the comics "V means Vendetta." After completing the pencil sketch, the mask is cut.
Manicure scissors are made of eye rubber.
Next will go easy job. In fact, it turned out the usual coloring, which should be filled with colored pencils.
Black shredded eyebrows, mustache and beard.
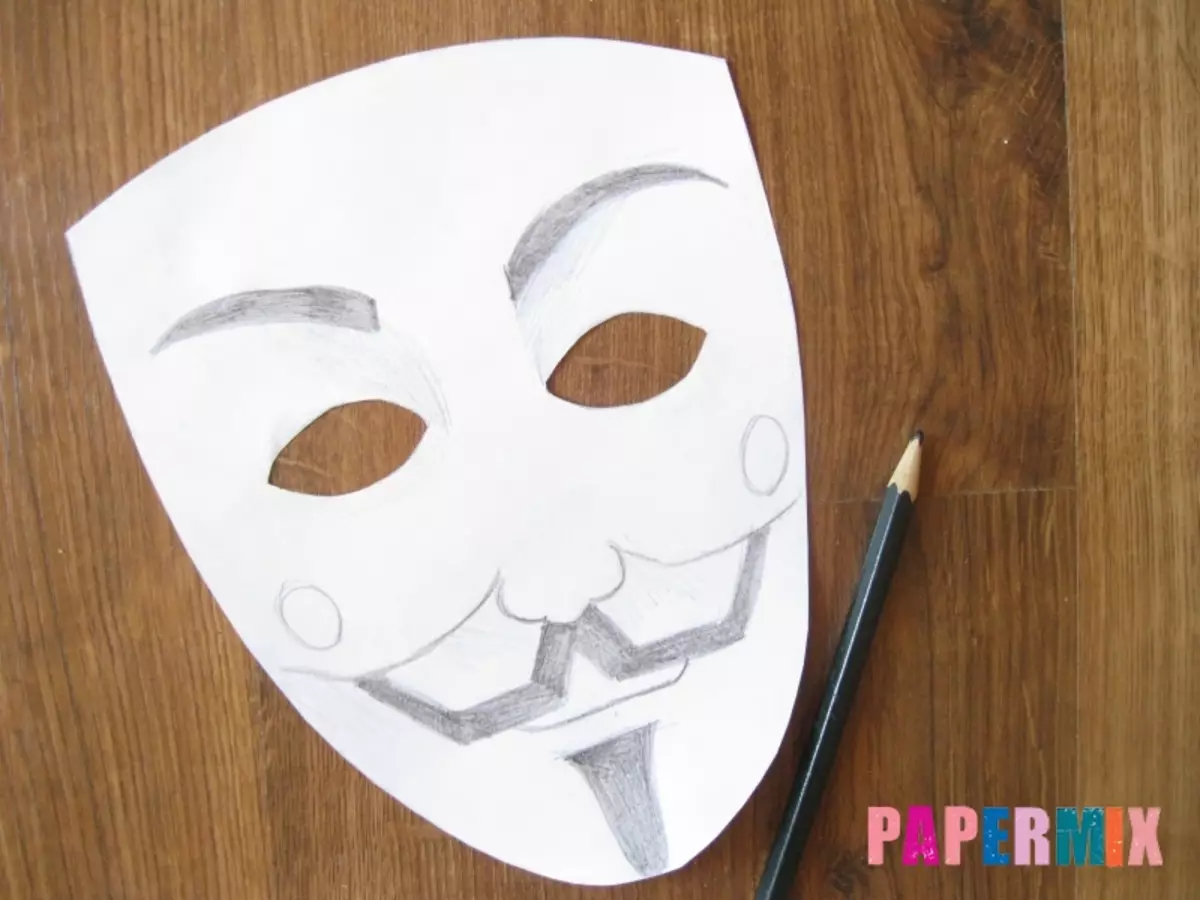
To give a light volume, a light shadow is superimposed under eyebrows and cheeks. In order not to be noticeable pencil lines, the pillows of the fingertips are shadowing.
Article on the topic: Booties-shoes crochet for kids with description and schemes
With the help of red pencils denotes a blush.
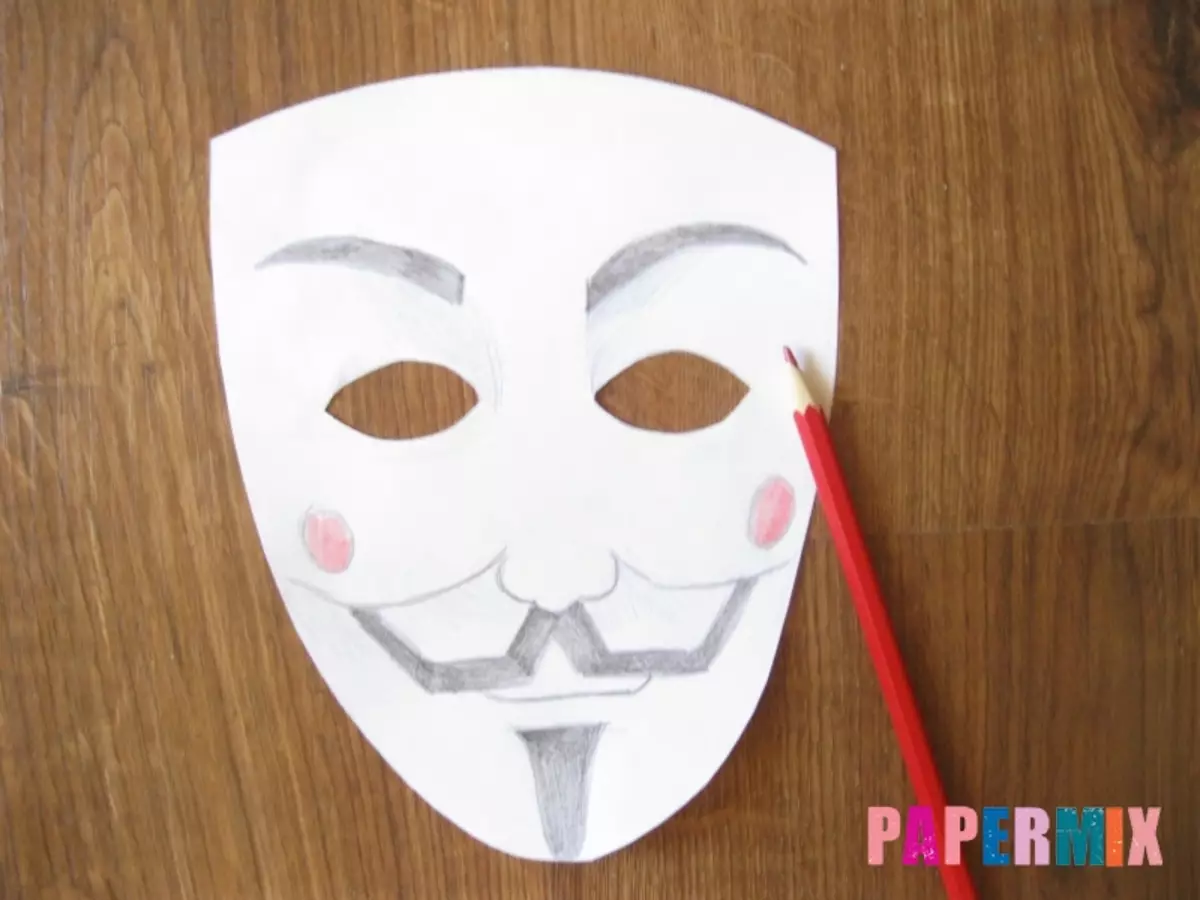
It remains to consolidate a hat with a horny side of the work.
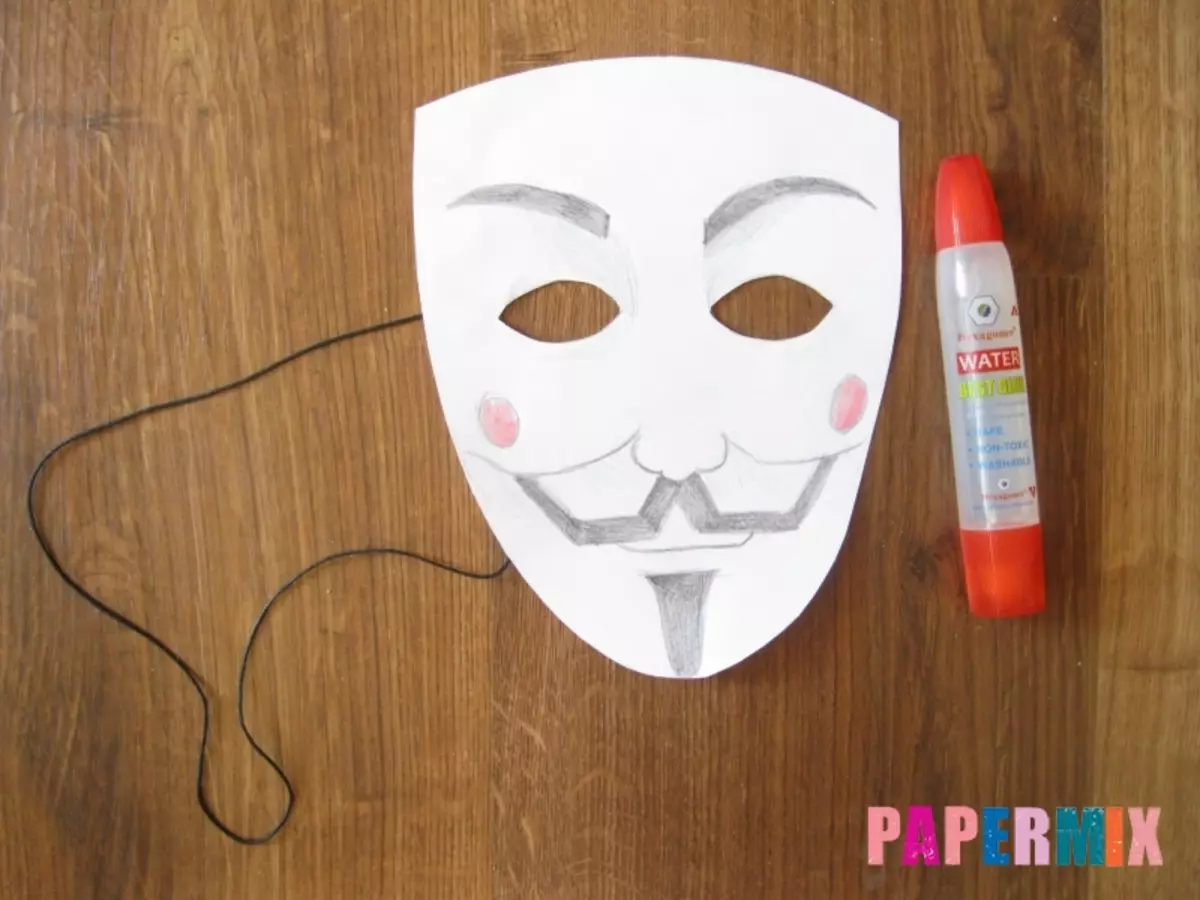
Mask is ready.
Complete option
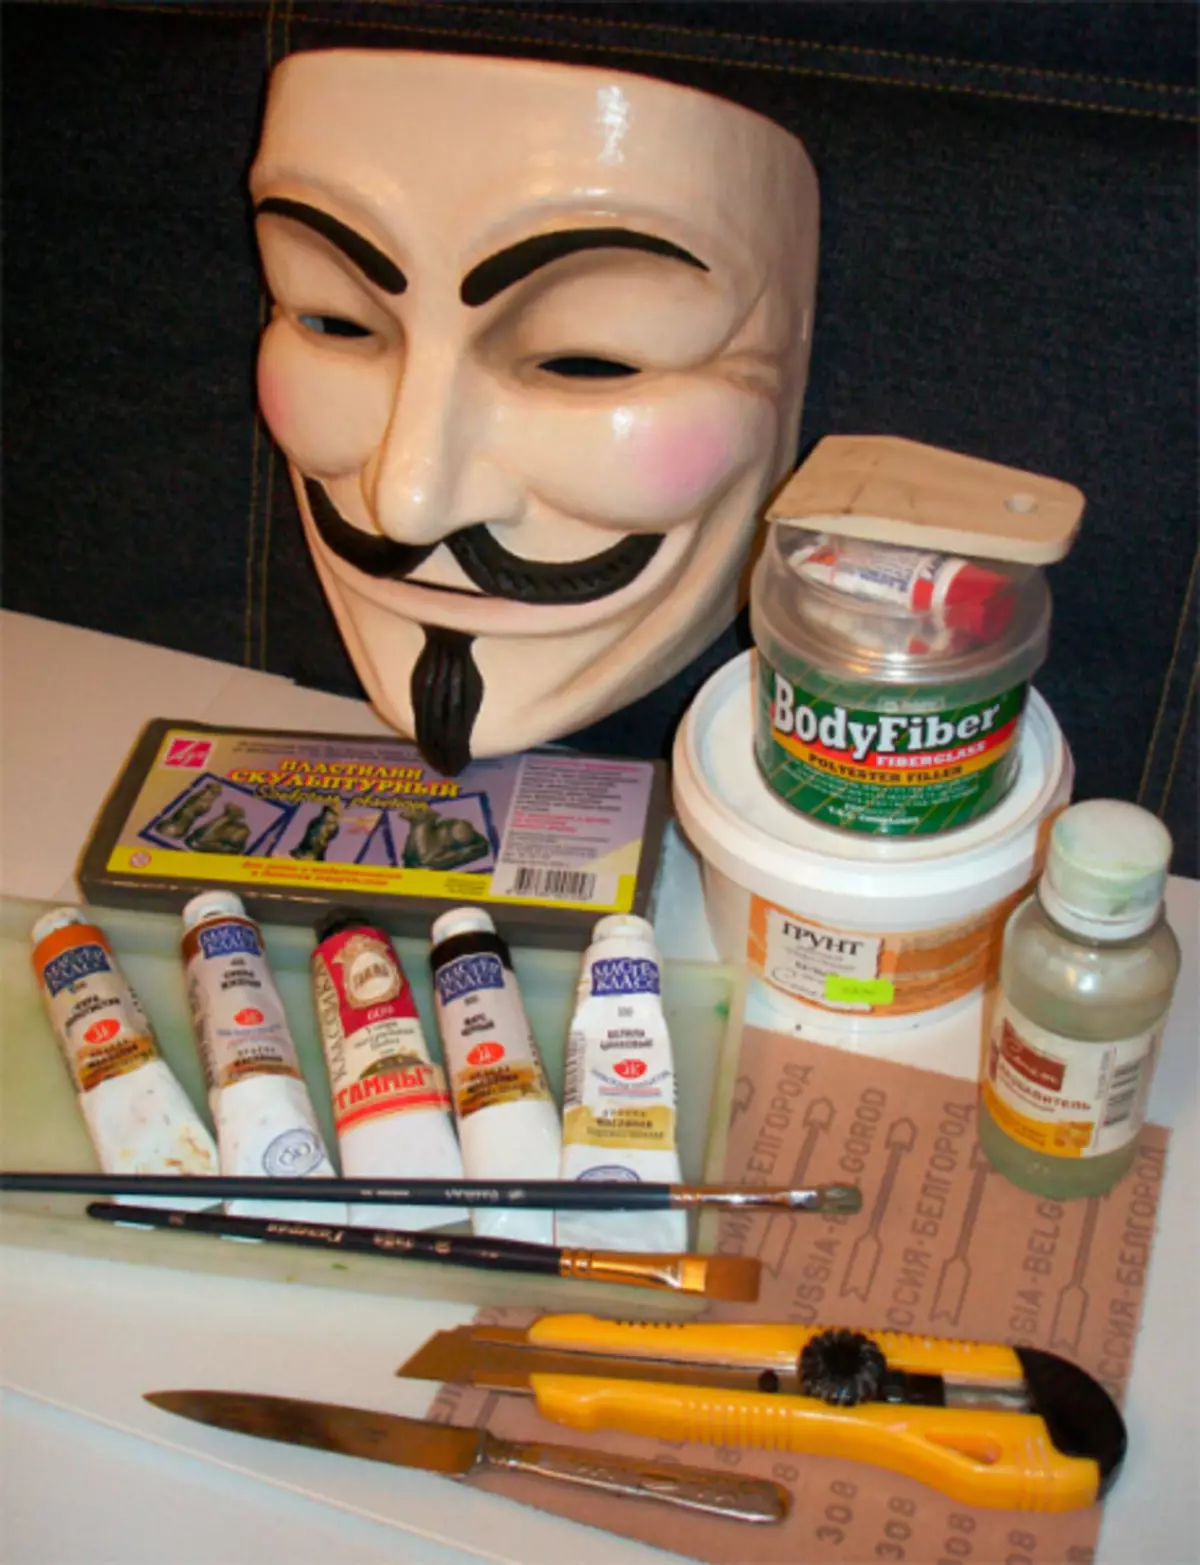
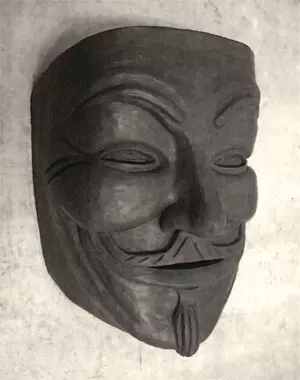
Active use of the product involves its execution of more durable materials. These instructions will be useful to masters with artistic skills.
Volume work in the papier-mache style can be a stylized element of the characteristic interior of the room.
To understand how to make a good job, you should familiarize yourself with step-by-step actions.
When performing the product, you will need:
- Sculptural plasticine (sold in art stores);
- old newspaper;
- Pleaster (or glue for paper wallpaper);
- acrylic or oil paints;
- knives with sharp and rounded end;
- stationery knife;
- brushes;
- bandage;
- Thin gum.
To achieve perfect similarity with the original, it should be studied as much as possible photos from different angles.
Before starting work, measurements from your own person are filmed: width, height, nose, eye.
On a note! It is preferable to apply a schematic marking on paper. It will simplify the work on the product.
Lrack is carried out on a solid foundation. Of the heated plasticine, you should portray the volume of the mask.
During the work, it is advisable to constantly check with the original. Therefore, it is better to keep his image before your eyes.
When the general shape is flattened, attention is drawn to the details. Using knives, the necessary correction of the workpiece is carried out. After elimination of all irregularities, the papier-mache layers are applied.
Before this, the newspaper is arbitrary to pieces from 2 to 4 cm. The initial layer consists of paper and is superimposed without glue. Slices of newspaper are pre-wetted in water and are seen to a plasticine base.
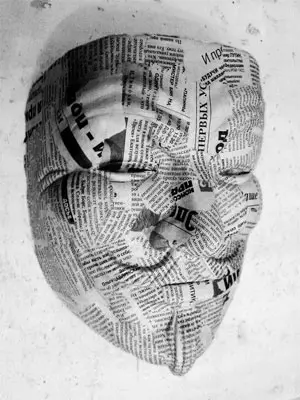
For the next two layers, the newspaper is foaming into the hubber and manually smoothes on the workpiece, repeating all the contours of the flattened face. The fourth layer of work is a bandage. It is necessary to increase the strength of the product.

The mask is visually divided into parts by the width of the bandage. Alternately, each part is lubricated with a hub, after which the bandage is superimposed and is applied. Bandage strips should go a little on each other. The following three layers are made from the newspaper in the manner described above. On the eighth layer, the billet is again processed by a bandage.
Article on the topic: Bead rings and beads do it yourself: Schemes for beginners
A total of 14 overlays are carried out, where each fourth layer is performed by a bandage. Surplus newspapers and bandages leaving the contour of the product is cut.
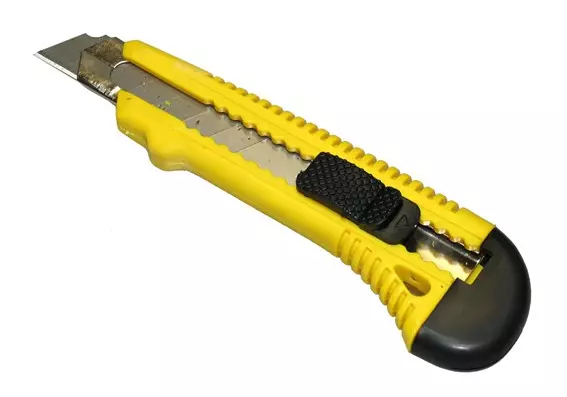
With the help of a stationery knife, rubies are carried out in the eye and nostrils area. The workpiece should be well dry. At the edges of the mask are made of neat cuts between the layer of plasticine and papier-mache. So it will be easier to remove the mask from the base.
The back of the product is cleared of plasticine and non-flimple paper residues. On the sides on the inside, small holes for gum are made.
So that the mask looked presentable, you can get excavated by her skin and apply a layer of primer for canvas. At the last stage of the work, the billet is painted in a corresponding way.
If desired, the paint layer after drying is covered with varnish.
If the work is properly performed, the product will look no worse than the finished ceramic mask sold in stores.