
Photo
Plasterboard has long been an indispensable material for repair. With the help of it, the surfaces of the walls are aligned, and modern multi-level ceilings are performed.
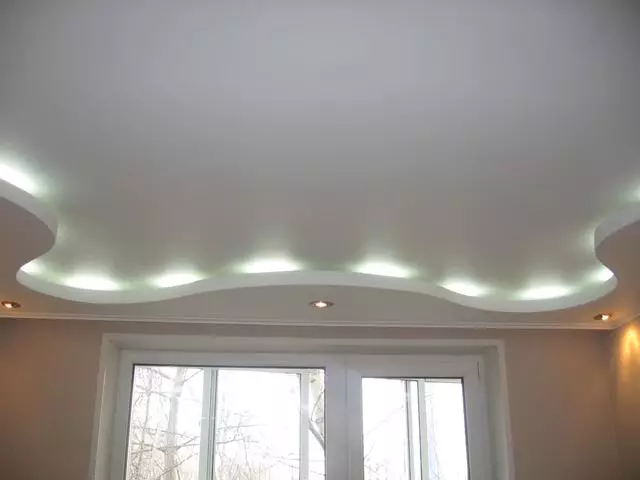
The ceiling of plasterboard is popular due to the simplicity of installation and good appearance.
Plasterboard has another "dry plaster" name. It is represented by a gypsum mixture concluded between the layers of construction cardboard. Depending on the quality of the material, the sheets are divided into such subgroups:
- Normal plasterboard sheet - GLC;
- moisture-proof sheet - G Clac;
- refractory sheet - GKLO;
- moisture-fire-resistant sheet - Globo;
- Hypan fiber leaf - GVL.
Thanks to such a variety, this material can be used for partitions, the construction of the arches, alignment of the walls even in the bathroom. But the greatest popularity of GLC acquired in the equipment of the ceilings. The ceilings from GCLs are single and multi-level, wounded and painted, with illuminated and without, with a straight and complex form.
Tools and materials for repair of the ceiling of plasterboard
To perform the repair of the ceiling of plasterboard, you will need such tools and materials:
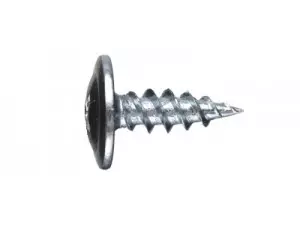
When repairing a plasterboard ceiling for connecting profiles, self-bugs are used.
Plasterboard. Standard sheets of sheets - 2500x1200 mm. It is necessary to calculate the surface area and calculate the desired amount of material. The essential advantage of drywall is that during installation there is a minimum of waste, as the sheet can be lined in any direction.
- Frame guide profiles: galvanized guides Mon 27x28 and ceiling profiles of PP 60x27.
- Suspension for fastening the ceiling profiles. They are straight and suspended with wire taiga.
- Dowels are nails for mounting the frame to the concrete ceiling and walls, the size of 6x40 mm. If the ceiling is wooden, then the suspensions are fastened with self-draws.
- Saw-bugs. They are used to connect profiles.
- Conventional tapping screws for mounting drywall.
- Tools for work: Perforator, drill on concrete with a diameter of 6 mm, screwdriver, Bulgarian for cutting profiles, water level or laser level, scissors for metal, construction knife.
Sheet material is different thickness: from 6 to 12.5 mm. Slim drywall for ceilings is used in the manufacture of curvilinear surfaces, and thicker - for aligning surfaces.
For the ceiling of plasterboard it is better to choose a material with a thickness of 9.5 mm, it is it called the ceiling. Thick plasterboard for ceilings will be heavy, which will require more powerful profiles and rigid fasteners.
Montage of plasterboard with your own hands
Performing the repair of the ceiling of plasterboard with their own hands has such a sequence:
Fastening required for the framework of the frame under the plasterboard ceiling.
- ceiling markup;
- Mounting frame;
- Mounting drywall to the frame;
- Putty, painting, wallpaper paste.
First you need to decide which the magnitude the ceiling is lowered from the main one. Typically, this distance is 100-200 mm. The suspended ceiling is good that in the gap between the concrete and plasterboard surface, you can hide the wires for point and main luminaires.
With the help of a level or laser level, we mark the suspended ceiling line from drywall and make marks on the walls. According to these lines, guide profiles are fixed. The step between the mounts should be about 400 mm. If additional elements are planned in the form of boxes on the ceiling, then additional profiles are attached to this.
Next, you should make a markup to install the suspensions: across the room is drawn parallel lines with a pitch of 450 mm. On the first line marked with a pencil with a step of 500 mm. On the second transverse line, the first label is made in 250 mm from the wall, and the following labels will be increments of 500 mm.
The third line and other odd are placed similarly to the first line, and the fourth and all even - similar to the second transverse line. Thus, the markup is made in a checker order. This will ensure the rigidity of the frame mount.
You can build a frame using suspensions or guide profiles in the form of the letter "g".
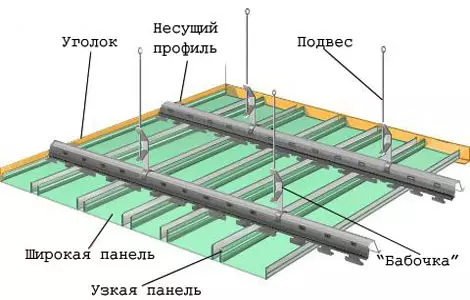
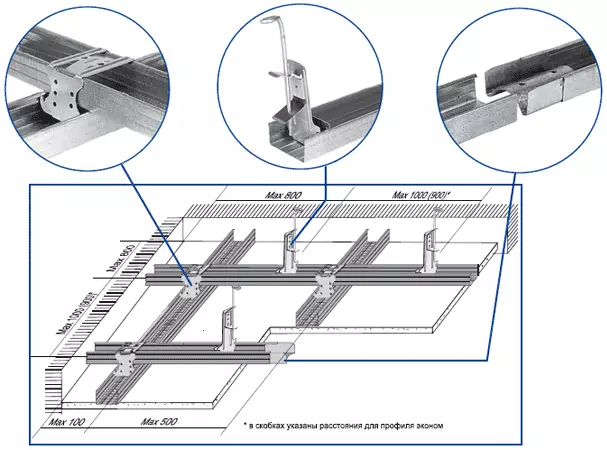
Diagram of the framework of the frame under the ceiling of plasterboard.
The suspensions should be fixed in the marked points on the ceiling using self-tapping screws or dowels. Next, proceed to securing carrier profiles. Their length should correspond to the starting frame located around the perimeter of the room. To do this, measure the width of the room and the subtraction of 10 mm from this value is the length of the ordinary profiles.
Beaching profiles are inserted into the suspensions and secured with self-draws. In this process, it is important to observe the horizontal profile. To adjust the profile location, you need to change the position of the attachment. To control the horizontal, it is best to use a laser level.
So that the framework is durable, transverse profiles will be little - it should be enhanced by the longitudinal elements. For this, the material of the guide profiles is cut into pieces of 400 mm. They are fixed to galvanized crossing with increments of 500 mm special fasteners - "crabs".
Final works of repair of plasterboard ceiling
The main part of the work is completed: the frame is ready and its horizontality corresponds to the generally accepted standards. Now you can sow it. For mounting the ceiling of plasterboard, you will need at least two people: one mounts, and the other holds the sheet. If the ceiling consists of several parts, then the GLC is pre-constructed and cut.
The sheets are installed close to the walls and jack to each other, across the longitudinal profiles. Plasterboard is attached to the carcass with self-draws in a step of 200 mm. At the same time, the hats of hardware should not be recessed into the material, since the rigidity of the frame is lost.
The seat of the sheets of plasterboard sheets should be sickled.
The place of the junction of plasterboard sheets should be sickled. This technique will ensure the smooth surface after putty. Places where screws are screwed, too, should be processed.
Now the surface is ready for putty. The ceiling in two layers of the starting mixture "Knauf", and after the finishing layer is applied. The layers of putty should be applied with an interval of 1-2 days so that each layer is good dry.
After the ceiling of the drywall is completely dry, it can be painted or hugged by wallpaper.
For painting of this surface, acrylic paint on a water-emulsion basis is suitable. Such a coating falls smoothly, dries quickly and does not have a sharp smell. Color of paint can be selected from different shades. The paint on the ceiling is applied with a short pile roller or a pulverizer if the walls are not yet processed.
There are several tips for performing a ceiling of plasterboard with their own hands:
- Dowels should choose metal, not plastic.
- Standard suspensions are good to use when the ceiling is lowered by no more than 20 cm. If the distance from the main ceiling is larger, then instead of standard suspensions you can use the segments of the guide profile of PP 60. Details are enough to bend under 90º and a short side to attach to concrete.
- Electric pipes are paved according to the pre-drawn scheme. They must be isolated in the corrugation.
- Before lining the frame, check the correct operation of the electrocommunications. To do this, connect the lamps and sockets and check their work.
Repair of plasterboard ceilings is a modern look at the finishing of the premises using the minimum number of tools, experience and time.
Article on the topic: Pros and cons of new buildings