Having a cottage plot, always want to set it out, and even somehow differently. However, garden decorative elements are not cheap, and durable does not differ.
People with a developed fantasy can make original crafts for a cement garden, which differs not only to high-resistant to various kinds of influence (frost, hail, sun, water), but also accessibility (for an acceptable cost you can buy in any construction store).
Nuances of work with cement mortar
For decoration and designer supplement, you can use flower pots, kashpo, figures of fairy-tale characters or objects of plant world, made by their own hands from cement. This material cannot be called naughty, and most have a large or small experience with it. Nevertheless, there are several important rules that need to be observed that the crafts from the cement mortar are high-quality and durable.The technology of preparation of the mixture is as follows. . The main components are prepared: cement, building sand, water and tile glue (for better plasticity and reducing the risk of microcracks). 2 parts of the sand takes 1 part of the cement (for greater strength you can take 1 part) and 1 part of the glue. Lastly, water is added in small portions to the consistency of thick sour cream. With such a mixture, it is convenient to work: it does not flow and at the same time enough plastic.
All cement products require long drying. Frozening can last up to 7 days. So that the surface does not crack, the finished creation is covered with polyethylene. To give the product a beautiful and right form, the foundation is located on the hill of the sand or blocking into it (depending on the idea), but not on a flat surface.
After the figure is completely frozen, the shape must be covered with primer and only after that you can apply paint or varnish. If the handicraft has roughness and other irregularities, it is finalized by sandpaper and a file.
In addition to the cement solution, a concrete is sometimes used, which is distinguished by the presence of large fractions (pebbles or crushed stone) and increased strength. Crafts from concrete for giving can be represented by large monolithic boulders, as well as this material it is convenient to use to create a base for various compositions (a platform for a fountain, pedestal for sculpture, a terrace for flower pots and so on).
Another similar material - plaster. It is not so durable as cement, but more plastic and decorative. With it, you can create hollow figures. For garden creativity, molding (sculptural), acrylic and architectural species are used. When working with this material, it is necessary to take into account its rapid frost. Very often, it is recommended to add to cement mortar when creating sculptures.
Article on the topic: Forged doors: Photo options for finished products
Interesting ideas for beginners
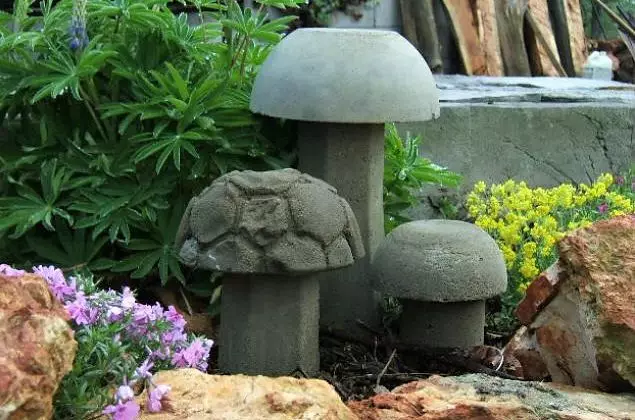
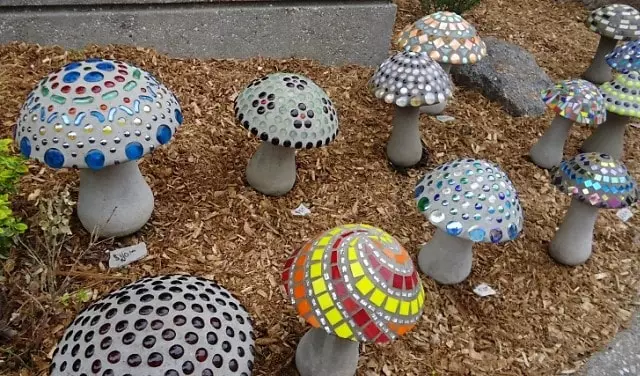
Without the experience of using cement in decorative purposes, it is better to start with something simple that does not require the skills of modeling and obtaining the desired consistency. The first exhibits in your garden can be cute fungi, multi-colored balls or original colors pots.
For the manufacture of the mushroom, you will need an old rubber ball (the size of the cap will be dependent on its size), a plastic bottle (it becomes the basis for the leg, its size should be proportional to the hat), a metal bar for fastening the cap to the leg. The ball is cut into two halves, one of which is installed in the sand bucket and evenly pressed. Next, cement mortar is poured into the resulting form and levels.
The plastic bottle is cutting off the bottom and neck and insert into the filled form in the center, immersing 1 to 2 cm. Then, using a long iron bar, connect the future leg and the mushroom cap and poured the cavity with a solution inside the bottle. For several days, the product should be bought, after which you need to remove a piece of a ball and a plastic cylinder.
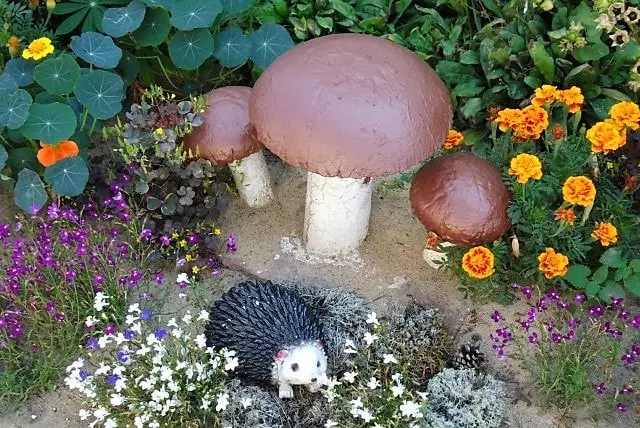
After another day, the product can be covered with paint and decorate with different elements. Speeciously look at the plot of mushrooms of different sizes as a small clearing. It is also worth noting that your fantasy can prompt you to use other tanks (bowls, jars) and methods for making garden fungi.
It is enough just to make an opening ball that seems like easy and air. For the base, the air ball is used (the size of future figures depend on how much you infield the ball). Next to the finished solution is placed any rope and then wipe the ball.
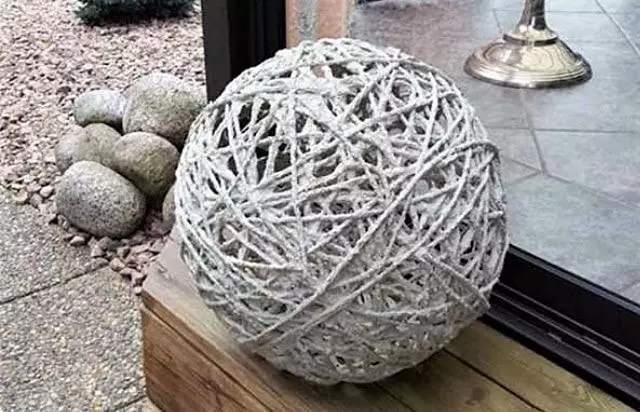
It is not worth the basis too tightly, you need to leave sufficient holes for further extraction of pieces of a bundled ball. When the product can be driving to decorative coating.
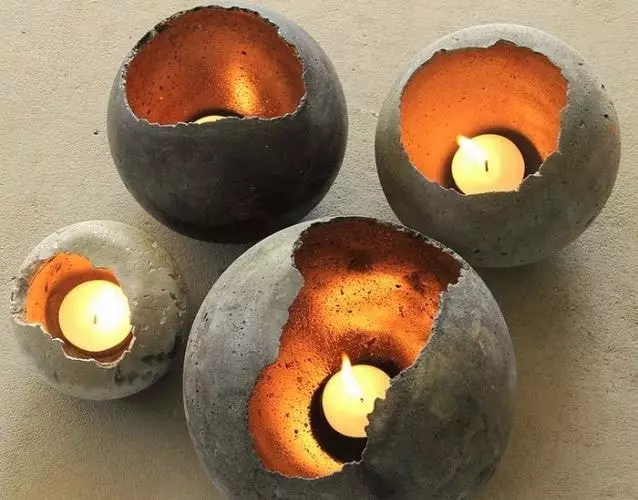
If you cover air balls with cement mortar with adding in a small amount of gypsum for faster frosted, you can get original garden lanterns or flower pots.
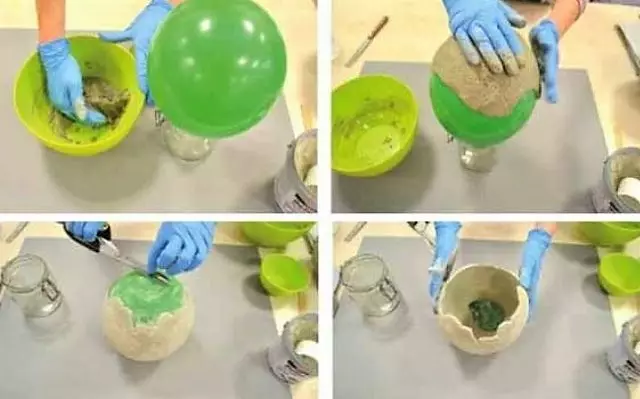
By such a technique you can make vases for dried sets. In this case, decorative staining is exposed not only to the external, but also the inner side.
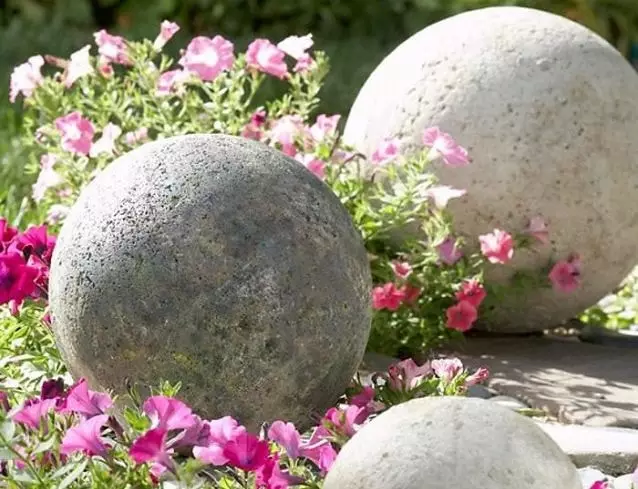
If you pour the solution into a small hole of rubber balls, you can get monolithic balls of different sizes. Painted in different bright colors and chaotic scattered in the garden, they will become a concise and stylish decoration.
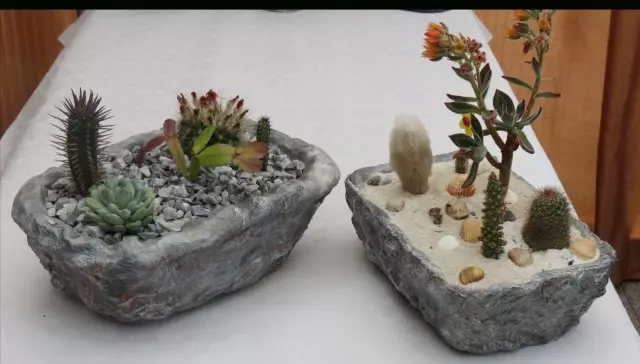
Using plastic containers, you can make kashpo for Cacti Tolsthenka and Crassus Ovat. The container is wrapped with a polyethylene package, and the package with clay or sand is placed inward so that the container holds the shape. Next, it is covered with cement mortar. After complete drying, all the auxiliary materials are retrieved, the drainage holes are done in the bottom with the help of drill, the product is ground and covered with paint.
Article on the topic: What a coating is better for a water warm floor: Masters reviews
It is very easy to make a flower vase using a plastic bucket or a vase and another suitable container.
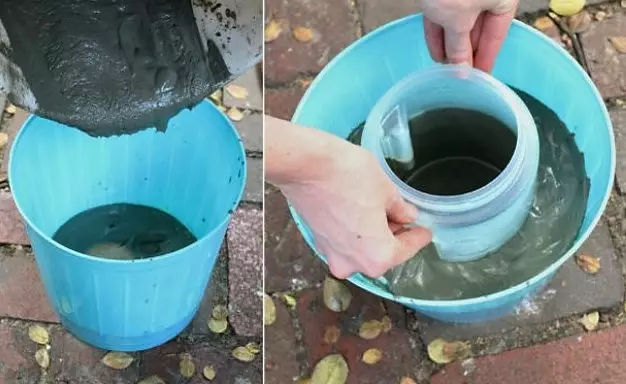
One container is inserted into another, a solution is poured into the space between them. As a result, it turns out a good quality that you can additionally decorate your fantasy fully.
Attractively look at the flowers planted in Kashbo from crossed hand palms. To create such a masterpiece, use ordinary rubber gloves, which are evenly filled with a solution. For stiffness to each finger you need to insert a rod from thick wire. In order for the product to be quality, it is impossible to form air bubbles.
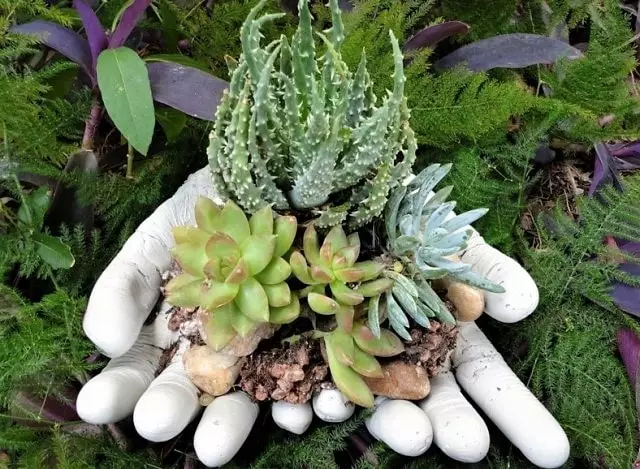
When the gloves are filled, they give the desired shape and fixed. After a few days, the rubber is cut and removed. If you need to connect two palms, then for this use the same solution. At the final stage, the surface is polished with emery paper, ground and painted.
Complex shapes with frame
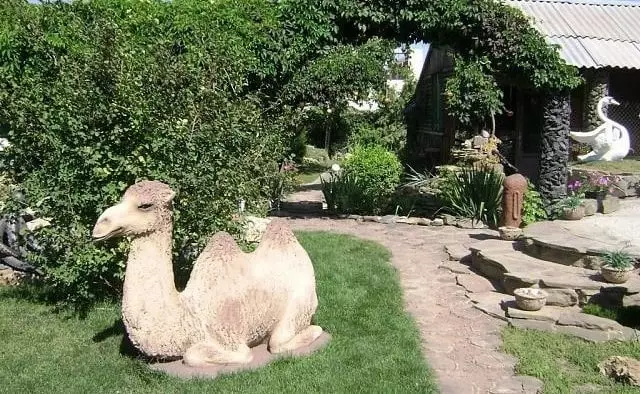
More engobally decorate your country house with sculptures of animals and mythical characters. Such creations imply a preliminary manufacture of durable frame and layer-by-layer applying cement mortar.
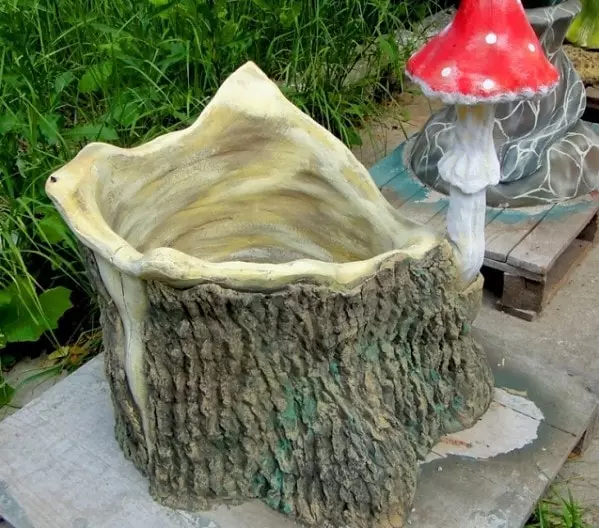
Interesting colors vases can be done using buckets from building mixtures. At the first stage, a suitable container is cooled with a plaster mesh and is covered with a thick layer of cement. At the second stage, it is necessary to fully solve decorative adjustment, making it imitation of an old stump with natural wrinkles on the crust.
Near the artificial reservoirs will appropriate the monolithic figure of the hippopotamus. The place for it needs to be determined immediately and thoroughly align, because in the future the figure will be stationary.
Two elongated plastic pelvis are suitable as a frame, which must be copped with wire. Another option is possible: a thick cement solution is covered over a heap of broken brick or rubbank.
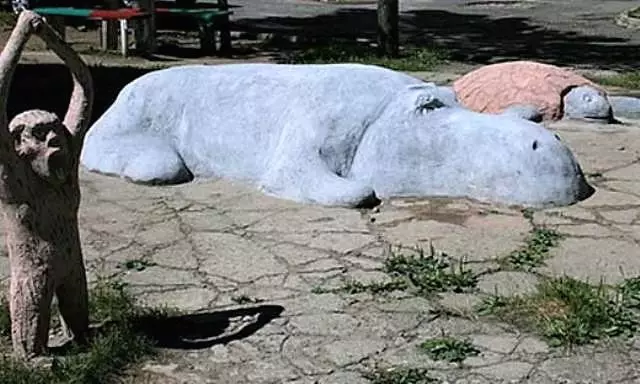
The figure itself does not contain complex elements and easy to execute. After frozen, the product is treated with pinching impregnation and dry pigment for concrete, rubbing powder with a rigid sponge.
More complex sculptures are performed in several stages: 1) manufacture of wire frame and foam or containers; 2) covering the workpiece with a plaster grid; 3) the applix of the mixture into several layers; 4) the formation of small parts (facial features, special texture, folds of clothing, etc.); 5) primer and painting of finished work.
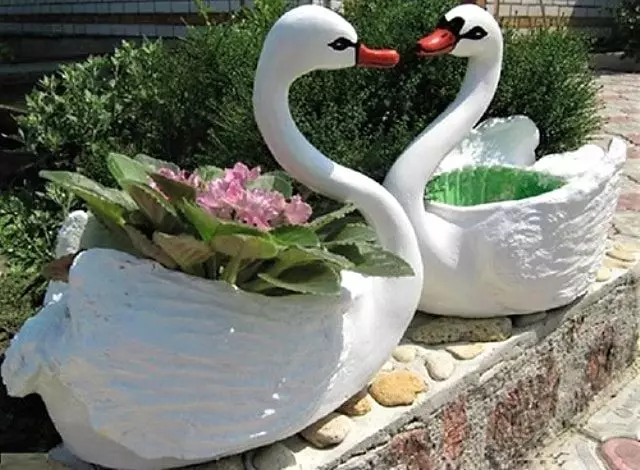
The elegant ornament of the garden will be floral vases in the form of swans. Frames - old plastic pelvis, neck - twisted wire. The head, wings and imitation of the plumage will have to do from the cement mixture, showing the skills of the sculptor.
Monolithic figures have a considerable weight, therefore, as an alternative, there is a way to create lightweight oversized objects. You can decorate your garden with boulders of different sizes.
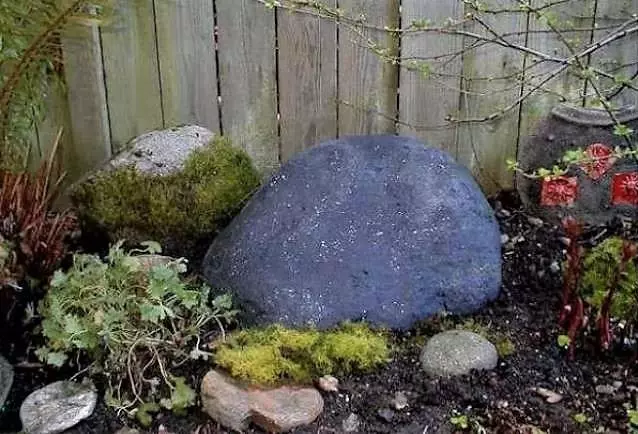
For their manufacture, wire is associated with a tight lump. Any unnecessary and lightweight material (trimming foam, plastic bottles, foam).
Article on the topic: Installation of the shell with a pedestal
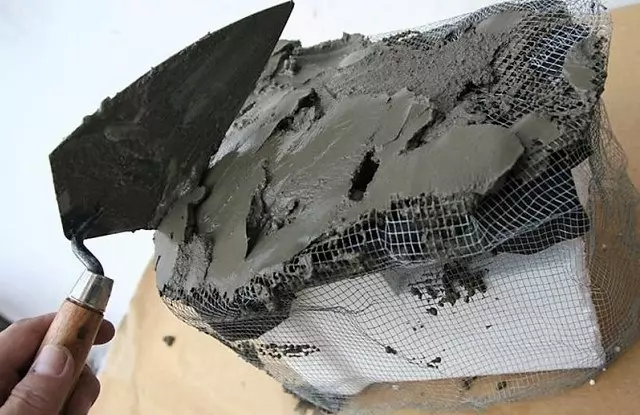
The resulting base turns into a plaster mesh and is covered with dense cement mortar. The more irregularities and protrusions, the more naturally the "stone" will look like.
Small garden figures are performed from a cement mixture with adding gypsum or portland cement.
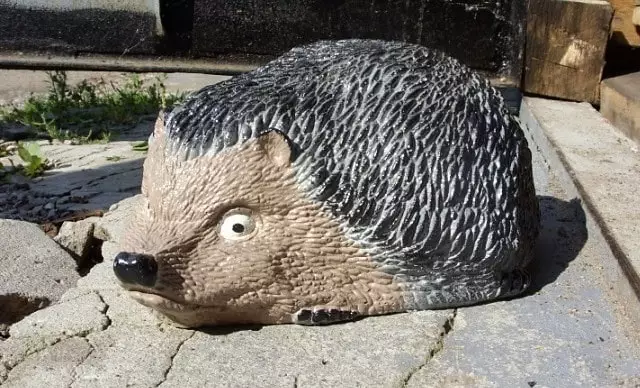
Here you can use the methods described above, as well as any basics: old toys, garments, household utensils.
Step-by-step instructions for the manufacture: 3 master class
To disassemble the nuances of the art presented in the article in more detail, consider the best master classes with a phased explanation of the work.
1. Spectacular Cement and Fabric Vases
To make the garden vases from cement and tissue, use either pure cement, or Portland cement. At the same time, the mixture with water should be sufficiently liquid. You will also need a bucket or other cutter for the frame, a piece of polyethylene and a piece of fabric.
The material should be sufficiently dense and well absorbed fluids, i.e. the synthetics are not suitable here. It is better to use cotton fabric.
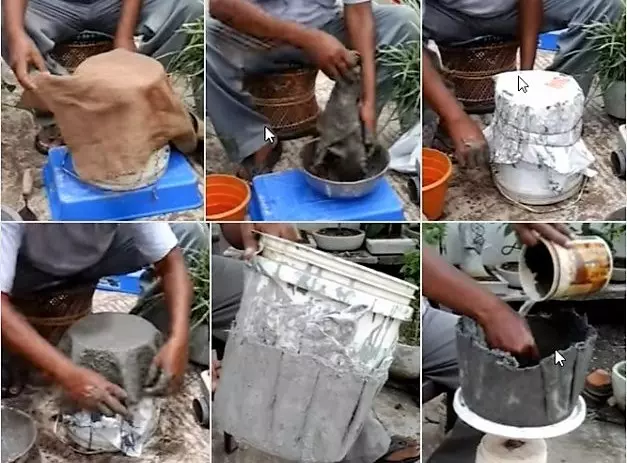
- Cut a piece of the desired size. If smooth edges are needed, then spinning;
- Weanly wet the matter in the solution;
- On the prepared bucket fixing polyethylene;
- Laying on top and smoothed fabric moistened in solution;
- After 2 days, the cement will grab and the bucket can be removed;
- The product is slightly wetted with water and leave until complete drying for another 5 days.
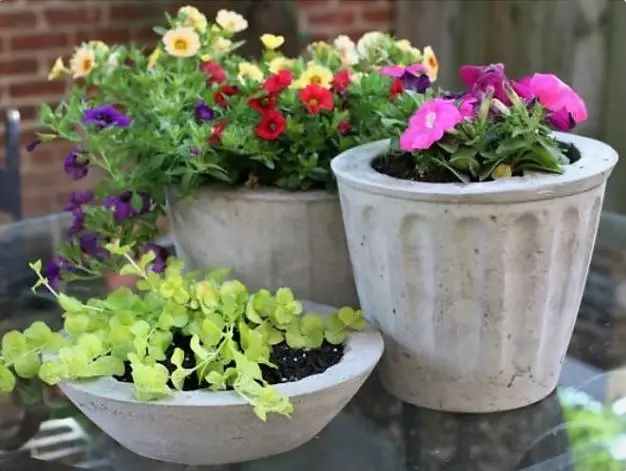
Even large-sized plants can be planted in the finished vase.
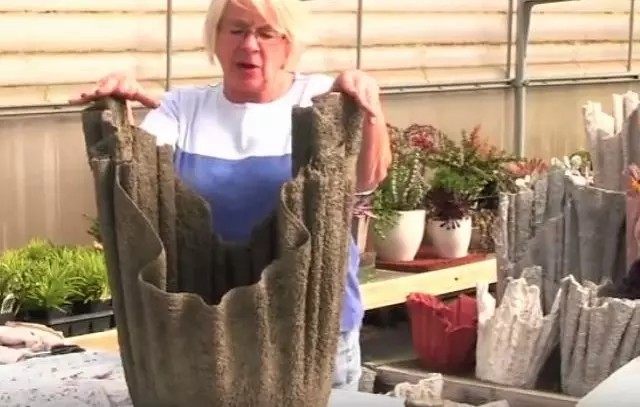
Experiment with shape and staining of the vases and create your own unique compositions.

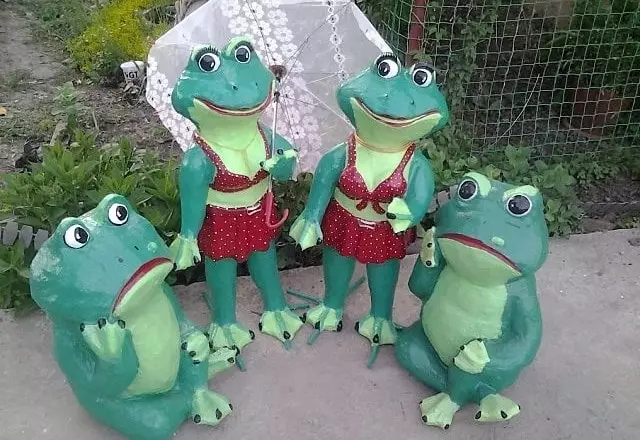
2. Funny cat for garden
To begin with, we harvest the frame from the cropped plastic bottle and wooden plates, which are fastened with wire.
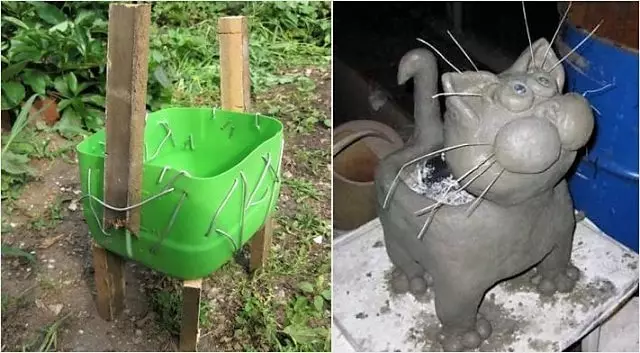
The solution is prepared from cement and sand in a ratio of 1: 1, additionally (directly in hand), during operation, add gypsum. Gradually inflicting solution, create all the details of the sculpture.
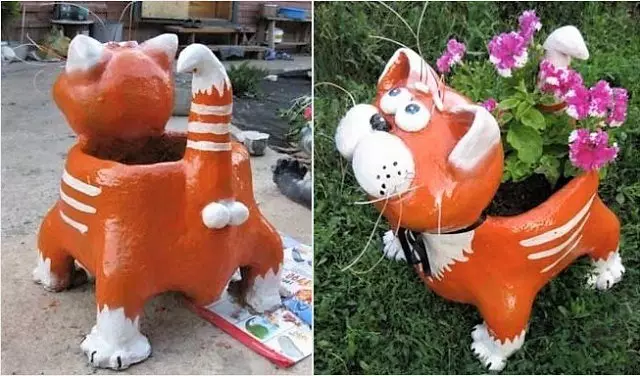
The finished figure is polished with a damp hand and leave to dry for 4 days. The last touch is painting with water-emulsion or enamel.
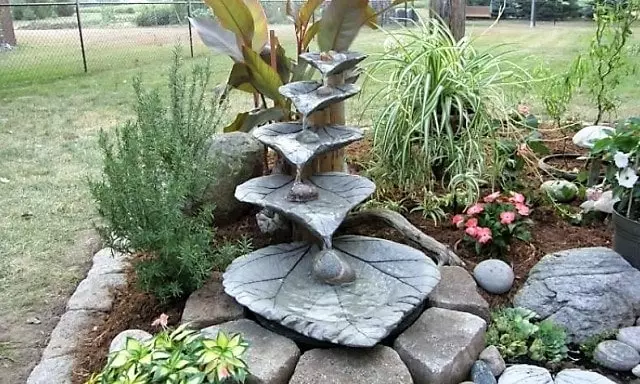
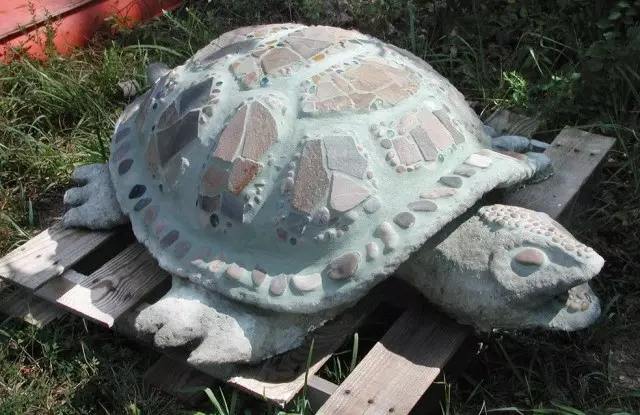
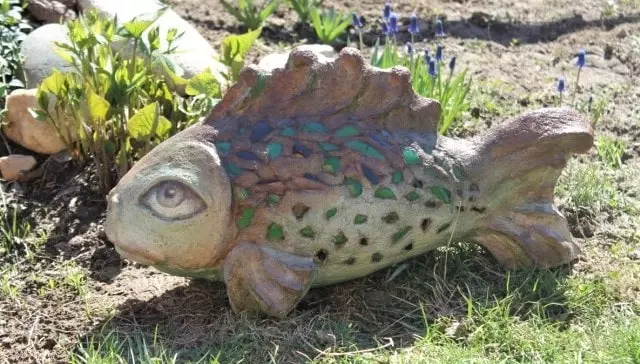
3. Large sheet-rinking for birds and pets
No less successful and universal decoration of the garden will be a sheet of cement. The plastic film is placed on a hilly from sand, and then a large sheet (the holmik will allow you to get a figure with a deepening, and not flat). If there are small holes in the sheet, they should be closed with small leaves so that the cement solution does not flow.
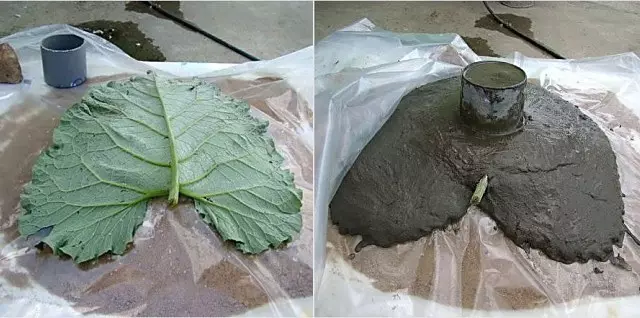
Next, the sheet is covered with a thick layer of the solution, and a short string of the polypropylene tube is inserted into the center and is filled with cement, which will serve as a leg for crafts.
For several days, the workpiece is covered with a film before drying. Then remove the sheet, ground and color.

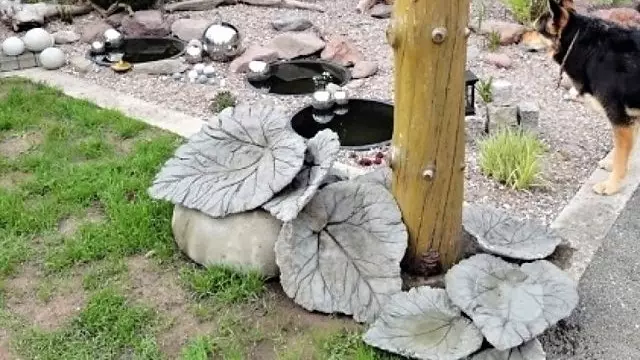
If desired, from several similar billets, you can make a fabulous fountain.