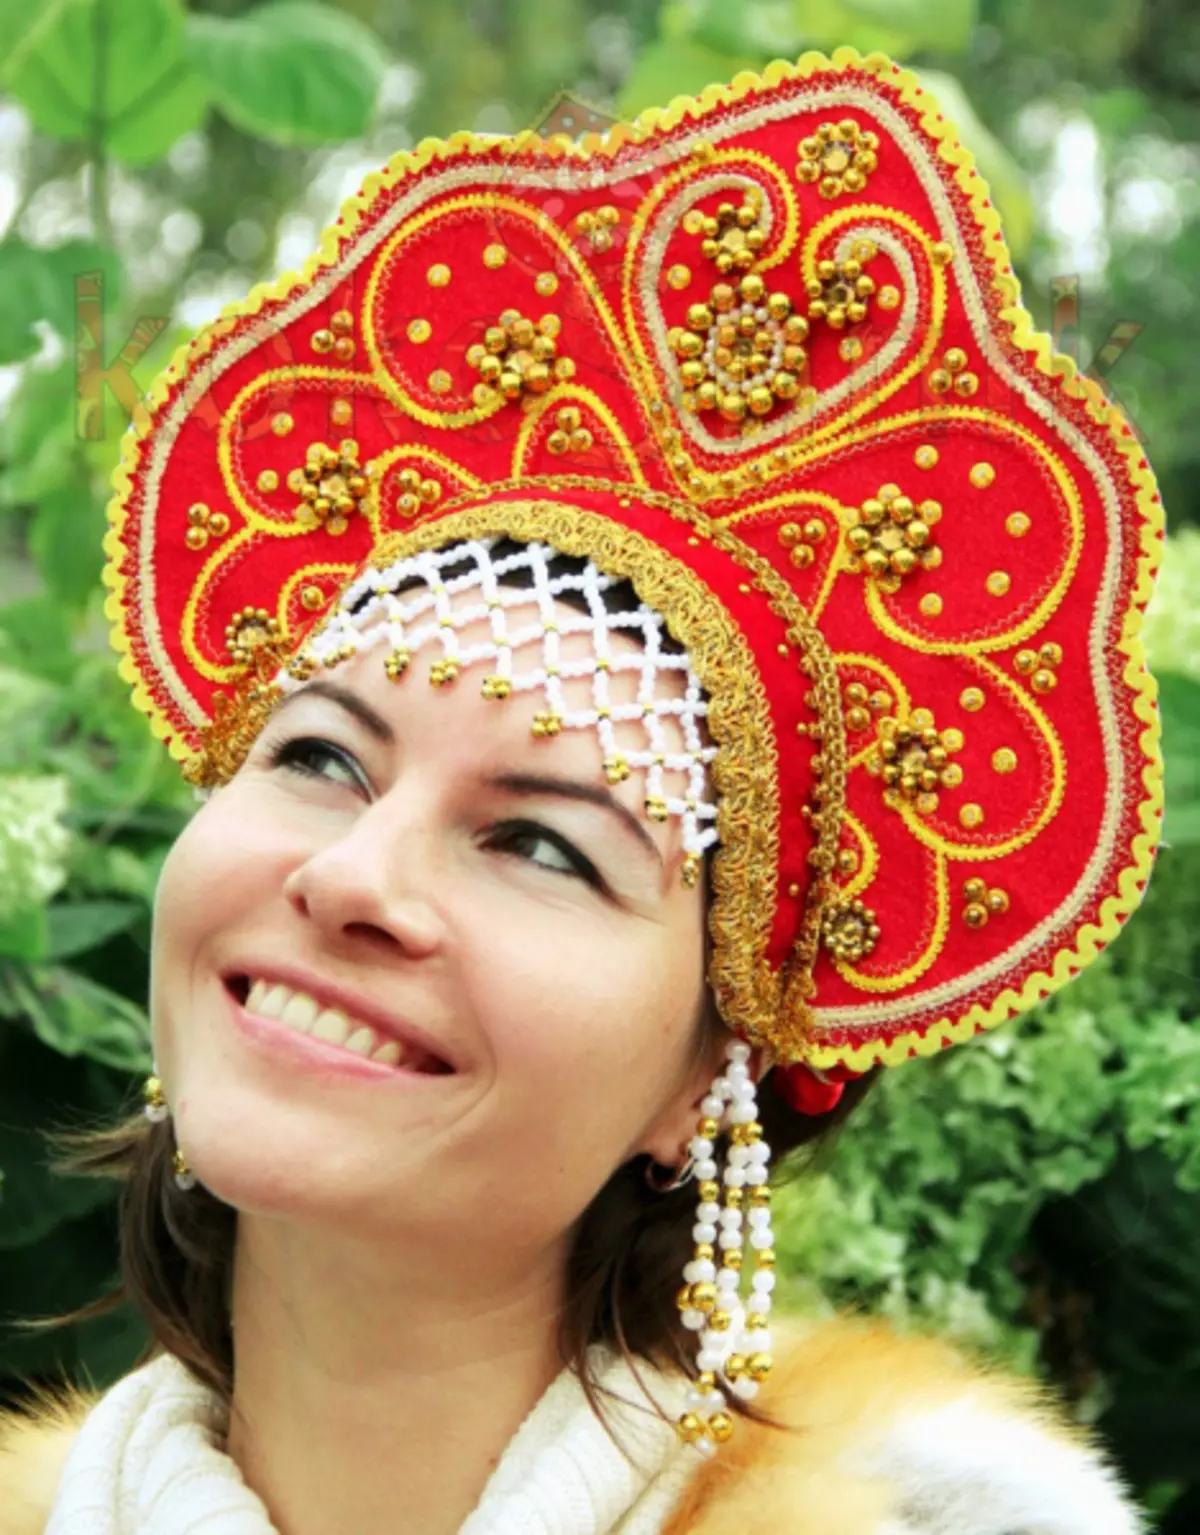
It seems that such an element of women's clothing, like Kokoshnik, has long outlived himself. However, it is not. Frequently people turn to Russian traditional fault. There are events in life where without it can not do. We offer you three simple options, how to make Kokoshnik do it yourself.
A bit of history
Kokoshnik - an old-fashioned semicade, having a shape of a shield or appealed. In each Russian fairy tale there is an incomizible beauty, on the head of which the Kokoshnik is sure to bang. Traditionally, girls wore a headdress on the occasion, each with its special manner of performance and the original pattern. By his luxury, it was possible to determine how solemn and the reason for which she put it was.
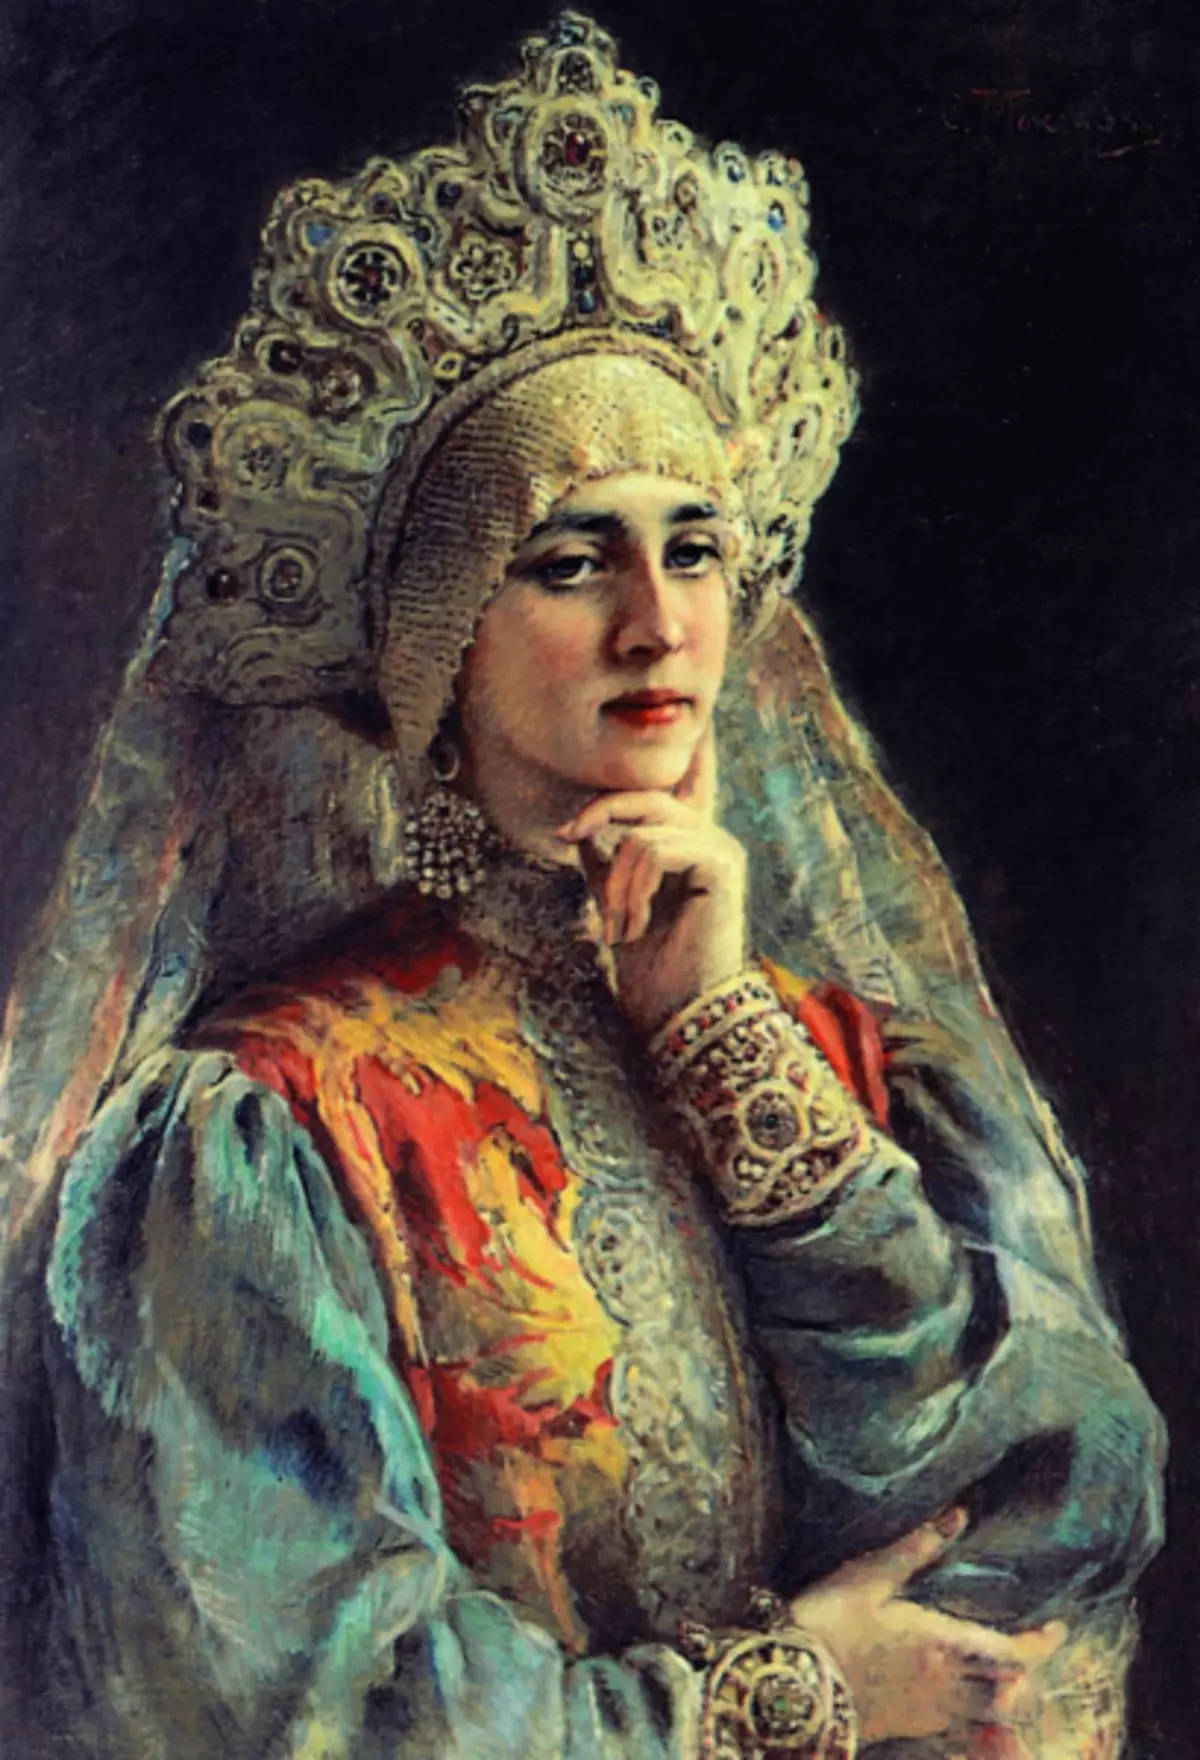
In the history of Kokoshnik, much still remains a mystery, despite the efforts of researchers. For example, no one knows when he appeared in everyday life. Familiar to us Russian folk seats could wear both married and unmarried women. Until the time of Peter I, Kokoshnik was put on even in the boyars of the estate, and in the 19th century they were most popular with peasants and merchants. They were performed mainly with a lightweight paper fuel, hats and satin ribbons. With modern methods to create this head, you can read below.
Children's Maslenitsa
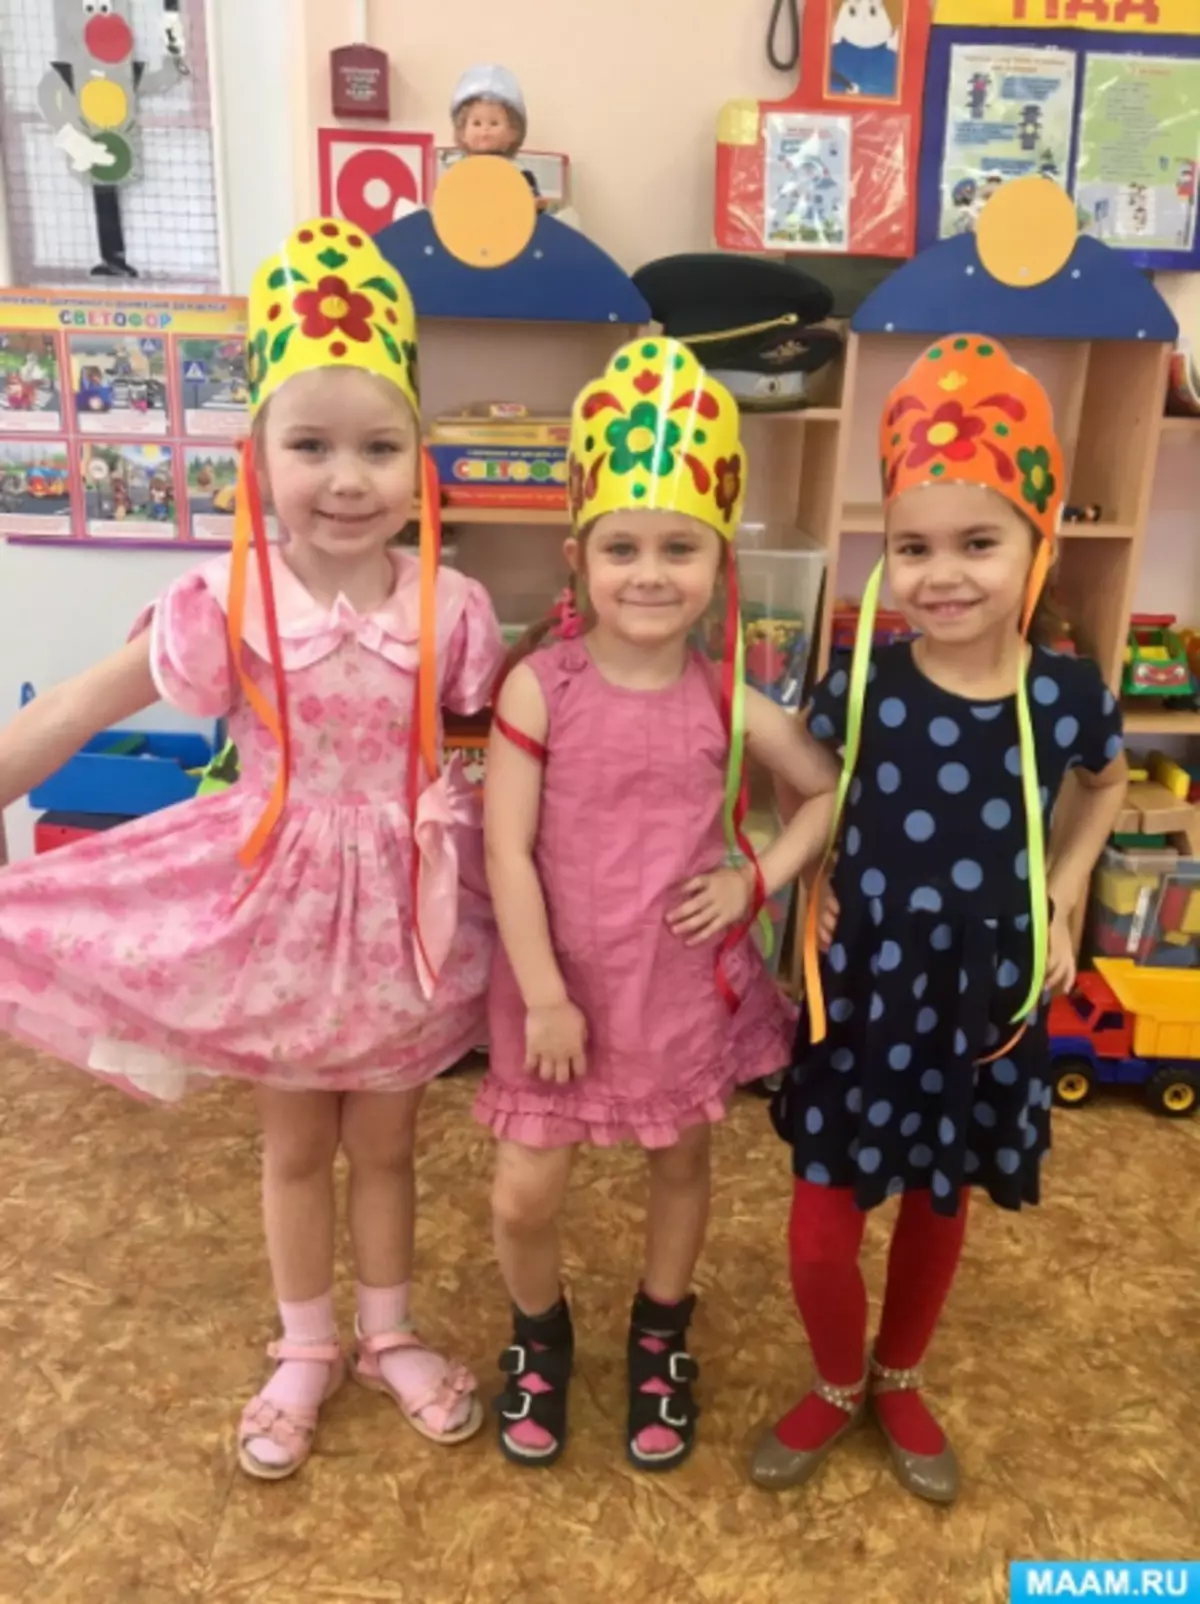
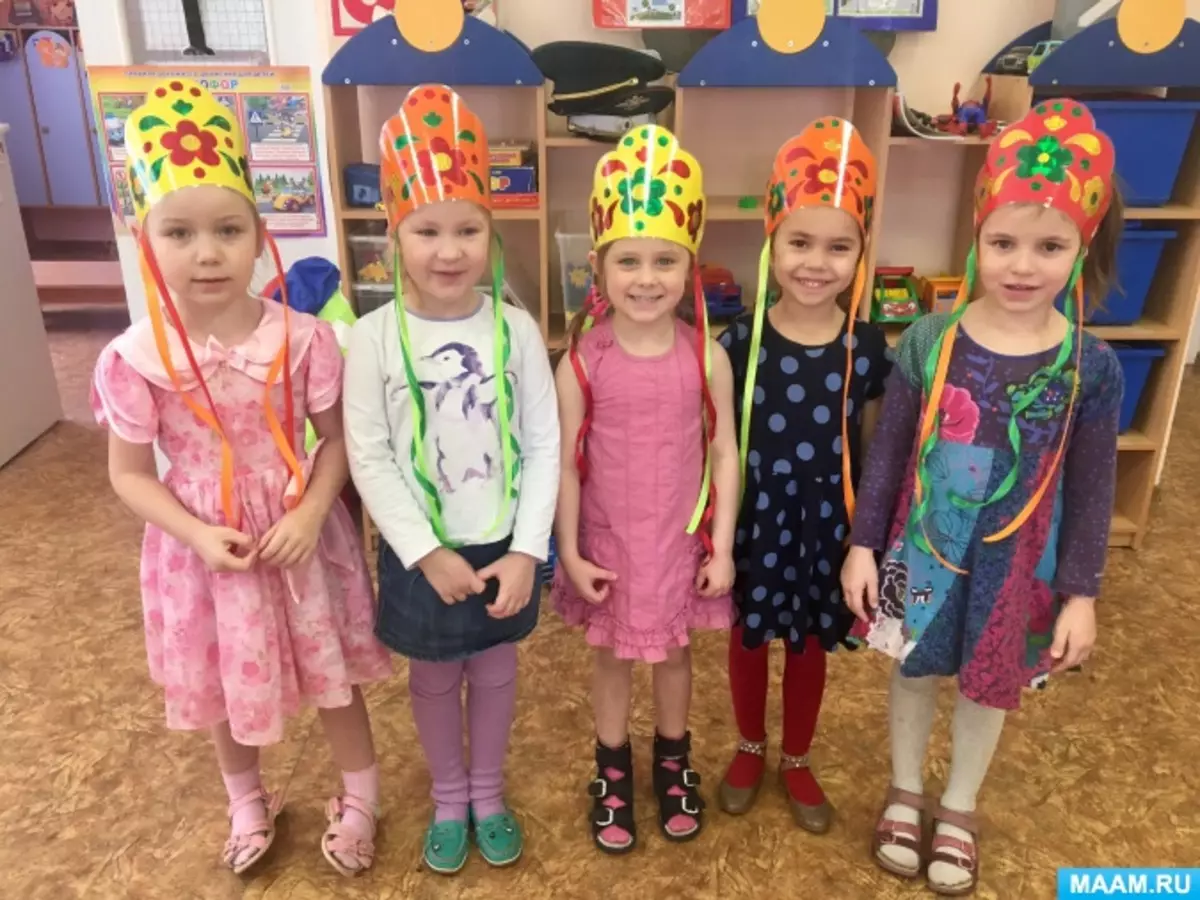
Maslenitsa was also a good reason to paint in the new Kokoshnik. Therefore, often teachers and teachers use this occasion to introduce children with Russian traditions and culture. Do you need to urgently make a headdress in kindergarten for a holiday? No problem. We offer a simple and fast version of the Kokoshnik from cardboard.
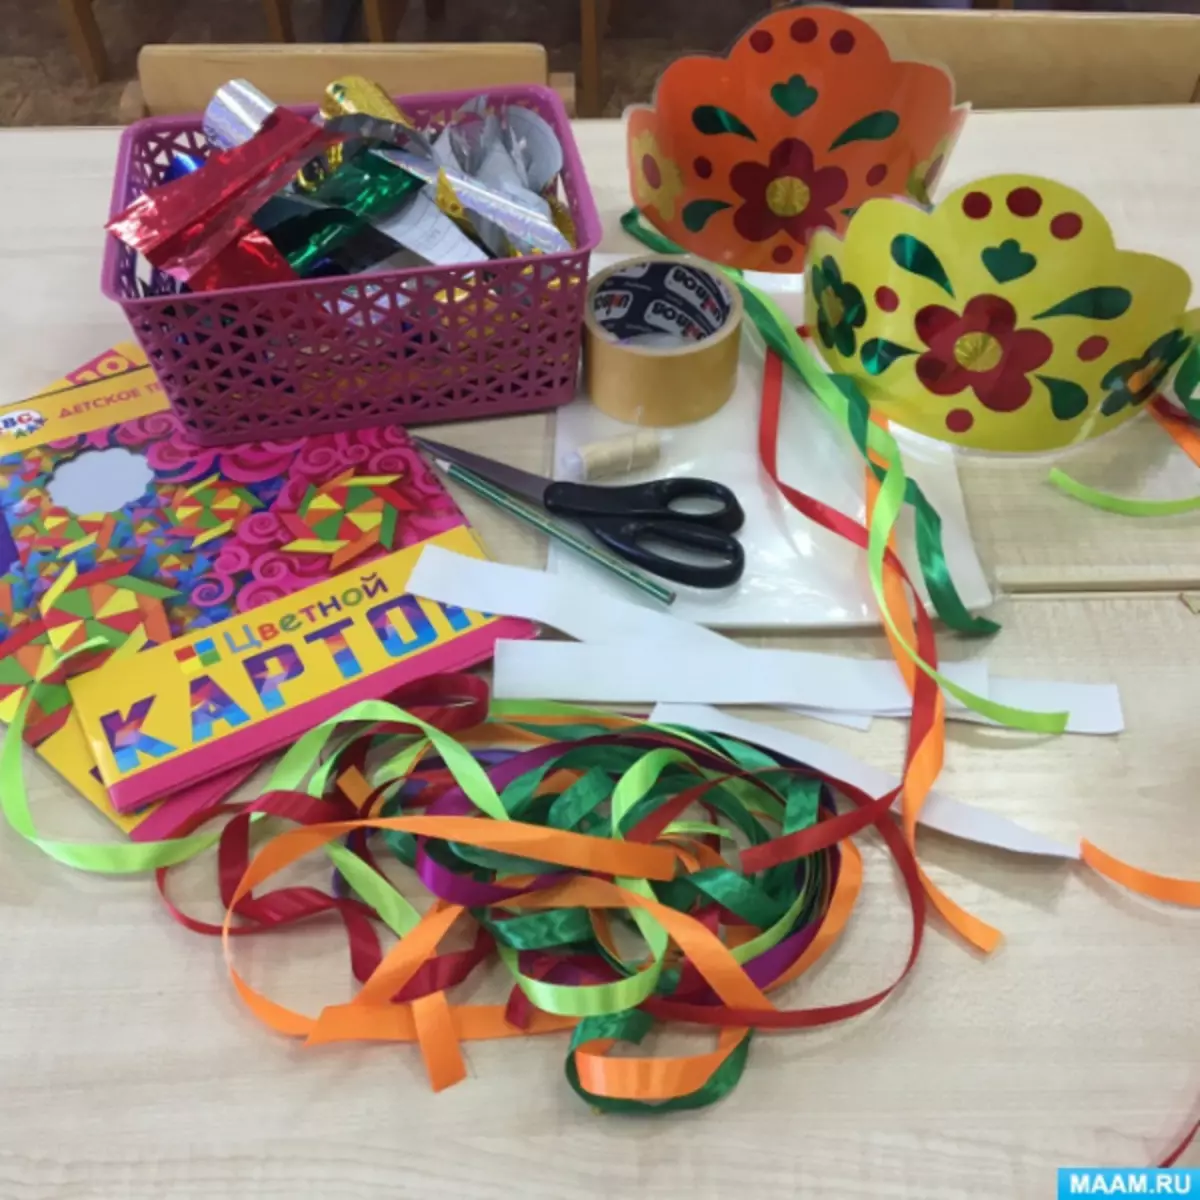
For work you will need:
- Color cardboard;
- brilliant self-adhesive paper;
- Multicolored satin ribbons;
- Rubber for fastening;
- double sided tape;
- scissors;
- needle with thread.
Article on the topic: Openwork crochet pattern for summer blouse: scheme with photos and video
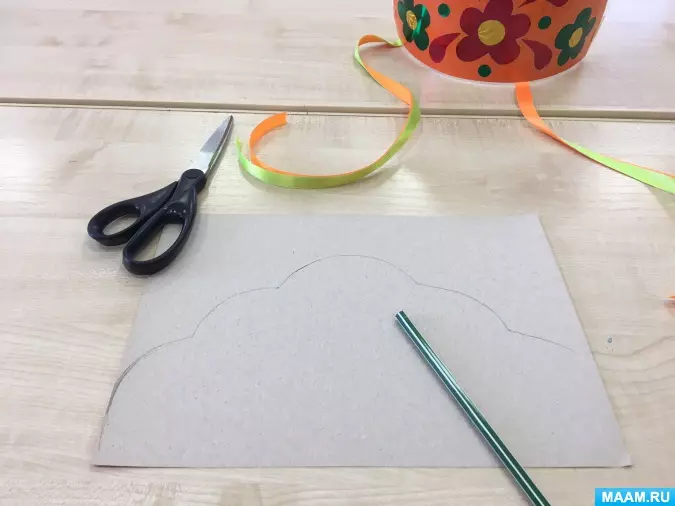
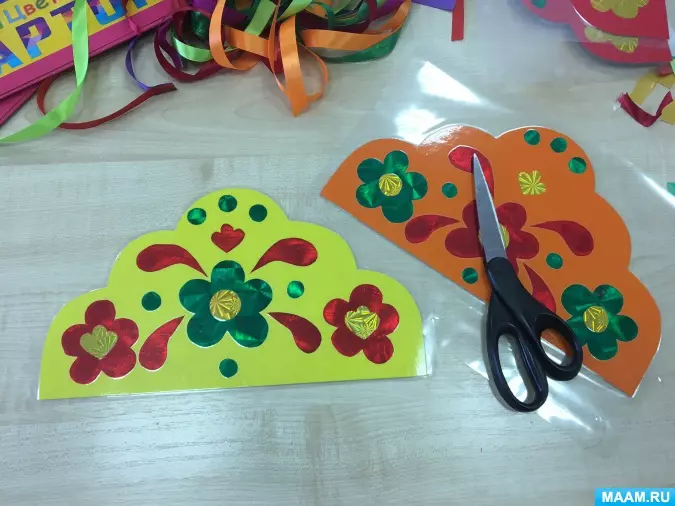
Choose any cososhnik form, transfer it to the cardboard and cut out.
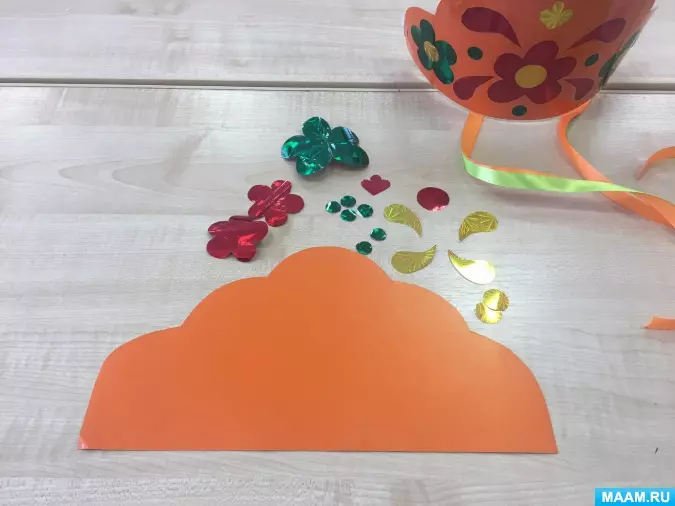
Decorate your product with self-adhesive paper. Flowers, droplets, pea of different colors and sizes will be perfectly looked. Please note that the composition is best of them.
For further preservation of Kokoshnik, it is possible to laminate it, however, the tape perfectly cope with this task.
Then we sew a gum. Take a wide enough so that it does not give.
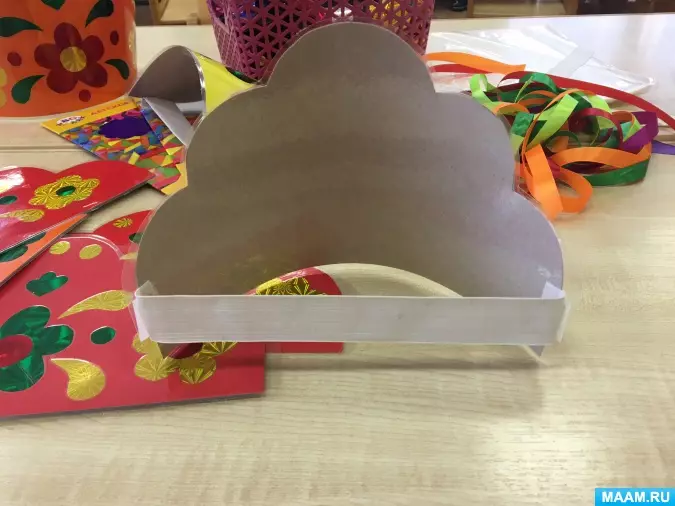
To complete the product using double-sided adhesion, glue satin ribbons.
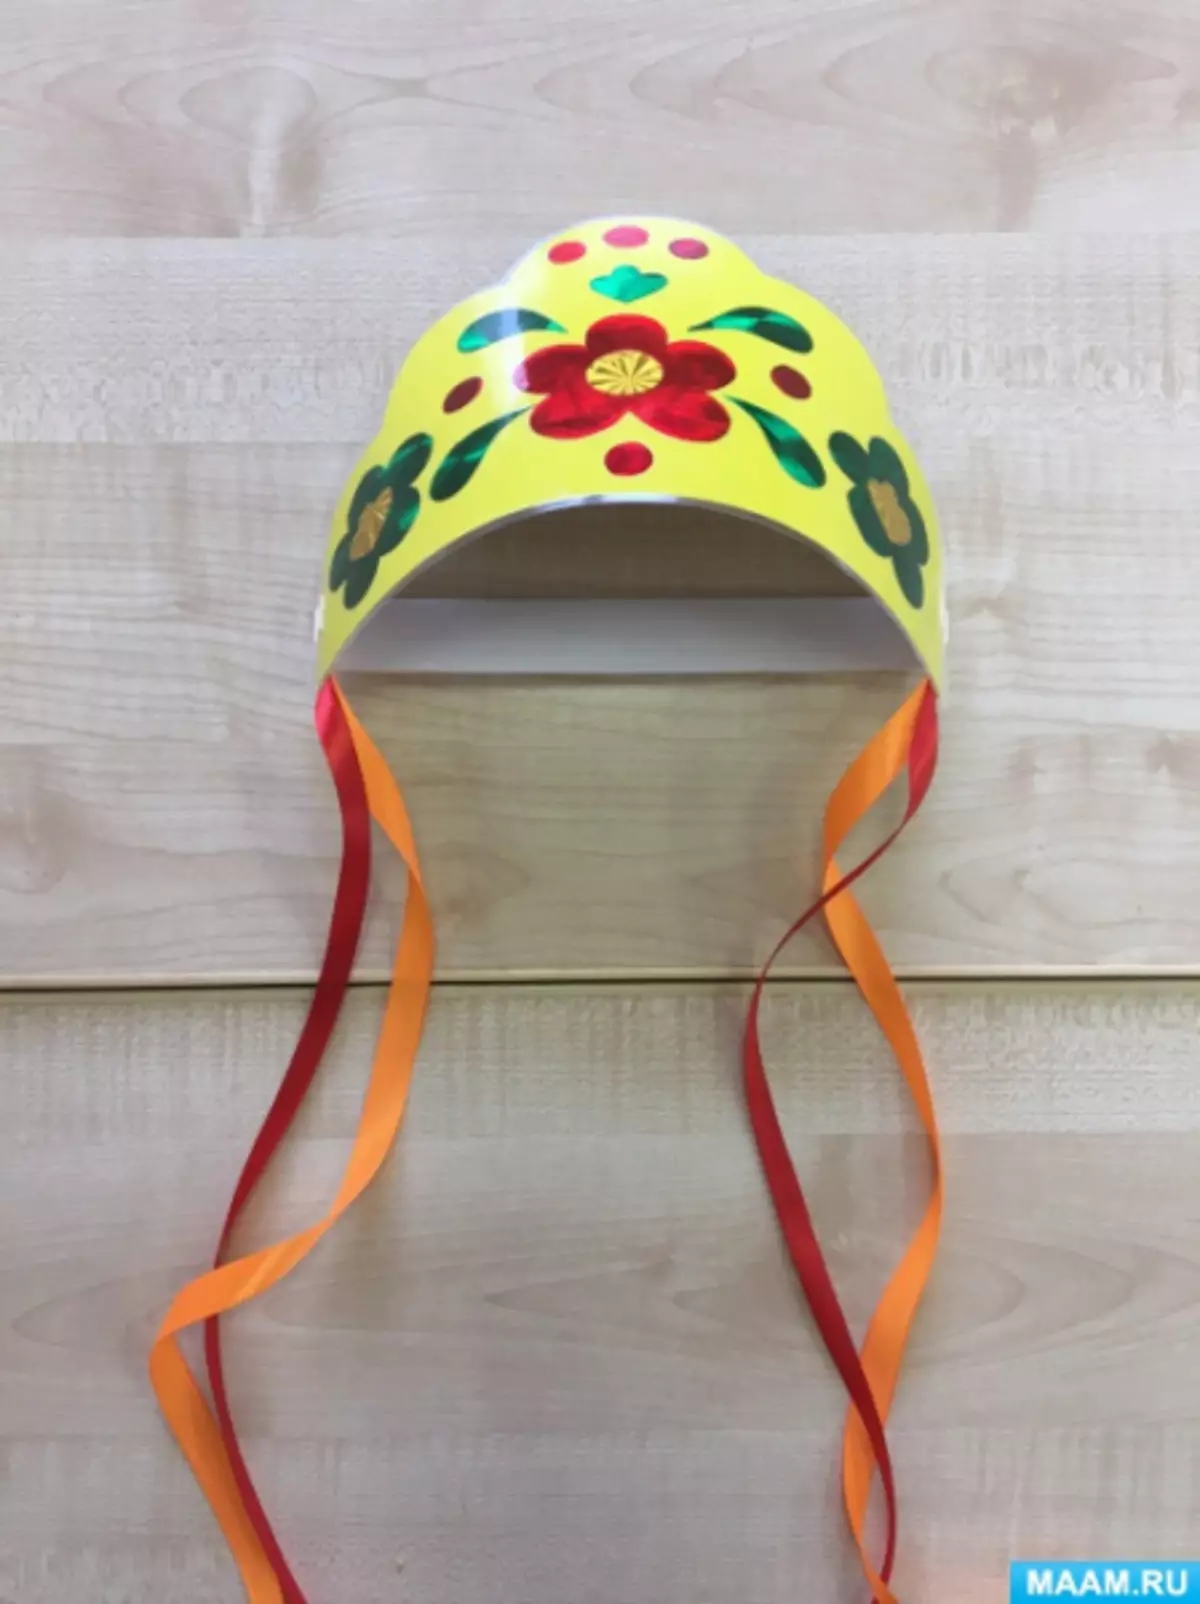
Kokoshnik ready. It turned out to be bright and easy, and still very convenient for children of kindergartens. They will not be difficult to pass in it at least all day.
Paper decoration
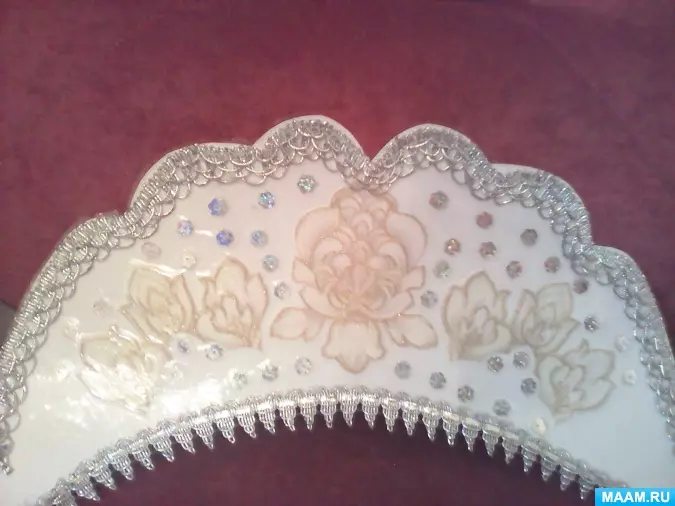
On the Internet, the most common cardboard options for kokosnovnikov, however, you can make no worse outfit from paper. Especially in the event that recently in the house was repairs.
You will need:
- whatman;
- Wallpaper with a beautiful pattern (flowers, leaflets, curls, etc.);
- rhinestones;
- silver braid;
- Wide white ribbon;
- Wide gum;
- Scotch;
- glue;
- scissors;
- needle with threads.
First of all make a pattern on the pattern.
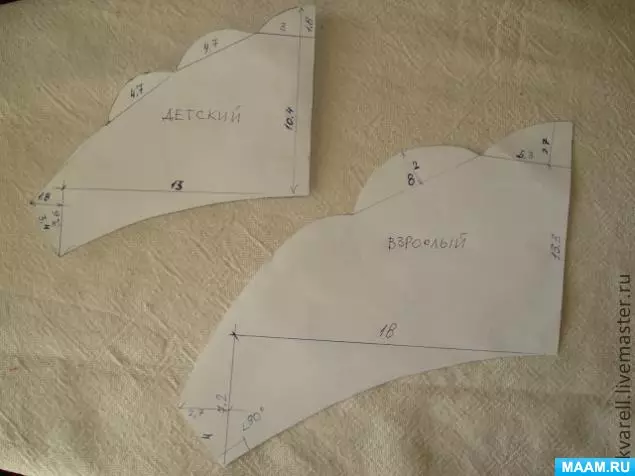
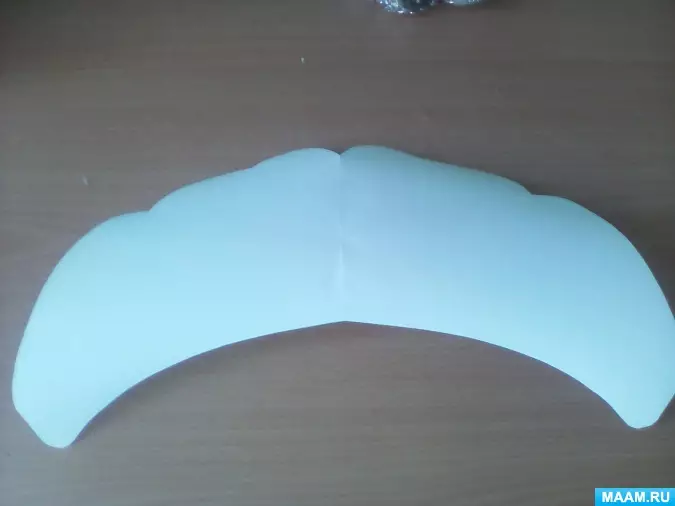
From Watman, pick up the billet of the Kokoshnik.
From the wallpaper, cut the necessary patterns of the pattern, add rhinestones and make up the composition on your product. With the help of glue, secure them in our places.
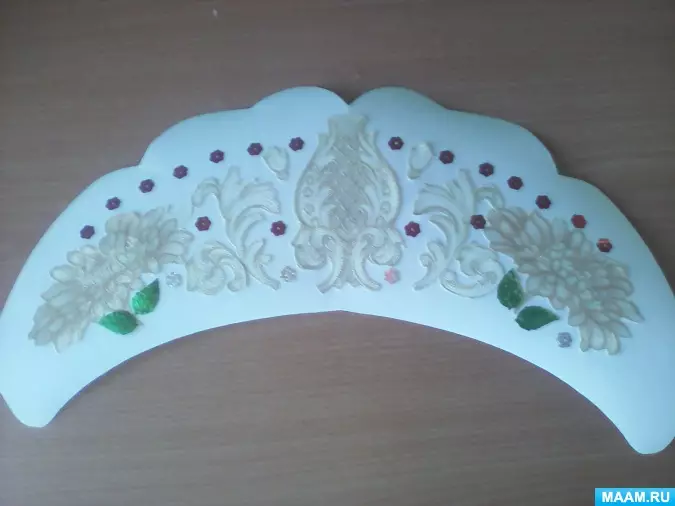
On a note! So that rhinestones do not disappear, and the Kokoshnik himself did not reverse, cover it with a scotch with both sides.
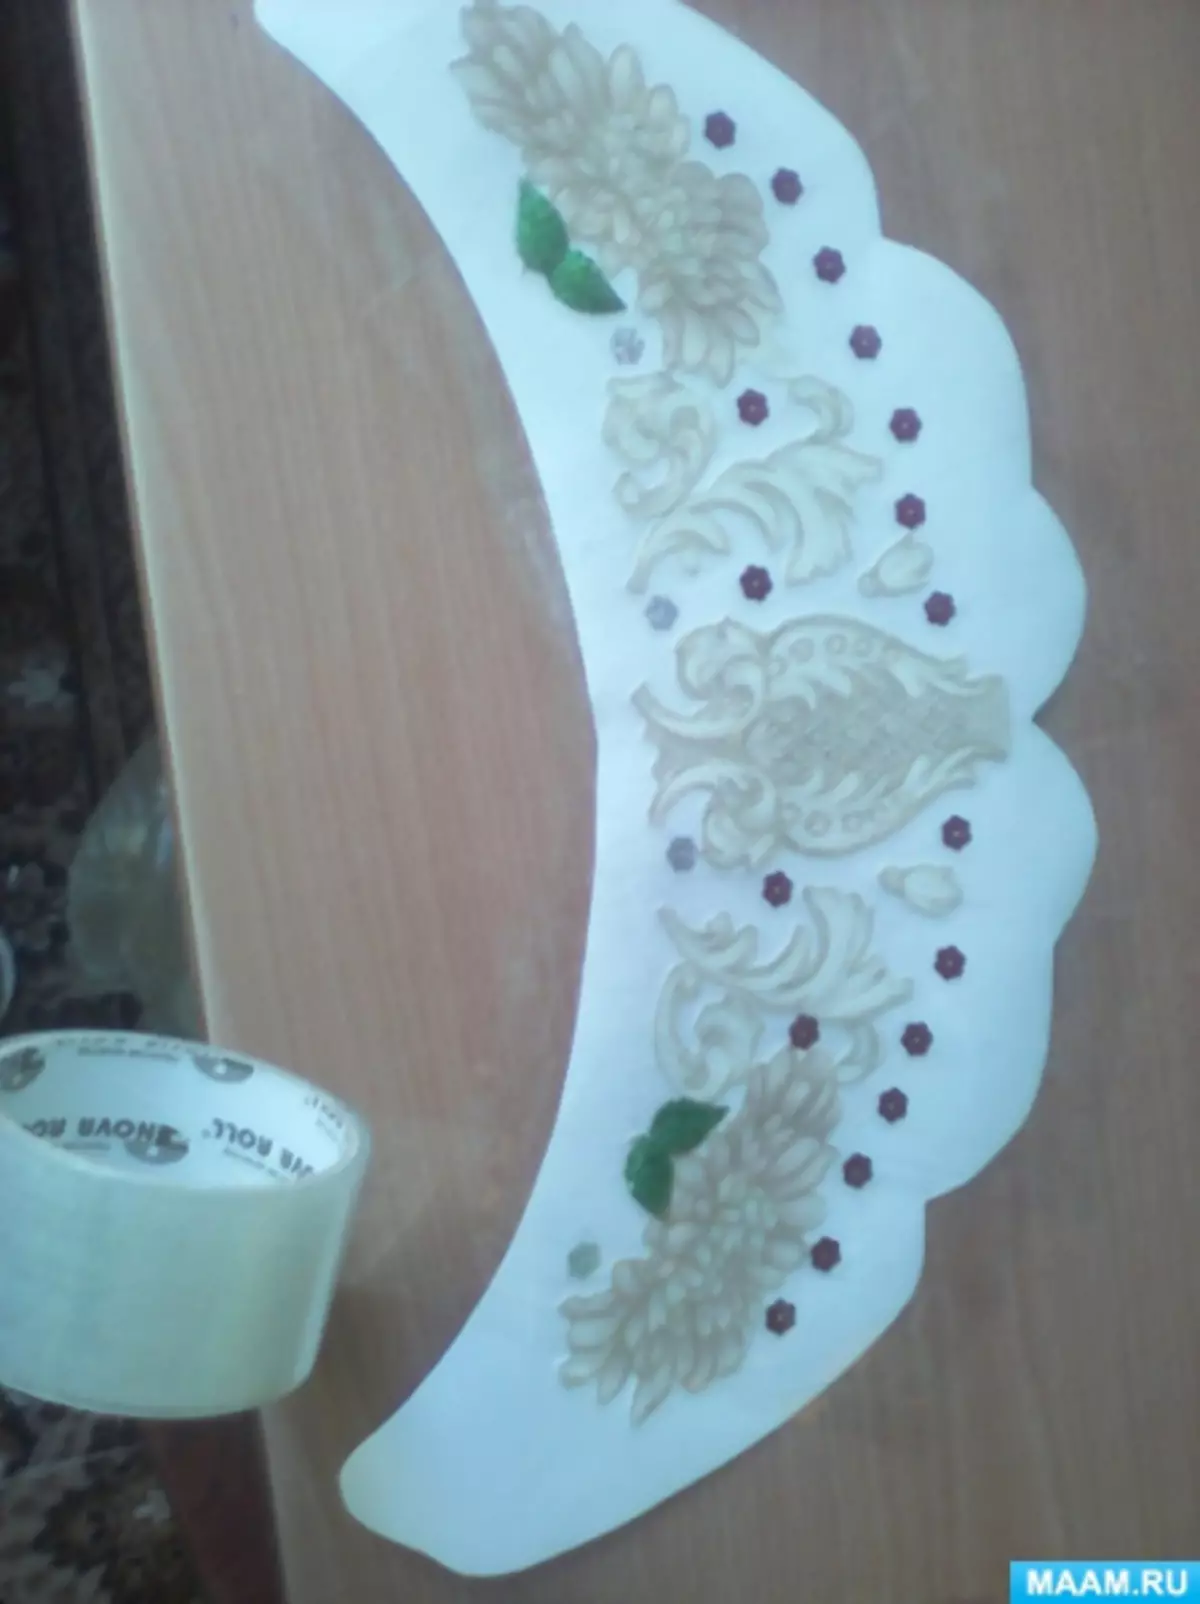
Cut the perimeter of the product with silver braid.
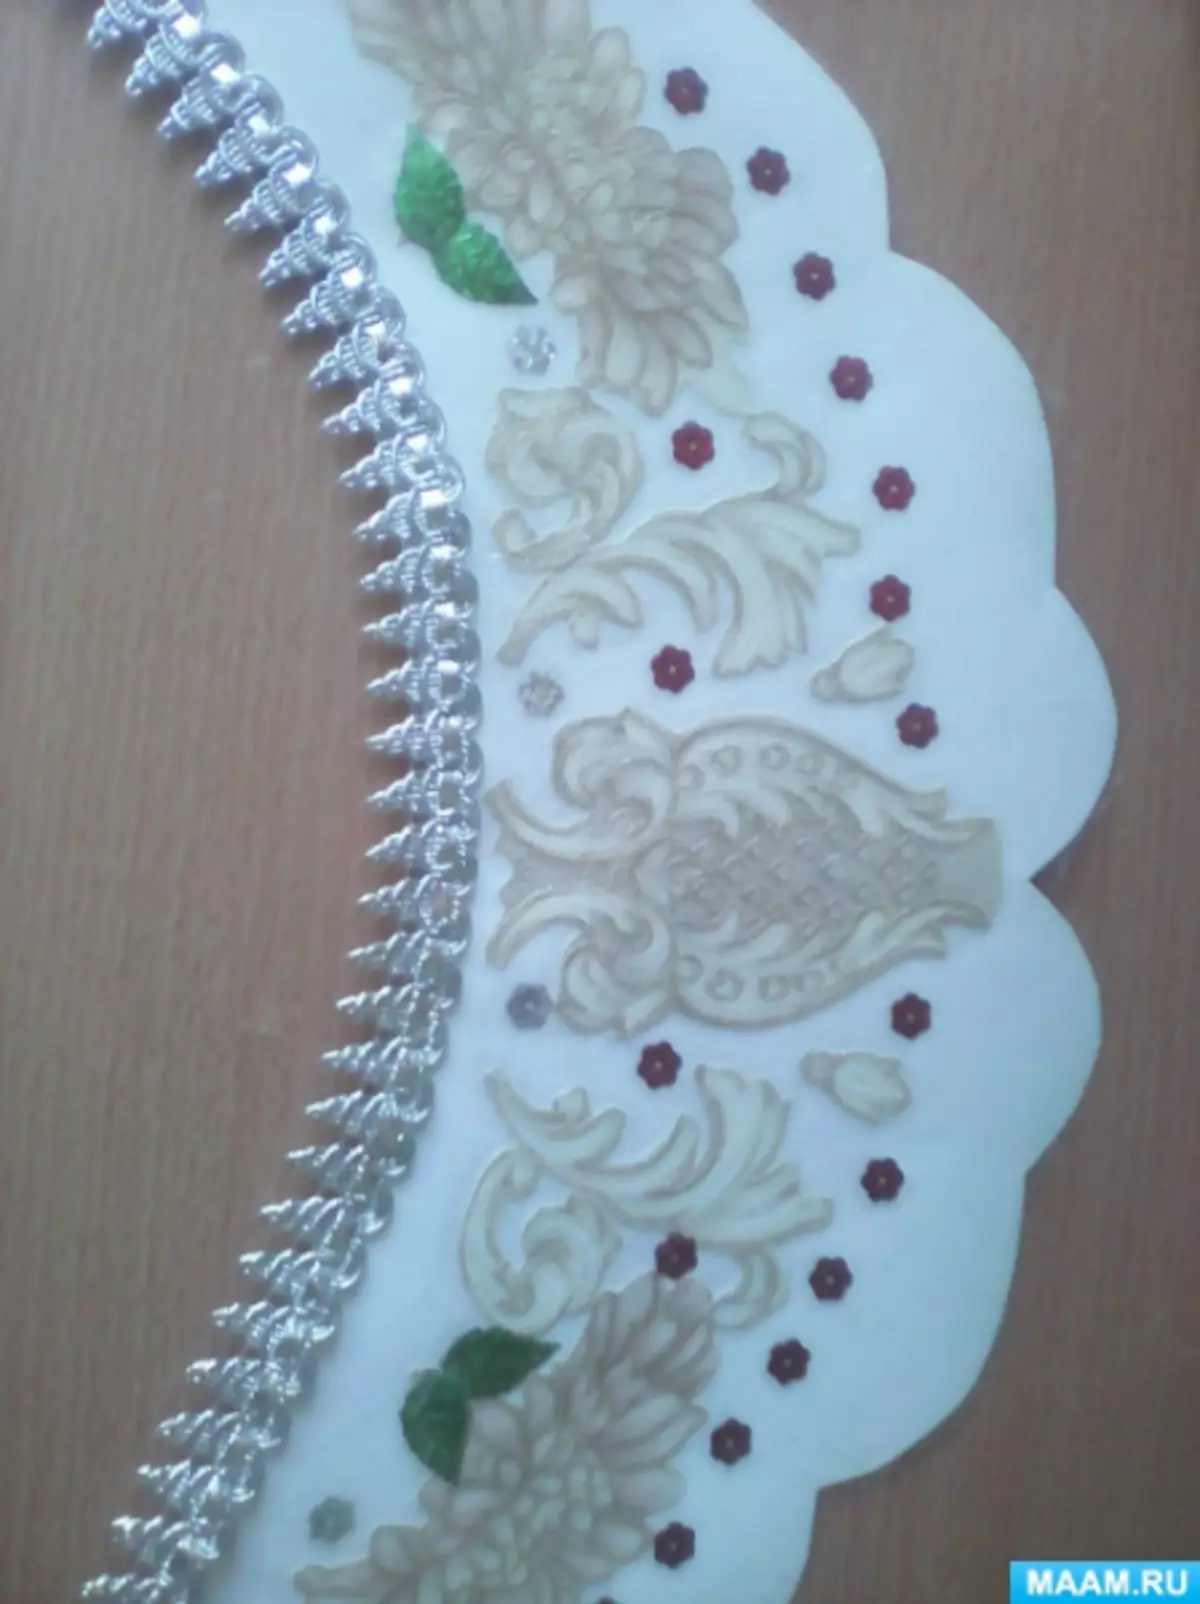
At the end of the work on the edges, fasten the gum of the desired size and the trigger, so that you can start the back of a beautiful bow. Patterneal Kokoshnik ready!
Embedded option
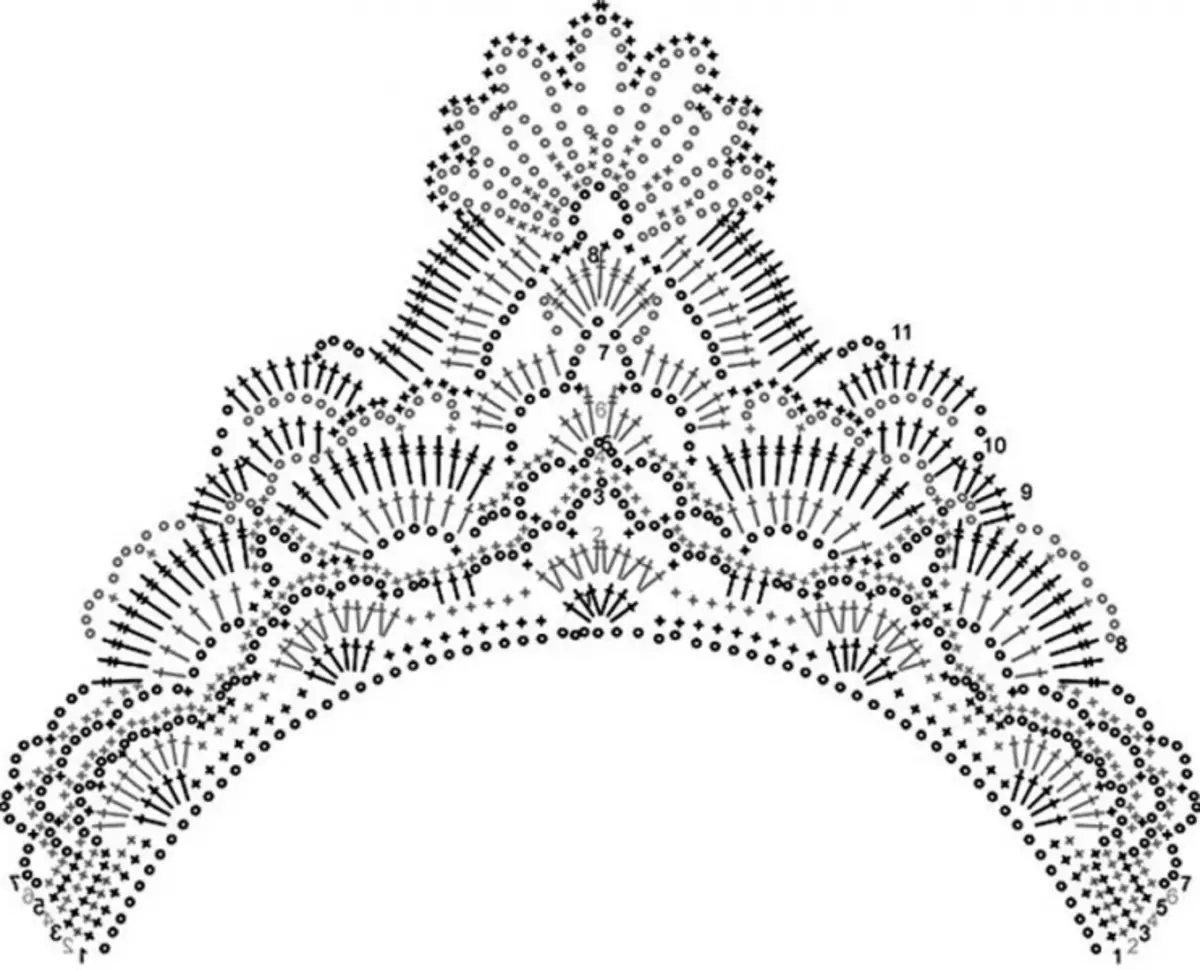
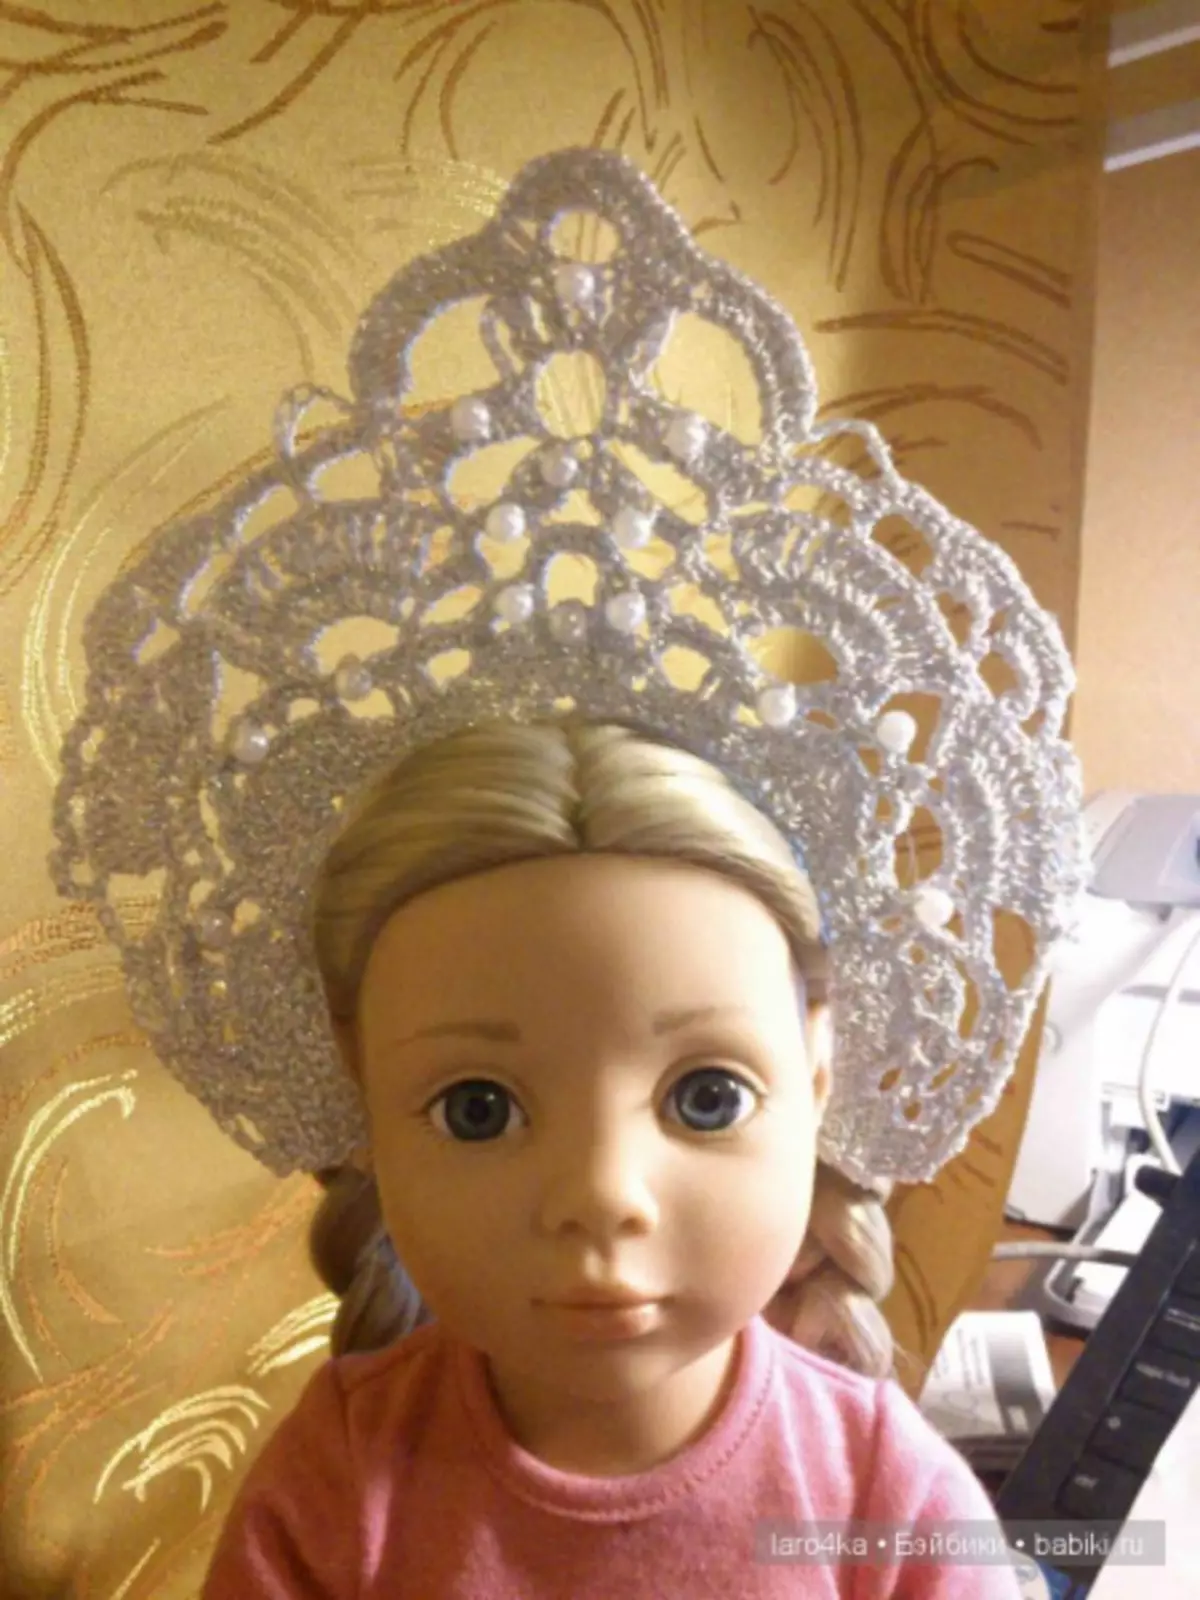
The unusual and original decoration for the girl will be a crochet-knitted kokoshnik. You can make it in two ways.
You will need yarn (choose the color to your liking), rhinestones, PVA glue (instead of starch, is much more convenient), iron, rim.
Start your work from the founding of Kokoshnik. Stick yarn to the edge of the hoop and wrap it carefully, fixing at the end. Then tie the product for the selected scheme:
Article on the topic: African paper beads - detailed master class with photo

Ensure the resulting product with an iron, then heal the pva glue, dry and attach to the rim. At its discretion, decorate Kokoshnik rhinestones.
White frost behind the window
This master class helps to make a winter decoration, but if you use the yarn of warm colors, it will turn out to be a cososhnik for spring and summer holidays.
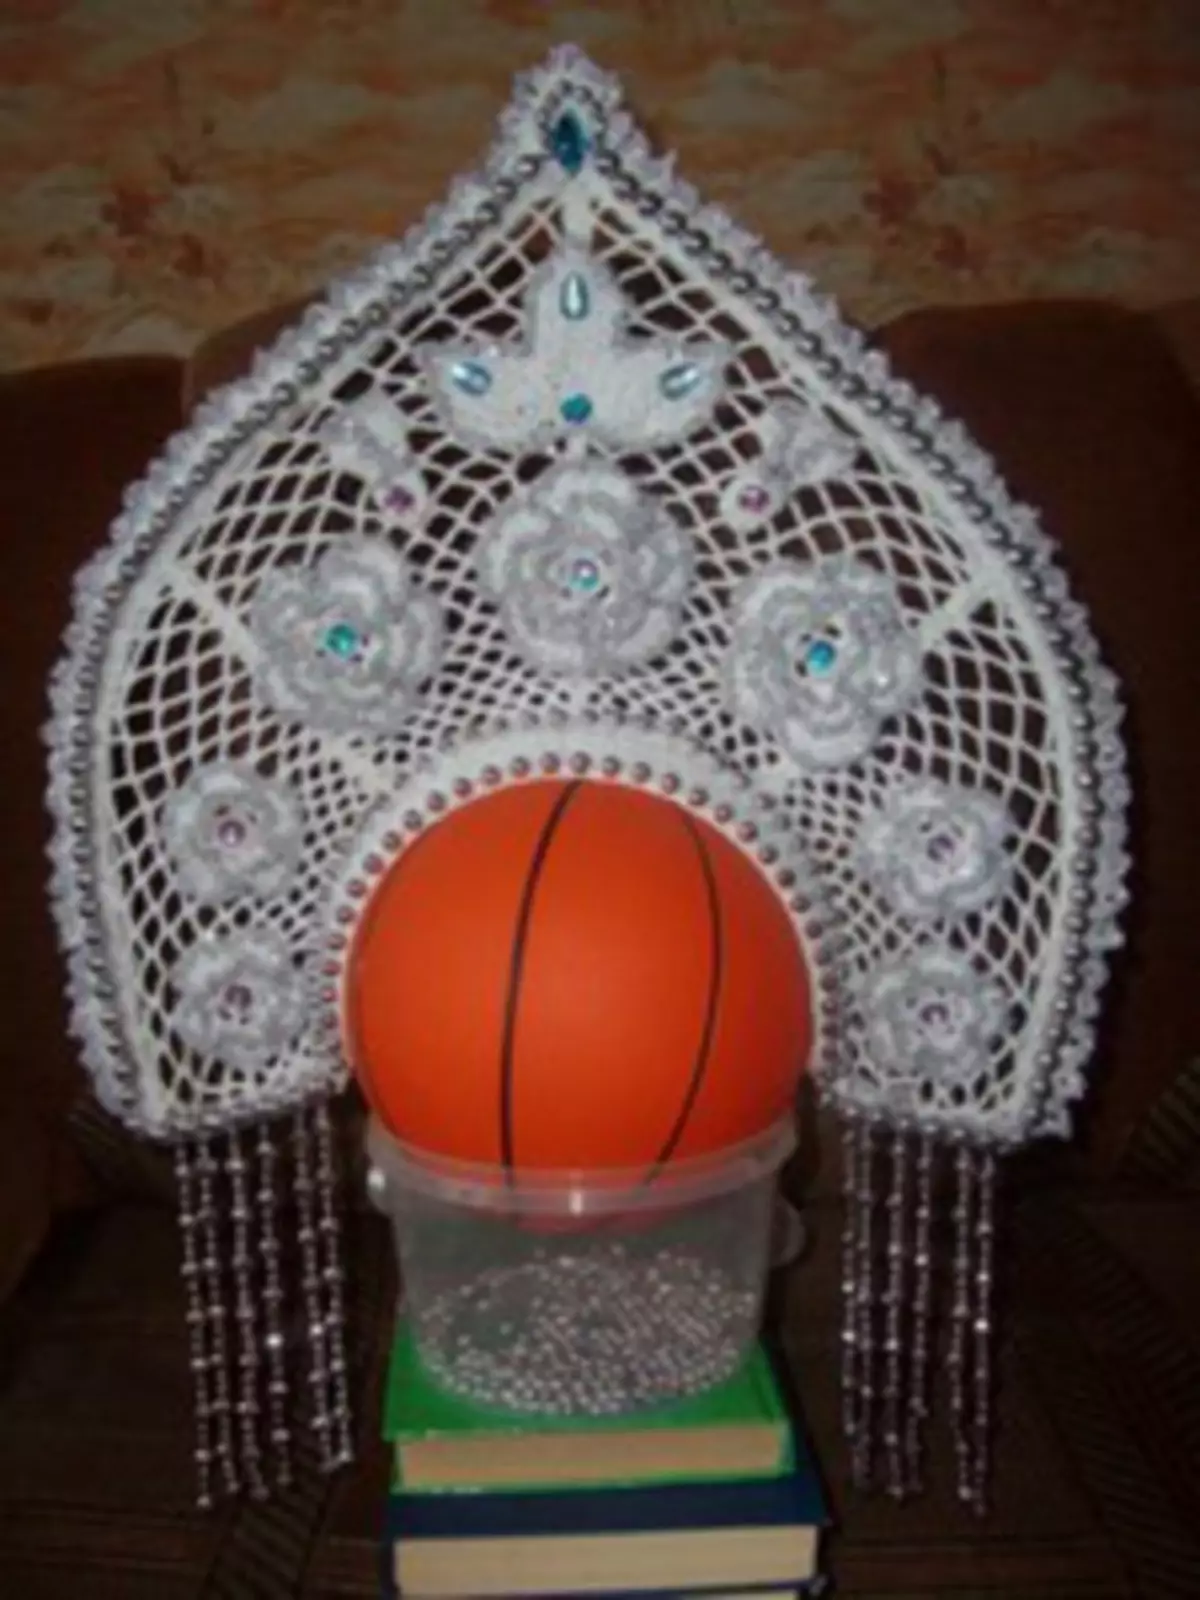
Necessary materials:
- Metallic cotton yarn - 2 Moves;
- The yarn is an asterisk (silver - only on the strapping) - 1 skeleton;
- beads;
- rhinestones;
- rubber;
- Fleece;
- satin ribbon;
- wire.
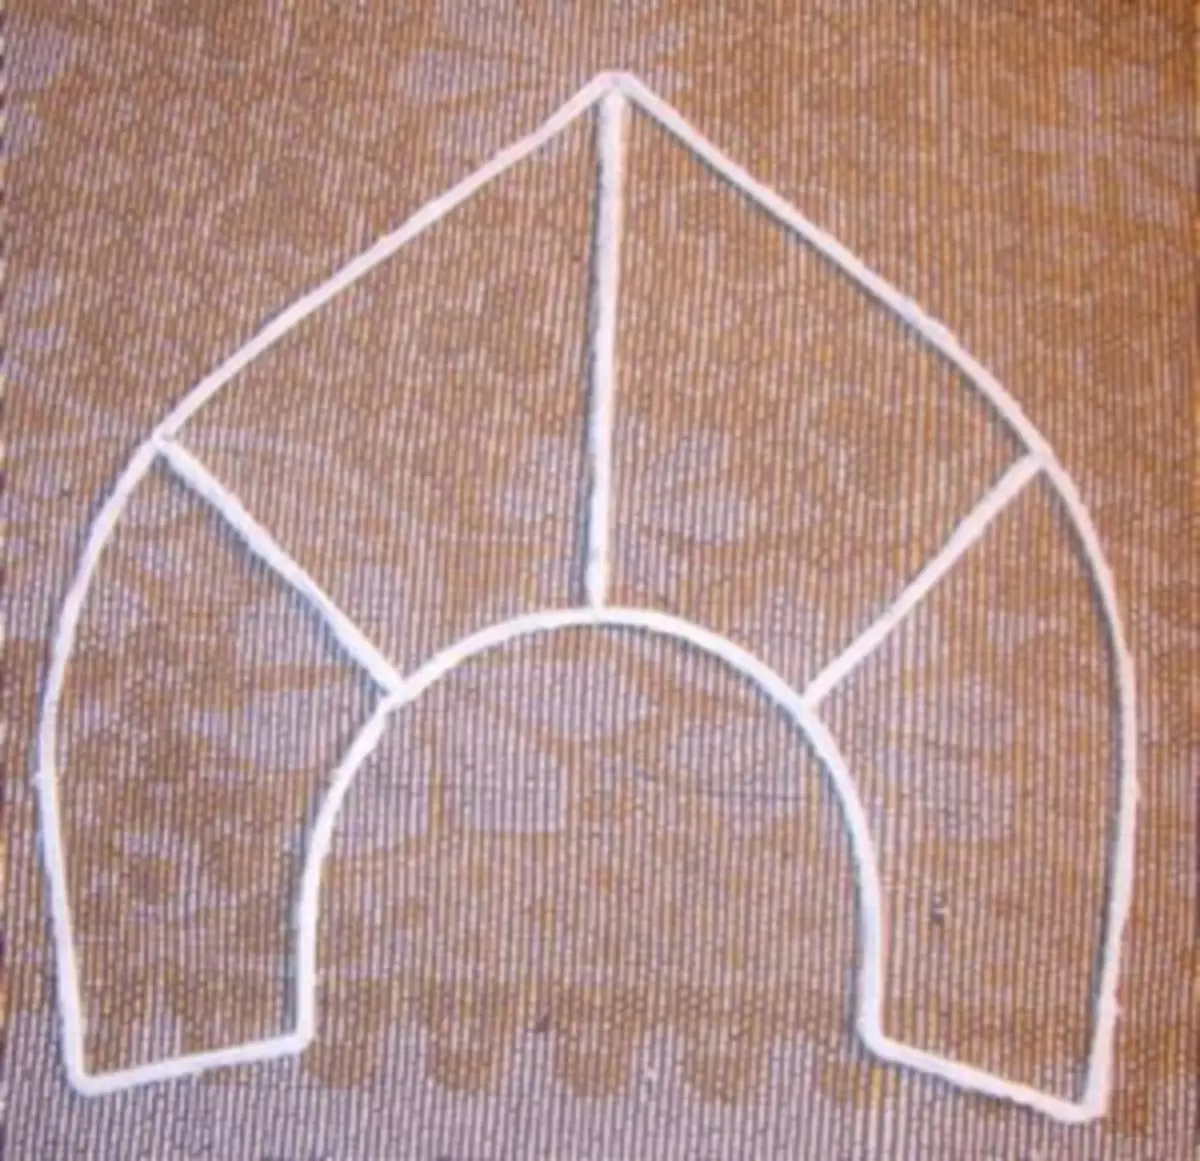
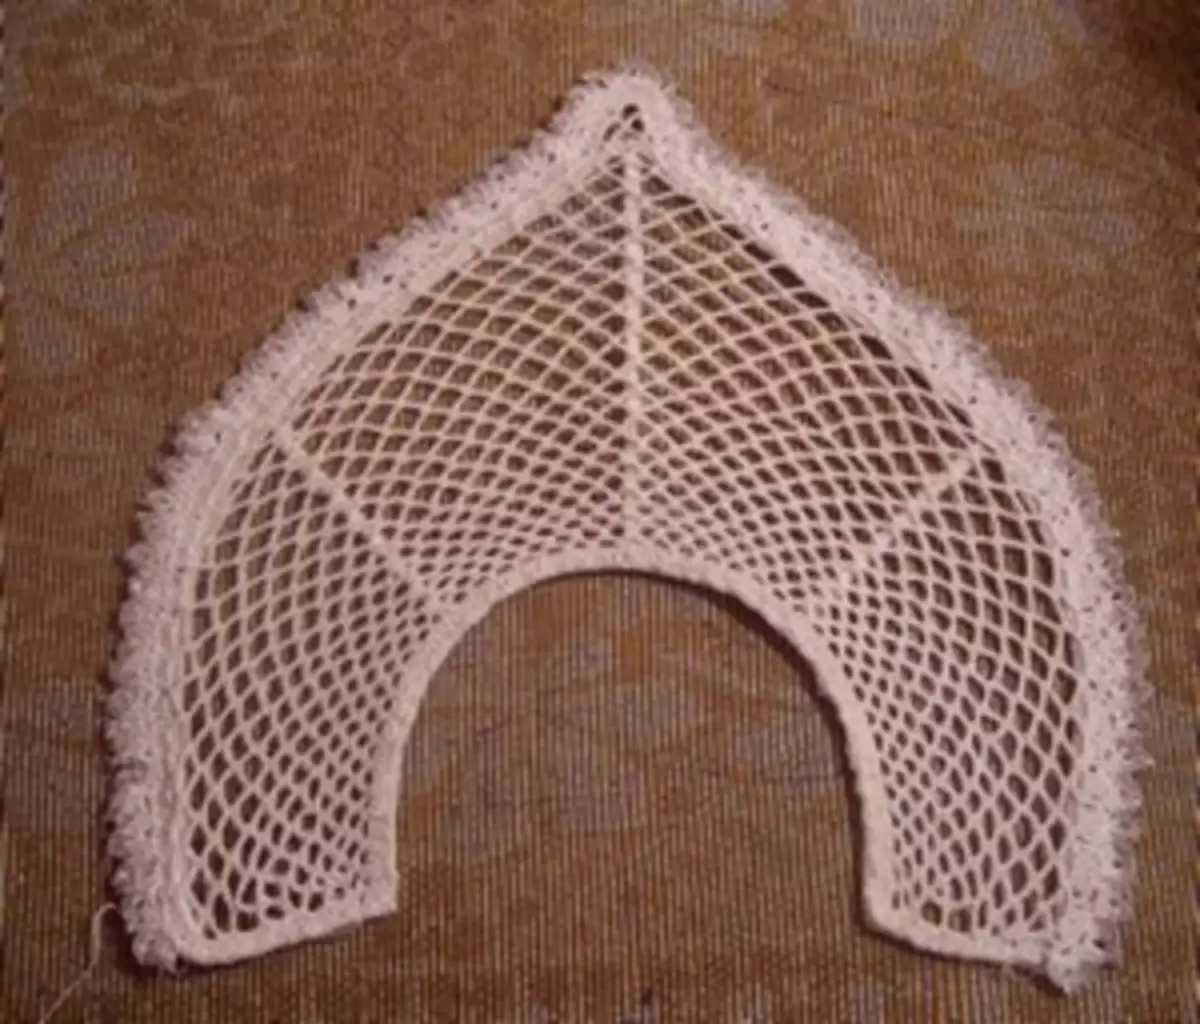
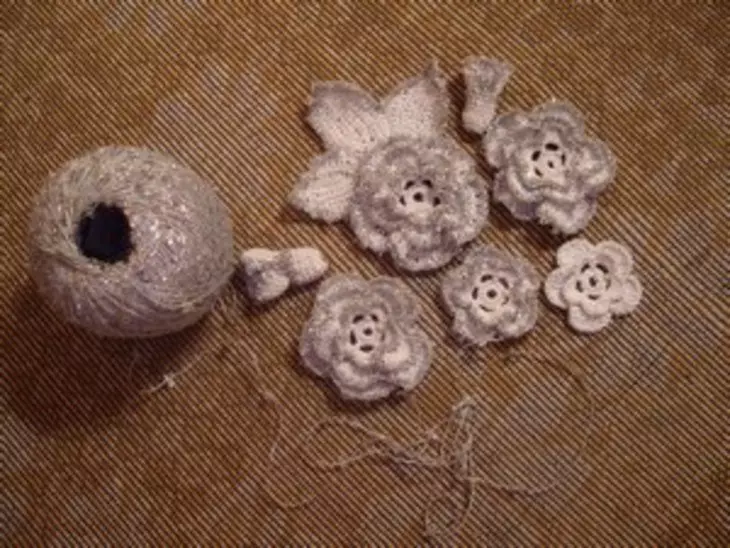
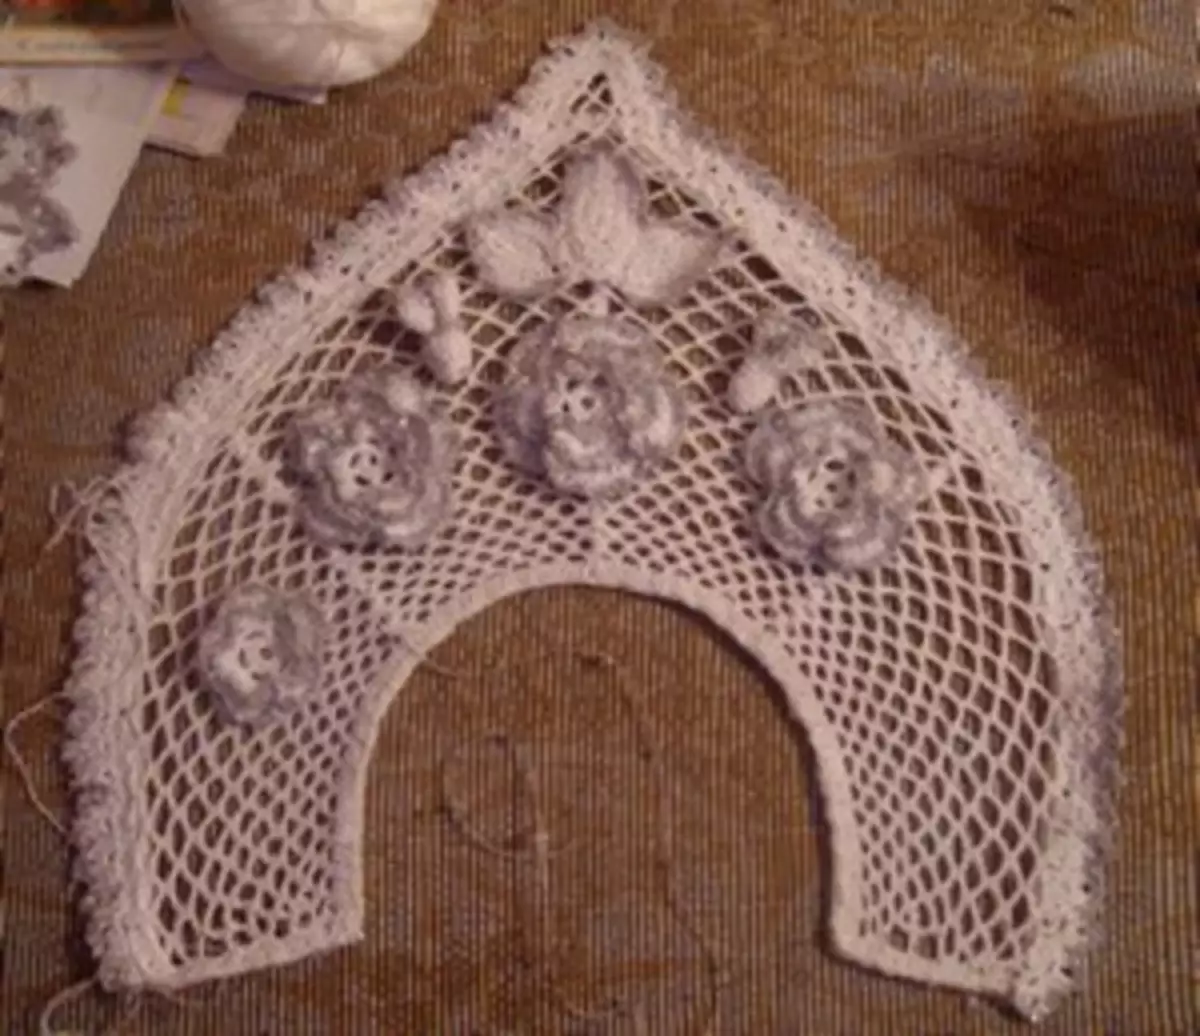
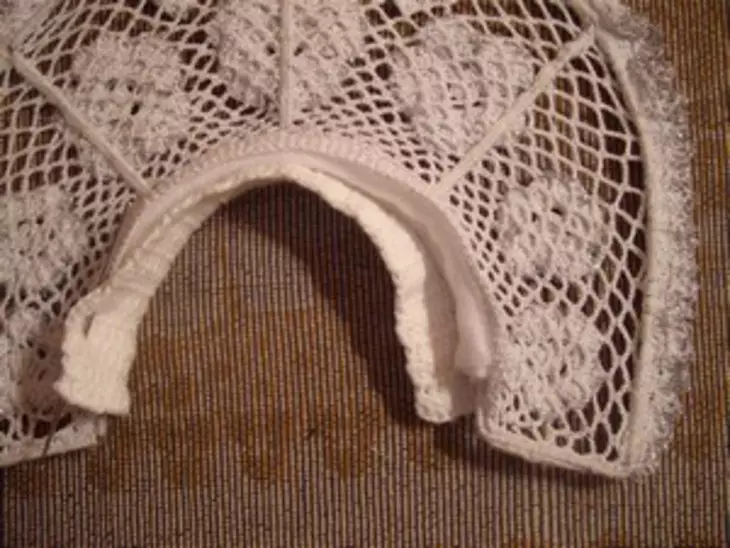
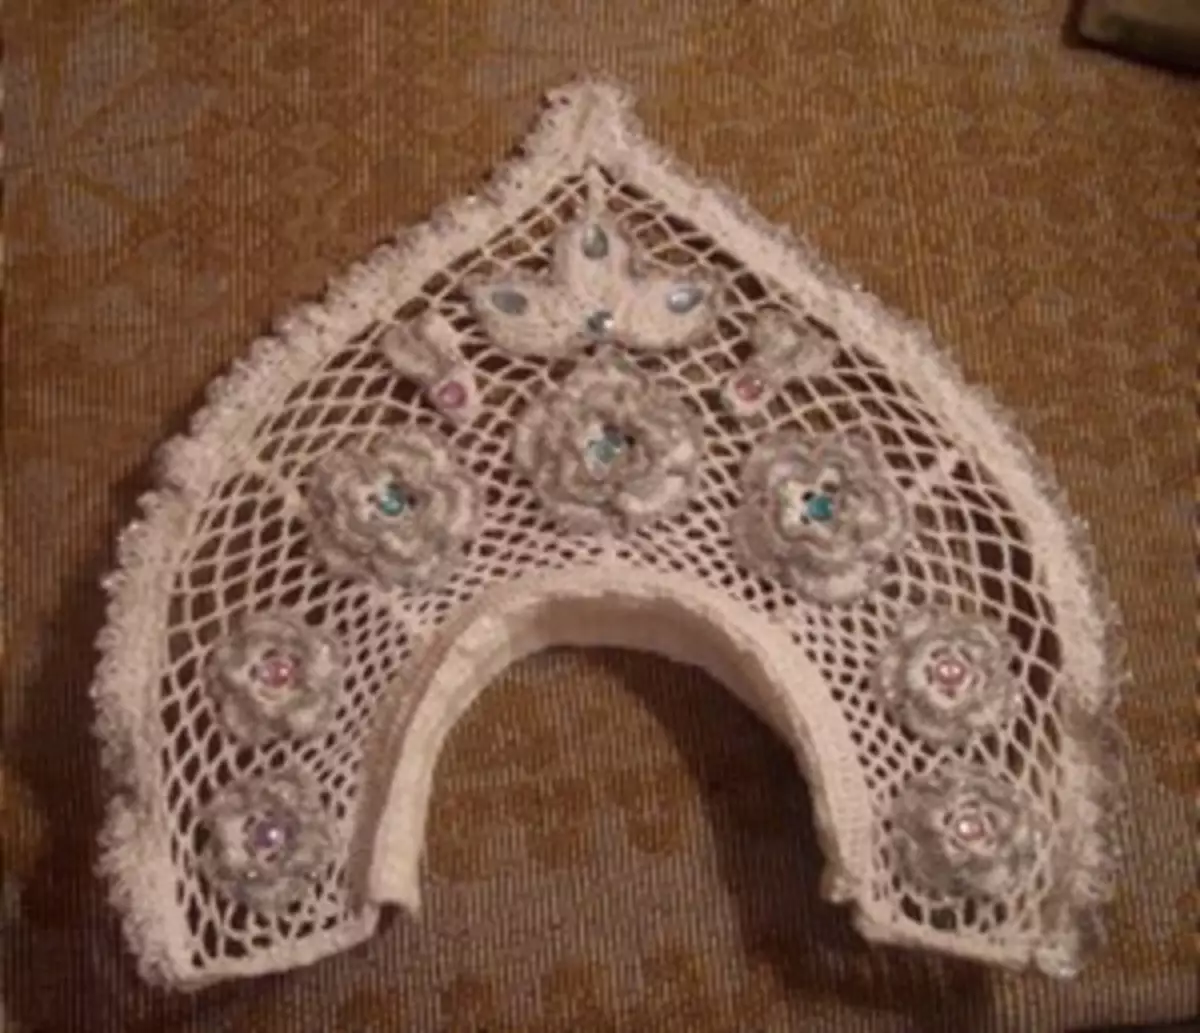
Progress. From the wire, make the framework of the future product, tie it with crochet. Tension on it knitted grid. Tie the floral elements of the decoration (you can leave, curls - what is enough for your skill and fantasy) and attach them to the grid in the planned composition. To make a route (rim) you need to score and penetrate several rows, not reaching the end. Then type the loop from the rear side, without having reduced. Tie the second part.
Fold 2-3 times the fleece strip and consolidate it between the details of the land. So the rim will not put pressure and it will sleep better. Decorate Kokoshnik Beads and Rhinestones. Behind the sew gum. Secure the ribbons to get a bounce from behind. Kokoshnik is ready for the upcoming holiday.
Step-by-step photo of work: