
Everyone loves to receive gifts, and especially nice if they are made personally. Today we will analyze the master class in which the creation of a paper shill is made in detail, where we consider some options for the performance of gift packaging.
Elegant way
Materials that we need:
- paper;
- scissors;
- PVA or pencil glue, or glue-gun;
- Decorations, sweets, decor on our taste.

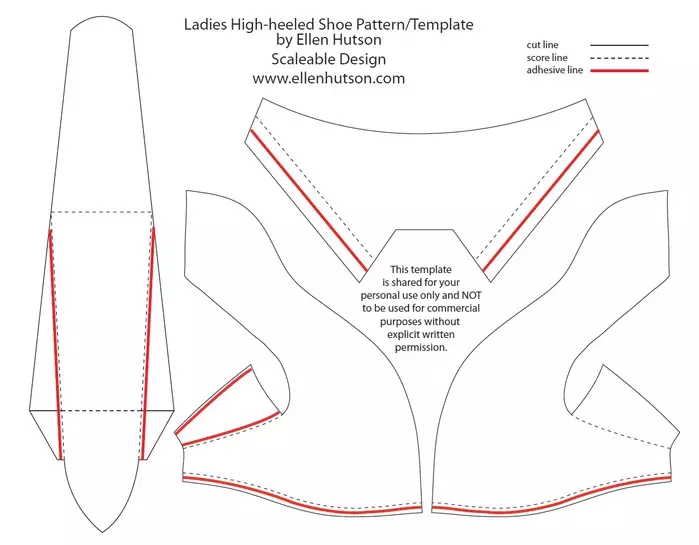
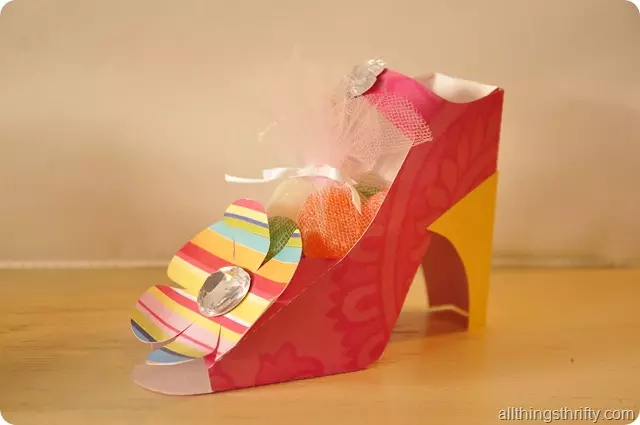
To create it, we will need a template to be printed on paper. Paper should be dense. Using the printer, print a template on paper. Clean cut. The dotted line on the template shows the fold lines, and the red line is a bonding line.
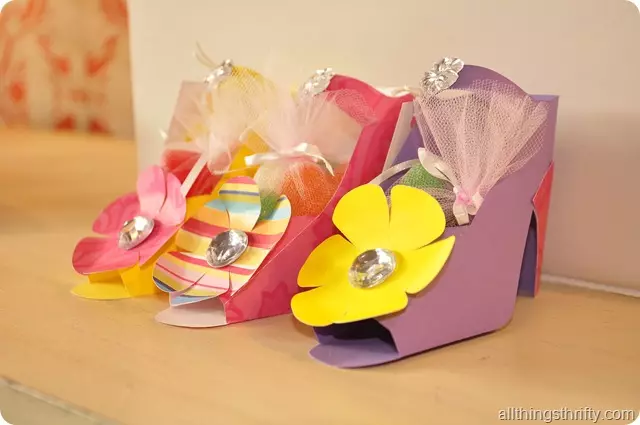
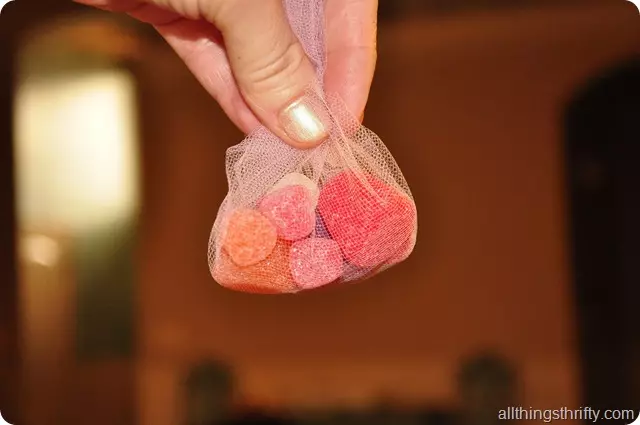
You can put various souvenirs or sweets to the finished shoe, wrap in a piece of beautiful fabric or organza, fix ribbons, decorate a shoe to your taste.
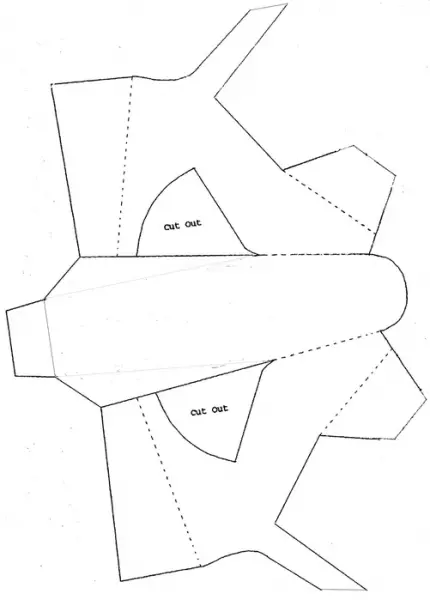
Interesting and gentle
This is the second version of the shoes, is made similar to the first option.
This looks like a tender template:


3 option
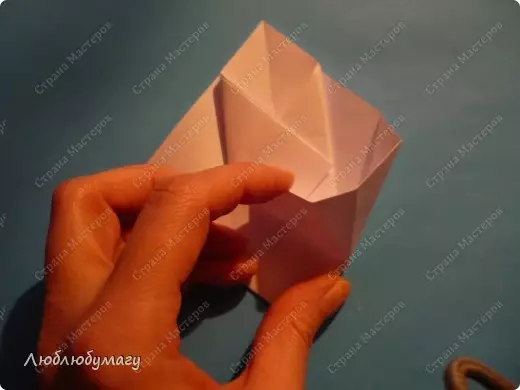
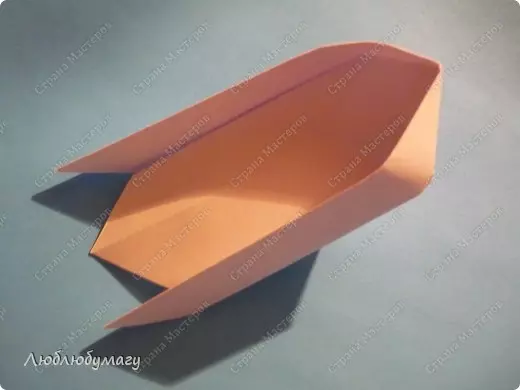
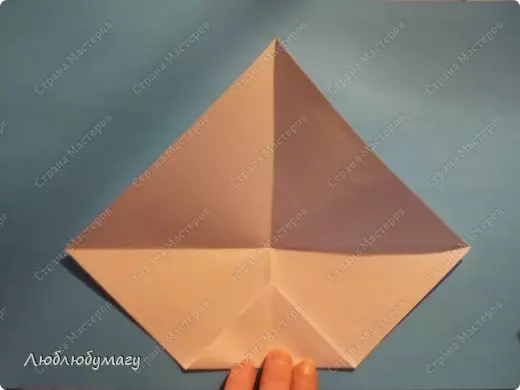
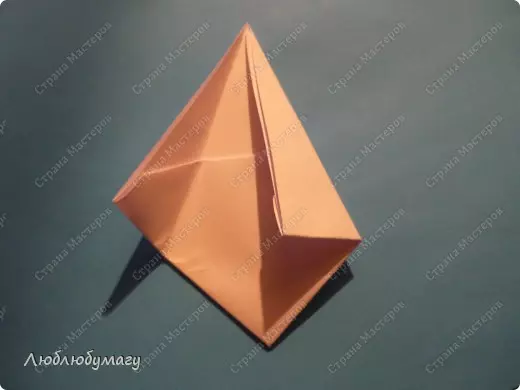
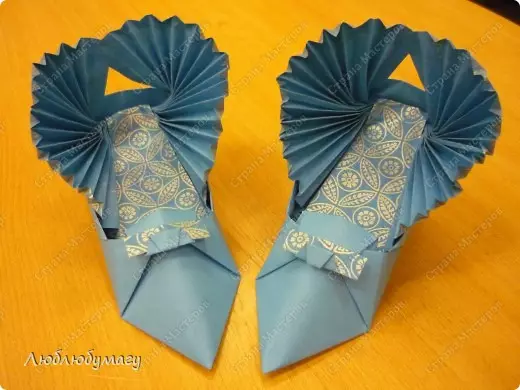
Another option of paper shoes in Origami technique.
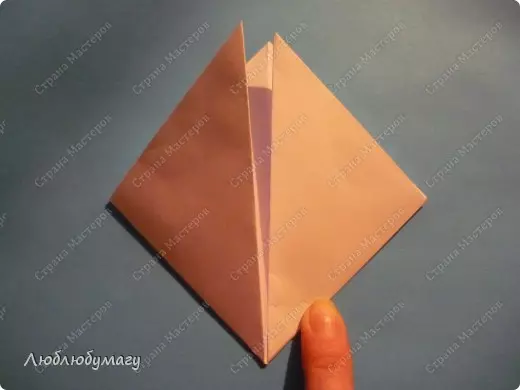
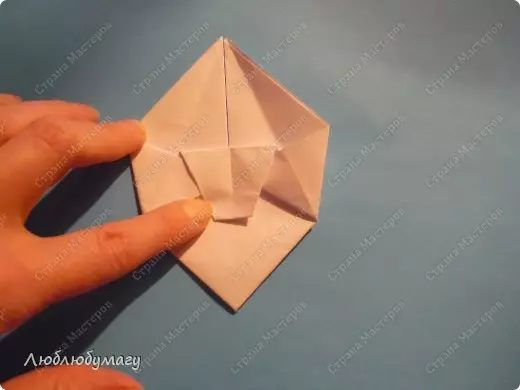
We begin to make a shoe with a heel. Make the square of the paper diagonally in half, then break and again diagonally and dispersed. Bottom corner to the center and disperse, look at the photo.
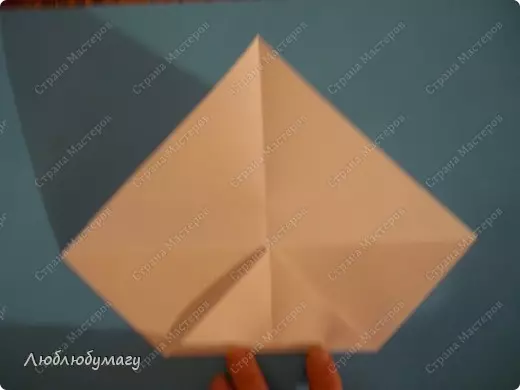
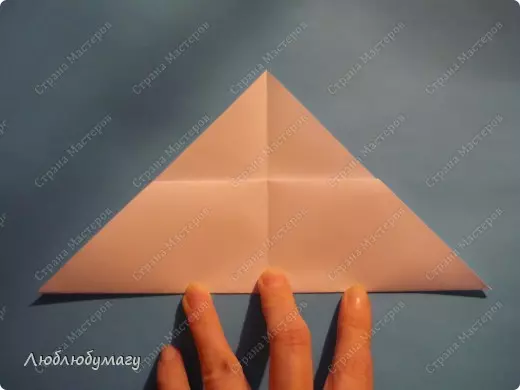
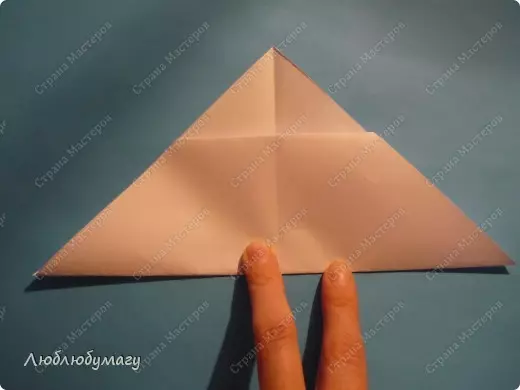
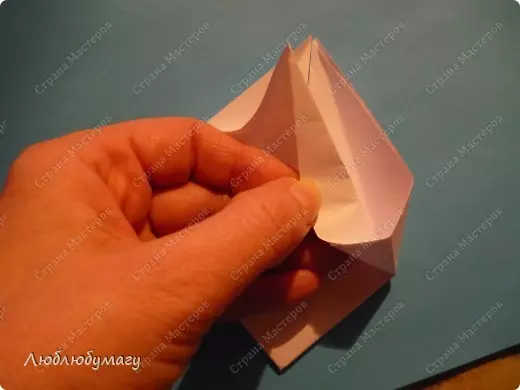
Invert paper. Sharp edges bend to the top.
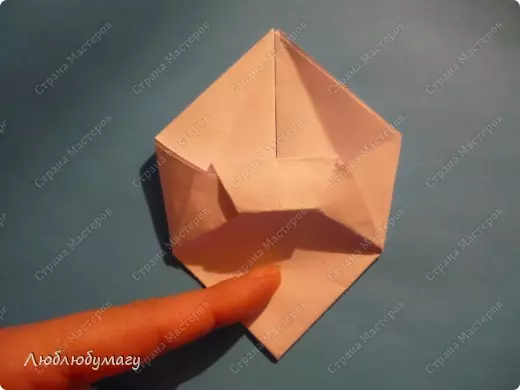
Reverse work again. We divide on 3 parts.
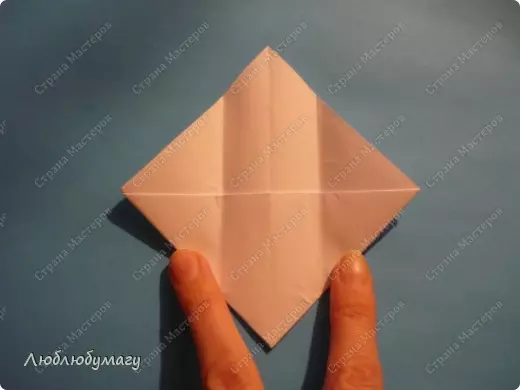
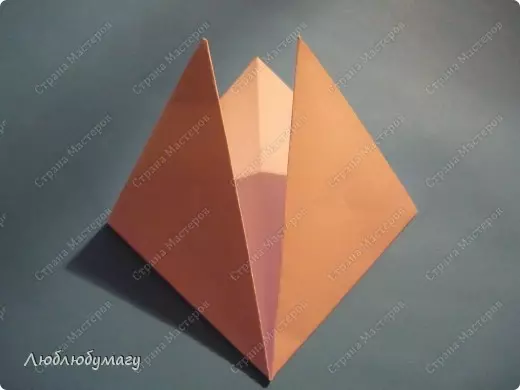
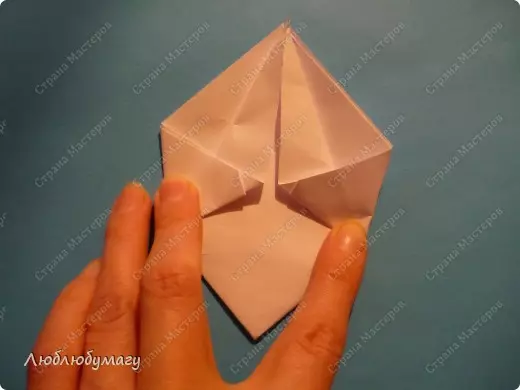
We work with layers.
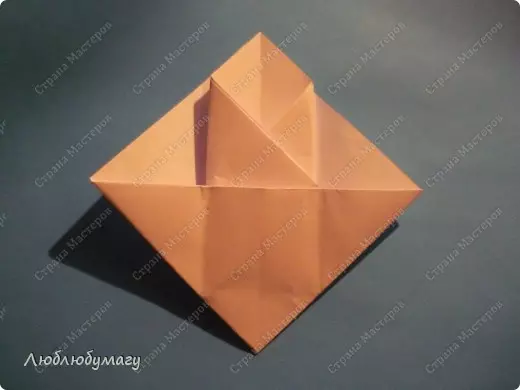
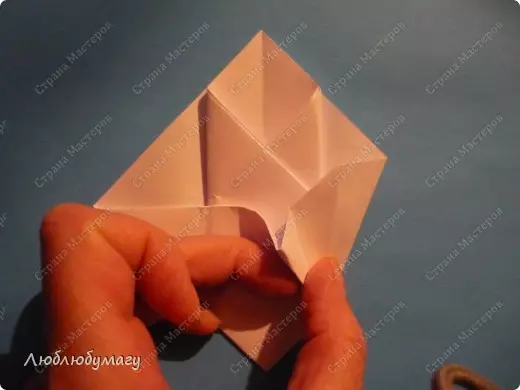
Repeat what we did on the opposite side.

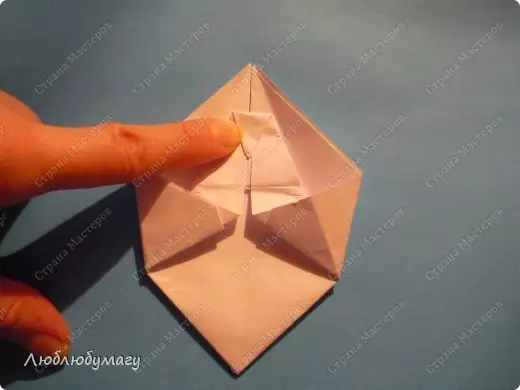
We fold on both sides:
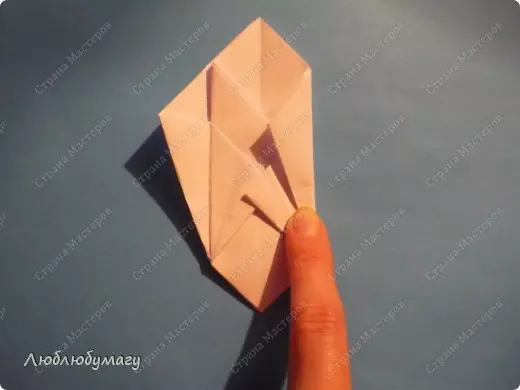
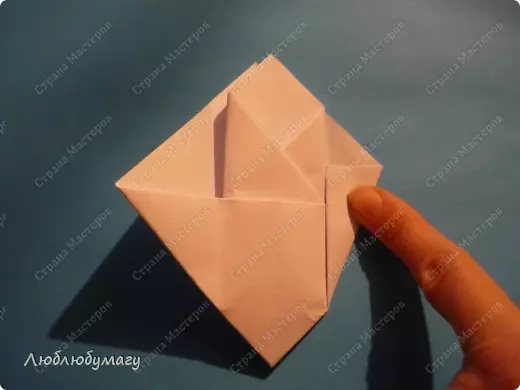
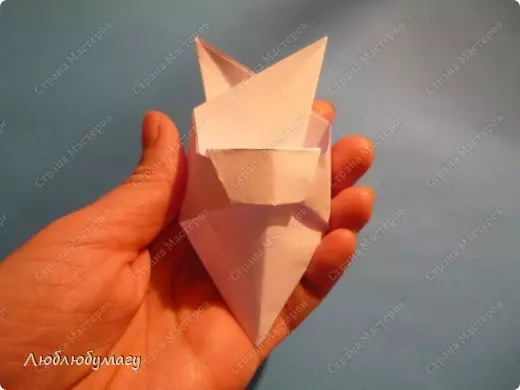
It has come to the heel.
You need to smooth the heel.
To create a shoe sock, bend the lower central corner to the center.
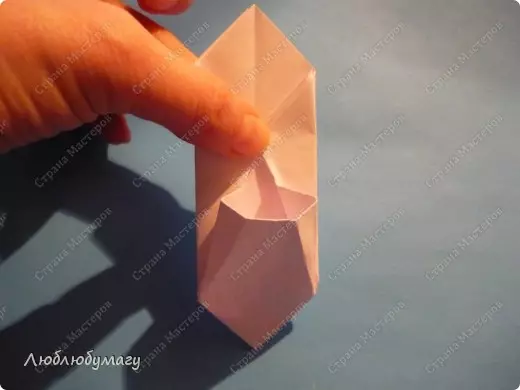
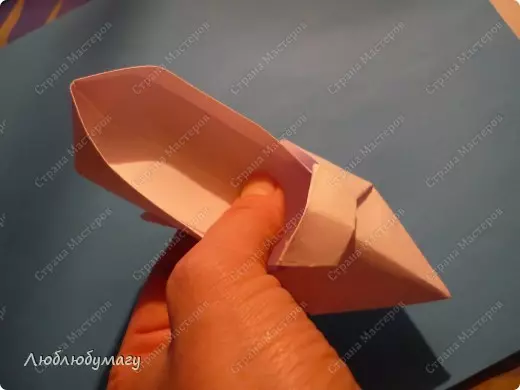
From the bottom up raise the corners, turning the work.
Now again you need to turn work. We do as in the photo.
With the help of glue by connect the sock and the heel of our shoes.
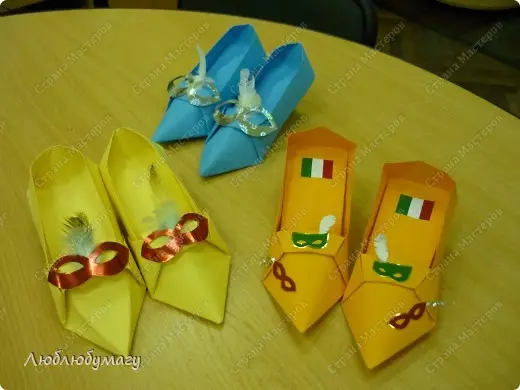
Such ready-made options after decoration can be obtained:
Article on the topic: Bear head from Pompon. Master Class
Here is another shoe diagram in Origami technique:

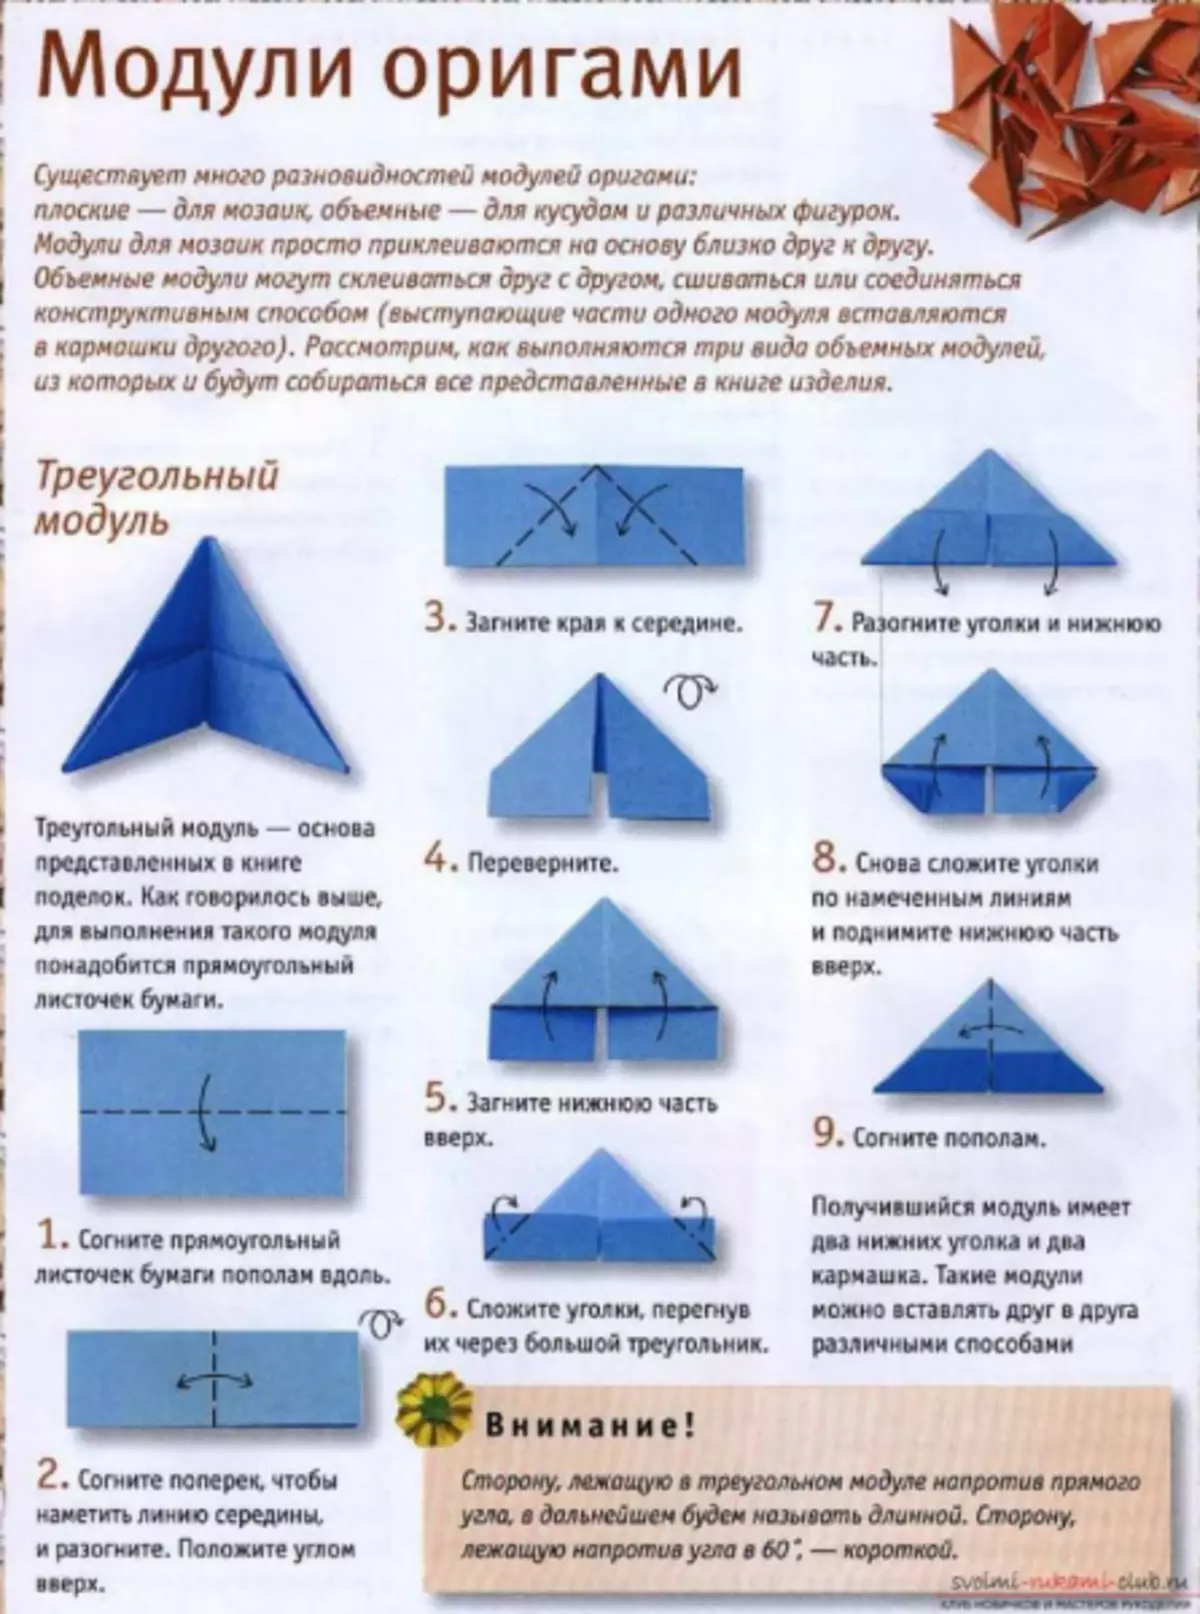
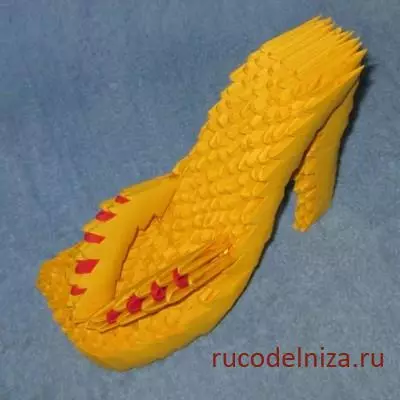
Modular origami
Modules make this principle:
Here we will do this shoe:

To create it, we will need:
- 18 leaves of yellow paper;
- 2 leaves of red paper;
- Adhesive moment "Crystal";
- Scissors and knife stationery.
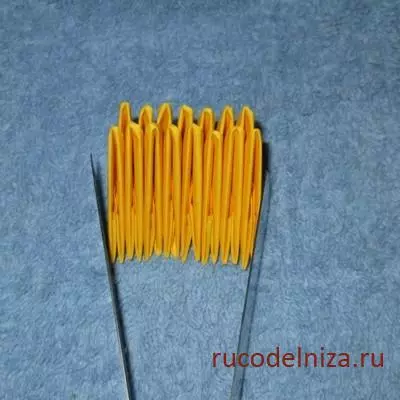
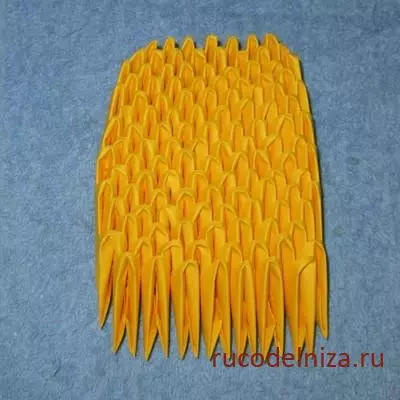
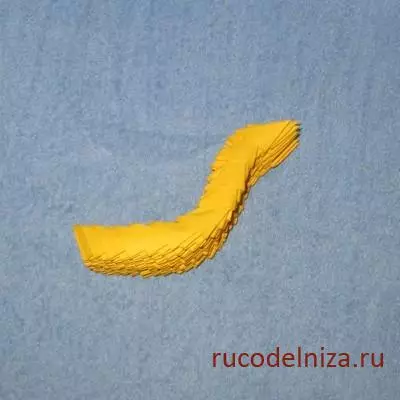
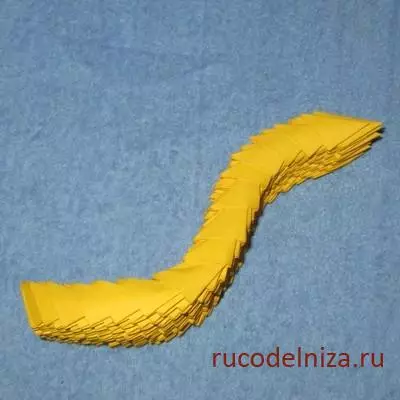
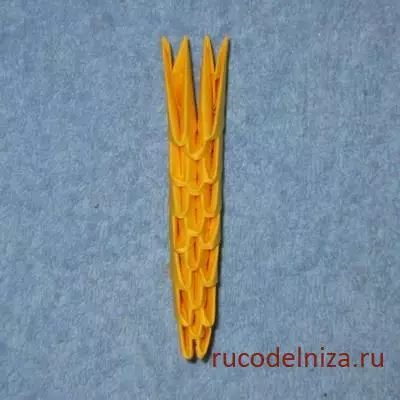
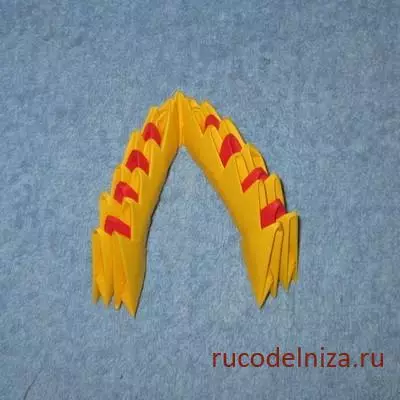
To create such a shill, you first need to make modules. We will need 279 yellow modules, 21 red-sized red module. The sole of the shoes we will collect separately, is also separately assembled by heels, straps of shoes and flower. Then separate parts are glued together.
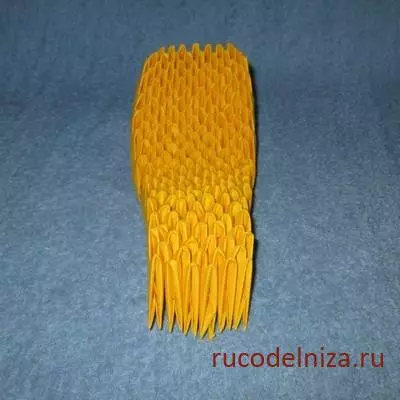
We collect the sole. It is assembled from yellow modules. Red modules for collecting soles are not used. In the first row we have 7 modules. The second row is already one module more - 8 modules.
In the third row: 9 modules. Fourth row: 8 modules.
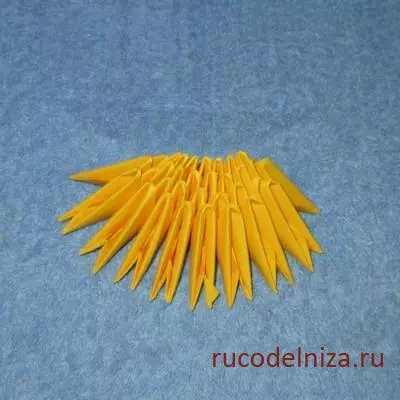
Fifth row: 8 modules. Sixtar row: 8 modules.
Seventh row: 9 modules. The eighth row: 8 modules. Ninth row: 9 modules.
Tenth row: 8 modules. Eleventh row: 9 modules. Twelfth row: 8 modules.
Thirteenth row: 7 modules. Fourteenth row: 8 modules. Fifteenth: 7 modules.
There should be no corners of previous rows, we hide them in the pocket of the next row modules.
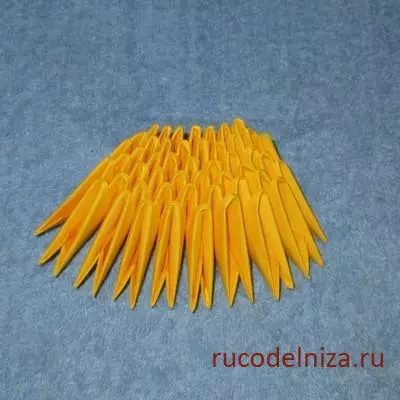
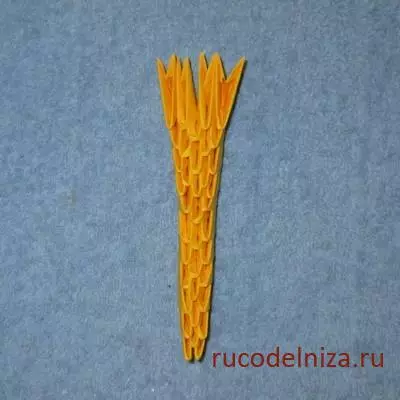
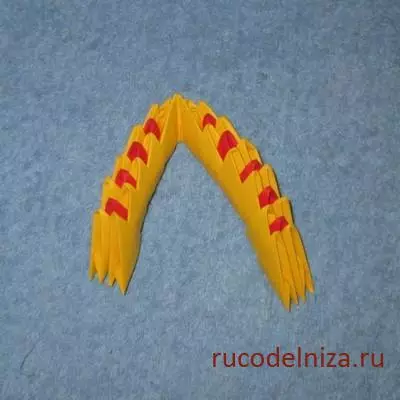
16 row: 6 modules. 17 row: 7 modules. 18 row: 6 modules.
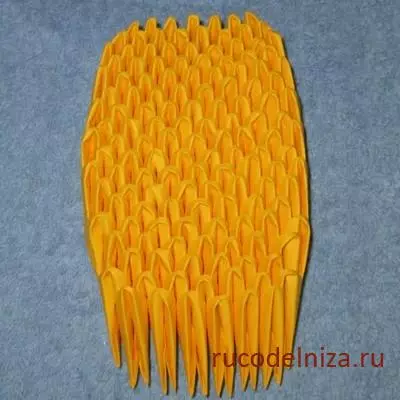
19 row: 7 modules. 20 row: 6 modules. 21 row: 5 modules.
22 row: 6 modules. 23 row: 5 modules. 24 row: 6 modules. 25 row: 5 modules.
Due to the bends, we make a realistic sole.
We continue to create further. 26 row: 6 modules. 27 row: 5 modules. 28 row: 6 modules. 29 row: 5 modules. 30 row: 6 modules.
31 row: 5 modules. 32 row: 6 modules. 33 row: 5 modules.
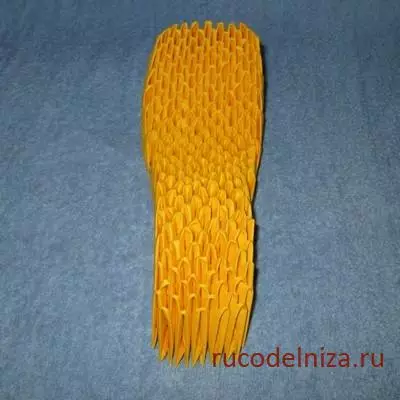
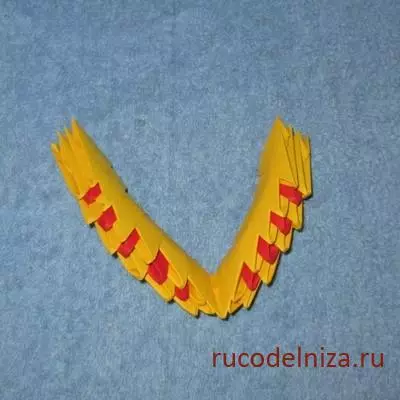
Here we got the sole of our shoes.
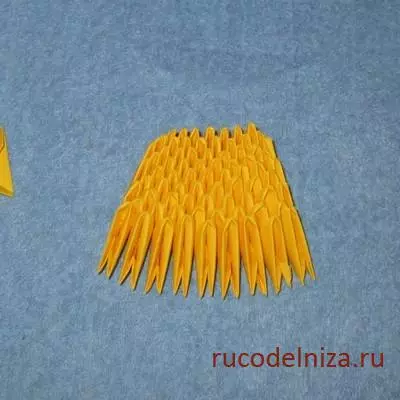
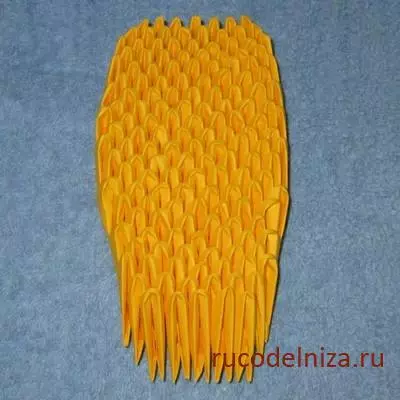
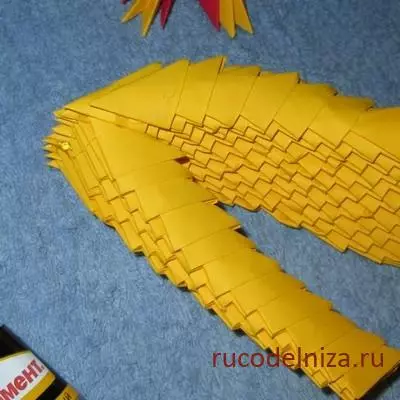
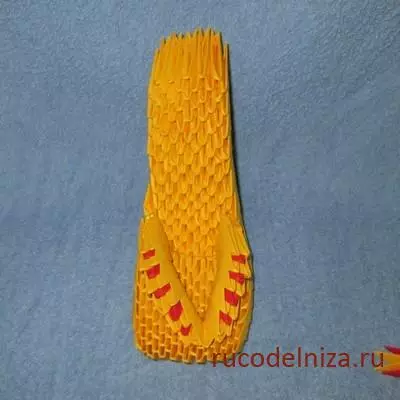
Now we have to make a heel. In the heel we will have 15 rows of modules.
From the 1st to the 13th row, the number of modules in the ranks changes: 2 and 1, and so the alternation continues
Article on the topic: A simple salting recipe for winter with a hot way

From the 14th row to the 18th row, the number of modules in the ranks changes. 3 and 2 modules alternate.

The fifteenth row consists of 4 modules and this next to our heel ends.
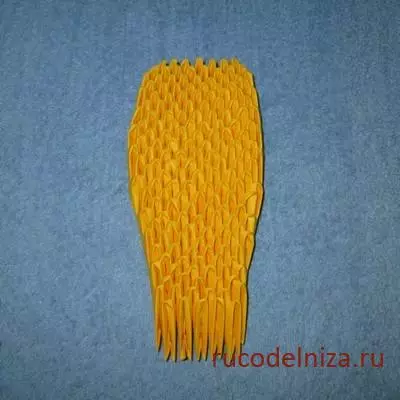
Sole glue to heel.
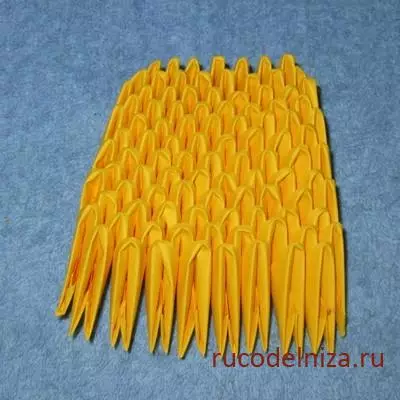
Let's leave the glue dry and we will collect straps. But already we will use both yellow and red modules.
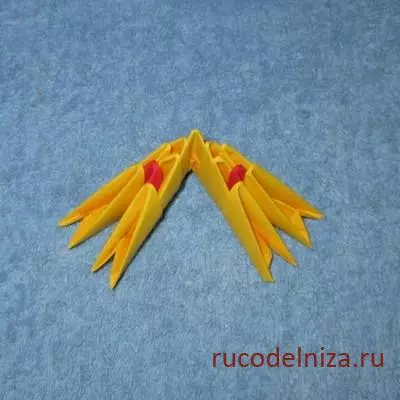
One strap must be made longer than 2 rows.
Now glue straps.

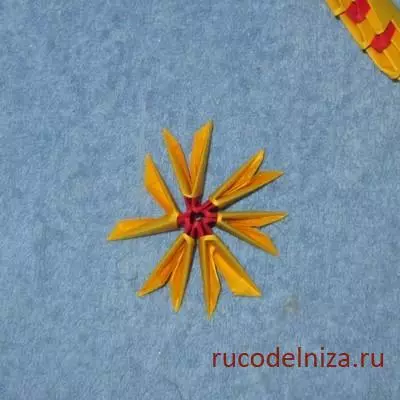
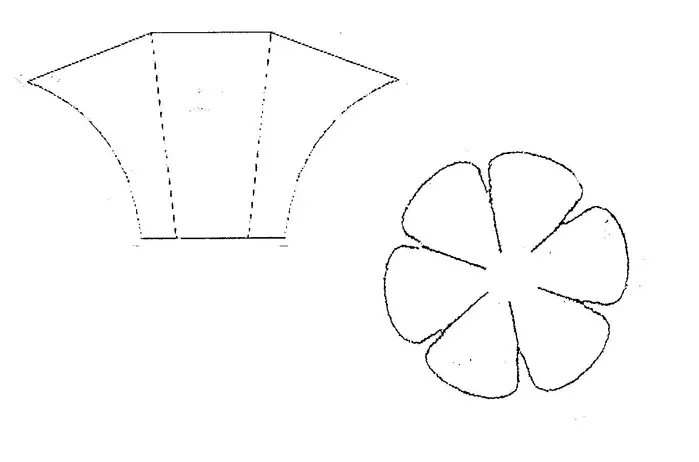
Decorate our shoe flower. We collect it from red and yellow modules, as shown in the photo:

Finished flower glit to our shoe.
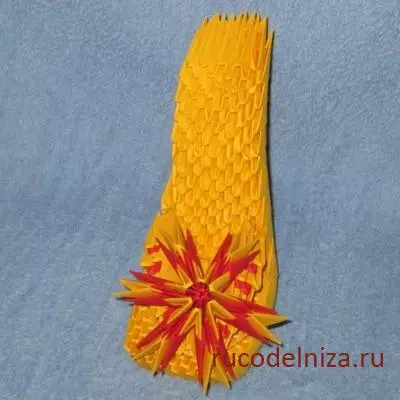
Shoe ready!