
To make a garden cachepot in the form of a fabulous stump, it is necessary to prepare cement, building gypsum (alabaster), water, construction grid, primer, alkyd paints of brown, yellow, green, black and white, empty plastic containers, tassels, sponge, tape and two tanks for the solution (Fig. 1).
Caspo will have three separate colors. Therefore, the first thing that needs to be done is to cut the tops in plastic bottles, pour sand in them and connect with a tape (Fig. 2).
Next, wrap the workpiece with a construction grid and prepare a thick solution. To do this, take two parts of sand and cement, mix them in a separate container. Then, stirring the mixture, gradually add clean water until the solution is formed, a consistency resembles a liquid sour cream. Make sure that the solution is homogeneous, without lumps.
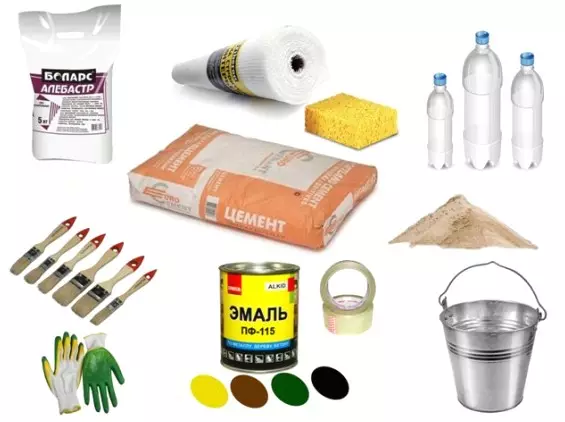
Fig. one

Fig. 2.
Take the second container and set a few cement mortar into it. After adding the alabaster, stir well and quickly apply to a moistened billet from plastic bottles. Remember that alabaster freezes very quickly, so make small portions of gypsommate.
Apply the solution to the entire surface of the KashP. After a damp palm, you swallow the workpiece (Fig. 3).
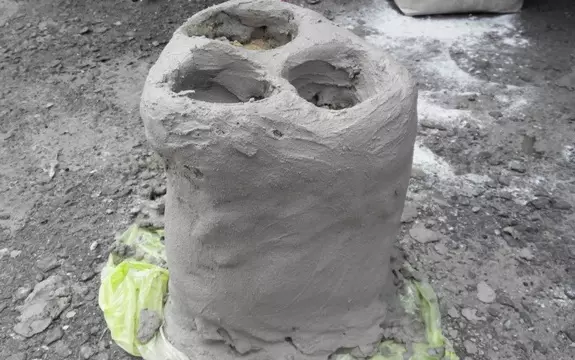
Fig. 3.
Remember that when working with cement-plaster mixture, you need to wear rubber gloves.
Leave your kashpo for ten or twenty minutes so that the solution is frozen.
The next stage is the application of curly elements. To do this, use the same cement solution with the addition of gypsum. Each separate part of the face is attached to the moistened surface of the porridge.
In order to make the eyes, take a small portion of the solution, add alabaster so that the mixture can be rolled out in the palms. Then split the mass into two parts and roll two balls with wet hands. Quickly tell them to the workpiece.
Article on the topic: Unusual liquid wallpapers: 5 species of drawings
Make eyebrows over your eyes. To do this, roll the sausage from the gypsum cement, cut it into two parts and attach over your eyes. Make relief notches with stack or knife.
To make a nose, form a ball, attach it to the porridge, and after the wet fingers, press the nostrils where the nostrils should be deepened.
Similarly, make your mouth, forming a finger inside the ball hole, and increase your ears (Fig. 4).
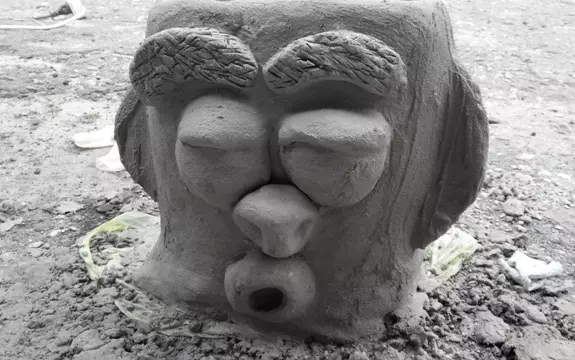
Fig. four
Behind Cachepo Make Craer. To do this, add so much alabaster to cement so that it is not very thick, but not a broken mixture.
Take a little solution in your hand and throw on Cachepo. Then fingers quickly form the relief. Work in the direction from above at the bottom (Fig. 5).
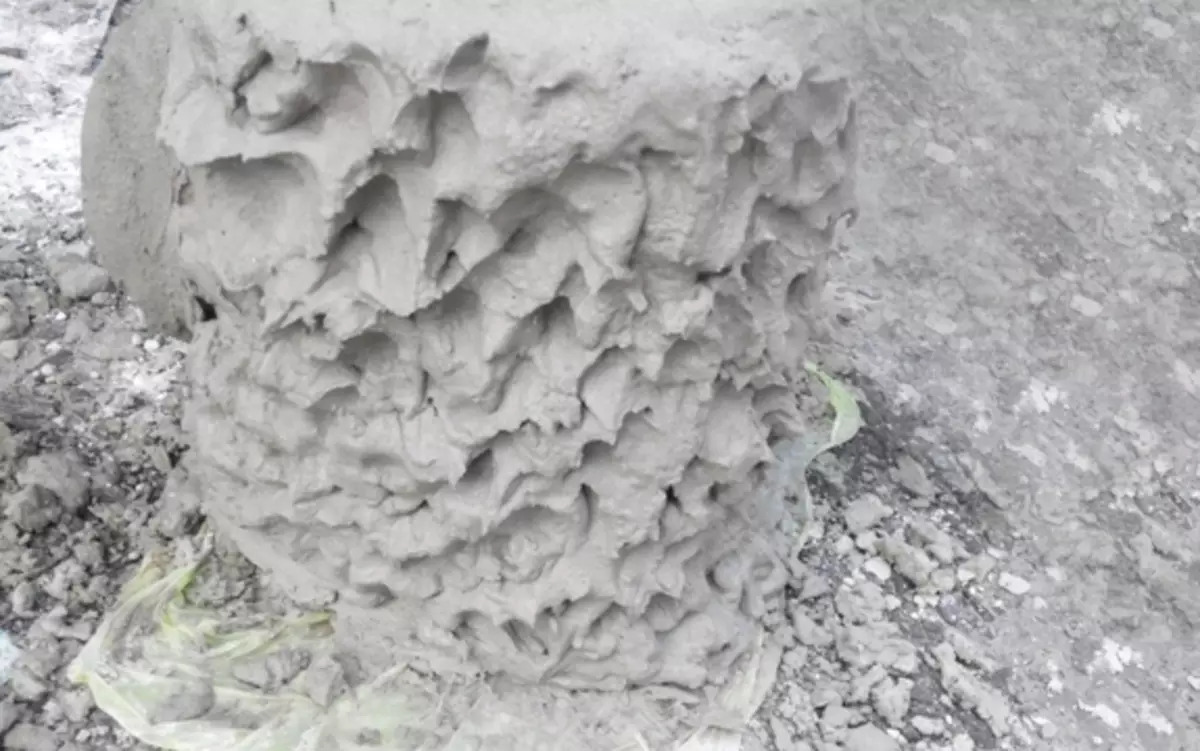
Fig. five
Leave your porridge for several days to complete the solutions. After booting the workpiece and apply several layers of brown paint (Fig. 6).
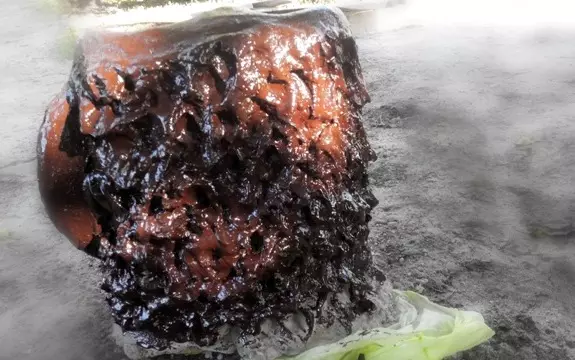
Fig. 6.
After drying out the paint, apply a little yellow paint on a dry sponge and cover the stump (Fig. 7).
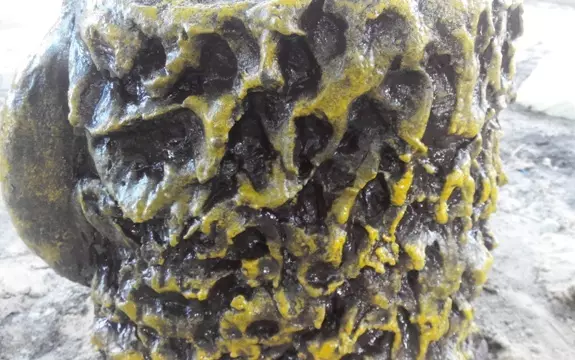
Fig. 7.
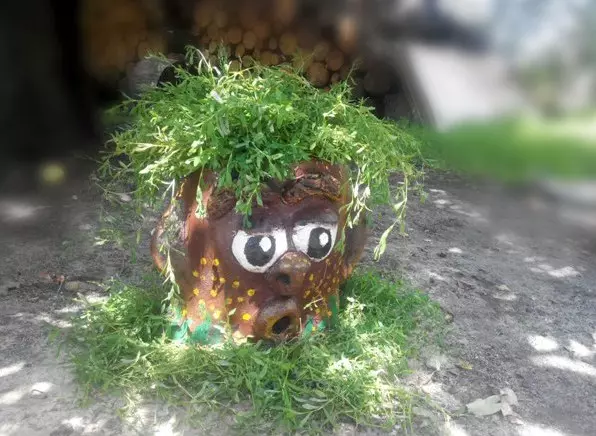
Spool your eyes, let off the eyebrows and mouth, as well as draw the freckles and grass (Fig. 8).

Fig. eight
Each subsequent layer of paint apply after complete drying of the previous one.
To plant plants, make a hole at the bottom of the tanks, after laying small stones, sand, and after - so much. Now Kashpo is fully prepared for plant planning (Fig. 9).
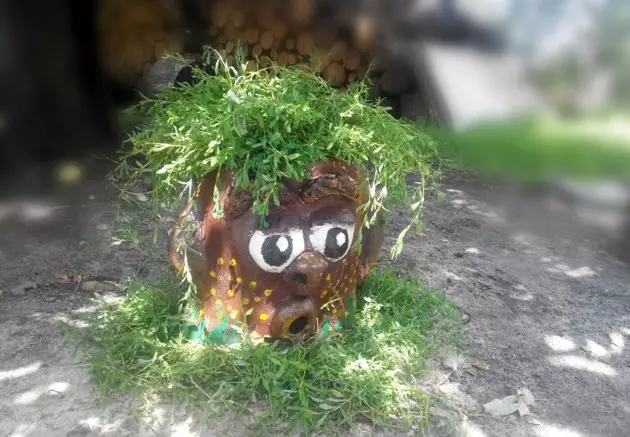
Fig. nine