
Laminate, originally intended for the arrangement of floor coverings, is used as a universal material for the objects of the doors, wall decorations and ceilings. Laying the laminate on the ceiling is not much more complicated than on the floor, and can be made with your own hands.
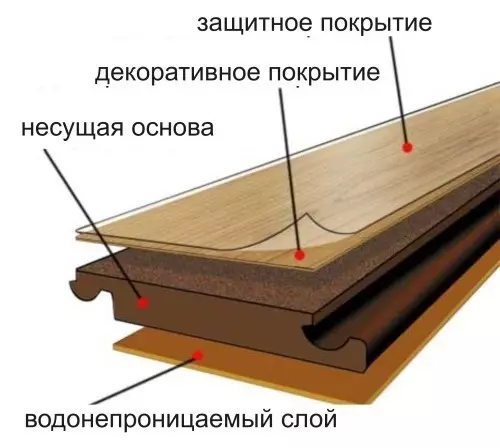
Laminate structure.
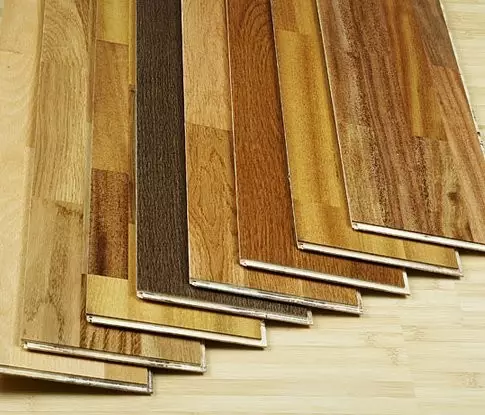
Properties of laminate panels
Special laminated board for finishing the ceilings is not performed. In this case, ordinary laminate is used with reduced strength and wear resistance requirements. The ceiling, in contrast to the flooring, the increased mechanical load does not turn out.
The laminate has all the positive properties of natural wood and exceeds it by strength and wear resistance. By structure, the material is a design of several layers (from top to bottom):
- Polymer film that protects material from moisture penetration and mechanical damage. The coating can be glossy or matte, smooth or relief.
- Paper layer has a decorative purpose. The drawing on paper can imitate wood structure, stone, tile, etc. For ceiling finishes, the light tones of the drawing is preferable.
- The main layer of laminate board - wood (MDF or HDF-stove), impregnated with a special composition to improve the performance properties of the material.
- The bottom layer, as well as the top, is a paper impregnated with water-repellent composition for protecting wood stove.
After the acquisition, the laminate should fly up in a unpacked form in the room where work will be performed.
The connection of the panels is performed by snapping the plug-in lock. On one side of the panel is a longitudinal groove, with another commercial comb.
Material has good heat and sound insulation properties. When laying it on the crate there is an opportunity to equip additional isolation. Laminate is unpretentious in leaving, has a long service life. It is thermosetic, does not ignite, but deformed from the flame.
The ceiling finish with this material is possible only in rooms where there is no excessive humidity. In unheated premises, baths and kitchens it does not apply. With its production, phenolic resins are used, which subsequently distinguish toxins.
Article on the topic: Linoleum for gender: Preparation in painting, primer with your own hands, need wooden flooring, processing
But if after installing the panels during the month, the room is periodically ventilated, the selection is stopped, and the material becomes safe. Therefore, the installation of laminate on the various designs of the room is desirable to be carried out in the absence of tenants.
Regardless of the method of covering the ceiling of the ceiling with a laminate, after its acquisition, the material must fly up in a unpacked form in the room where work will be performed.
During this time, the laminate "adapts" to the climatic conditions of the room.
Preparation for laying laminate panels
Laminate laying scheme for ceiling.
Before deciding how to lay a laminate for the ceiling, learn the last for its strength and flatness of the surface. If you plan to install lamps, you should define the arrangement of the wiring.
Before working on the ceiling decoration, its surface is prepared. Old stucco must be removed, the surface is primed. When moisture, the laminate swells and deforms. If there is a danger of water leaks from the top floor or attic, it is desirable to equip waterproofing at the overlap.
If the wiring passed in the ceiling not in the strokes, but in the layer of plaster, it is placed in small plastic channels. Wires can be attached to the construction silicone point fixation every 15 cm. In the rails of the crates for wiring, the grooves are separated.
Calculation of the crate, it will depend on the size of the acquired laminate board. The sizes of the cross section of the framework for the frame are taken at least 15 × 30 mm. Rake, passing around the ceiling perimeter, must have a width of 50 mm. Cell dimensions should not exceed 0.5 × 0.5 m.

Tools for laying laminate.
On the perimeter of the ceiling using the level of the framework of the framework of the framework. On the ceiling with a pencil, the location of the crates and the drilling points of the holes are applied.
The holes are drilled by a perforator under a dowel-nail Ø 4 mm in 500-700 mm increments (for lags). The depth of the holes is taken equal to the length of the plastic dowel + 8-10 mm. The drill diameter is taken by 1 mm less than the diameter of the plastic dowel under the nail.
When attaching the transverse elements, they are nailed with a dowel-nail with an indent from the edge of the rail of 50 mm. The length of the fastening nails is equal to the rack thickness with the addition of 40 mm.
Article on the topic: We make a beautiful rug from old things with their own hands
For laying laminate on a wooden frame, additional materials and tools are required:
- Wooden bars for the crate;
- Perforator (electric drill);
- Dowel-nails Ø 4 mm;
- kleimers or minor carnations;
- liquid Nails;
- hammer saw;
- roulette, pencil;
- ladder.
Mounting frame and laminate laying
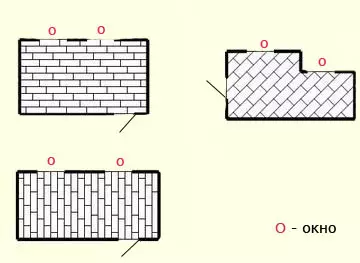
Possible laminate laying schemes.
The base frame from BRUSEV is mounted on the ceiling with self-tapping screws or dowel-nails. Guides are attached to the ceiling strictly perpendicular to the direction of laying laminate panels with a step proportional to the size of the panel.
Before arranging the framework, wooden bars should be carefully sucked, in order to avoid the deformation of the crate afterwards.
Mounting the frame begins with the fastening of lags. The rail is pressed against the line with the holes, and it makes the markup for drilling. Holes (Ø 3.5 mm under a nail Ø 4 mm) on the rail are dried on the floor. There, nails are driven into the thickness of the bar, then it rises again to the ceiling, and nails ride into the holes to the end. Perform these actions directly under the ceiling tedious. In the same sequence, the transverse elements of the crates are fixed.
In the frame cells, you can lay foam sheets to prevent moisture accumulation over the laminate. For the arrangement of thermal insulation ceiling, the cells sometimes blend by mounting foam.
For fastening the panels to the crate use curvators - elements of fasteners for laying clapboard. But to install them in the locks, the latter have to be short.
Carnate laminate to the crate can be directly through the panel with small carnations. At high ceilings, they will be invisible. To finish the carnations into the body of the panel, in the grooves of the tower or in the deaf hole use the batter. The tool can be made independently from the kerner or bar (Ø 6-8 mm), drowning it under a truncated cone and leaving at the end of the "Piglet" under the hat of the carnation.
On the perimeter of the ceiling from the wall, a distance of 1-2 cm is left. Unlocked areas serve as compensatory gaps in case of deformation of the finishing material as a result of moisture. Upon completion of the laying around the ceiling perimeter, pannies of plastic or polyurethane are glued.
Article on the topic: Decorative tree in the interior - 75 photos of design options
Sticking laminate on the ceiling
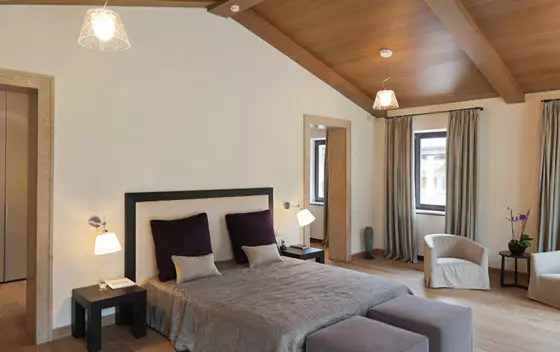
The ceiling made of laminate will decorate the room and create additional sound and thermal insulation.
Sticking the panels directly to the base surface of the ceiling is chosen as a method of mounting a laminate with their own hands to preserve the useful space of the room. At the same time, it will have to achieve the ideal evenness of the foundation for finishing, several times producing putty and primer. The process will take quite a lot of time.
The method is extremely rare due to the complexity of the work and toxicity of the adhesive composition. When docking the panels, the already laid are cut off, so each panel is pre-naked with small nails through the edge of the groove.
If you still chose this way of installation, then you will need:
- putty, primer;
- Spatula, solutions capacitance;
- two-component glue, sealant;
- brush, hammer;
- small nails;
- backups.
Laying of laminate is made from the left far corner of the room. Apply glue to the ceiling site, commensurate with the panel area, as well as on the back of the latter. Laminate Castle Connection Grease Sealant, it will harden the design.
The panel is pressed against the ceiling by the backup, or bilateral tape is glued at its corners. The next element is processed in the same way and is inserted into the ridge in the groove with the lock snap.
When finishing the ceiling of a small area of the shield from the panels can be collected in a similar order on the floor. Then two-component glue is applied to its irons. The design is entirely pressed to the ceiling by backups.
A smooth surface under the laminate sticker can be created by pre-installation on the ceiling of plywood or drywall sheets. But in this case, the height of the room will be braked due to the device of the crate.
Laminate installation technology on the ceiling is more complex than laying outdoor coating from this material. But here the main one is the right choice of the method of installation and attentive approach to the preparation of the base surface or frame. If the preparation is performed at a high level, the process of laying laminate will become pretty light.