
There are many ideas, ways than to take a child in your free time. Spend your leisure fun and efficiently, make a craft from paper, because it is useful for imagination, the development of shallow motility of the hands, the production of perfection. Children love to make animals, plants, birds. Therefore, in the article, we decided to tell how the bird is from paper, with a selection of photos and videos.
Multicolored Pernaya
These birds are made of colored paper or cardboard. If there is no one or the other, do not be discouraged. Take a simple blank sheet, then color it with colored pencils, wovers or paints. Draw feathers or patterns, apply all your fantasy! When the leafle is ready, you can begin to start work. Consider the whole process in stages:
- Prepare leaflets of different colors, scissors, glue.
- Draw the template of your bird. Cut on it two mirror items.
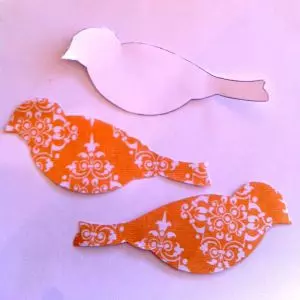
- Slit both parts.
- Wings, tail. It will take a color paper of another color. Cut out of it a couple of parts of a rectangular shape, fold each harmonica.
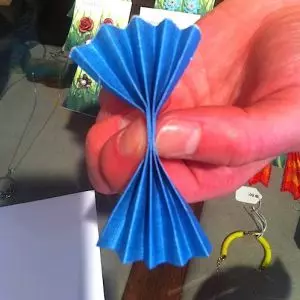
- Make cutters for wings, tail, as shown in the picture. The inner sides of the tail are sticking to the bird body.

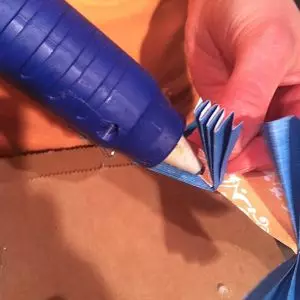
- Collect your craft. Admire the result.
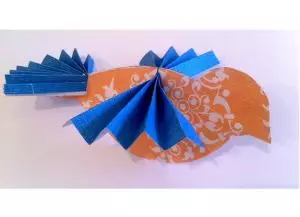
Here is another example of birds:
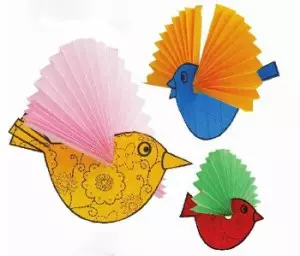
Crafts will become an excellent decoration of the children's room. And if you choose more calmer color tones, you can hang a few birds over the baby's bed.
Office resident
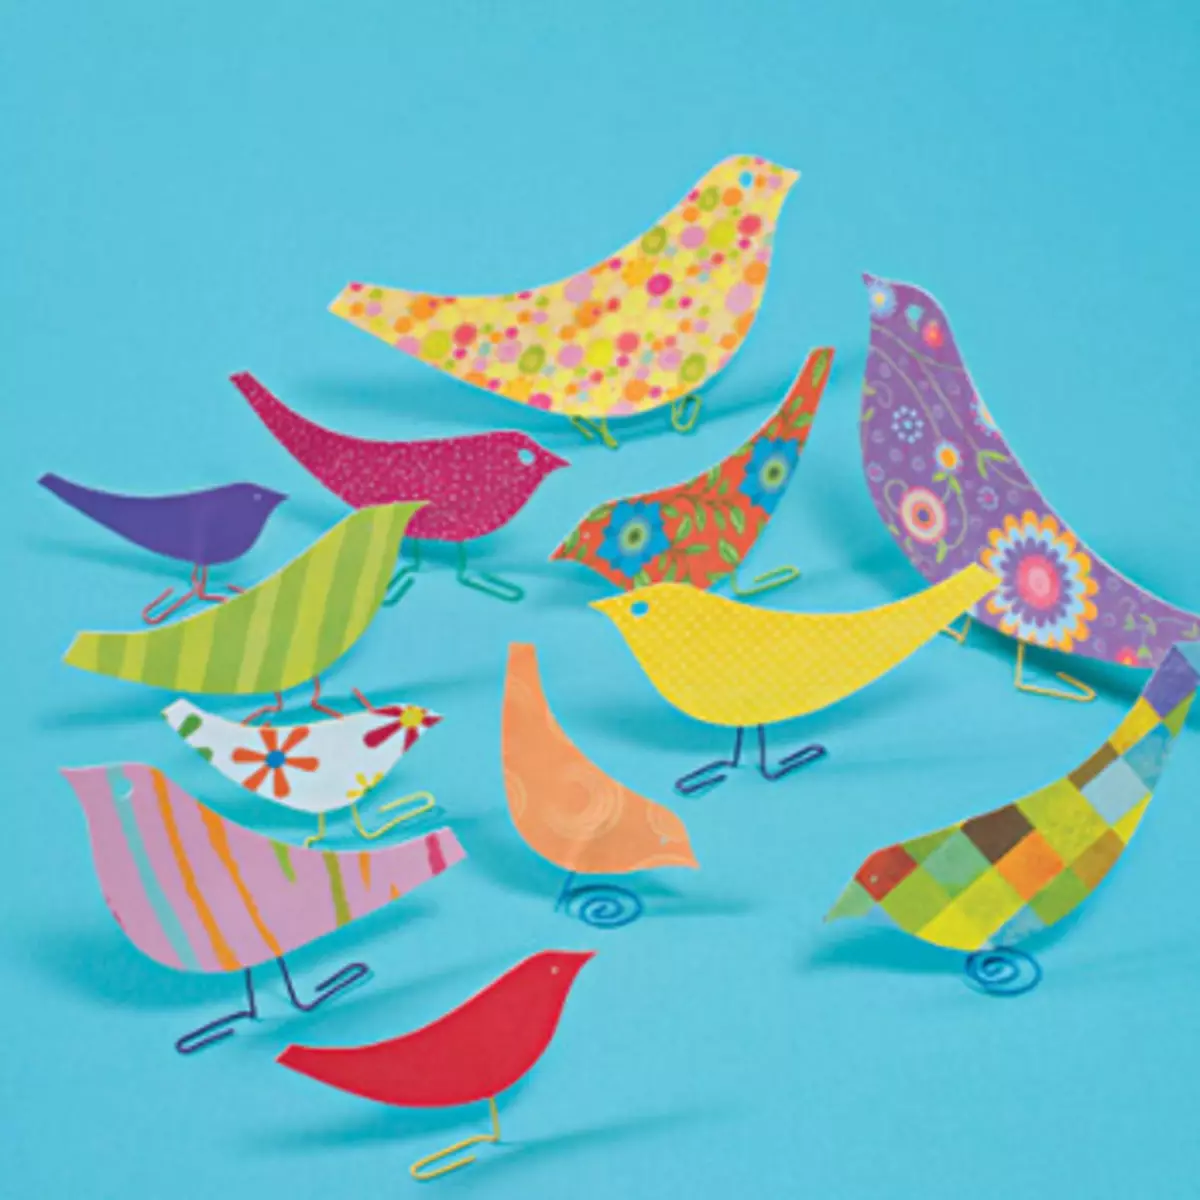
If you work in the office and in the lunch break want to forget about the work, then plunge into the world of creativity. Make a bird that can become your future talisman.
To create such a bird, you will need:
- leaf;
- clips;
- glue;
- hole puncher.
Draw a bird template, cut two details. Before connecting to them, take a pair of clips and straighten them so that the resulting form began to resemble the bird's paws. Now glue the details with the paws in the middle. Punching use to make a glazing.
Article on the topic: The jacket with smear spokes from mohair with schemes and photos
So do your own hands you will make a bird from girlfriend.
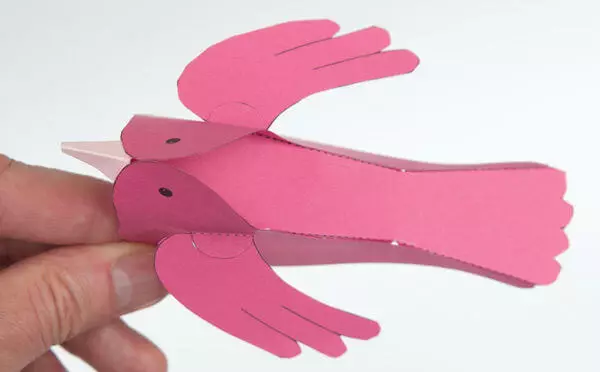
Give the craft volume
In order to make a bulk model, you must use the following sketch.
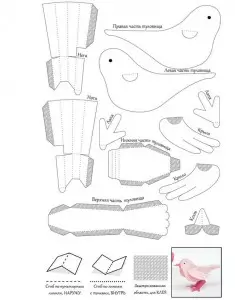
Print the material. Cut all the details. Bend all parts according to dotted lines, as well as prompts in the photo. Start assembly. For starters, glue the beak according to the following image.
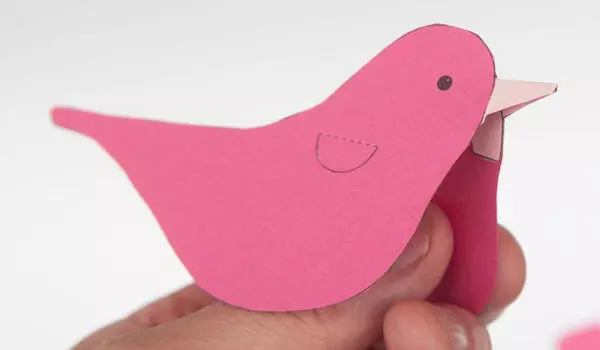
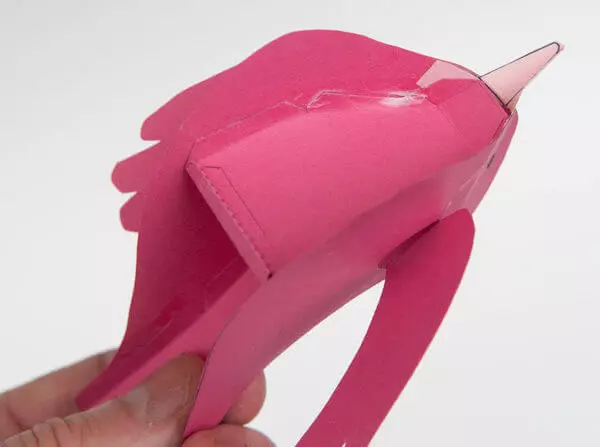
Then attach the upper part of the body, after - wings.
Now turn the side and lower parts. See the picture.
The latter glue your paws. Watch the knee bent at an angle of 90 degrees.
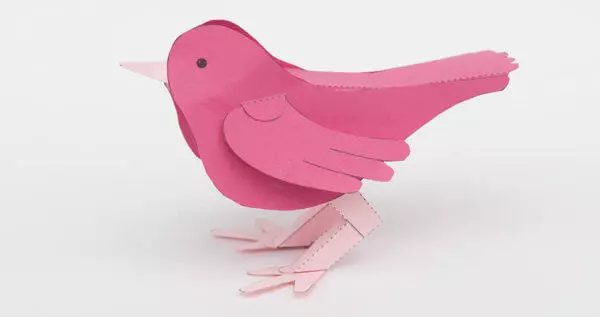
It turned out enough light handicraft even for children.
Eastern technique
Origami's birthday art is considered ancient China. But more this technique has gained its development in Japan. For a long time, only representatives of the aristocracy owned the skills of folding paper in such a way to get a figure. In the second half of the twentieth century, origami began to spread all over the world. At the moment, adults and children of each country will gladly make animal figures, plants. As part of our article, we propose to see how ordinary paper turns into a bird.
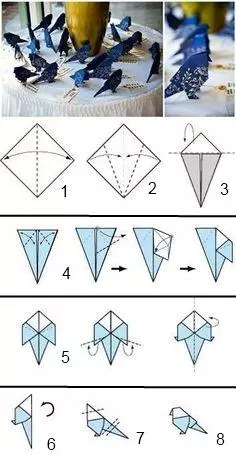
It is necessary to take a sheet. Cut square. Then clearly follow the instructions in the picture. Consider a Read more:
- Position the sheet as shown in the image 1, bend it to the dotted line;
- Left and right corners fold, and the resulting triangle wrap back;
- Make wings according to pictures 4 and 5;
- Bend the model in half;
- Move your head, tail (pictures 6, 7, 8).
Your East Ptashka is ready! If you wish to make a crane, then look the following video:
We master quilling
The most popular needlework style is quilling. The technique suggests twisting the paper strips of different length and width. The obtained spirals give the necessary form to further create from them different compositions. Ideas for queening a huge amount. Create both volumetric and flat figures. It can be appliques, paintings, decorative boxes, vases.Article on the topic: Weaving baskets from a vine for beginners: how to weave your hands with video tutorials
Creating things with this technique - the process is quite time-consuming, but very fascinating. To throw half the work done will not even be an amateur. Professionals use ready-made sliced strips of one, several colors, use a special set of tools (ruler, tweezers, rods for twisting).
We offer to familiarize yourself with Quilling closer. Watch the video for the creation of peacock (firebands).
Ptashka will be bright, colorful, unique. Original gift will appreciate handmade lovers.
Video on the topic
Pay attention to Useful Videos: