
Photo
For modern and stylish interior, you can use various types of flooring, including parquet or massive board. But there are more original options - this is 3D floors, with their own hands that can be created. These are coatings made of polymer mixtures that are poured in liquid form, with a special three-dimensional layer with an ornament. After the frozen, a durable coating is formed, which is steadily almost to any type of exposure. Mechanical strength and adhesion with base base high. If the polymer gear is required, the coating will be shot down with pieces of concrete.
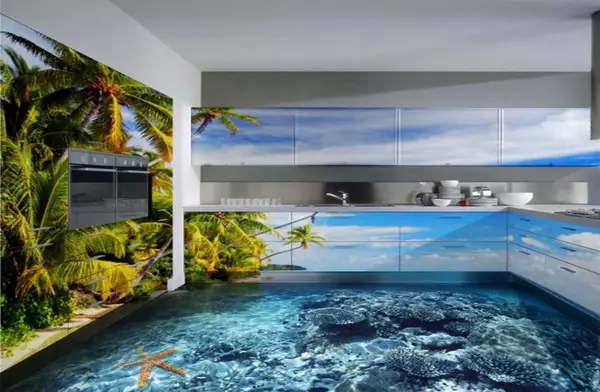
With the help of 3D floors, you can realize any fantasy in the interior design of any room.
You can make such a floor independently, although it is necessary to comply with numerous recommendations of specialists. Otherwise, it will be not only difficult to correct the error, but also expensive. It is much easier to clearly follow simple instructions than trying to remake the coating re-on.
Paul device 3D
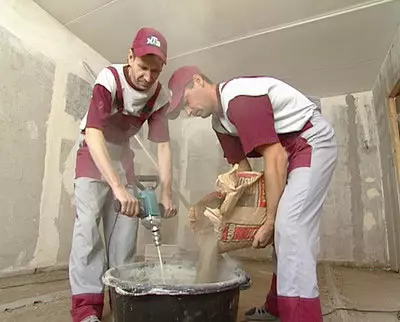
To create an unusual three-dimensional floor base, it is necessary to prepare such materials and tools:
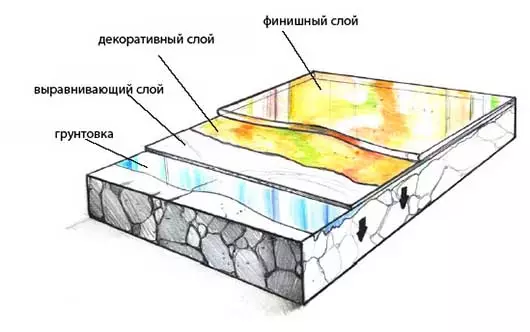
Floor 3D device.
- the container in which mixtures, a building mixer will be missed;
- Kelma, the riche for applying solutions;
- needle roller;
- roller for primer compositions;
- a vacuum cleaner;
- scissors;
- Simple brushes;
- Protective studded shoes;
- two-component primer mixture;
- base layer;
- means for decorating 3D gender;
- Finish transparent material:
- Protective varnish of selected type for finishing coating (glossy, matte, anti-slip).
Preparation of the foundation is that it is necessary to close all cracks and potholes of concrete, to rush big bumps. After that, it follows the surface to dry, clean from dust and remnants of construction waste, solutions that were used for alignment. After the base is dried and cleaned, it must be covered with a layer of special primer . This will not only improve the quality of the application of the polymer, but also increase the adhesionability of the concrete base and coating. The primer will correctly prepare the basic base for work, give it the necessary characteristics. If microcracks remain, the primer will fill them in, make the surface smooth and ready for work.
Article on the topic: Fliselin wallpapers: their pros and cons, as well as features
First layer - basic
The first layer of polymer floor is basic, it provides the necessary foundation for all further work. It is important that only high-quality materials are used to apply, to their application it is necessary to relate carefully, by observing the technology and manufacturers recommendations exactly.When applied, the base temperature should be at least 10 ° C heat, and humidity is up to 60%.
The base layer is applied strictly according to the previously performed on the walls, so that its thickness is clearly suitable installed. To dry out the first layer of the polymer takes 7 days, until this point, it is impossible to start decorating work.
Creating a three-dimensional layer
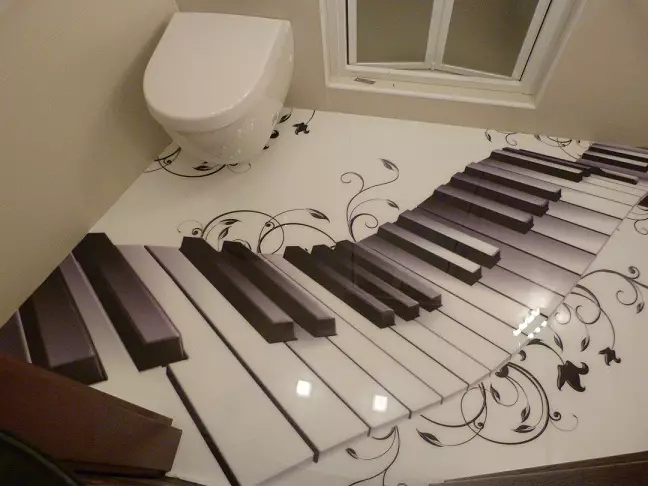
To obtain a three-dimensional effect, various materials can be used, there are the widest opportunities for fantasy. Several options for the decoration of floors are used, among which:
The three-dimensional floor layer is drawn by an acrylic or a special stencil is stacked.
- Using the floor surface as a canvas. For decorating, designers or artists are invited, which actually create real pictures with acrylic colors. Such author works are expensive, but the effect is impressive. After filling with a transparent layer of polymer, real works of art remain.
- Special stencils can be used to create a three-dimensional effect. They can be ordered in specialized companies, after selecting the floor ornament is printed on the film of the desired size. You can choose any, for bathrooms are used seashells, fish, any marine motifs, for living room lawn, flowers, cities panorama. When choosing a future three-dimensional coating, it is necessary to take into account that the resolution of it should be good so that the ornament is clear.
- To obtain the desired effect, materials such as sequins, beads, bulk materials, special chips, pebbles, etc. are used. Previously, it is necessary to develop a pattern, after which it is necessary to begin to apply gently, in accordance with the composed of the scheme.
- Sometimes the combination of several color sections is used. Materials for filling different colors are used, they create unusual stripes, geometric or abstract ornaments.
Article on the topic: Lining with your own hands: DIY
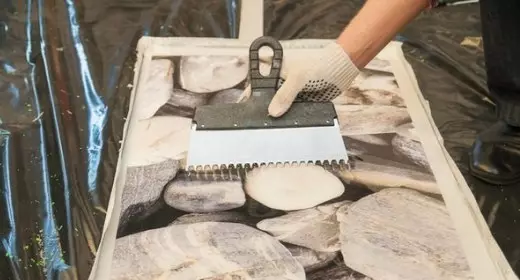
Apply a 3D drawing to a fully used base layer. For films, it is sometimes recommended to use a thin layer of PVA glue so that they do not shift during the fill of the finish polymer. The same applies to the use of various decor items that cannot be shifted from the place intended for them. It is this phase of decoration trusted by professionals, since with their own hands without proper experience to perform work difficult.
Finish coat
The finish coating of the 3D floor is a transparent layer, it is smoothed by a spatula, so that there were no air bubbles.
After the correct film is laid correctly, are taken for finishing processing. These are special two-component transparent mixtures that are applied with a layer thickness up to 3-4 mm. Polymer can be completely transparent if the 3D layer is used color, or with a specific tint when it is provided in order to obtain a specific effect.
It is necessary to apply the polymer from a long corner, carefully pouring the mixture to the floor and distributing it with a needle roller. It is necessary to apply the layer by pre-performed marks on the surface of the walls using the construction level. Only in this case the coating will be uniform and properly distributed. Walking on the surface at this time it is necessary only in a special studded shoe. During drying, it is impossible to move on the coating.
When the floors are flooded with their own hands partially, i.e. Combined floor covering is used, it is necessary to use a special technology. It is important to take care of smooth transitions between different materials so that they are invisible to the naked look, looked beautiful and harmoniously. After filling and drying, it follows in the future joint of the coatings to perform propyl with a depth and width of 5 mm. The seam is cleaned from dust, filled with primer, which should be carefully dryed. After that, you can pour the adjacent area with a color polymer, remove the tape and completely process the entire floor with the finishing transparent polymer. After this finish fill, the coating should dry.
Article on the topic: Glue for vinyl wallpaper: What should be glued
3D The floor is recommended to cover a special transparent varnish, which can be glossy or matte, special anti-slip. The number of layers - 2 is applied with roller, each layer must dry before applying the following.
Tips for specialists
To make the floor of 3d with their own hands, you need to follow such simple recommendations:
A mixture for 3D of the floor is prepared clearly adhering to the instructions.
- During the choice of dry mixture, preference should be given only to high-quality compositions from well-known manufacturers. When calculating the volume, the norms of consumption of a particular mixture are taken into account, after which approximately 5-10% is added. This is done so that the finished polymer composition is enough to work. The floor must be poured one time, it is impossible to interrupt the process.
- During the dilution of a dry mixture, water should clearly follow the recommendations, since the violation of technology will lead to the fact that the floor will be poor quality.
- The drawing should be chosen in such a way that it organically fit into the overall interior. In this case, the 3D floor do it turns out to be attractive and bright.
- When pouring each layer, drying time and conditions that are specified by the manufacturer are required. You can not violate such requirements in any way.
- When applying each new layer, make sure that there are no foreign objects and garbage on the surface. This is an important condition that affects the final quality of the coating.
Polymer floors today took a durable place. They are used not only for commercial objects, but also for residential premises. It is especially beautiful and stylish 3d floors with a three-dimensional unusual effect. 3D effect is obtained due to the fact that the selected polymer or decorative elements are applied to the base layer. After drying, it turns out a durable and solid surface, creating an extraordinary visual effect of depth.