
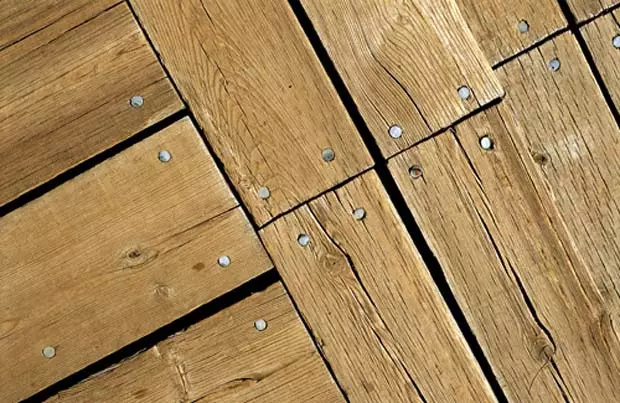
The tree can be considered the second floor coating made by the hands of a person's housing (the championship of historical justice requires to give the skins of the killed animals). But despite such a respectable age, the wooden floor and today remains one of the most sought -led, durable and stylish flooring.
Most often, the floor creaks due to the fact that the wood is breathtaking or got out the old nail.
However, he, like all the creations of nature and human hands, is not eternal. In practice, this means that in order to extend the life of its operation, you need to monitor its condition and make repairs in a timely manner. Especially since the floor, like no other part of the house, daily and hourly exposed to intensive loads.
Why creaks wooden floor
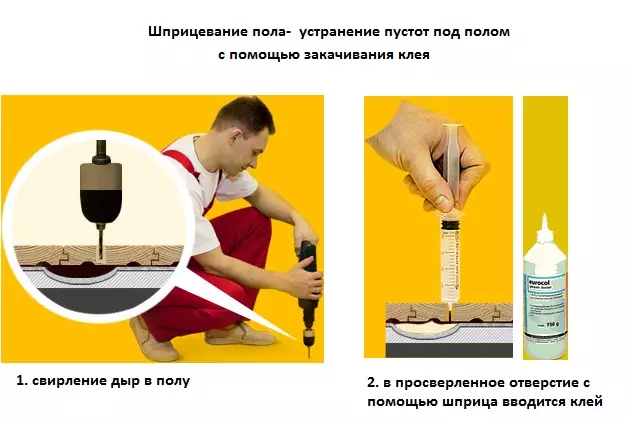
Repair of the floor with the help of glue and syringe.
The first sign indicating that the floor was not all right, the creak appeared in it. Many owners of frivolism do not pay due attention to him, believing that they deal with the natural process of aging wood.
Partly they are right. The reasons for the screap may be somewhat, but they all indicate the structural problems of the floor. Among the most likely reasons for the screens are most often found: drying of boards or lag (as a result of which they decrease in size); discharged nails; Insufficient compensation gap between floorboards and wall or its absence.
The floor will creak and then when it was taken too much a step between lags or the floorboards of insufficient thickness. In both cases, the boards will be fed, making an unpleasant creaky sound. Also, the cause of the appearance of a syringe can be fluctuations in air humidity in the room and gross violations of the rules of floor operation.
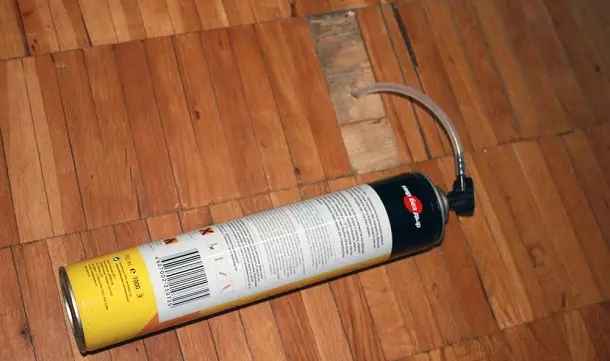
You can eliminate the creaking with the fill under the floor of the mounting foam.
It is very important to determine the cause of the edge of the floor, as it depends on how to repair it. After all, scrip screeching. The creaking from the friction of the board about the carnation of a nail for an experienced person is noticeably different from the screenshot of the boards of lags or each other.
In most cases, the creak arises from poor-quality or weakened attachment of boards to lags. At the same time, the boards begin to rub about lags or each other, making an unpleasant creak.
Article on the topic: Practical and original tabletop for kitchens from tile
If lags become the cause of the screenshot, then to eliminate the cause, they need to at least end, and if their condition is too bad - then and completely change. In both of these cases, do not do without opening the floor. But if the lags in order and the creaking of the floor are caused by other reasons, you can try to eliminate it without dismantling the boards. For this there are several ways.
Filling assembly foam
In this way, you can use when the underground space is small, up to 9 cm. In the slots between the floorboards produce a mounting foam in an amount sufficient to fill the underground space. Foam, expanding and frozen, knits and fixes the boards, giving the floor additional rigidity.But this method has two essential nuances. First, the mounting foam is not a cheap pleasure, so it requires significant financial costs. Secondly, this method can be considered only as a temporary measure. Indeed, in the process of operation, a mounting foam renovated in this way will be compacted, to see, contribute to the weakening of the total stiffness of the floor. As soon as it happens, the creaking will return.
Approximately the same result and at the same time you can get if instead of the mounting foam, pour into the slot talc or graphite powder.
Chucking Kliniev
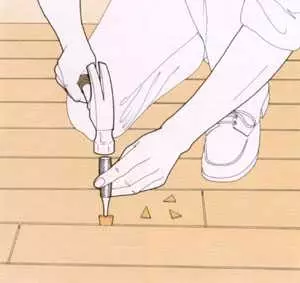
To eliminate the creaking, you can having boobing wooden clins between floorboards.
To eliminate the creaking from friction of boards with each other, we use wooden wedges. To fulfill this work, you will need:
- hammer or kiyanka;
- Dobanchnik.
To eliminate the creaking, you need to drive in the gap between the boards wooden wedges-struts. Wedges must be pre-made from thin wooden rails, each wedge in length will be 10-15 cm. The wedges are installed in 15-20 cm increments, and it is very important that the driven wedges do not perform above the field level. In order to do not squeeze the clogs from the slot over time, they immediately before scorching, you need to smear with glue: carpentry or pva.
If the targets between the boards are too small to score wedges in them, it is possible as an alternative to use homemade putty, mixing directly before working wood sawdust with PVA glue and fill with this mixture with a metal spatula.
Article on the topic: How to choose a glass bath curtains
Hauling self-drawing

Hauling with self-drawers is used if the floor crept between the coating and lags.
This method is used only when the screenshot is between the board and lags. Here the main difficulty is to find lags, especially if the boards are covered with paint layers. To find them, you will have to dismantle outdoor plinths from both sides, and then using long thin metal rods, mark their location. For this, the rods must be stuck in the floor in the center of the lag, and if it is impossible to do this due to a concrete base, then directly in the lag, connecting them by the marking cord.
Self-tapping screws need to take 2-3 cm less than the total thickness of the lag and floor boards. To determine the desired length, it is necessary to measure the thickness of the lag and the thickness of the boards and summarize the results obtained. Using the cord as a guideline, you need to screw 2-3 screws to the center of the lags in every board, while you need to drown them as much as possible to the board.
Old nails, if they sit tightly and their caps do not protrude above the floor surface, you can leave, otherwise it is better to remove them. This method is characterized by simplicity, low-cost and efficiency, but it is suitable only for one case out of 10, since the remaining 90% of the cases of sex squeaks occur on the passage sites.
Starting to strengthen the creaking boards with self-draws, it is better not to be limited to them and screw the screws into all the floorboards.
After all, the nail enters the wood, splitting it. Initially split layers are trying to connect and hold the nail firmly. But over time, the fastener weakens, partly because the split areas lose their elasticity, partly because the nails themselves decrease in diameter. The self-tapping screws are not cleaving, but screwed into a layer of wood, so they are in terms of durability and the compound fortress much more practical nails.
To fulfill such repairs, you will need:
- drill;
- screwdriver;
- nail holder;
- long thin metal rods (minimum 2);
- cord or fishing line;
- Line.
Laying plywood or chipboard
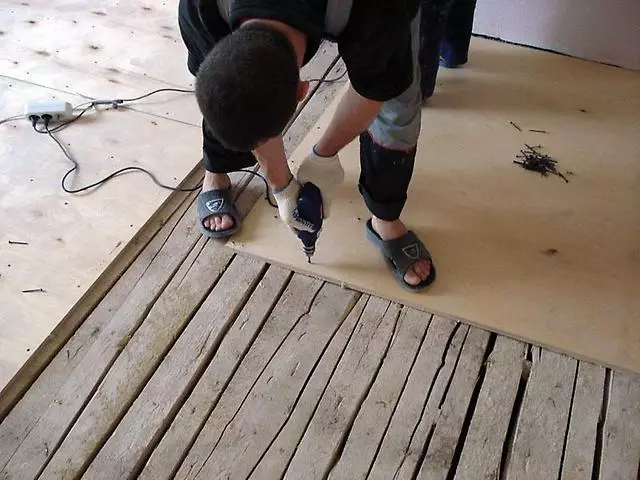
Flooring sheets of thick plywood over the wooden coating is made to eliminate the screens.
A good means of eliminating creak, which appeared due to insufficient thickness of the boards or a wide step lag, is the flooring over the wooden coating of the sheets of plywood or fibreboard. It can only be used if the floor is smooth. Plywood sheets need to take no less than 12 mm thick, because a thinner sheet when walking will be fed and put pressure on the base from the boards, thereby not the problem of the screap will not be eliminated.
Article on the topic: What if your cat does wallpaper and how to wean him
To perform such a method of repair, we will need:
- saw-knife;
- drill;
- Screwdriver or screwdriver.
Plywood or chipboard are stacked over wooden boards and are attached to them with self-draws in 15-20 cm increments. At the same time, lay the sheets of plywood or chipboard better at an angle to the already laid boards. If all technological operations are fulfilled correctly, then problems with creak can be forgotten for a long time.
How to eliminate the grazing of the floor from the chipboard
First you need to accurately determine the floor section that creaks. This site needs to be released from furniture and remove the floor covering from it. The site should be noted in chalk, drawing a square with the sides of 15-20 cm on the floor, and then cut it with a grinder or disk saw. You can use for this and the electrolovka, but it will have to work longer.
The roulette or ruler is measured by the distance from the base of the floor to the bottom of the chipboard. Then 4 wooden bar is cut off with a length of 12-16 cm and a thickness equal to the extinted distance of minus 2-3 mm. Carved bars are driven under the chipboard in all 4 corners of the square, performing the function of peculiar mini-lag and eliminate possible deficits. Finally, you need to put a drinking piece of chipboard into place, fix it with self-buildings to the scored wooden bars and put outdoor coating. The floor in the place of this repair will not creak for a very long time.
To perform such repairs will be needed:
- Bulgarian, disk saw or electrolybiz;
- a hammer;
- drill;
- Screwdriver or screwdriver.
It is necessary to approach each flooring individually. After all, sometimes quite a little more deeply drowning nails to eliminate the cause of the squeak. And it is not at all necessary to perform a costly bulkhead of the floor or a complete replacement of the flooring, if you see that the surface of the floor is in good condition, but in some places an unpleasant creaking appeared. In this case, it is quite realistic to do with cosmetic repairs, and, the main thing that renovated in this way, the floor will surely serve you for many years.
Good luck!