
Not everyone in the house and, moreover, there is a fireplace in the apartment. And sometimes you want to create a festive mood (so that there is to put gifts) or just want to make the room more cozy and chamber. In this case, you can create imitation. The easiest option is a fireplace of cardboard. Usually use packaging boxes from under large equipment.
False fireplace from cardboard: models
Falsh-fireplace from cardboard, as well as the real, can be used and angular. In both options, the portal can be straight or arched. As you like more. If we talk about the practical side of the case, straight easier to do, it is easier in the decoration. Even newcomer will cope.
What could be a fireplace from cardboard
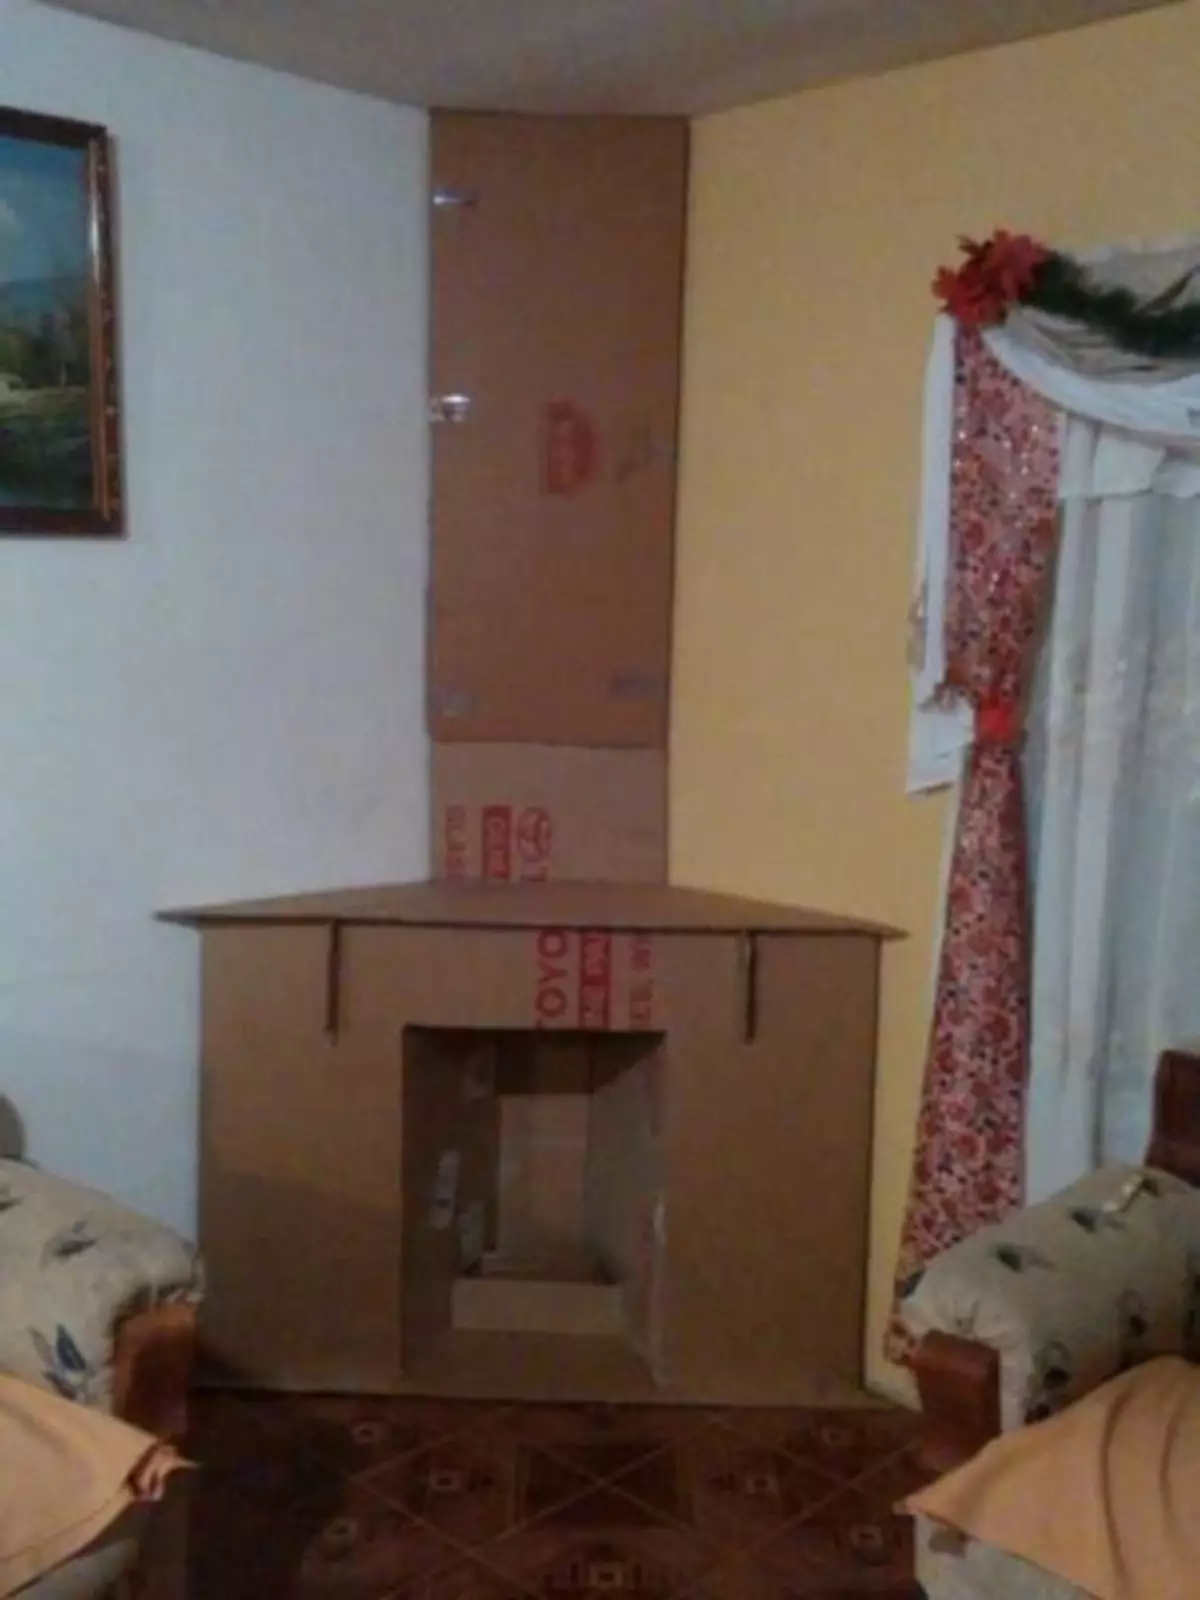
A wall fireplace is perfectly suitable if there is a decent free section of the wall. He looks perfectly in the simpleness between the windows. If the walls are all busy, but there are angles, you can build an angular model.
What materials are needed
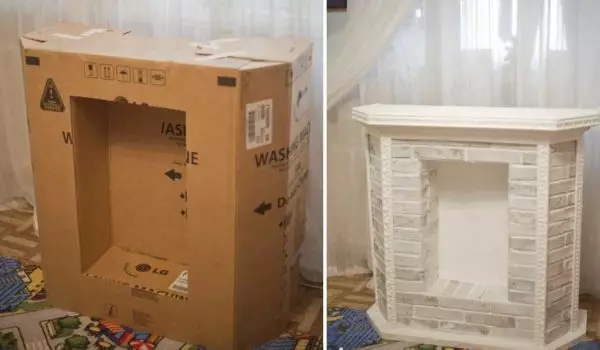
The best material is cardboard boxes. Make a fireplace from cardboard is the easiest way if there is a box from under a large monitor or TV. All you need - cut portal and glue the side walls.

Can be made of a large cardboard box or some small
A little more work will be if there are only small shoe-type boxes. But then you can collect a more interesting model in form.
Still need:
- scissors;
- stationery knife;
- PVA glue;
- Paper (greasy) scotch.
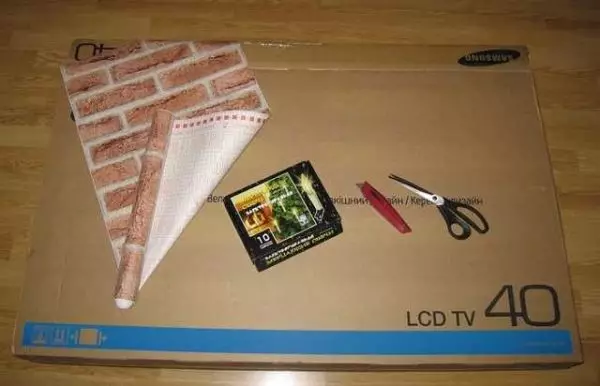
It is almost everything you need to make Falkintim from cardboard
These are all materials and tools that will be required. Of the whole list, questions may occur only with respect to Scotch. Why paper? It is good at any finish. Including when painting. So the option is universal. If you paint the fireplace you are not going to, you can use the usual sticky tape.
You still need to finishing material, but we will talk about it later, since there is a lot of depends on the method of finishing.
Assembly options
If there is a big box
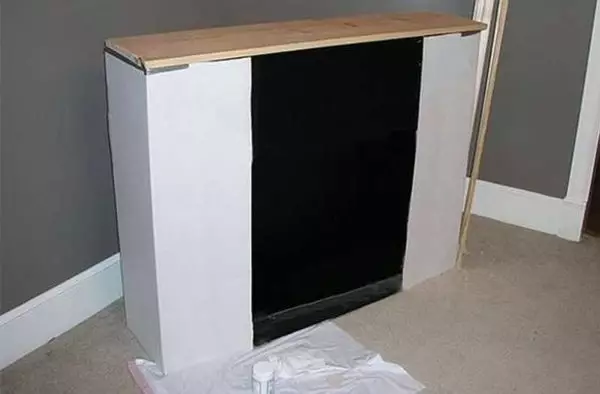
From a large cardboard box, you will get a fireplace with a rectangular portal. Samples are determined by themselves, but the optimal height is about 80-90 cm, the width is approximately the same, the depth is 6-15 cm centimeters. But there are models and wider, and already, and above, and below. All your taste. For example, a drawing of cardboard falsefin with dimensions.
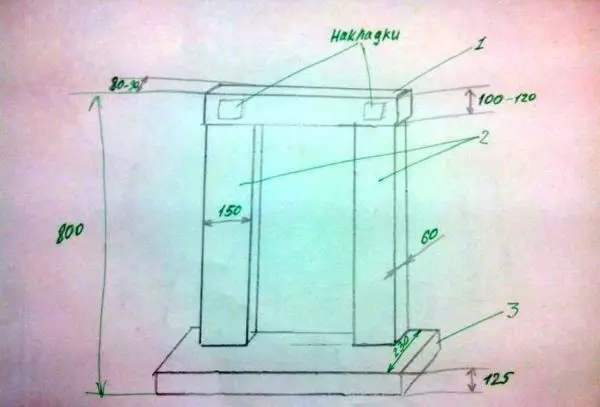
Fireplace drawing from cardboard box
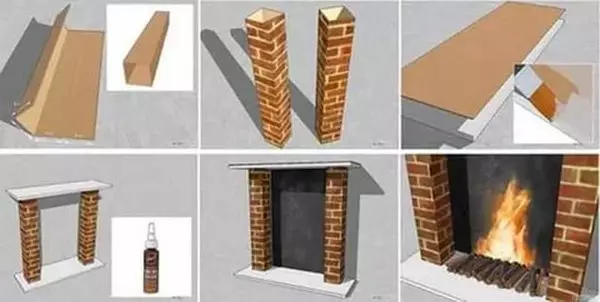
Collect the simulation of the fireplace from the cardboard start from the central part. The first form columns. Cut rectangles in size - no problem. The problem make smooth bends in the right places. We take a large ruler or a flat bar and a solid object with a rounded end. For example, the ballpoint handle is suitable, you can take a spoon or fork and use the handle. The idea in the following - along the line, where the fold should be, apply a ruler / bar, carry out the back side of the ballpoint handle or the handle of the table appliance along the plank, pushing the cardboard. But see carefully, do not break. According to the applied sheet, the sheet is easily bends.
Cardboard fireplace parts
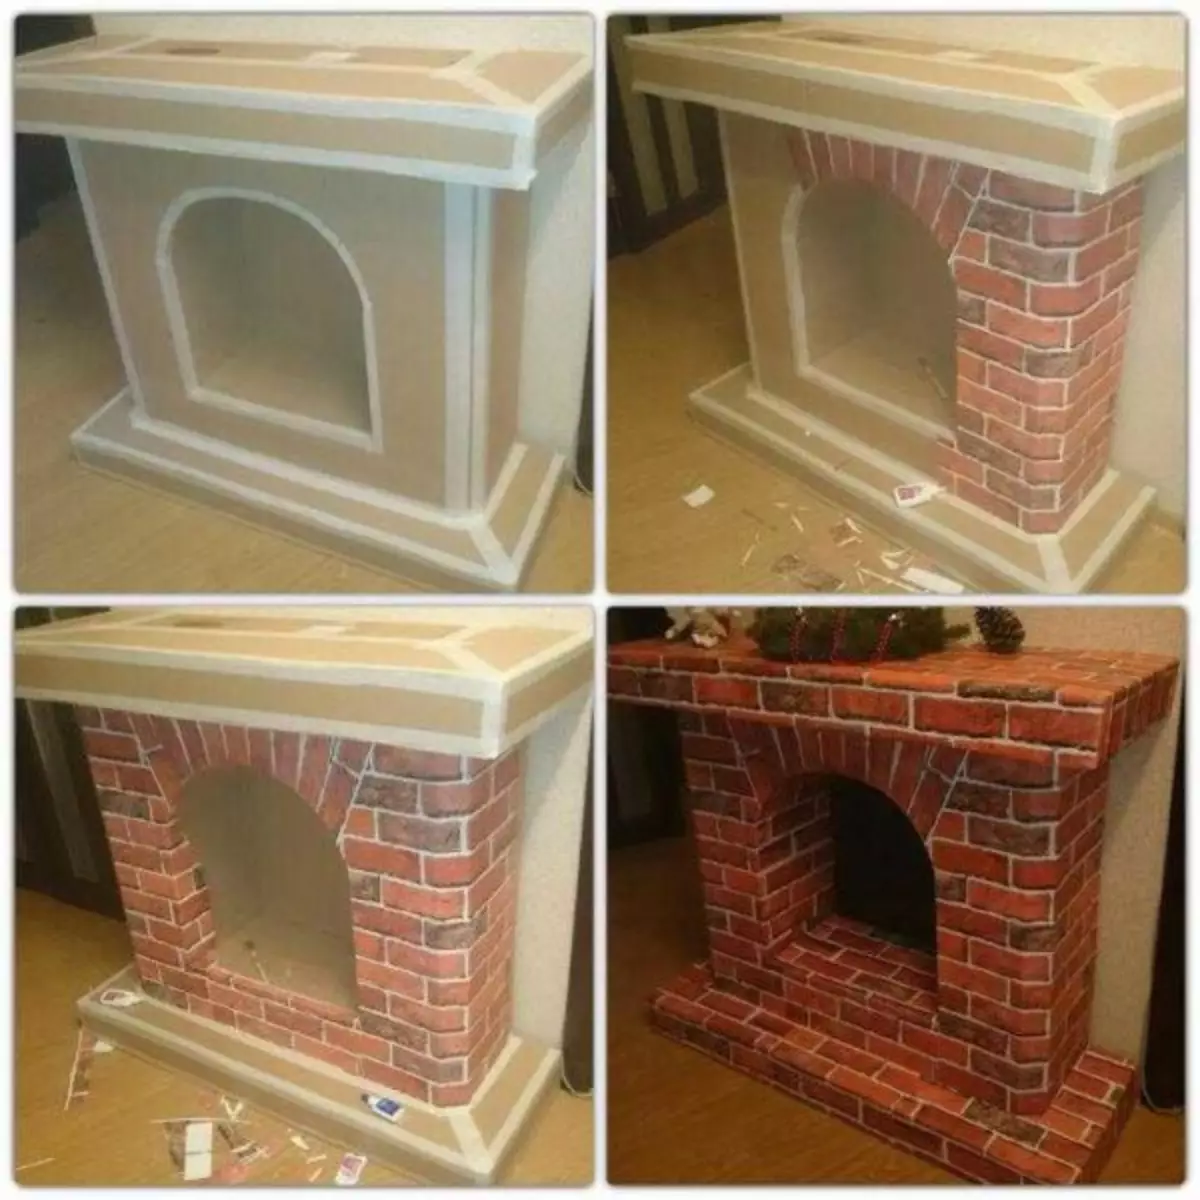
The central part is gluable or painted immediately. Then it will be too uncomfortable. You can paint black, as in the photo. Another option is to imitate brickwork. It looks good too.
It is convenient to glue the parts between themselves with a scotch (the type of scotch has already been discussed). We glue each connection from two sides. Scotchi do not regret. This fireplace from the cardboard was painted, because the columns were covered with white dense paper. You can use the primer, but on it put paint.
Almost done
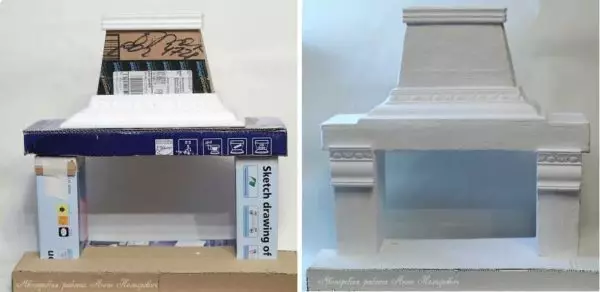
The shelf over the fireplace we turn out of several pieces of cardboard on the same technology. If you plan to set something, it is advisable to make rigidity ribs - a few partitions. If the whole design turned out to be durable and stable, you can make a shelf from a piece of plywood, for example.
If the cardboard is thin, the polystyrene / foam can be used. It is sold in construction stores. You can take the plates that go for the ceiling finish. They have treated edges, a drawing is applied to the front surface. In general, it may be interesting.
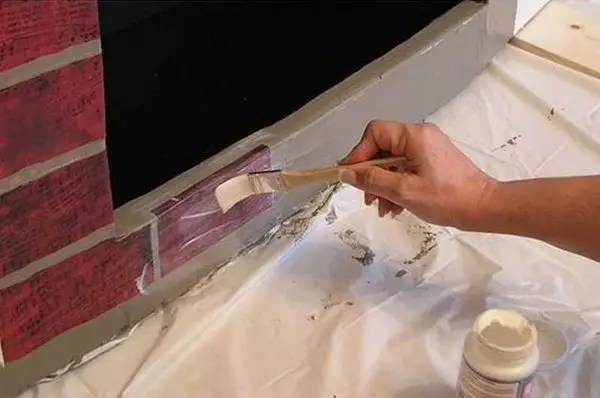
Next, it's a finish. In this embodiment, "bricks" cut out of the paper. They lay down the portal. Here you will need PVA glue. Do not forget between "bricks" to leave the seams. In the presented model, they are painted with basic color, but you can make them, for example, black, white.
Regulation of the portal
The rest of the surface of the falsemine is painted, and the foam (polystyrene) moldings are glued on top.
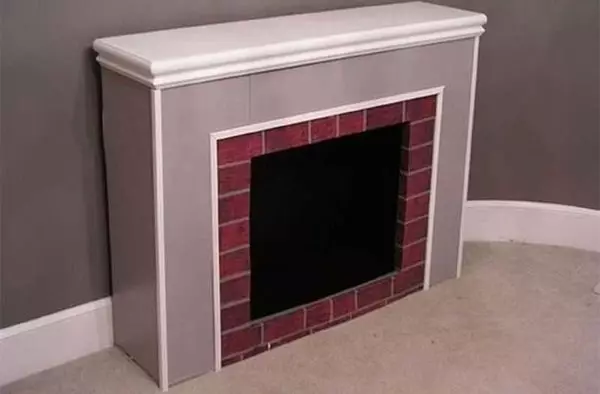
That's what happened
Moldings can be glued to painting. You need to cut them with a sharp stationery knife. Then the cut will be smooth. Glues on PVA or special glue. Spend remnants immediately, otherwise the paint will be lying unevenly.
The same design can be saved by wallpaper "under the brick" or wild stone. Also fit self-adhesive film. But you need to work carefully - it will not work out.
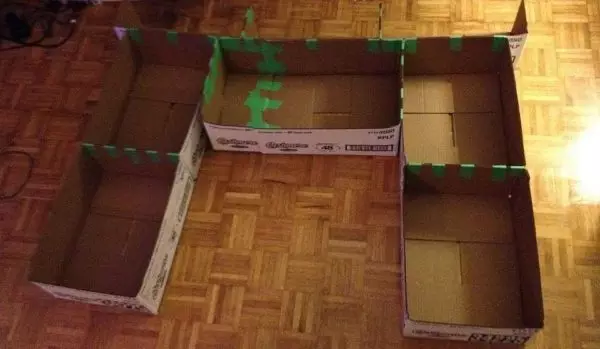
If small boxes
With small cardboard boxes, it is not more difficult to work. They can be the same or different size, thickness and widths. Based on the existing set, the design is collected.
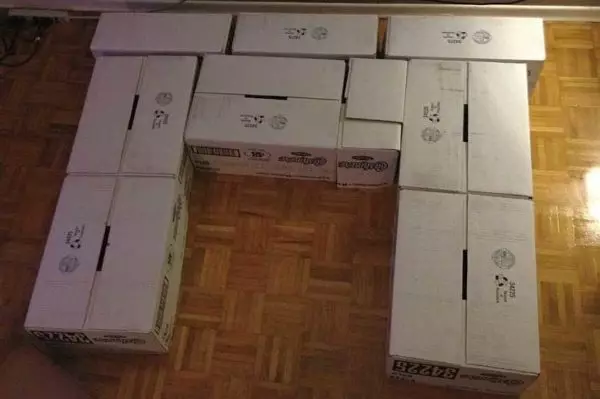
Here is what fireplace turned out of available cardboard boxes
There are two ways:
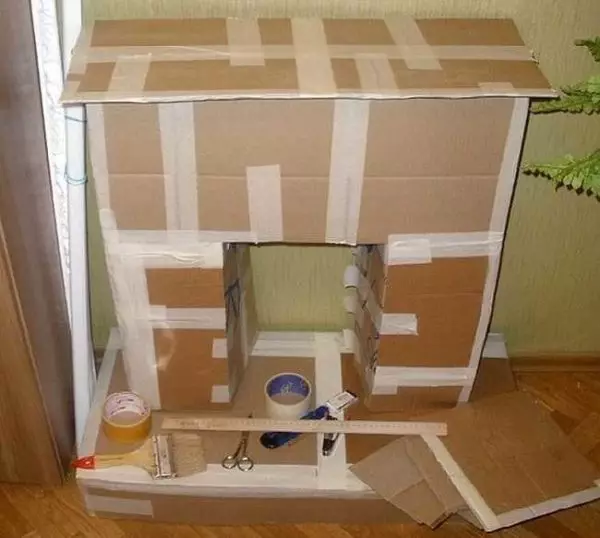
- Pack the opening part of the boxes with scotch, then glue them with each other. Clay can use PVA. Bonded boxes are good to press each other, leave for 8-12 hours to dry the glue.
- Cut off the opening part, and together glue them with chock pieces.
Glue the boxes with scotch from the back
The second option takes less time, but the design turns out unreliable. At large dimensions can be saved, flexing.
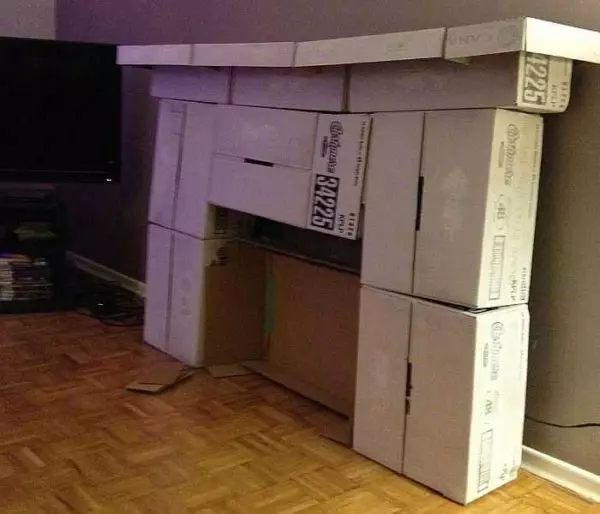
With cropped lids design is rolled
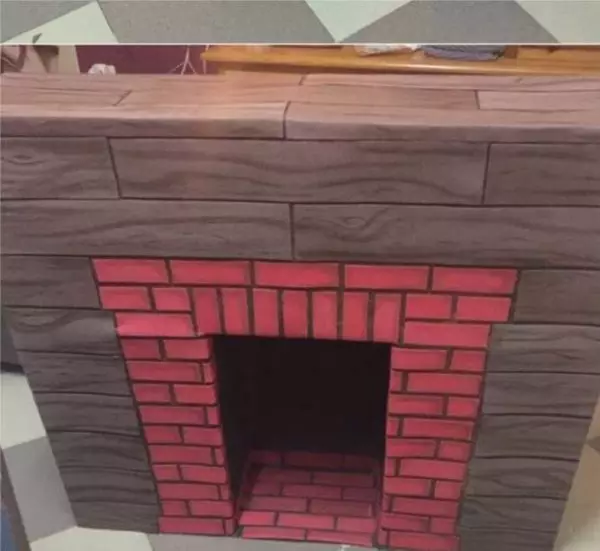
To give a penalty from cardboard boxes a presentable view, painting it "under the brick". To do this, the surface of a thick paper is grayish brown. This color will be background.
For coloring needed reddish brown paint and a large foam sponge. It can be trimmed by brick size - 250 * 65 mm. Paint the paint in flat dishes, make a sponge in it, applying it to paper and slightly pressing, draw bricks.
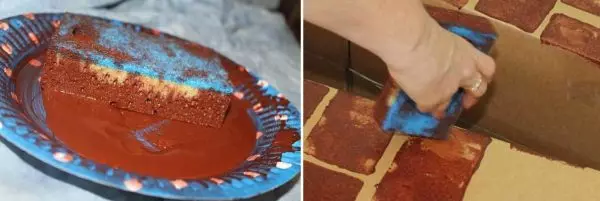
Draw bricks
Working, it is necessary to ensure that the "seams" between the "bricks" were the same width. This is not an easy task - you will distract slightly, and the size is not the one. You can proceed easier - cut the paint tape for narrow strips, stick it, draw "bricks". After drying the paint scotch remove.
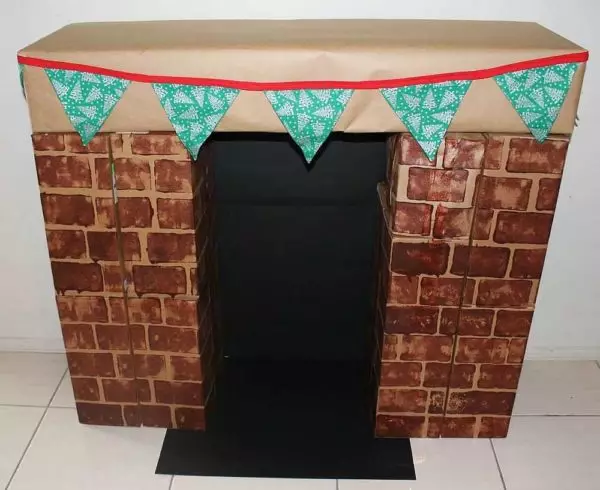
Here is such a fireplace of cardboard
The upper part had to be reduced, as our fireplace turned out too rag. Better box use whole.
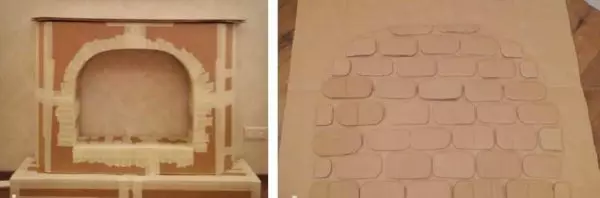
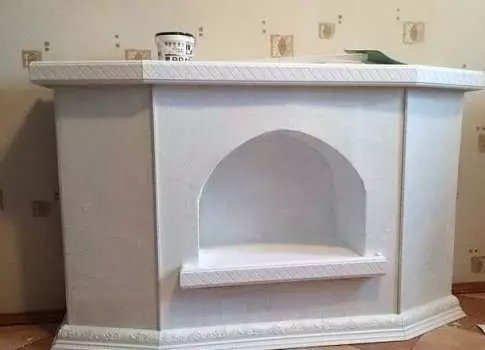
Fireplace with a round portal
His assembly is more time-consuming: you have to go well to cry. For this fireplace it took 4 large boxes (both from the TV).

Fireplace drawing of cardboard with dimensions
Separately glued the base. From the inside of polystyrene stressed ribs. The weight turned out to be solid and the base without the amplification was fed. The strips set about 5 cm. They were glued to the greasy tape, then the base was sampled from all sides.
Then cut the front part and arranged the back wall. It is better to decorate right away until they glued. On the cardboard sheet transfer arched cutout. From the cardboard, cut "bricks" and glue them so that the edges do not go beyond the "arch". When the glue dries, we collect the main part of the portal. In the portal, we also install several rigidity ribs - with a high height, the cardboard can "play", and so it turns out everything is firmly and rigid.
Cardboard Fireplace Production Process
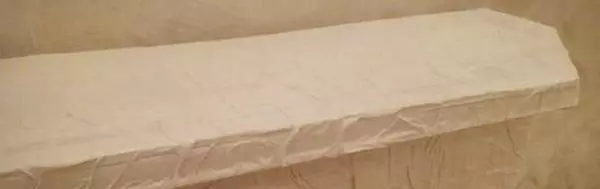
The next step is the manufacture of the lid. It is multi-layered - cardboard, polystyrene foam, cardboard. Everything is labeled with glue, the load is installed. When the glue is dry (after 14 hours), the lid fastened on the design of the scotch. Next - finishing work.
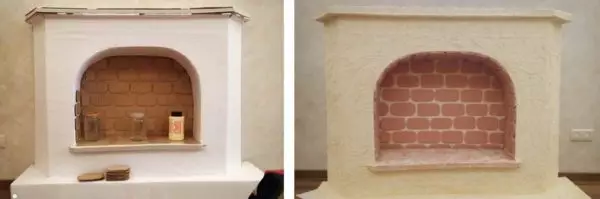
To level the irregularities from the tape, you get all the surfaces with dense white paper. You can take the sheets of A4 format, it is possible - larger.
Next, the roll of paper towels and PVA glue. It is divorced 1: 1 with water, pour into the spray gun. We wat the napkin, lay, slightly squeezing. Wester thin paper itself gives relief, it is only a little corrected, seeking better effect. Similarly, we process all the surfaces, excluding "bricks". We wait until he dried.
This is the surface.
We take the paint of red-brown and the color of the ivory (in this case). Brown paints "bricks", bright - the rest of the surface. Cardboard fireplace is almost ready. The finish strokes remained.

Here is a fireplace from cardboard
After drying, we pass all the brush slimmed in the gold paint. Paint brush, press, remove the paint residues on a sheet of paper again. We pass the "seams" between bricks, slightly assisted and "bricks". Next, in the same technique, we emphasize the surface texture. It is important not to apply too much paint. That's it. Cardboard fireplace ready.
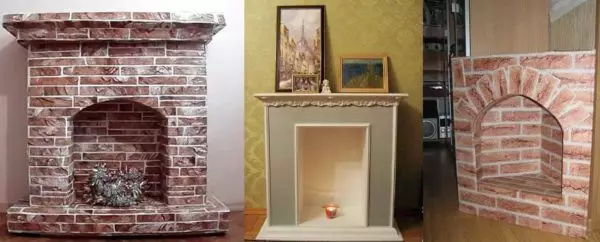
Cardboard fireplace design ideas in photo-format
You can make a fireplace imitation from cardboard of any form. Several ideas are collected in this section. You already know the principles of assembly, the decor can come up with yourself or take advantage of ideas with photos.
If you use good wallpapers "under the brick" will be very natural
If you use good wallpapers "under the brick" will be very natural
From one large box will be medium in size fireplace
A more complex shape and used polyurethane moldings are creating wonders.
Imitation of masonry from different bricks
In the process…
High portal do quite just
Decent option ...
Even with a chimney
Article on the topic: Wooden garage: Construction with your own hands