
More and more people seek today in the bathrooms, it is not easy to mount the sink, and still combine it with a tab.
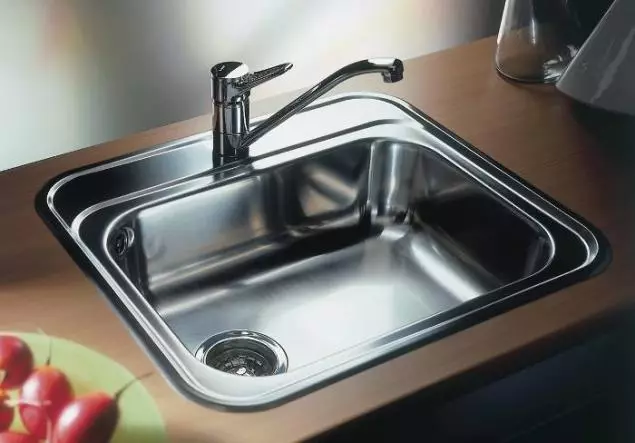
The optimal material for the sink in the kitchen is stainless steel, it is budgetary, as well as sufficiently long in operation.
This is quite justifying it with its functionality and convenience. After all, such a sink with a tab can not only hide from the eyes not quite aesthetic elements of plumbing, but also become a convenient storage for different detergents and other hygienic accessories.
Choosing a location
Before attaching to the fastening of the sinks directly to the cabinet, first you need to decide on a specific place in the bathroom under the bedside table. Not always the host of the premises wish to mount the sink with a table in a standard place chosen when planning at home. That is why it is necessary to determine the place in advance, long before you spend the pipes and other sewasonal wiring.
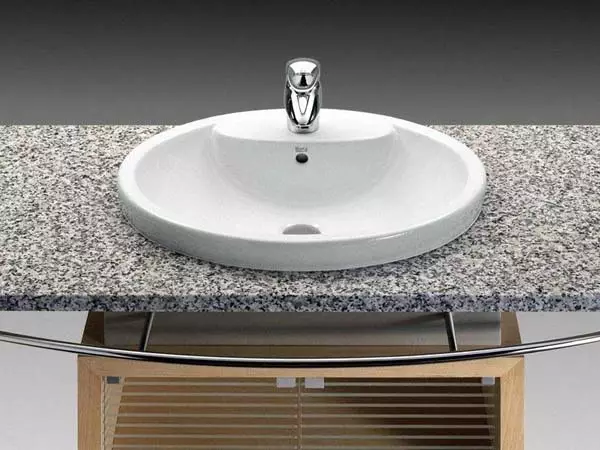
Curling shells are most popular, they allow you to create a single room design.
First of all, it should be noted that in most cases the sewerage tube comes out of the floor. Therefore, immediately decide whether it will be convenient for you, if there will be pipes in the end of the cabinet, in addition to accessories. If so, choose such a bedside table in advance to cut holes on its bottom and shelves for pipe wiring and the siphon was the least problematic. If this option is not suitable, then it is better to install the sink elsewhere. But the rubber output hose will still need to be tested under the sink or from under the bottom of the stands, or having done a small side opening in it.
Take into account the dimensions of both the total area of the bathroom and separate stands. It is very important that in the future the bedside table with the sink prevented you calmly walk or place other, no less necessary things in the bathroom.
It is extremely important that the pipes in which hot water flows are not in contact with the Tumba. It can hardly damage its surface. Therefore, or position the tumbler so that the distance from the hot tube was at least 3 cm, or attach to the place of contact with the heat-resistant fane or the usual dense foil. This and the surface of the furniture will save, and will provide room with extra warmth. And this is also important, as warmly destroyed dampness and will not allow the appearance of mold. And the air in the room will be warmer, which is very good in the cold season.
Article on the topic: Hozblok in the country do it yourself
List of necessary tools
Integrated sink is perfect for a housewife who loving cooking, ensuring comfortable cooking.In order to properly install the cabinet with a sink in the bathroom, you need to get acquainted with the list of tools, the presence of which is necessarily in any case. So, for installation, you will first need:
- Washbasin with a complete set of plumbing devices for it (mixer, siphon, etc.);
- Cabinet under the sink;
- drill or perforator;
- Spanner for fixing screws;
- a hammer;
- Hacksaw for cutting holes in the tabletop and the end;
- dowels;
- Silicone (if it is impossible to fasten the washing on the screws).
Preparation of cabinets and shells
After you have finally decided on the place, it's time to start a sink. Some people prefer to first install and fasten the sink on the wall, and then mess around with a tab. However, this is not entirely convenient. There is a more optimal and easy option.
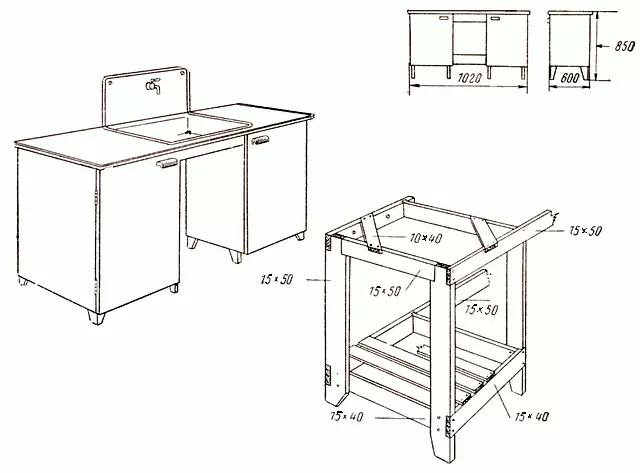
Scheme and sizing for sink.
First, you must accurately make sure that the entire sewage wiring, which will be hidden under the sink, is installed securely and works well. As soon as you check it, proceed to the installation of the bedside one. To begin with, open the bought in advance. As a rule, it is sold in a disassembled form, and complete the screws and other necessary attachments must be taken to it. Very good if the assembly scheme is applied. So you will bring the nightstand much faster. When you collect it, how can you tighten all the screws and corners. Please note that there will be a very large load on the tube not only at the expense of one shell, but also due to hygienic items that will be on the shelves inside. And after the final installation of the cabinet with the sink, fasten the nuts and screws again will be very hard. Most likely, you will have to fully disassemble the entire design.
So, the bedside table is assembled. Cut it to the wall to make sure the correctness and convenience of the selected dimensions. Now go to the assembly of the sink. It is necessary to collect it yet separately from the couch. To do this, first screw the mixer well to the sink, securing it so that it does not rotate. Connect the remaining tubes to the mixer and once again to calm the mixer to the sink. It is best to use a plastic or special soft rubber braid for pipes. This is a more reliable option. Metal over time is sure to rust that will give to flow in the pipe. And rubber and plastic will be able to last long.
Article on the topic: How to pick up the width of the curtain ribbon for the porter from the taffeta: preparation, sewing, tightening
Now go to the installation of the siphon. Turn over the sink and securely attach it to drain conclusion in the sink. You can pour some water over the bucket in the sink. If there is no water in the place of the mixer and the siphon and the water will not be covered, everything is installed correctly. Otherwise, you will need to twist the mixer, siphon or tube until over the plumbing will have no moisture.
Starting cabinets with sink
Marking countertops under kitchen sink.After that, go to the most difficult stage of work. It is necessary to attach the sink to the bedside table. It would seem that there is no difficult thing here. But it seems only at first glance. Very well, if the hole in the tabletop of the couch under the sink is already cut out clearly in size, as well as the necessary cuts for pipes. Then you will only keep sink into the cabinet, strengthen it so that it does not walk, and move all this design to the wall. Otherwise, you will need to independently cut all the necessary holes yourself. Be extremely careful with a cut in the tabletop under the sink. It is better not to immediately make a very big hole. Otherwise, the car wash will fall there and you will have to pick up a new endboard or at least a worktop for it. We gradually cut the hole, constantly trying to wash into it. And when the washbasin is secure there, you can be calm. The optimal option is attached to the perimeter of the washing. Typically, such stands are made under the order. But you do not have to mess around with the worktop.
When you move the bedside table with a sink to the wall, mark the chalk or pencil on the wall of the place where the bolts for the sink will be mounted (on the sink holes for bolts are located, as a rule, on the rear wall). Then drill with a perforator or drill (depending on the softness level of the wall) holes in marked places. In the holes tightly work dowels, then you can mount the sink itself in them. You can do this, at the same time putting the tumbler. But it will be more convenient to scout first the sink separately, and then squeeze the tumba under it.
Sometimes in some models, shells simply do not have holes for screws. Then you will have two options for solving such a problem. The first is to fix the washbasin to the wall on Silicone. If you choose high-quality silicone, you may not doubt the reliability: everything will be well held. But note that you can only glue if you have a wall of a tile or just painted. On the wall, plated wallpaper or glued, it is better not to experiment. Another option is to purchase a strongest tabletop for the sink (from marble, for example), and already consolidate the sink. But the neckline in the tabletop now will surely have to do with the help of specialists. You yourself can not handle this work. Now connect all the desired pipes and wiring, then turn on the water and check all times in case of leakage.
Article on the topic: Glue for linoleum: how to glue to the wooden floor, axon for natural, than to glue PVC metal
Installing the cabinets under the tulip shell
There is still a "tulip" type shell version. Its feature is that absolutely the entire sewer is hidden in the "leg", which is directly under the sink. If you decide to combine such a sink with a tab, consider these essential rules and tips.
In this embodiment, you will choose the end of the finished sink, and not vice versa. Moreover, it is especially accurate to be with a height. Since the height of the shell legs are not corrected, the height of the couch should be selected perfectly.
Choose such an end so that it is convenient to simply move to the already installed sink. Take into account the fact that no matter how much the shelves in the bedside table, each shelf must be in the middle to have a semicircular neckline for the diameter of the washing leg.
If you decide to put the Tumba, it is under the sink of this type, make a bedside table. Let the experienced professionals come to your home when the washbasin is already installed, everything is thoroughly measured and the most accurately and conveniently produce all the necessary cuts. It will cost more, but will save your time and money, since the probability of the measurement error or trimming is minimal here.
And in most options under the shell of the Tulip type, you can even stop the bedside table. Due to the fact that everything is hidden into the leg, such a type of sink will look so good. It will be much faster and cheaper to buy an ordinary cabinet and simply install it near such a sink, without cutting it. And under the sink you can always put the necessary things (for example, a bucket) or just leave this place free.