
Production of paper toys - a lesson that will never lose its popularity. Crafts from paper can be very beautiful and original, moreover, their manufacture is a great way to take children and teach them to methodicity, perfection and accuracy. This article will be on how to make a paper owl in different ways.
From cardboard sleeve
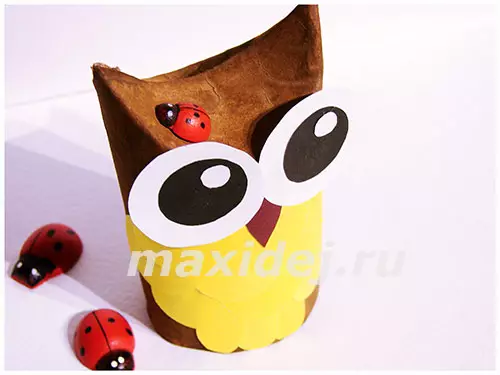
The main for such owl is a round cardboard cylinder on which all other elements are pasted. Here is a huge scope for fantasy, finishing options can come up with how much. Consider one of them.
We will need:
- cardboard cylinder or sleeve for which toilet paper was wound;
- colored paper;
- scissors;
- glue;
- gouache or watercolor;
- pencil.
We will analyze the workflow.
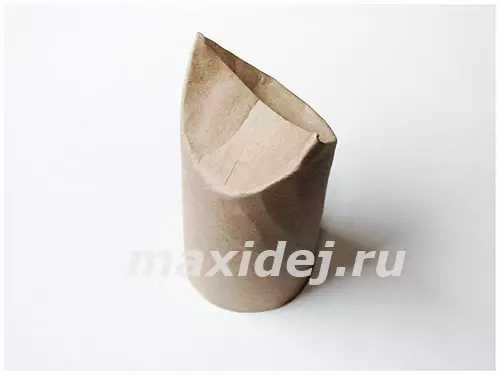
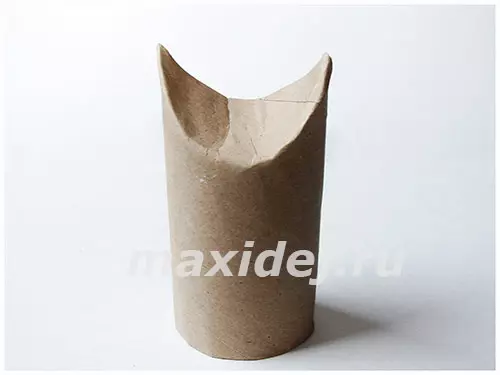
First of all, we process our cardboard bushing. We clamp both upper edges inwards as shown in the photo so that there are "ears". This part of the workpiece must be sold and try to try with your fingers so that the base is as neat as possible.

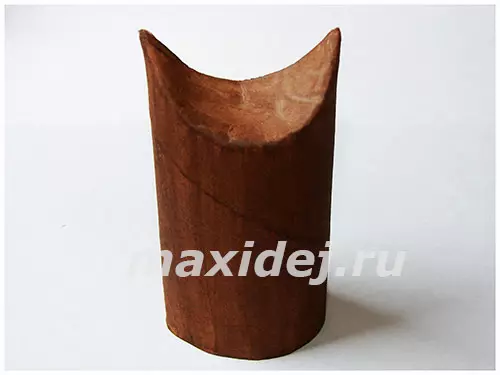
After that, choose the color of the future owls and paints it with a gouache or watercolor. The basis must be good.
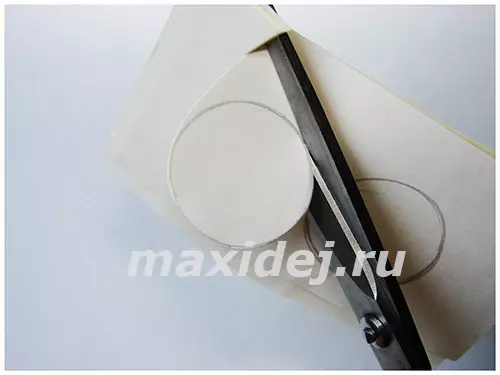
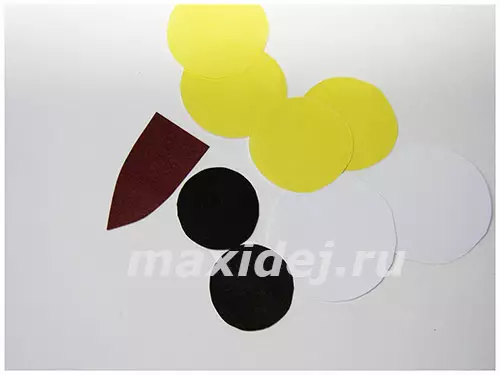
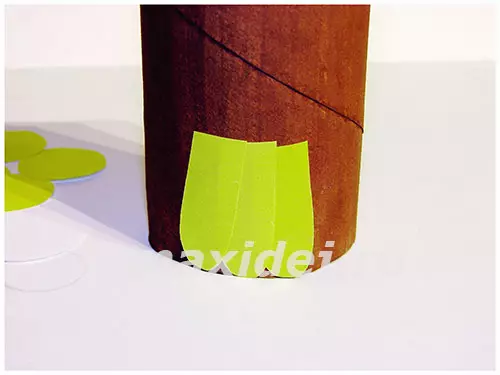
While the paint will dry, we will have time to cut out of paper, beak and feathers. We choose the paper of the desired color, we fold several sheets together, on the back of the last sheet, we draw small circles with a pencil and cut them out - it will be feathers on the chest of owls.
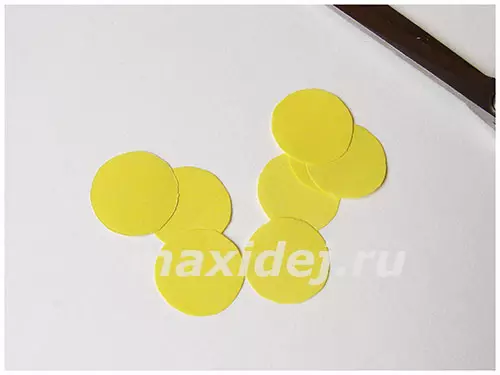
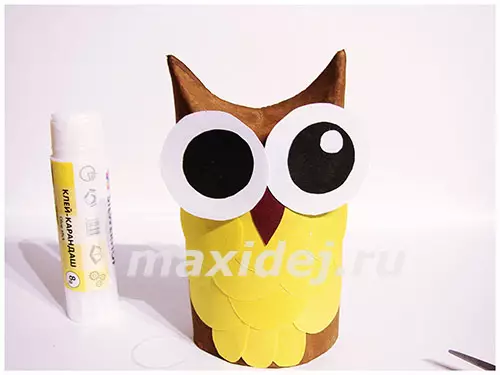
Further we make eyes - two white circle with a diameter of 4 cm and two black circles a little smaller diameter. Another small white circle can be made a glare - for expressiveness.
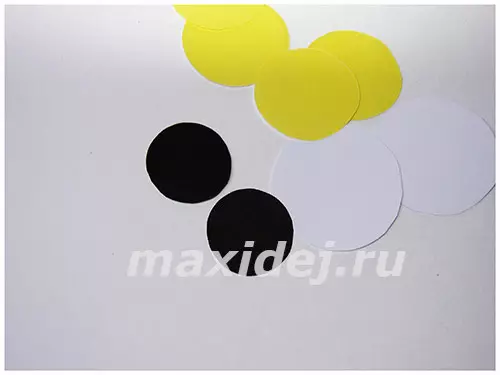
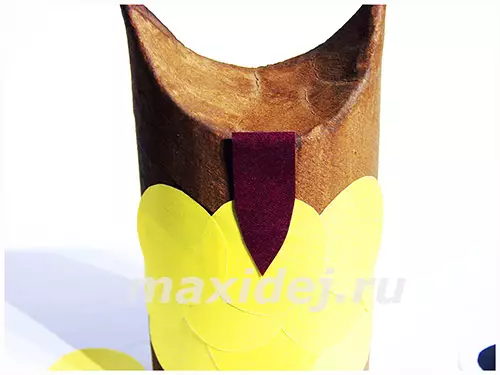
From brown or burgundy paper, we cut a small triangular beak.
Article on the topic: Children's slippers do it yourself
We make feathers in the form of "tongues" from the paper of the same color as for breasting feathers-circles. These feathers are suitable for the tail of the owl.
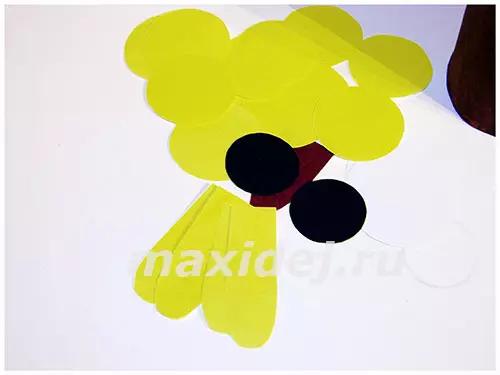
Now you can proceed to laying the foundation by all elements of the decor. We do it in the order shown in the photo:

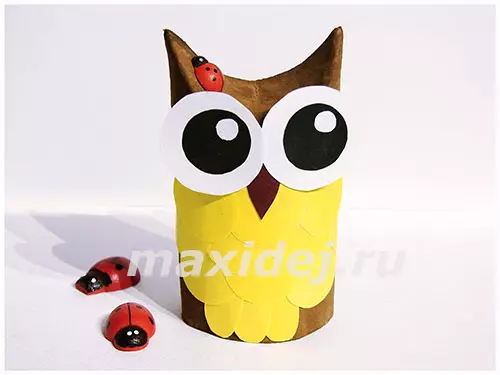
The paper owl is ready, but you can show fantasy and further, for example, decorating the head of owl with a bows, a bug, etc.
Paper Owl Origami
Consider two methods - classic origami (from one sheet) and modular origami (from a variety of small paper blanks).Classic origami
We take a square, carved from colored paper, and bend it on both diagonals to the color side inside, and then we can weaken. We turn over the header with the back side and we fold it crosswise, but now inside it should be a white part. Then, having worked with advanced folds, give a model to this species. Three upper angle must be put on the lower (more about how to do it, in the video below). "Wings" of triangles need to be folded and deployed. We drive the top of the workpiece and deploy again.
Further - the problem is more comprehensive. You need to reveal the top of the workpiece, squeezing from the sides, and do the same from the reverse side to turn out to be diamond (more than this process is shown in the video). The front and rear parts fold so that the valves look down. And we reduce the upper corners to the axis. Pulling out the item from the middle and attaching it, make a wing, then the same - the other. And fold the upper part. Owl in the technique of classic origami is ready.
For greater clarity, we recommend that you watch the video:
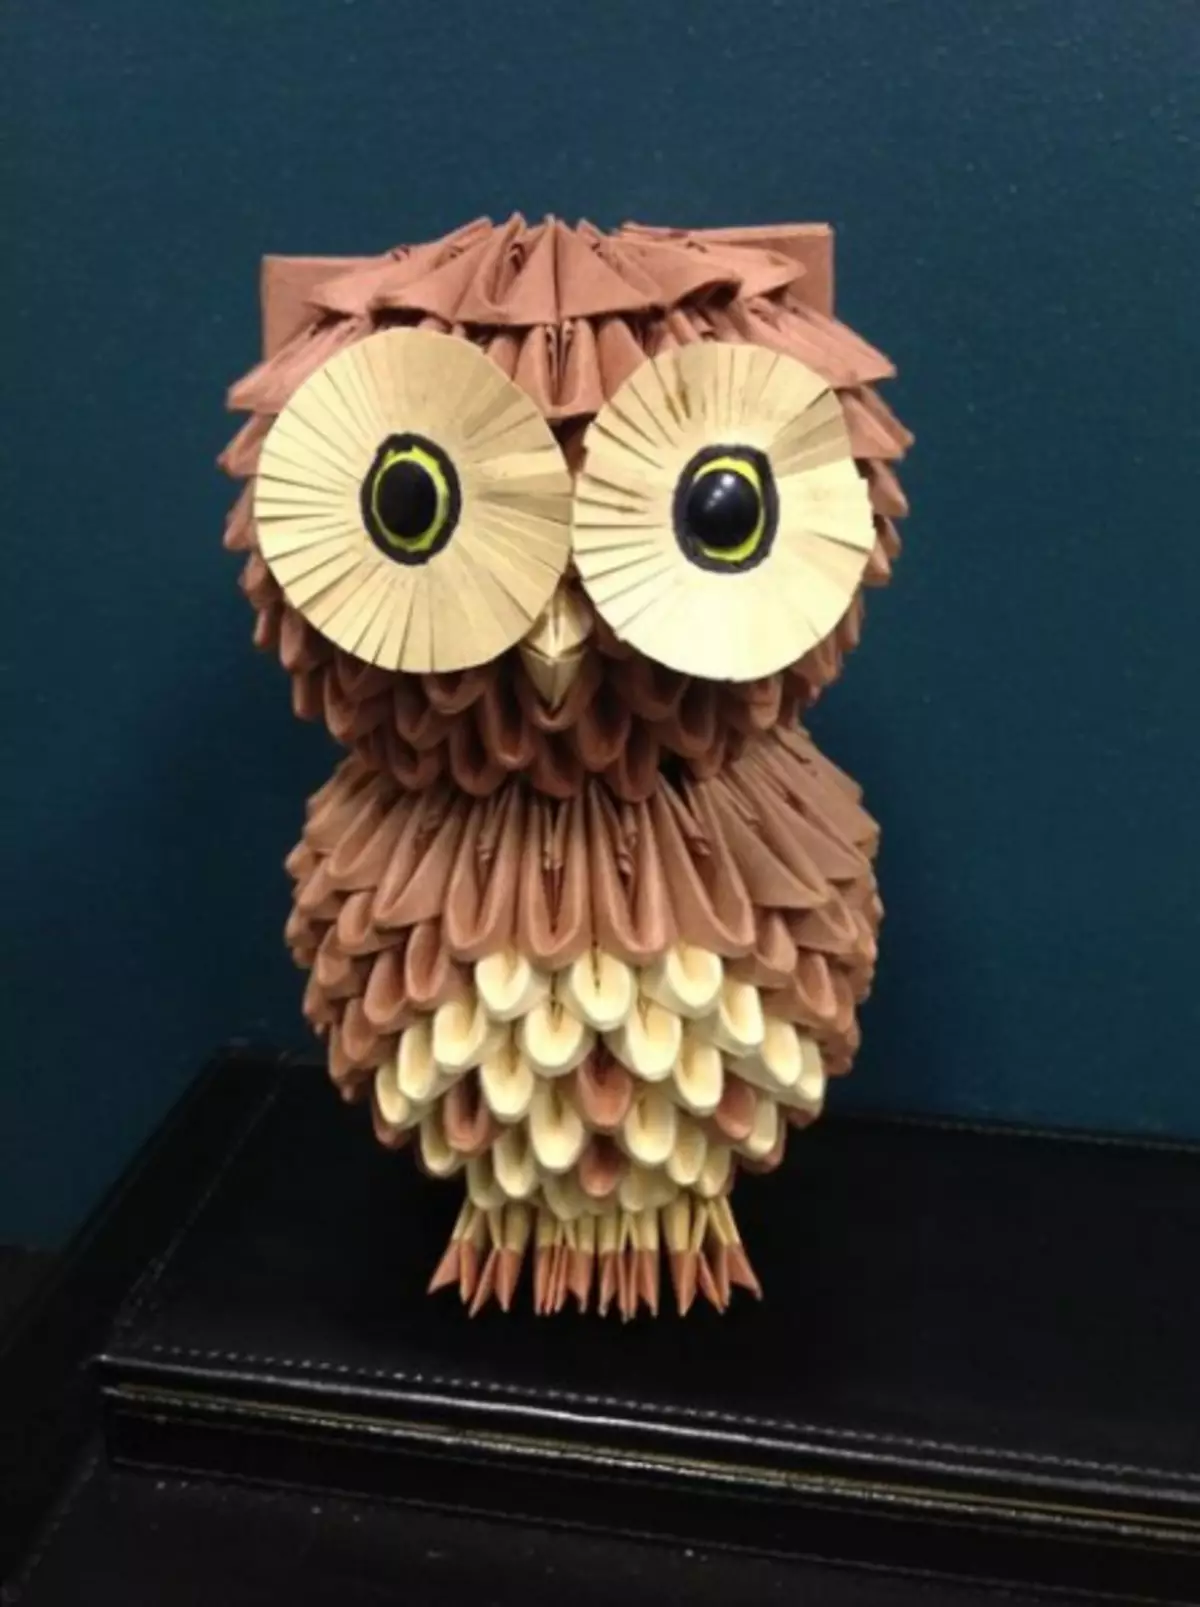
Modular origami
This method of manufacturing owls from paper is more complicated, but the result is very beautiful and unusual.
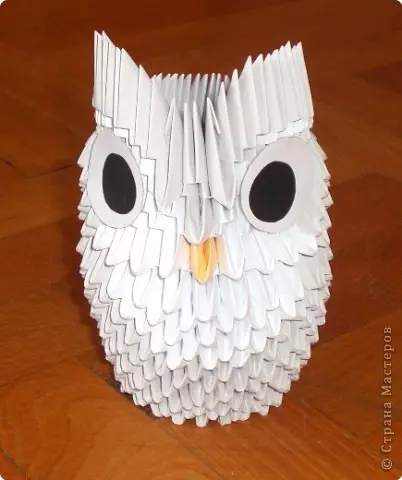
As mentioned above, when working in the technique of modular origami, the exercise is formed from a variety of pre-made small details - modules. This is another way to make the paper owl volumetric, and not flat, as it turns out when working in the technique of classical origami.
To begin with, we prepare modules. For their manufacture, the following scheme is used:
- A small sheet of colored paper takes and bends in half along, and then - across;
- The billet is painted, the right and left parts are converted to the resulting fusion line;
- The figure turns over. The lower edges are sweeping so that it turns out a smooth triangle;
- The triangle bends in half. Module is ready.
Article on the topic: Support for knife with hands from a tree with a photo
See also video on the topic:
Now that we learned to make modules, you should know in what quantity they need us. To make a paper owl, you should prepare:
- 274 blue modules;
- 102 black modules;
- 62 white modules;
- 1 Pink module - from it we will make the beak.
We start the assembly. To begin with 2 blue parts and are connected from one or the same blue or black. The billet should consist of 3 rows, the last of which should have 22 modules. From the billets is going ring. Of the 20 blue and 2 black details, we make rows of 4-6. In the ranks from 7 to 9 there must be only blue modules, 22 pieces. In 10 row 1, the white module must be installed so as to be above the middle of the black located below. The remaining modules are 21 - blue. 11 row are two white attached to the bottom, and 20 blue.
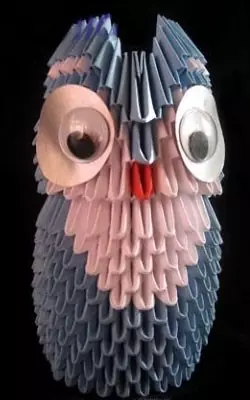
Required number of parts for the following series:
- 12 row: 19 blue, 3 white;
- 13 row: 18 s, 4 b;
- 14 row: 11 s, 9 b.
Next you need to make a neck, while directing the modules a little differently. Their number of rows:
- 15 row: 14 s, 8 b;
- 16 row: 13 s, 9 b;
- 17 row: 12 h, 8 b.
18 Row: The black module is placed in the center, and on both sides of it there are 2 and 3 white, around - 15 black. 19 Row: We take 12 black modules and have them on the sides of 6. 20 row: 2 and 1 black modules on the sides, in the middle - 3 white. 21 row: 2 and 1 black with edges, 2 whites in the center. 22 row: 1 black from the edges, 1 white in the center. 23 row: 2 black modules. 24 row: 1 black module.
It turned out ear. Just do and second. Add to Completion, add the beak - the detail of pink color. It must be installed in 18 row between white. It remains to stick your eyes and, at will, some decorations, and owl in the technique of modular origami ready!
Article on the topic: Publishing loops with knitting on the edge of the canvas with photos and video
And finally. The easiest way to manufacture paper owls - on ready-made templates that can be printed on the printer.
Video on the topic
See also a selection of video on the topic: