
The arrangement of the entrance doorway does not end with the installation door. For his attractive design, it is necessary to close the slopes.
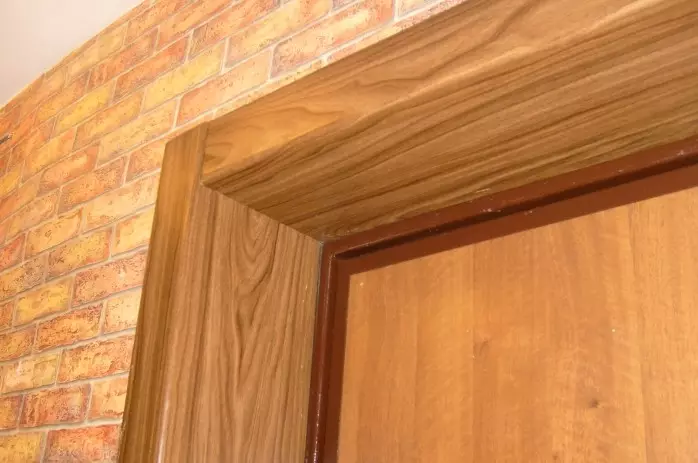
Installing the slopes is necessary to impart the beauty and strength of the door design.
As a rule, it is required to do it only from the inside, since the aesthetics from the outside is ensured by installing platbands. The slopes of the input door can be made independently.
Options for decoration of slopes
The slopes of the input door perform 2 main tasks: fixing the installation elements of the door and the creation of aesthetic appeal of the opening. Perhaps several ways to create slopes:
- Facing with finishing material on the frame;
- fixation of finishing materials with a solution;
- Filling with a solution with subsequent plaster surface.
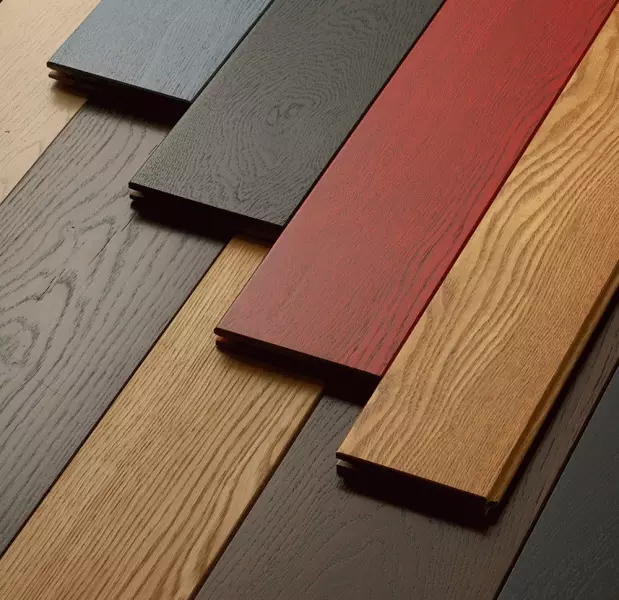
Laminate can be used as slopes.
From finishing materials to create slopes, you can use a wide variety of options: plasterboard, cellulose, wooden, plastic panels, MDF, laminate.
In order to provide maximum sound insulation, sealing and protection of the input door, it is recommended to completely close the slopes. The strength of such a slope will be significantly higher, as it will not be emptiness. If you mount the finishing materials on top of the discovery completely filled with a solution, then any designer solution can be realized.
If it takes too much the volume of the solution to fill the slopes, then it is possible to reduce its consumption and mount the frame from the fastening profiles or wooden bars, and the finishing material is installed on it. It may be plastic, plasterboard and so on. Sunscores, as a rule, it is much easier to do smooth, which favorably affects the external attractiveness of the entire room. Also spend through such slopes various communications in the apartment is much easier, as hinding the switch to it.
Preparation of the working surface
To create a smooth surface to the appropriate section of the wall, a solution can be applied.
Whatever the method of performing slopes is chosen, the surface is prepared in the same way. Door shoals, crossbar and the door itself must be placed by a protective film so as not to spoil the wet materials used. After that, too outstanding sites are eliminated, which can be written out of plaster or prevent the creation of a frame.
Article on the topic: Wiring insulation: All methods and necessary materials
Next, garbage and dust are removed from the surface and primer is applied. The optimal option is the primer composition of deep penetration. Surface formulations are suitable only if the wall is constructed from loose material, for example, foam concrete.
At the preparatory stage, it is recommended to pave a cable to summarize electricity into the hallway if the slopes are completely closed with a solution. If a frame option is assumed, it is better to perform this operation with a ready-made frame.
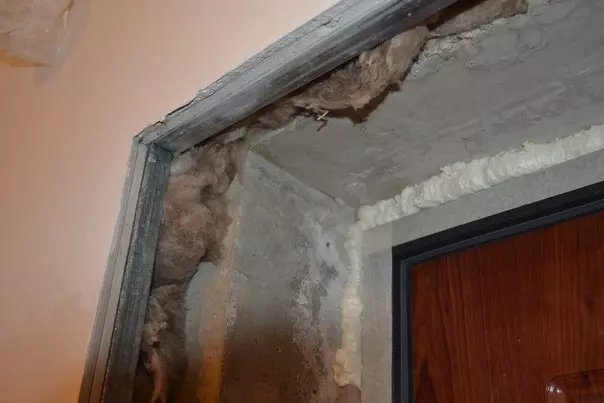
Speaks of the entrance door from plaster
Plaster door slopes.
After applying the primer, lighthouses are installed to create a smooth surface of the solution. They are attached to the solution. The optimal version is a gypsum solution that is grasped pretty quickly. Lighthouses should be located in the same plane, it is possible to adjust it with a bubble level. On each side you need 2-3 lighthouses.
After soaring the gypsum solution, the beacons are transferred to the application of cement-sandy solution. The volume of cement and sand in the solution should relate as 1: 4. You can add a little gypsum and pour such a number of water at which the solution will acquire a leaf of the curd mass. To mix the solution you need to take an industrial mixer, which is used as a nozzle on the drill. Stirring must be performed on medium turns.
The finished solution is applied to the slope with a spatula and cell. The surface is leveled in lighthouses and left for at least one day to dry. A starting and finishing putty is applied to the frozen solution. After drying the composition, another layer of finishing putty on the abrasive grid is applied. Fully dried putty can be painted. On this, the sealing of slopes is complete.
Laying finishing material for solution
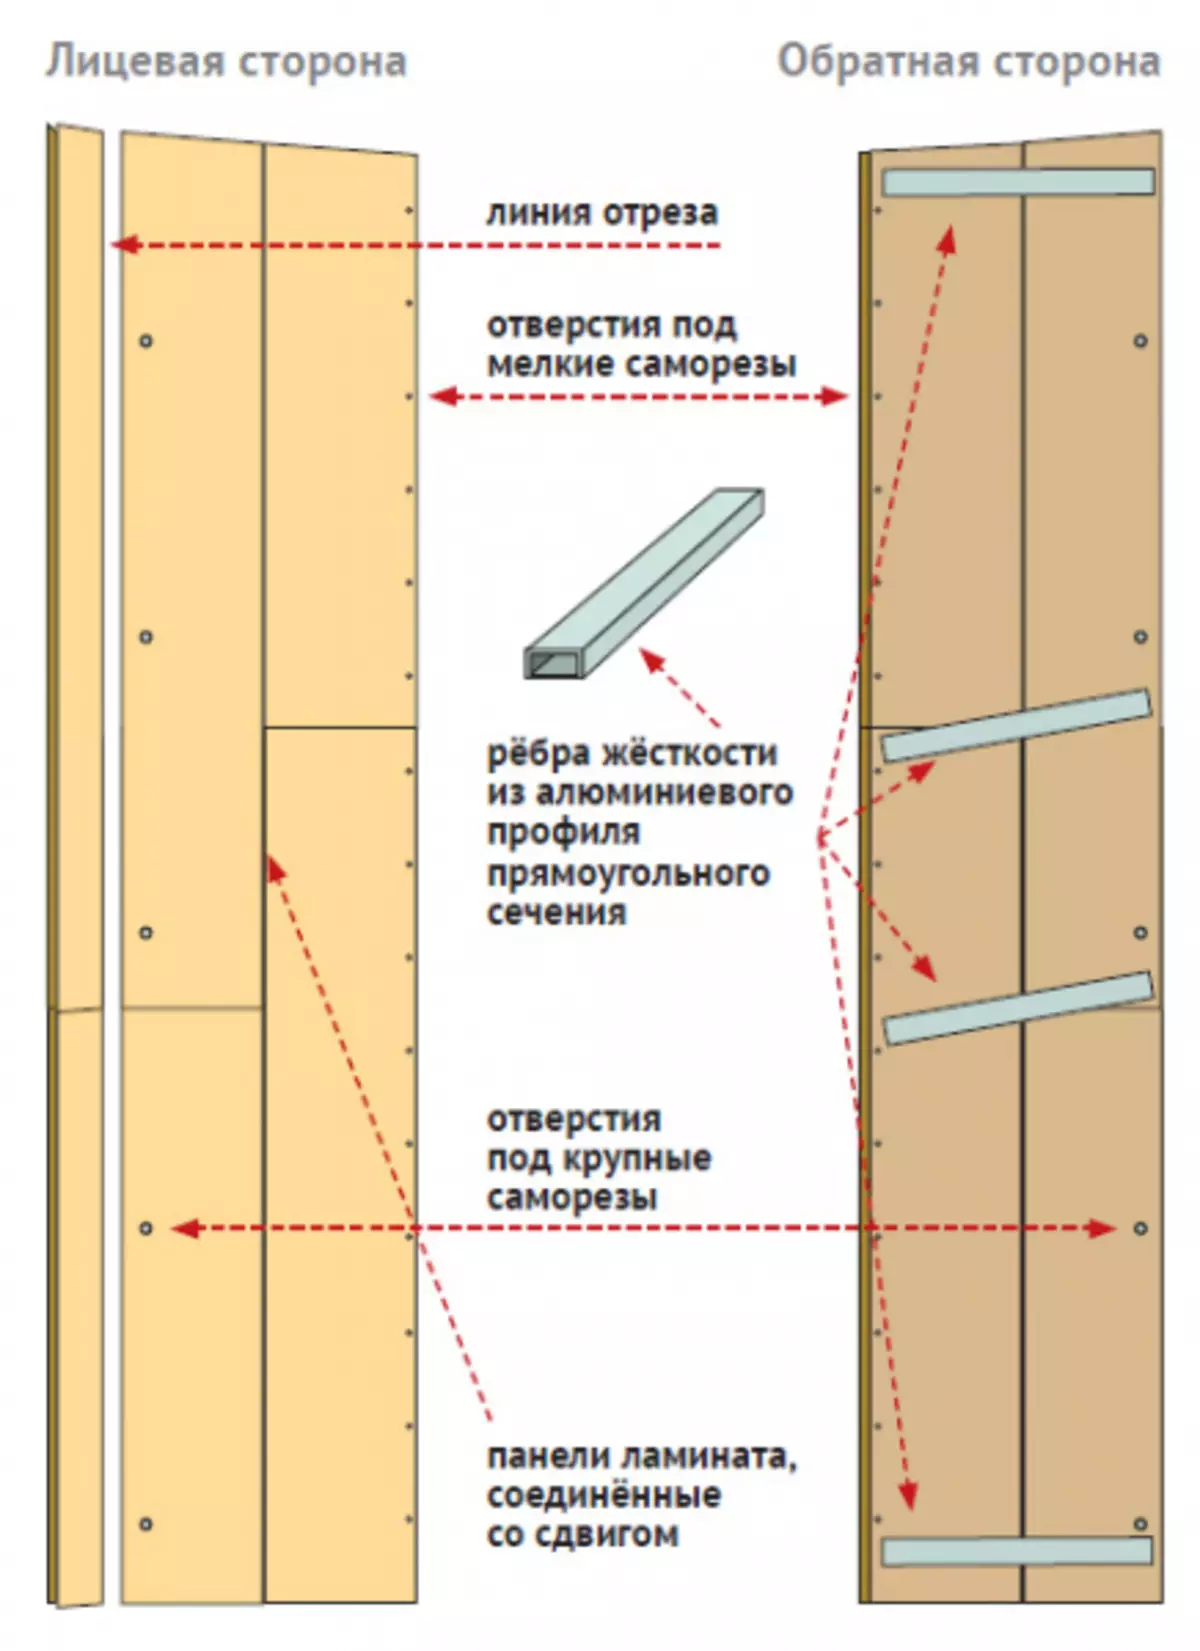
Laminate mounting diagram for door slopes.
Finishing materials are stacked on the aligned and projected surface, while they are additionally fixed with a solution or adhesive composition.
The level of slope is recommended to designate screws to which the finishing material will be relying. Screws screwed into the wall so that their caps form one plane with the thickness of the material. All space under the screws is filled with a solution, and the finishing material is placed on top.
Article on the topic: Location of sockets and switches in an apartment or house (photo)
Maximum reliability can be obtained if the cement-sandy solution is on the wall so that it does not take a little to the ships of the screws. The rest of the space is required to fill the adhesive composition. It should also be applied to the reverse surface of the finishing material.
The sheets of finishing neatly applied to the base and put it until it stops in the screws of the screws. Immediately after laying, you need to check the location of the sheet by level. If it is uneven, then its position must be quickly adjusted until the glue is frozen. If, after drying the adhesive composition between the base and sheet of the finishing material, the gap remains, then its sealing is performed or hidden under platbands.
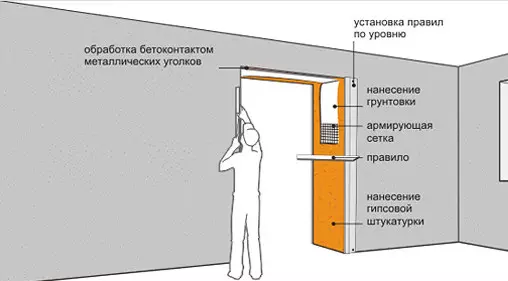
Montage of frame slopes
The basis of the wall must be processed by primer, even if the solution is not used.
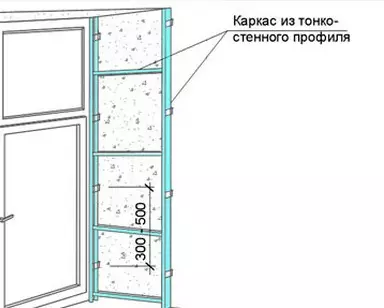
Frame scheme for slopes.
This will prevent the shower of small base particles. After surface preparation, all the necessary framework elements should be prepared.
To create a frame, a wooden timber, rails or metal profiles can be applied to install drywall. Plots of the base to which the frame elements will be attached, it is necessary to thoroughly dissolve. Thanks to this, the frame will fit tightly to the wall.
Frame elements are attached to the base with the help of dowels or shock screws. On the entire perimeter, 2 parallel railways or metal profiles are mounted. At the corners, it is necessary to install jumpers between carrier elements. For greater construction gain, you can install them in other places. After mounting the frame, you can pave the cable to the point of the switch setup. Next, go to the installation of the finishing material. This process has its own characteristics depending on the finishing used.
Self-tapping screws are used for fastening plasterboard. With their help, the sheets of the material are fixed throughout the perimeter. The gap between the material sheet and the base is closed with platbands, or its seal is performed. To enhance the mechanical properties of plasterboard slopes, their edges are reinforced with special perforated corners. In addition, a construction tape is used to stick the joint strip between the details of the drywall. Spacure is applied to the entire surface. Its layer is smoothed by a small grater. To finish the slopes, you can apply paint on them or wake with wallpaper.
Article on the topic: What is black repair (decoration) in a new building
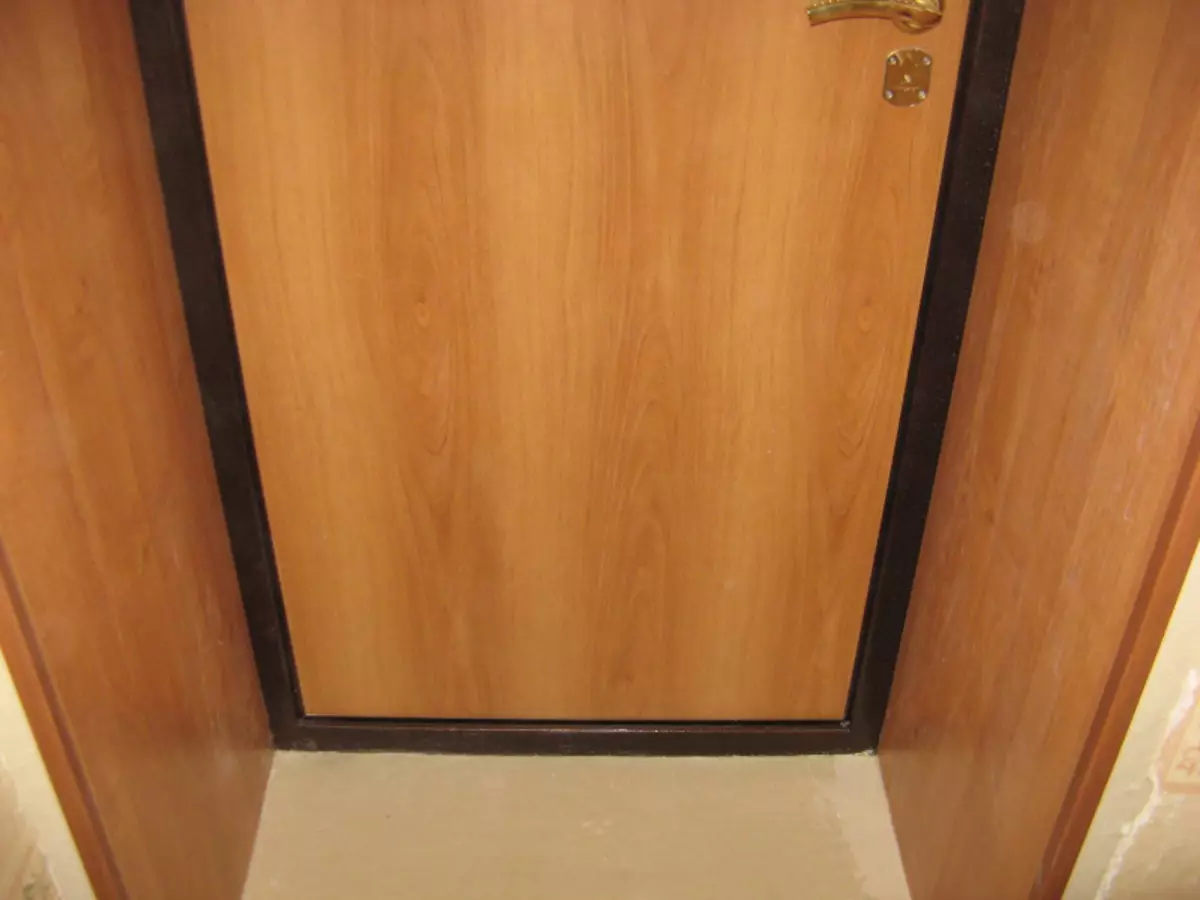
The slopes from MDF are easy to install, as they can be fixed using simple self-tapping screws.
The most durable, durable and aesthetic material for creating frame slopes is MDF. In addition, the installation of such slopes with their own hands is the easiest option thanks to a wide range of ready-made solutions. Bashed panels can be self-drawing, small nails or clemmers. The lines of the joint and corners are hidden under platbands or corners. Liquid nails are used to secure them.
When using laminate, you can lay mounting elements across or along the base ends. In the first case, only the first panel can be consolidated to the frame and the last top. Between themselves, they are connected by the latching of the castle. Each second or third lamella is additionally attached. All elements are attached to the top crossbar to the frame. With the longitudinal location of the lamellae, each must be fixed at least in 3 places: from above, below and in the middle.
Upon completion of the operation from the entrance door and jambs, you can remove the malarious tape. In the same stage, the lighting switch is connected.
Now you know how to close the slopes in various ways. What to stop - to solve you. In each case, it is necessary to adhere to the basic recommendations from professionals.