
The wedding is one of those events, to the preparation for which it is to take seriously not only by his perpetrators, but also invited guests. This applies not only to the outfits, but also in the first place to choose a gift for young. Some prefer to follow the old traditions and give household appliances, dishes and other things, but more and more people are trying to bring cash to their budget. This gift is universal, everyone will like it. Therefore, many prefer to make a wedding envelope with their own hands to beautifully pack money for newlyweds.
About how to create it, you will learn in this master class, where we will look at two types of envelopes: simple and traditional. Each of them is performed in the scrapbooking technique, but it is not necessary to worry about - special knowledge to do everything right, will not be required, everything will be explained in step-by-step instructions.
Simple converter
This type of envelope is well suited for those who have remained a day or two before the celebration and everything needs to be done quickly and without any problems. To create it, you will need:
- 1 sheet of finished bilateral cardboard for decoupage;
- Satin tape 0.5 cm width for cardboard color;
- Decorative element: small key;
- Basic tools: line, needle, glue, pillows for stamps, scissors.
When choosing a cardboard, focus on its density. The base for the envelope should not be in bends, but it is not worth it to take too fat material, so the envelope will look cumbersome and not too beautiful. If there are no cardboard in the store, it can become a dense paper on an alternative.
Take a look at the drawings on both sides. If they differ, but have the same color tone, it will play well in the design of the envelope.
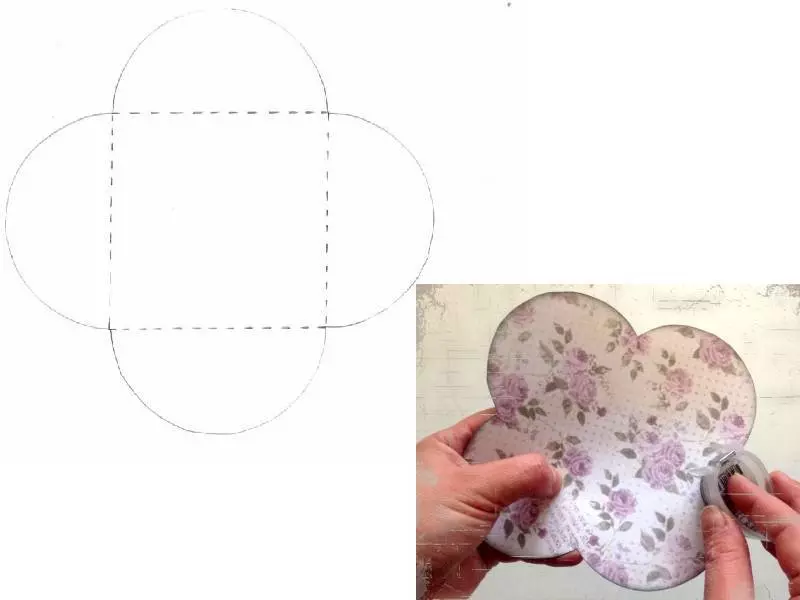
Stage 1. Prepare a template for an envelope and print it on ordinary paper. Then carefully cut it out, distinguishing the seats of bend from solid lines, and transfer to the purchased cardboard. If the printer capabilities allow you to print on dense materials, it is better to use it. So you will save time on cutting the template and transfer it to the cardboard.
Article on the topic: how to make a ring with your own hands
Next, cut the blank along the contour, without climbing behind its edges. Remember the depth of the product, toned the corners with gray. You can do this with a pillow for stamps.
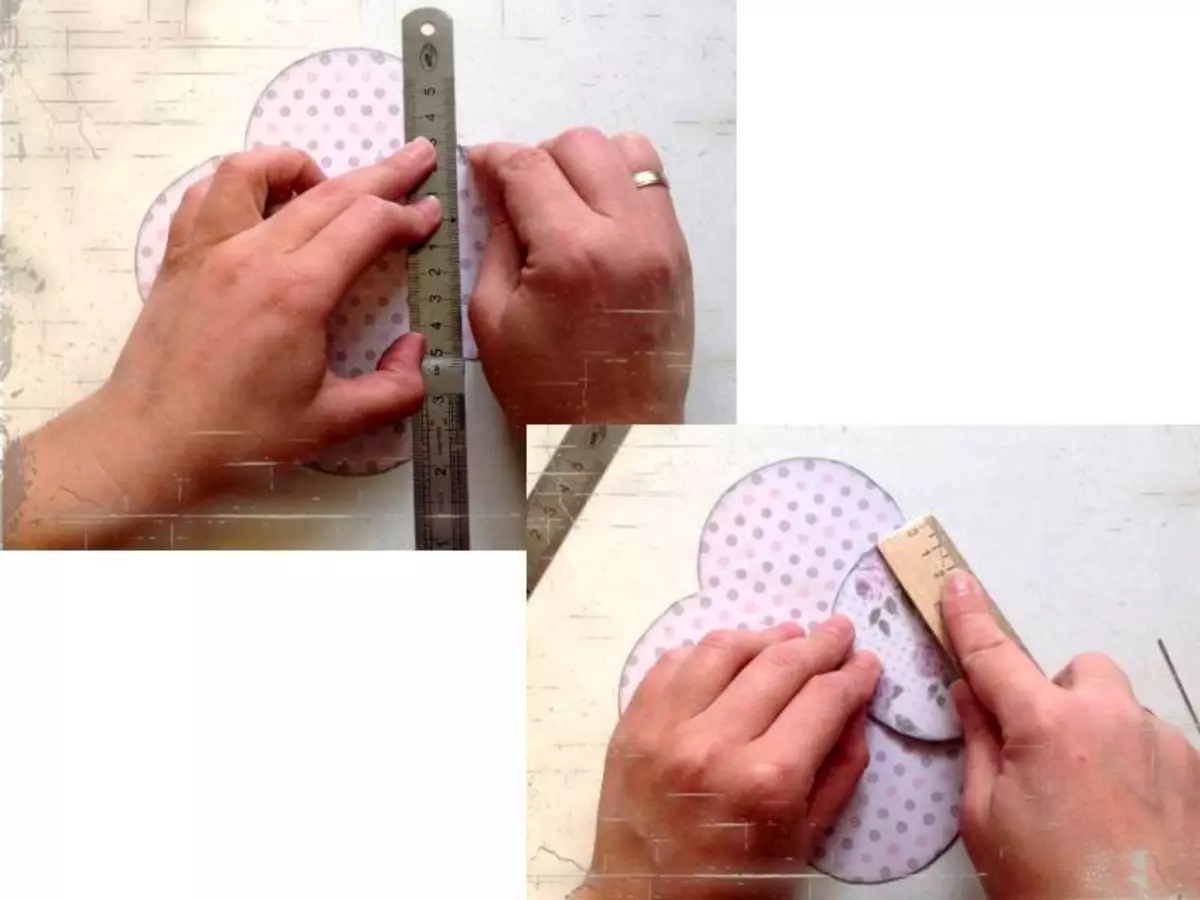
Stage 2. An important element of the envelope is the grooves. To make them, tighten the needles on the dotted line on the inside of the product. Do not forget to attach a ruler (preferably metallic), so the lines will turn out to be smooth, you will not go to the main part of the product.
For each fold line, bend the edges of the workpiece. This should be per minute. Folded grooves are eliminated from the need to look out for, it turned out exactly the fold and if at least a couple of millimeters remained, due to which the edges do not converge towards the center. It is important to make that the edges of the envelope are not revealed. To do this, give the place of folding with a wooden ruler (it is not necessary to do it metallic, since its structure is more rigid and can spoil the drawing).
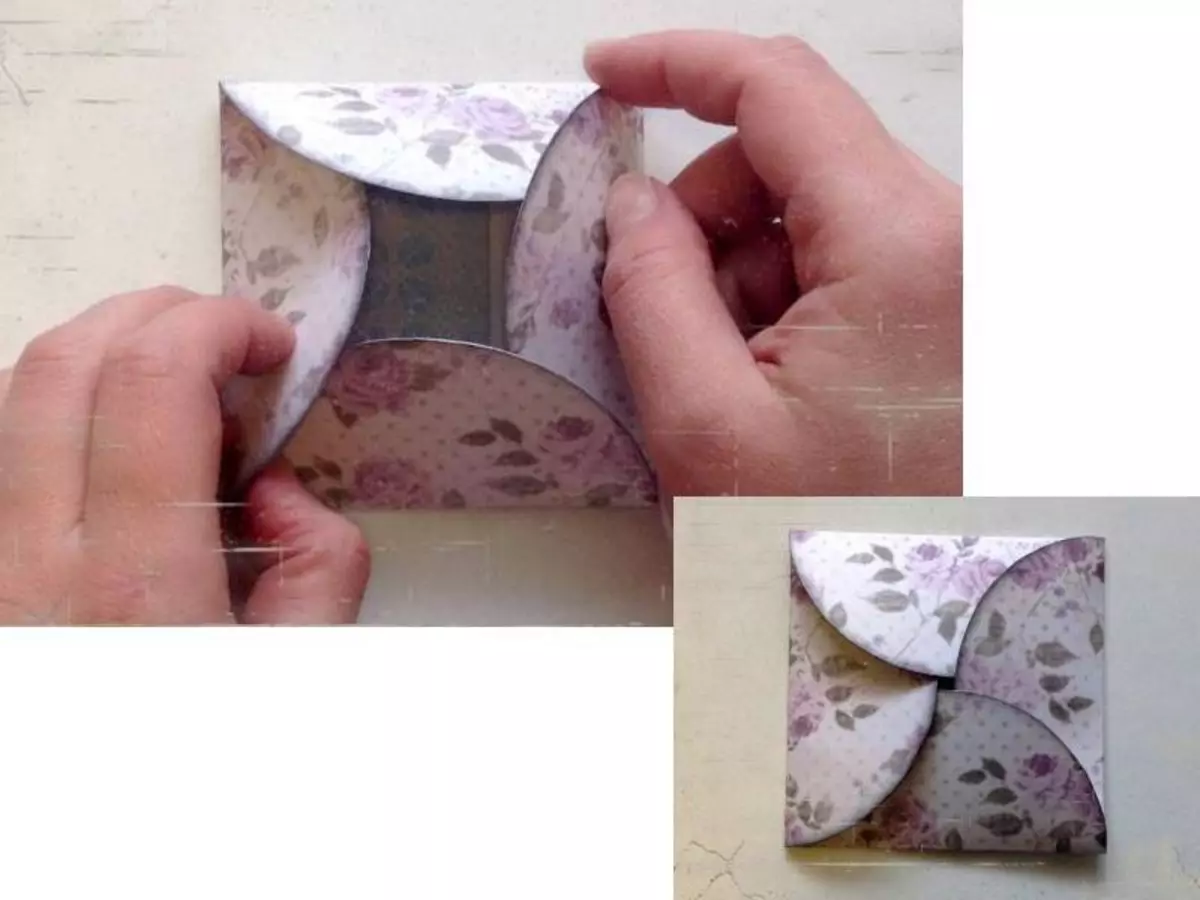
Stage 3. Insert the money in the resulting basis and close it. To do this, alternately fold to the middle of all sides of the workpiece. At the end you have to get a beautiful break.
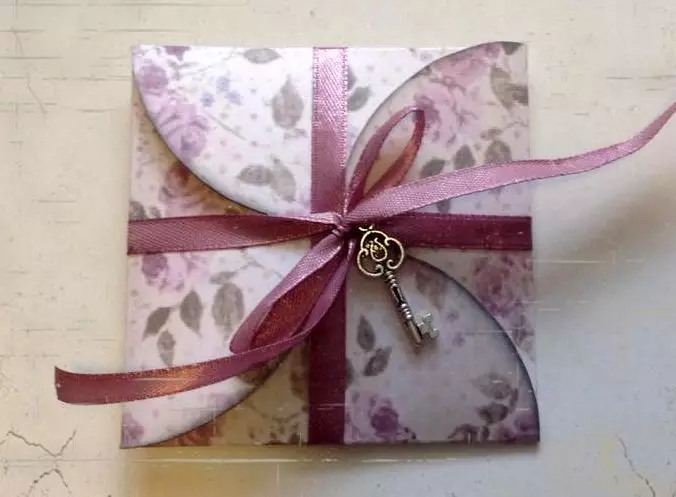
Stage 4. It is time to decorate the envelope. Cut one meter from the satin ribbon and impose the envelope with it as if you wrapped the box for the gift. Do not forget to tie a bow and attach the key on it. Pulling for it, the newlyweds will easily open your envelope. If it seems to you that the edges of the tape were too long, cut them down and felt the cut so that the threads would not be afraid.
Traditional option
To make such an envelope, you will need no more than thirty minutes. Despite its ease and ease of execution, he will be able to please the young seven of his elegance.
In the event that you have enough time in stock, you can more seriously approach the design of a monetary gift and use the scrapbooking technique not in its small part, as in the previous master class. In addition, here, in addition to paper and decorative elements, you also need a sewing machine, because some envelope details will have to sew.
Article on the topic: Ringing phenoshek from threads Moulin for beginners with photos and video
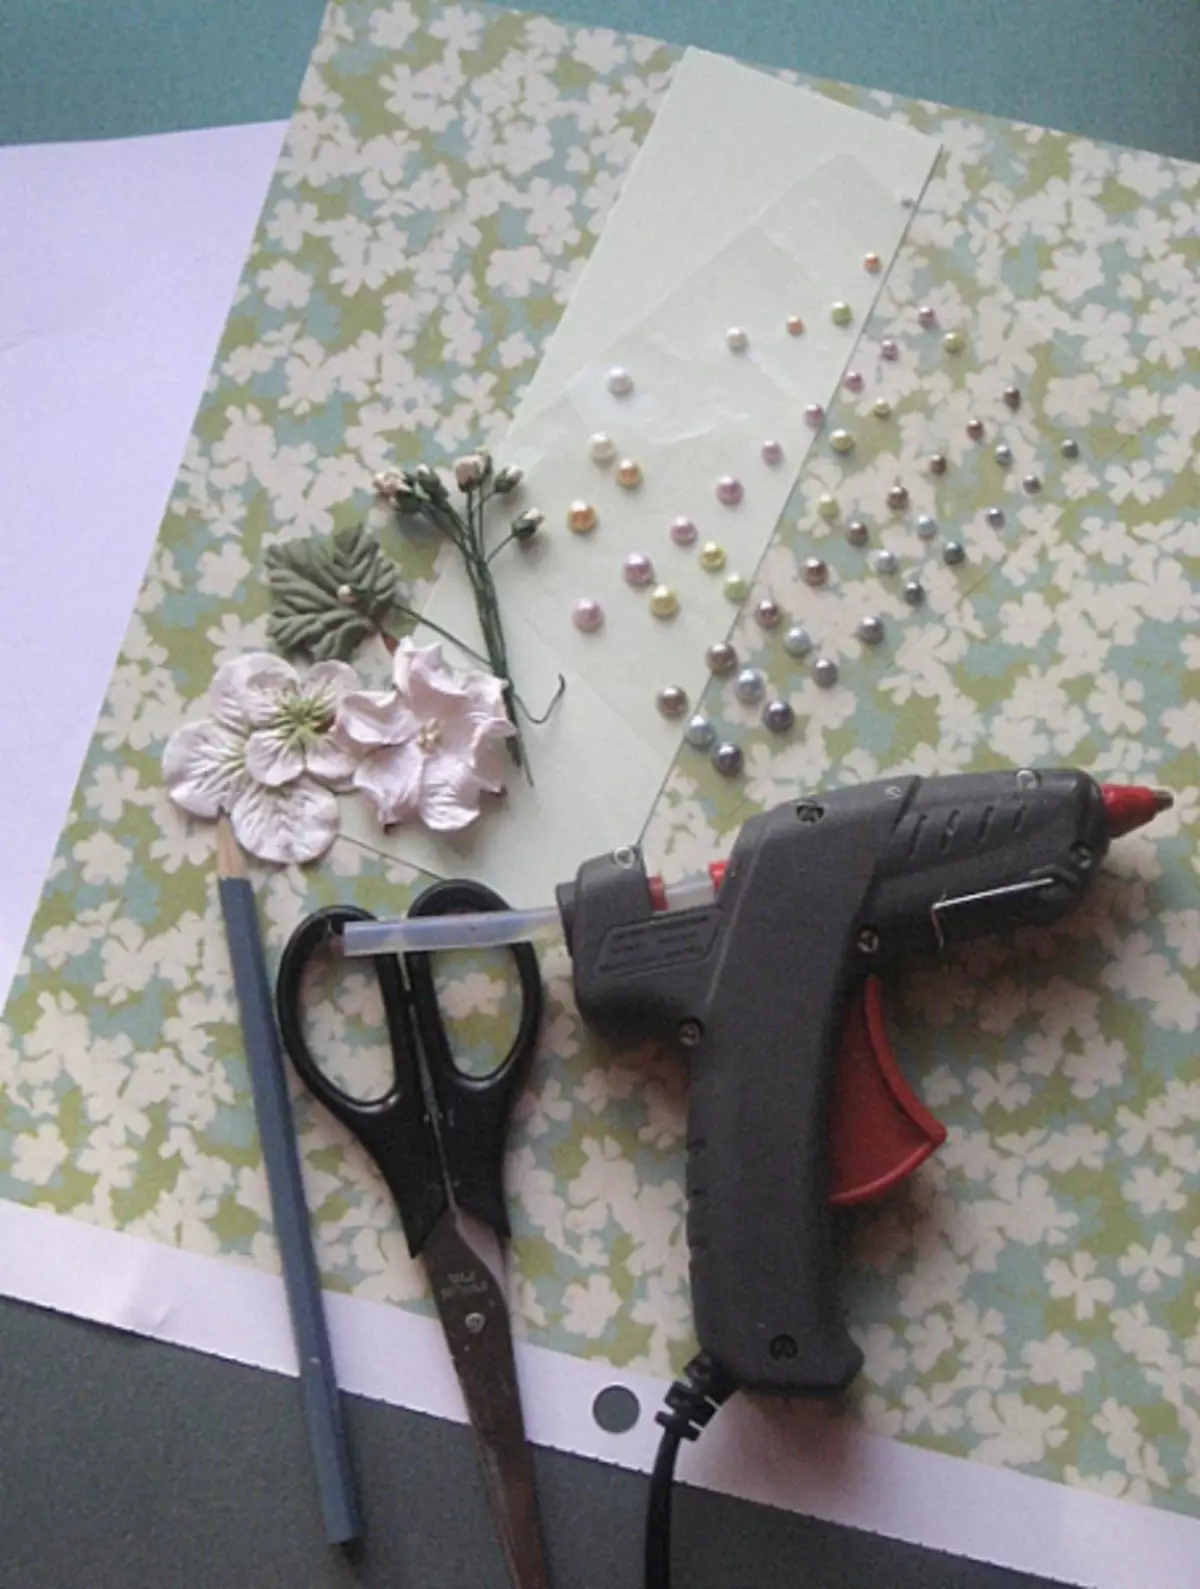
Required materials:
- Two types of paper - decorative and dense (without pattern);
- As decoration: Tape (from organza or atlas), artificial flower and leaves, as well as semi-graysins;
- Scissors, line, needle, plate and glue.
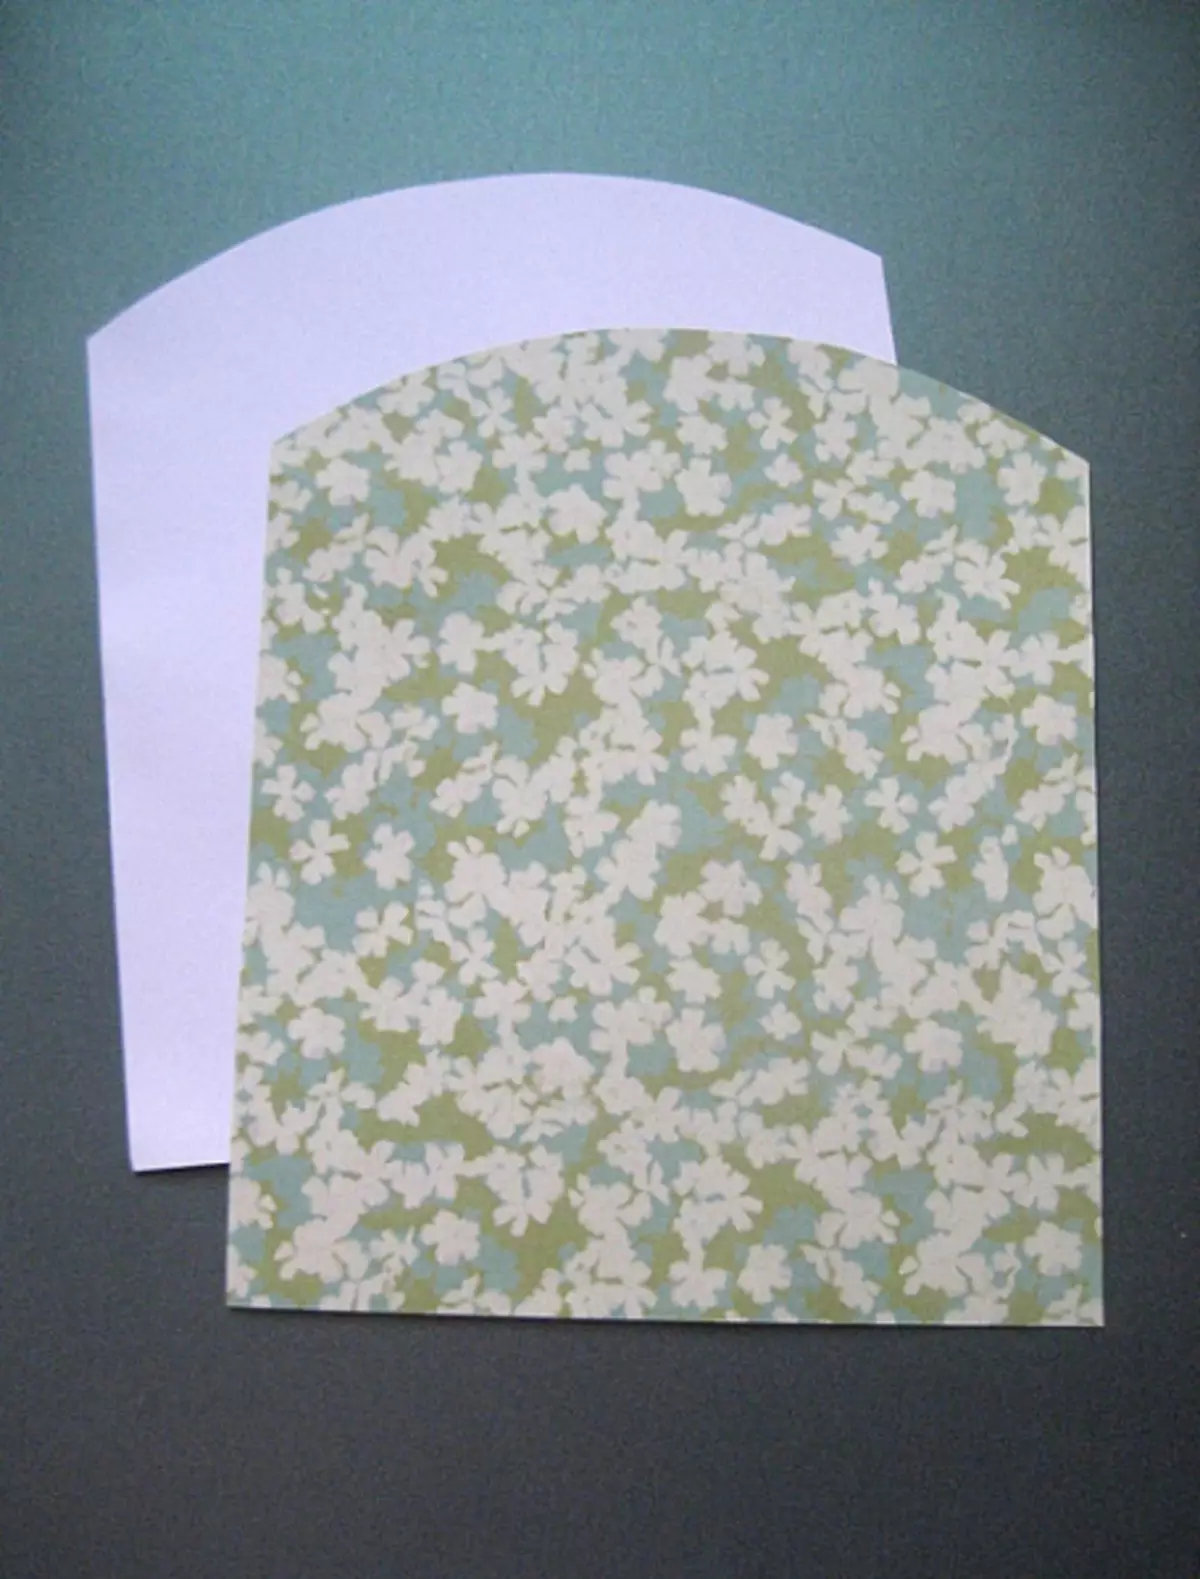
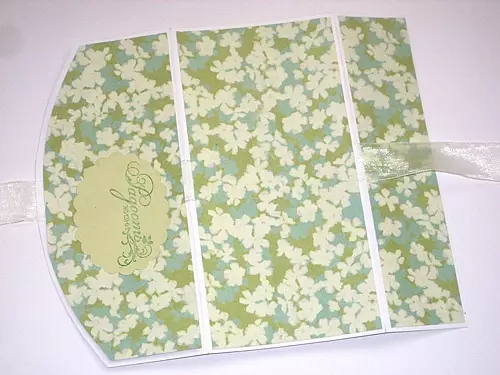
Stage 1. Make the workpiece of the future envelope. To do this, cut a 20 × 25 rectangle from thick paper. Placing it horizontally, outline from below and on top of two horizontal lines at a distance of 5 cm from the upper edge and 10 cm from the lower. These lines will serve as a fold. As the last time, attach it to them the iron line and spend the needle along the lines, forming a groove.
The side from which the fold is at a distance of 10 cm must be rounded. To do this, use any item of large diameter (25 cm or more), in this case, a plate. Attach it to the workpiece, circle around the edge and cut the unnecessary part of the workpiece.
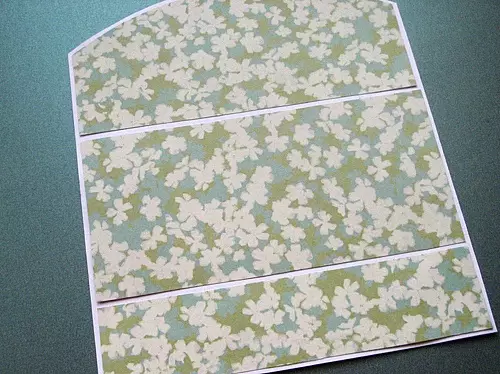
Stage 2. Now it is necessary to prepare the basic elements from decorative paper. To do this, the easiest way to use as a template obtained in the first stage of the workpiece. Attach the paper to it and calling the edge pencil, cut the rectangle with the rounded side. By placing it vertically rounding up, on the sides, cut the strips of 3 mm, downstairs - 18 mm. After that, read two lines: one at a distance of 4.5 cm from the bottom edge, the second - 14 cm. Cut the paper on them. You should have three items: facial (with rounding), rear (wide rectangle) and internal (narrow rectangle).
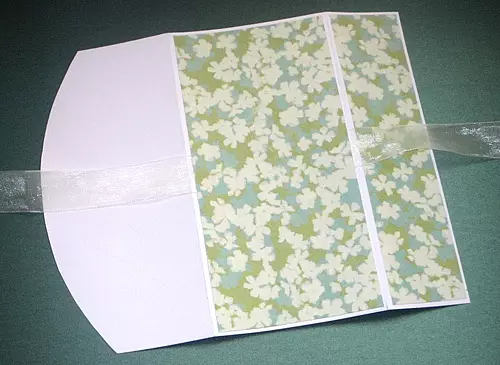
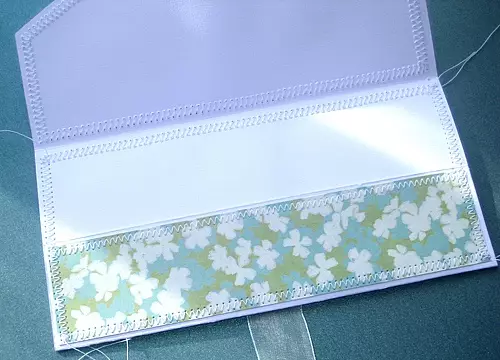
Stage 3. The most important stage has occurred - the envelope assembly. Cut a small piece of ribbon (30-40 cm) and glue it to the rear of the basis of the future product. At the same time, position the ribbon perpendicularly and exactly in the middle, the envelope will look more organically. Then glue the ribbon wide rectangle and with a rounded edge. The remaining element (narrow rectangle) is glued to the base, not passing tapes under it. She must lie on top of it.
Article on the topic: Palatin Peres with Schemes and Description: How to Tie with Spice
Send the rear side of the envelope inward so that the bills located in it could not fall out. To secure your pocket, use the sewing machine. Come on the seam "Zigzag" from below and on the bokes of the envelope. Thus, you can process all the edges and give alive, this kind of "Hand-Made", which will add charm's work.
The remaining part of the scenery is entirely depends on your fantasy, because it will make the envelope unique and enjoyable. Position artificial flowers, semi-graysins and other decorations on the front side, so that the work has acquired a finished look. You can also add a small plate at will, on which the congratulations will be written.
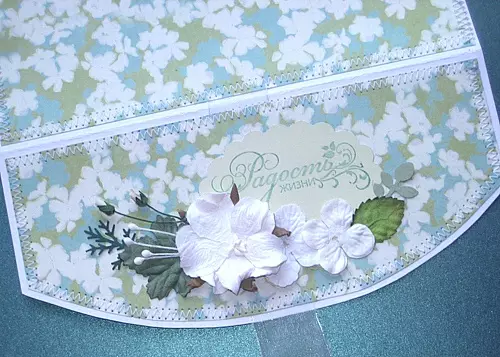
You can also use other elements of the decor, to place them otherwise - it all depends only on your creative approach. In any case, the envelope will give the future owner heat, and also will show your efforts.