
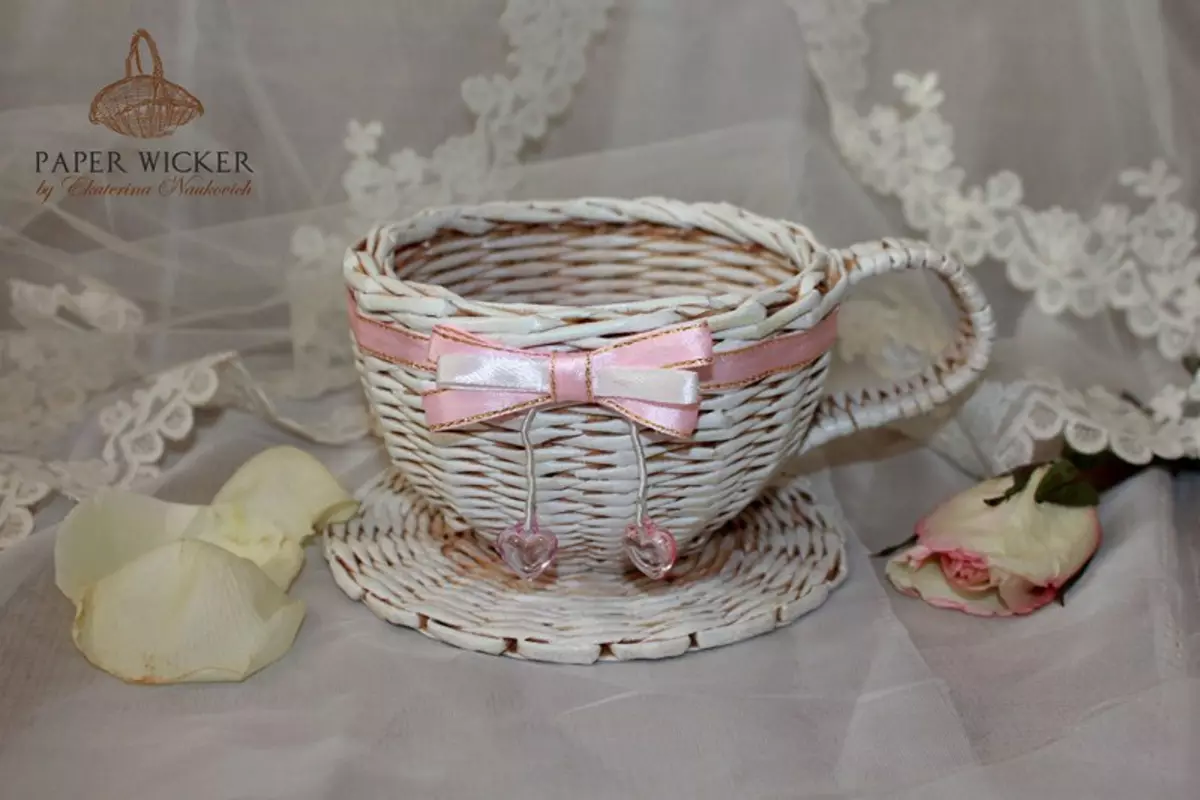
Cantry is a very useful decoration for a kitchen, which is practical for those who love order. With their appearance on the tables will be less disclosed packages with all sorts of sweets and candy. Also, various fruits are also placed in them, the kitchen decoration will attract attention to them, and children will not remain without the necessary vitamins, which is very important. In addition, such a useful thing can be made independently from the girlfriend. For example, you can use old newspapers that no one is needed. They will serve as a good service no longer as a printed product, but as material for the candlers from newspaper tubes, which will not only be durable, but also spacious. This master class will tell you how to make it with your own hands.

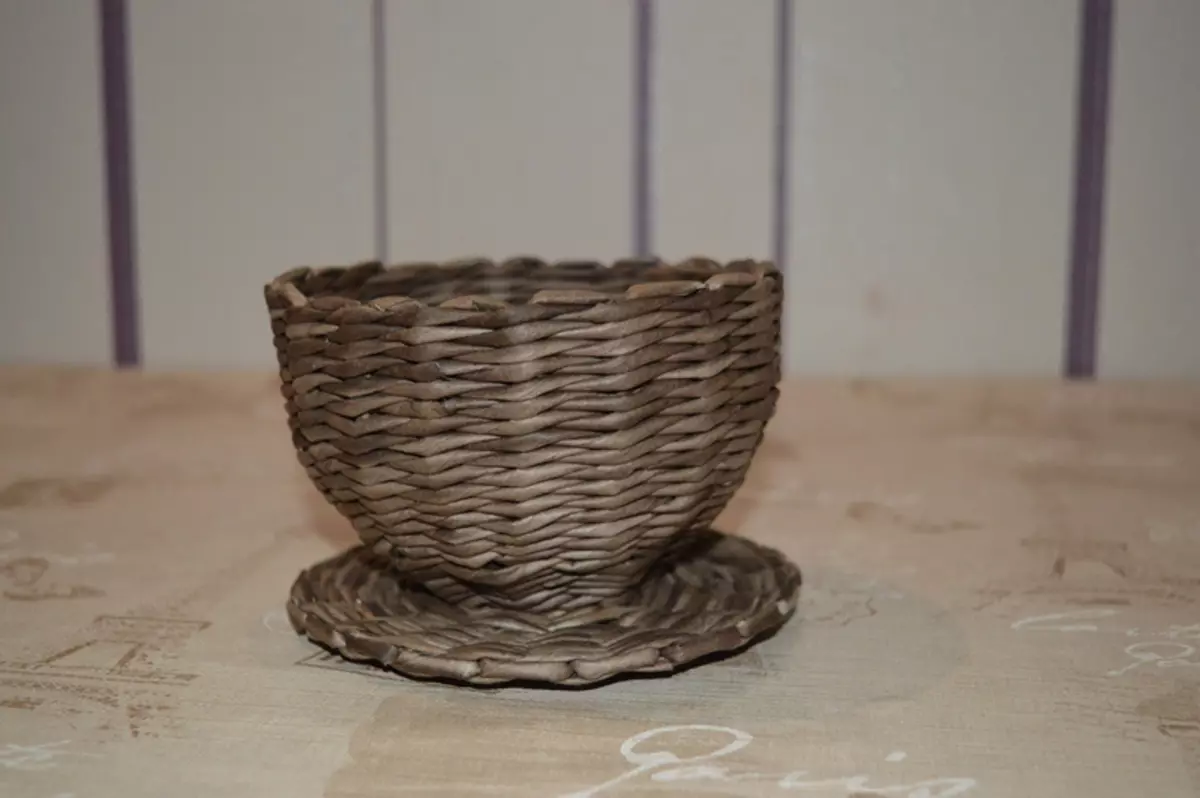
Mastery Candle Cup
On the manufacture of bowls-candlers will be needed:
- newspapers;
- knitting needles (1.5-2);
- PVA glue;
- acrylic lacquer;
- the form by which we will be tired (suitable salad bowl);
- stationery knife;
- scissors;
- Dense bristle brush.
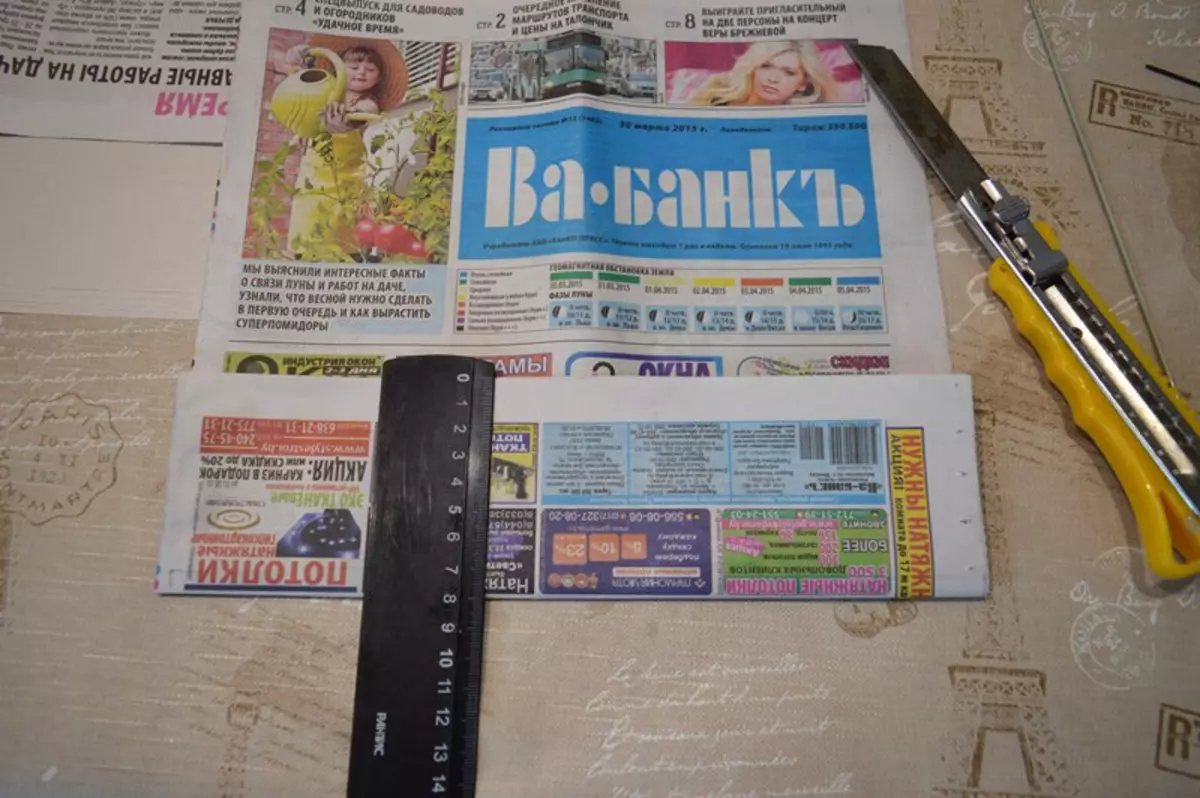
Stage 1. Prepare the tubes from which we will weave the cup. To do this, place the newspaper on a flat surface, cut it at the place of bend. After that, fold the sheet so that the strip is formed at 7-8 cm, and cut it off.
After that, take the needle and at a low angle (20-30 degrees) put it on a strip of paper. Twisting tube, hold the left hand to the newspaper so that it is as close as possible to the needle. Try to turn the paper on the needle tightly so that it never disengaged.
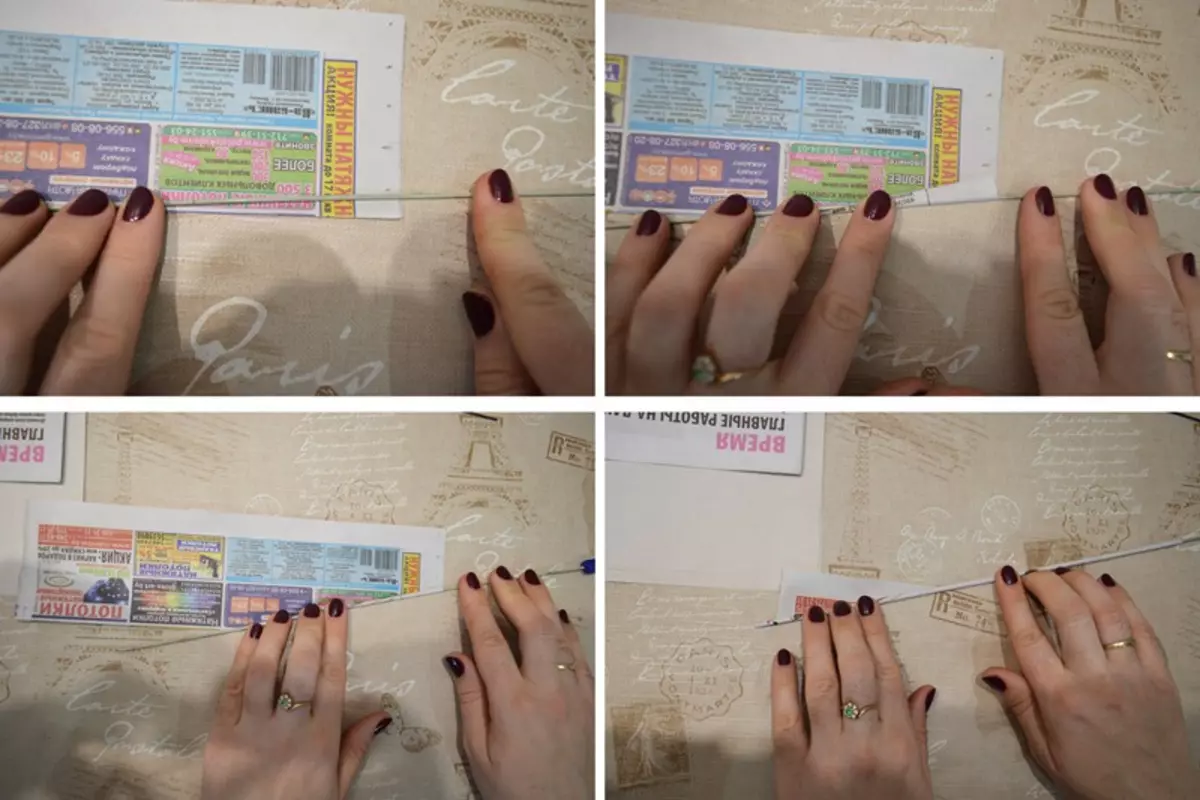
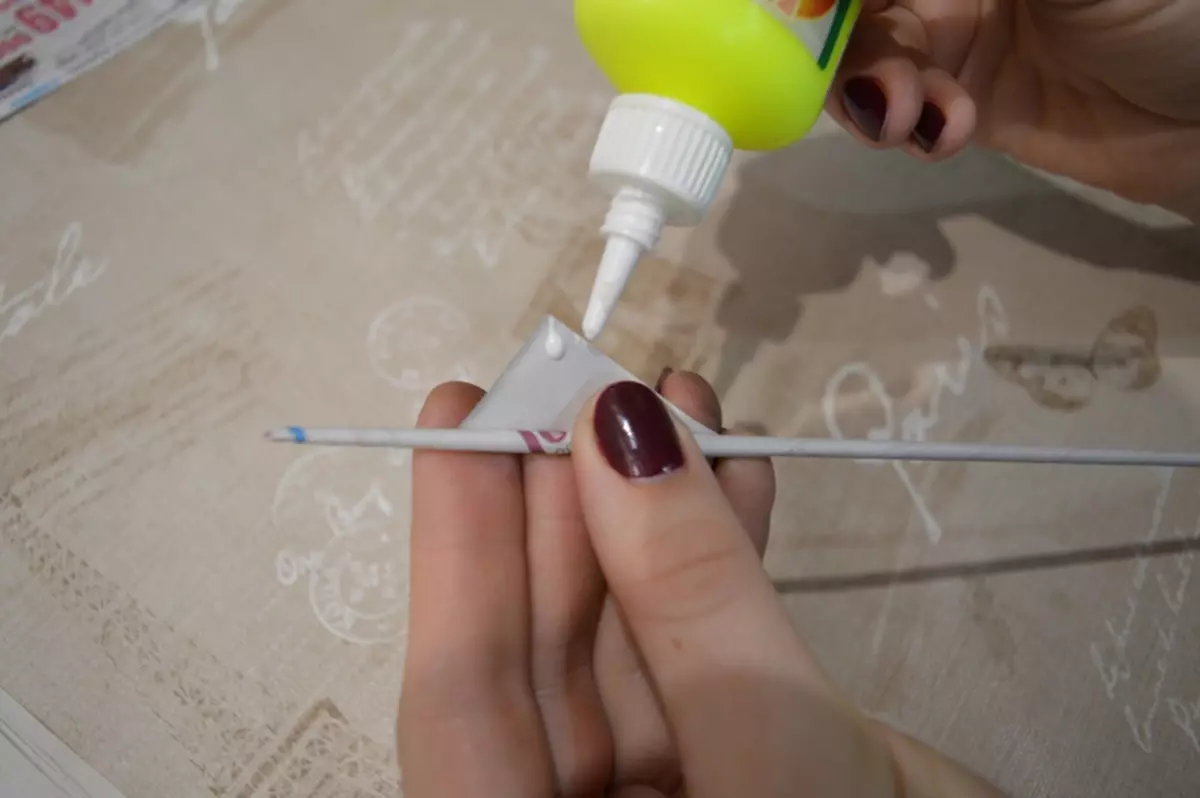
When the tube is spinning, it must be fixed. To do this, apply a drop of glue to the remaining small corner of the newspaper and press it towards the end.
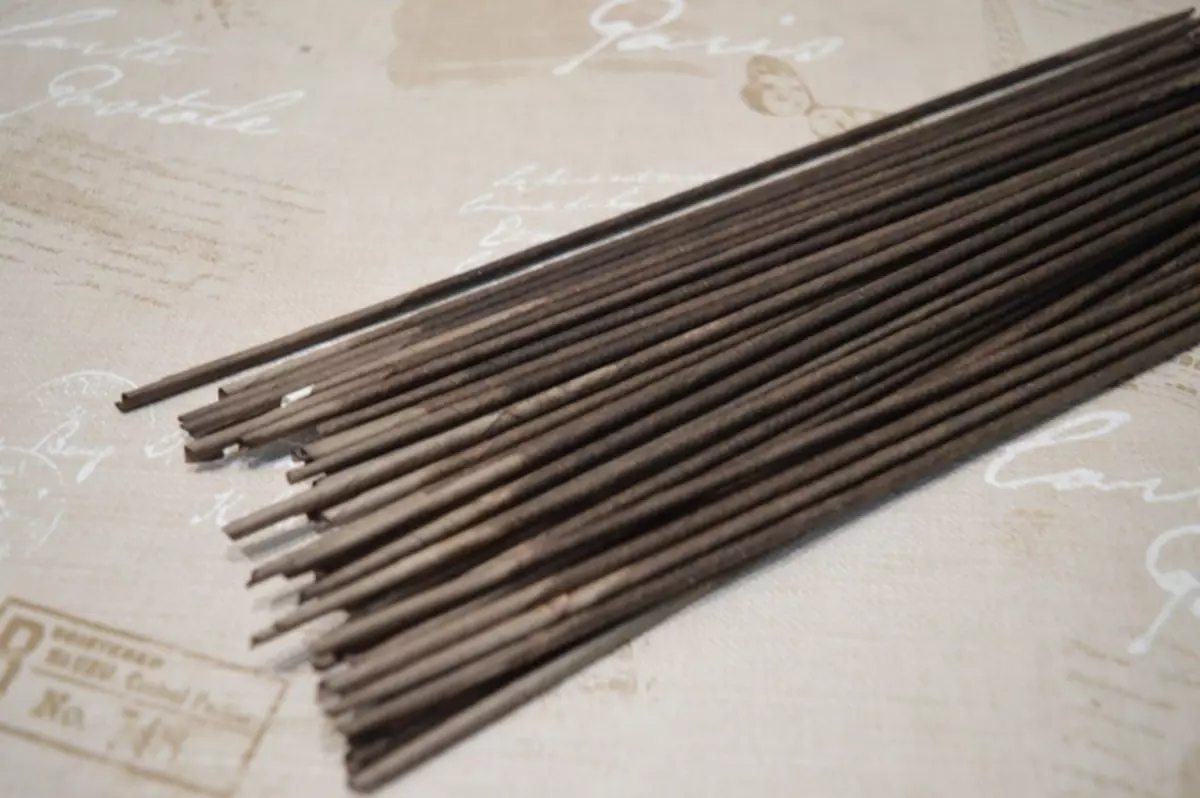
The finished tube should go dense, and one of her end will be a little wider than the other - do not worry, it will be needed to build up the tubes on each other. Now it is necessary to repeat it another 40-50 times. So many tubes at least it will be necessary to create a candy.
Stage 2. Now the finished tubes must be painted. The easiest way to do is with the help of a water-based simulat. Her palette is diverse, which will give you the opportunity to choose the most loved color, in addition, it does not smell and looks good paper. Take a small pack of the tubes and plunge it into the paint bottle. After that, remove, turn over the other side and repeat the procedure. Now you need to give the tubes to succumb.
Also remember that to give them elasticity you need to leave them slightly wet, so weave will be easier. If you have not caught this moment, you can moisten them with the help of a pulverizer, but the ends (4-5 cm) should remain dry.
Stage 3. Top patience, because the bowls begged here. Let's start with the bottom.
Article on the topic: Sale collar with the needles: master class with photos and video
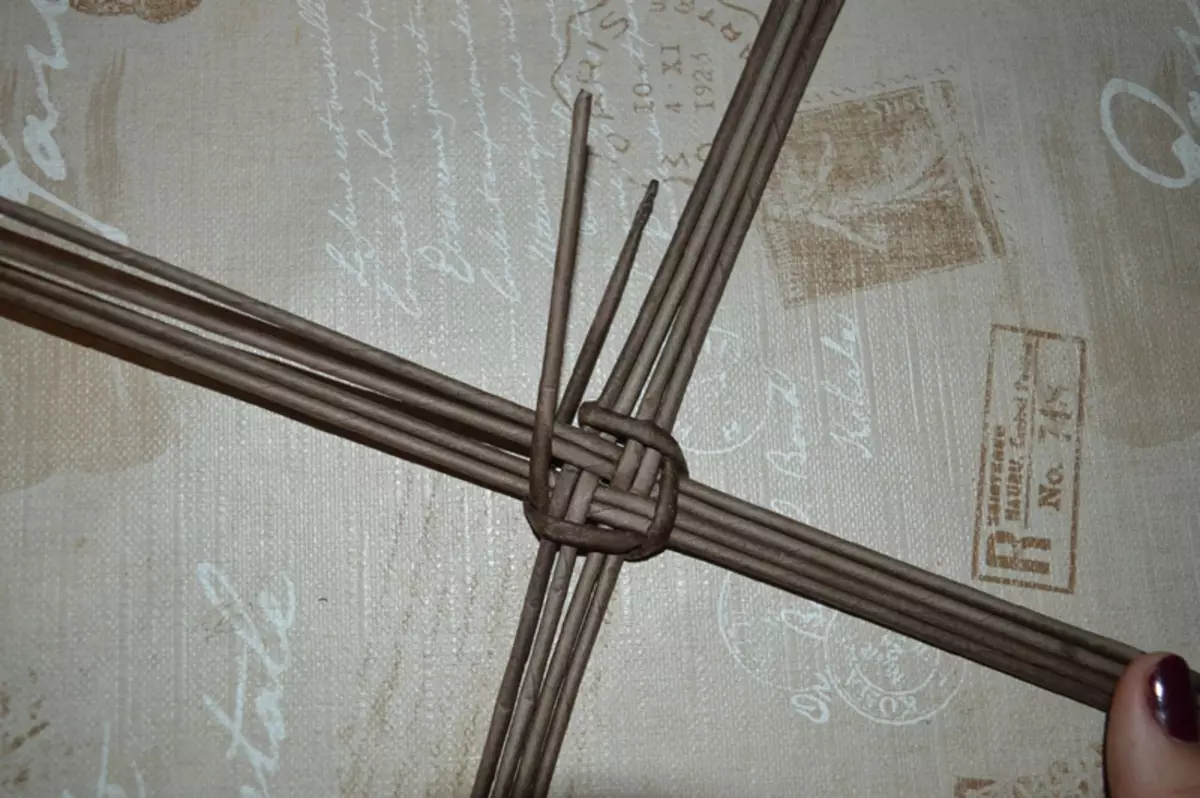
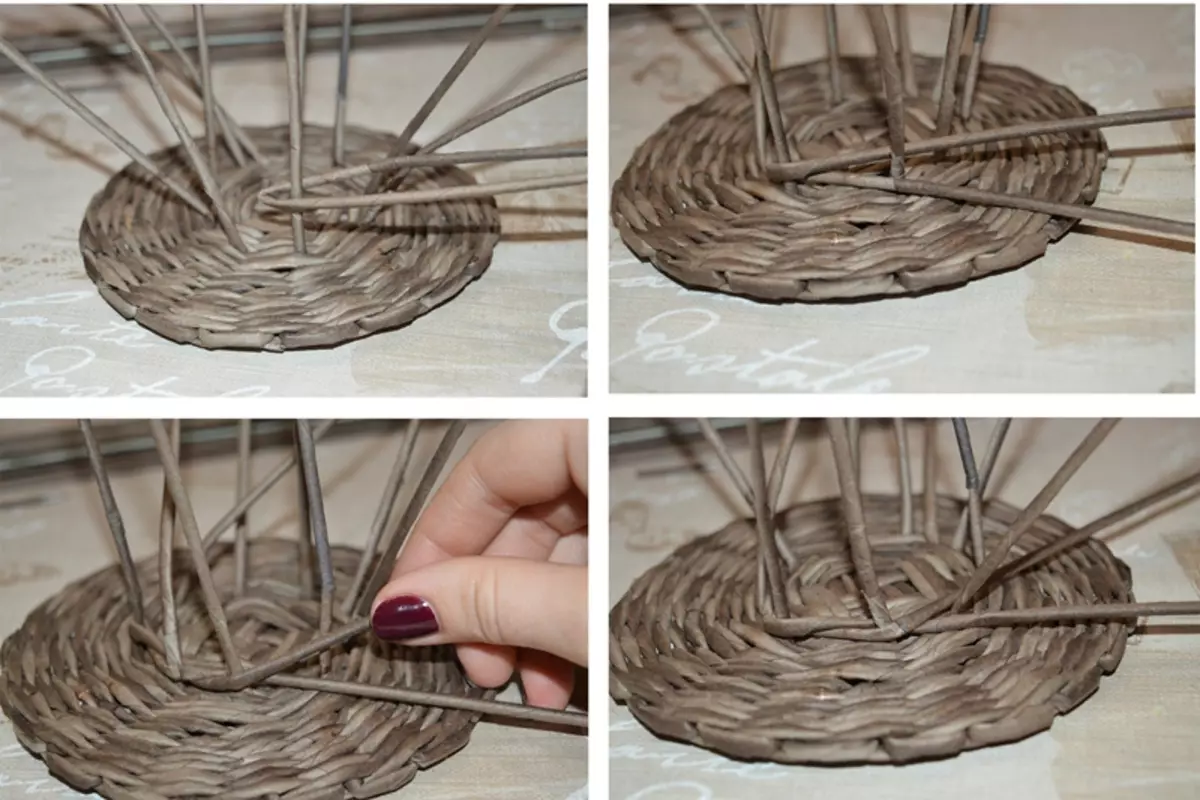
Take the tube and spread their crosswise, as shown in the photo below. So that they do not ride, slide them slightly. In the future, we will call the cutters.
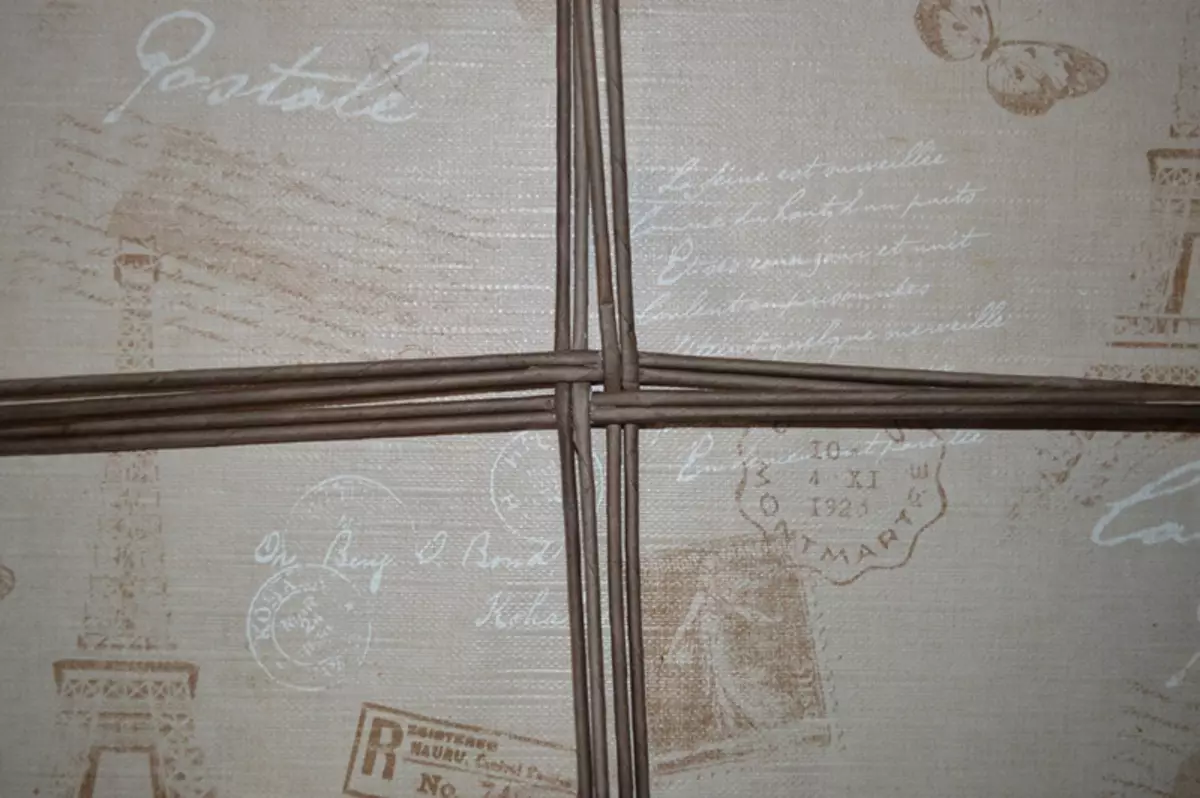
Take the following tube and, bent it in half, put on four racks at once.
Press it to the center of the base. So, you have two working tubes that you will be tired of a saucer for the cans. For convenience, one of them can be marked with a stationery, which will serve as a guide for the end of the row. Take the bottom tube, output them forward and put on top of four racks. After that, the upper working tube stretches over the bottom and let the four racks. This method of weaving is called a straight rope in two tubes.
Continue circular weaving up to 2-3 rows. Carefully keep track of the working tubes, because the lower tube is always displayed forward and put on the racks, and only after that, on top of the cross, you can put an upper tube and start it. If you do not comply with this rule, the picture of the candlers will assemble.
If you have ended the tube, increase it. Take the following tube and insert a narrow tip into its wide end. Do not forget to drop there PVA glue, it is necessary for a more dense connection.
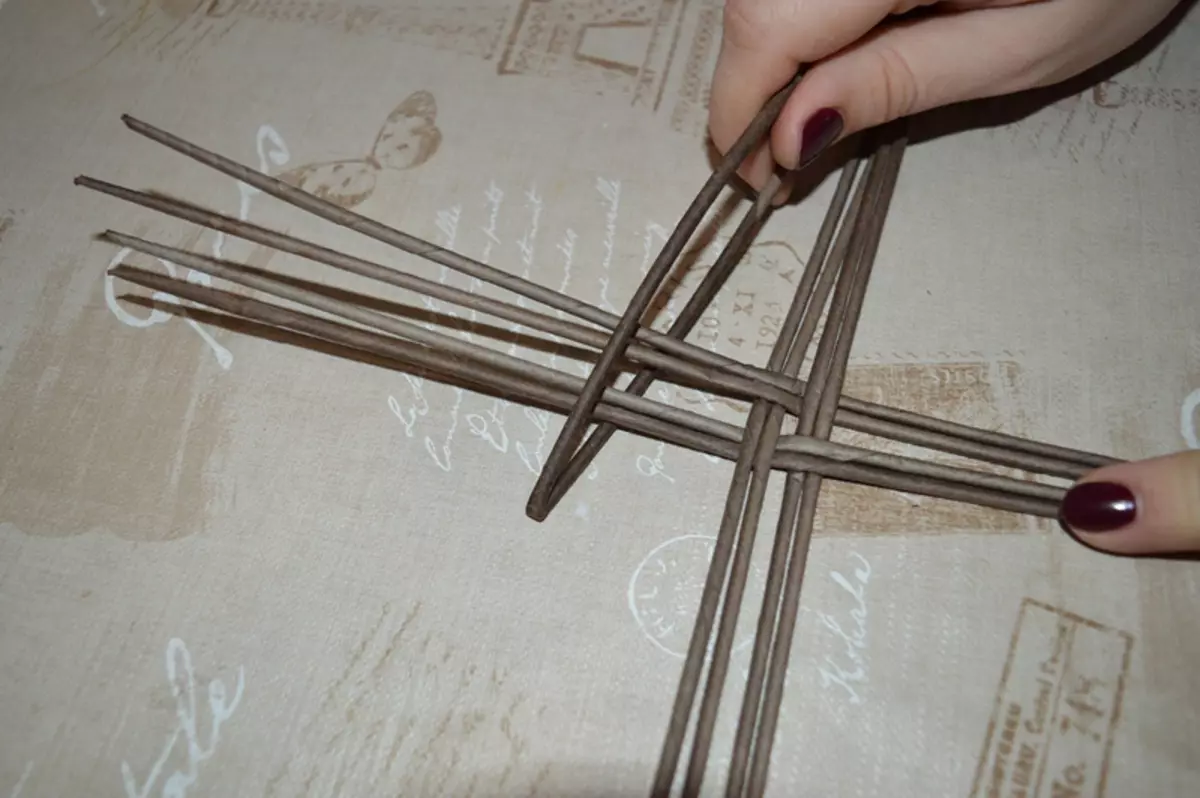
After 2-3 rows, start separating the racks of two and continue to be pulled out in the same way.
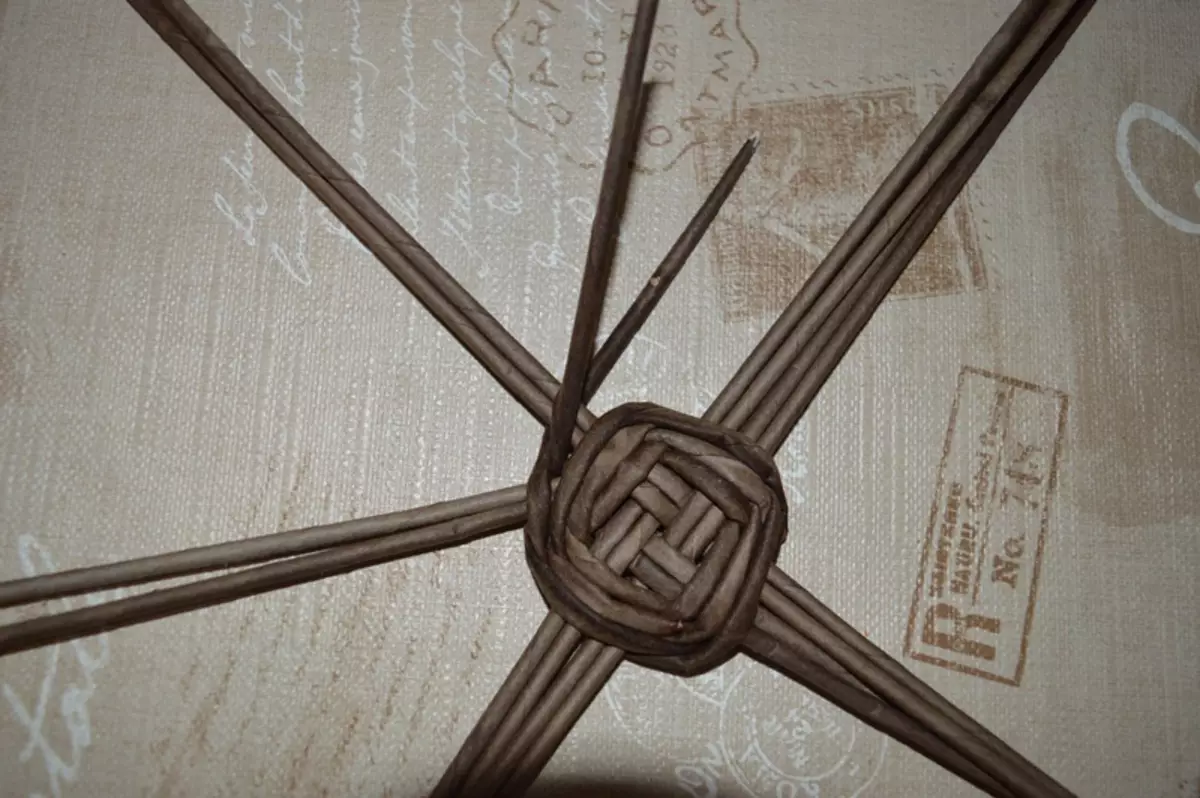
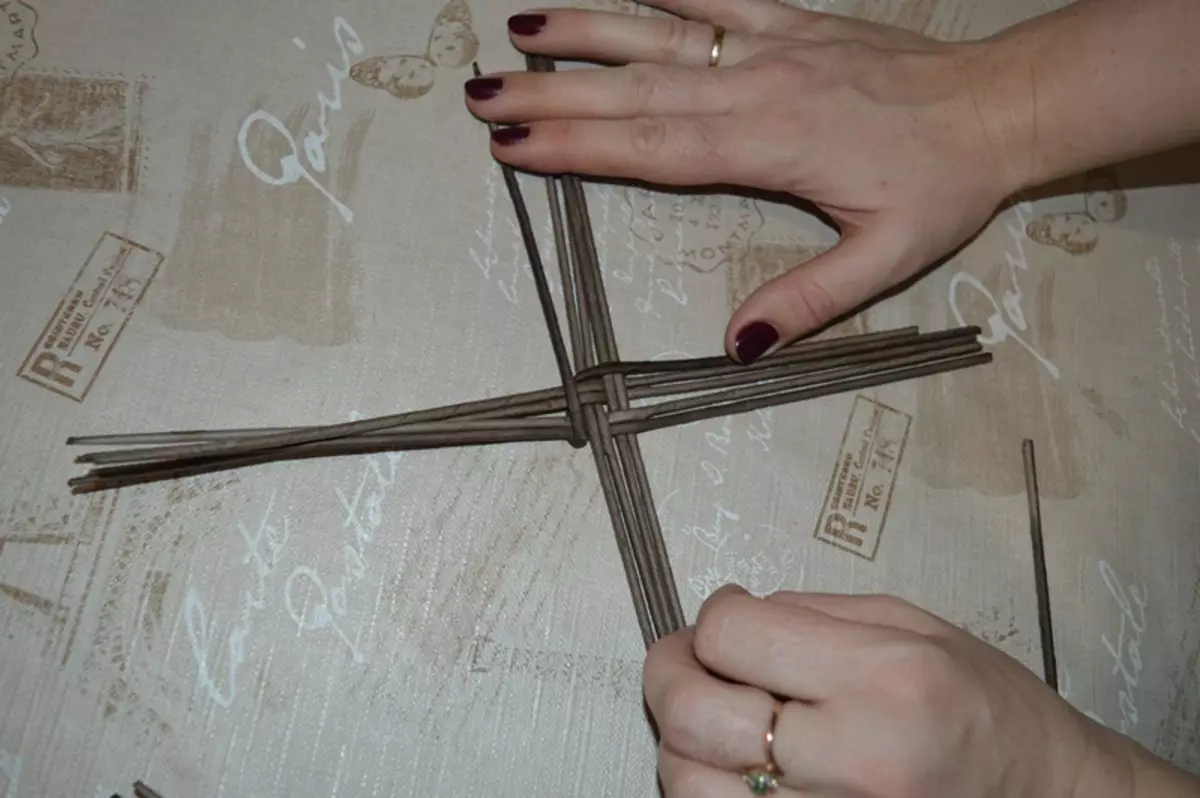
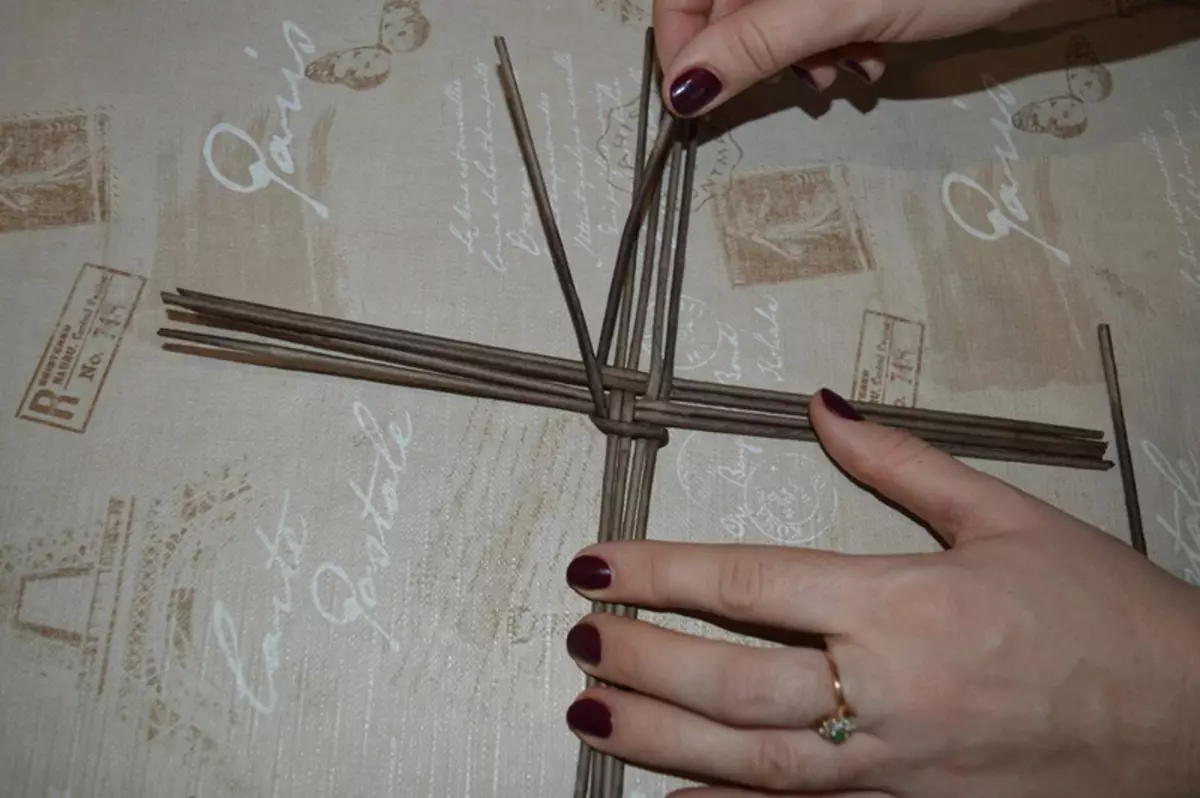
We will pull out a few more rows until it is about three cm between the racks. You can then divide the dual racks and form the "sun". It is important to make that at the same time the distance between them was approximately the same.
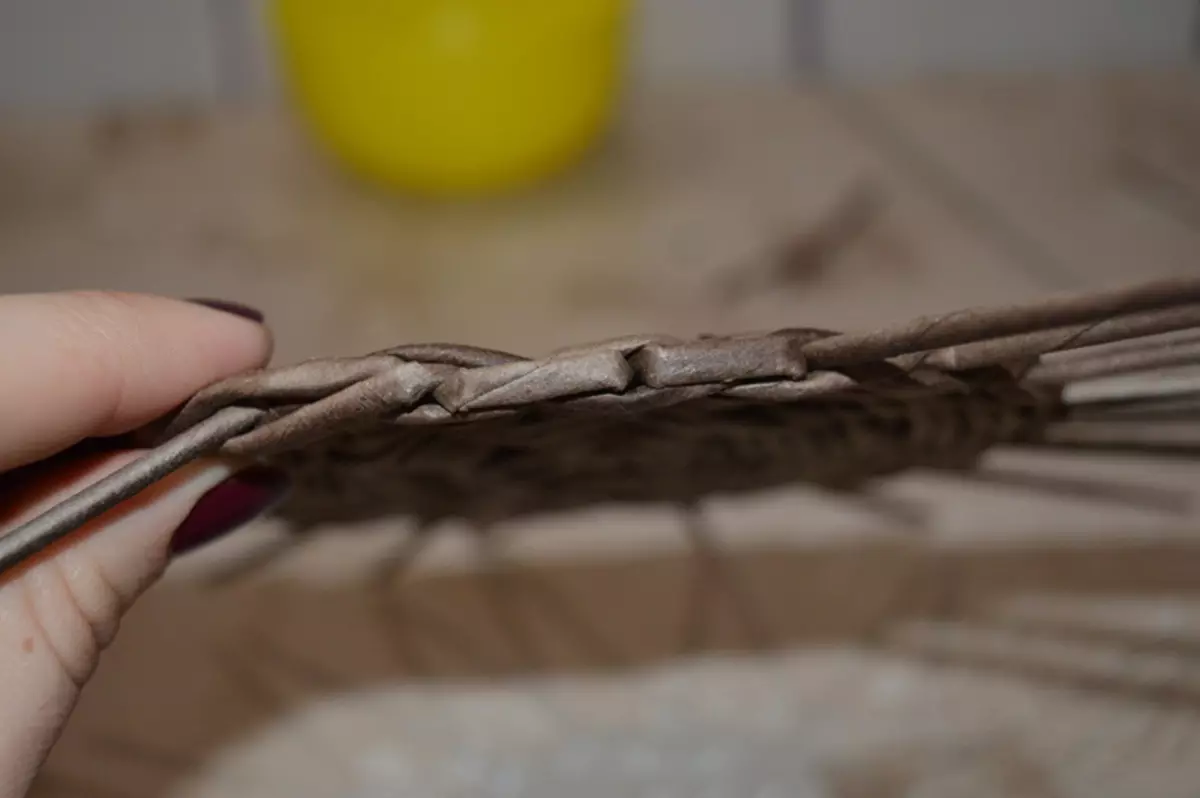
To ship the saucer to the desired size and finish weaving. To do this, cut the operating tubes, leaving the ends of 1.5 cm and hiding them into weaving with the help of the needles. To close the edge of the weaving, flatten the first rack, bend it next to the second, leaving the tip for 2 cm. Umpriginely cut off. After that, hide the end of the tube in a weaving next to the second counter. A similar procedure is done with subsequent racks. You can help yourself with the help of the knitting needles: push the weaving so that you can hide the tip of the rack into it. Thus, the closed edge was obtained:
Article on the topic: Snowman from threads with their own hands Step by step with photos and video
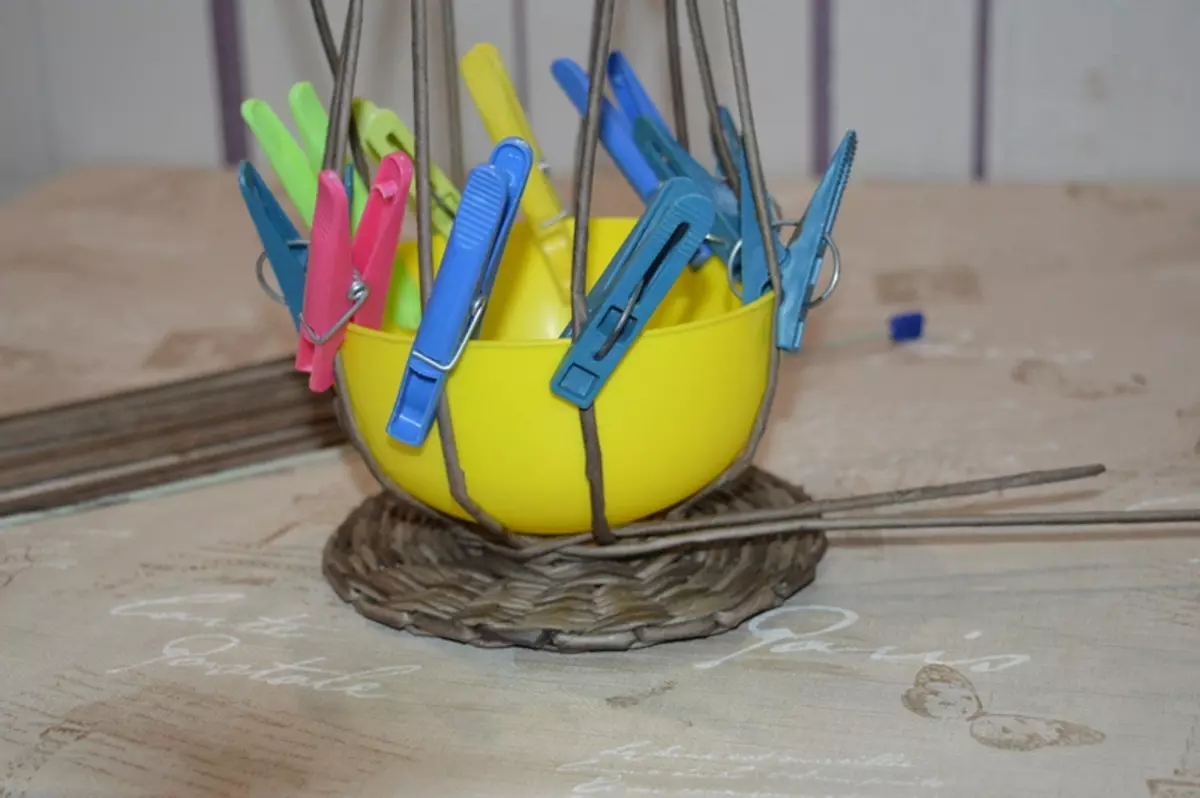
Stage 4. Go to the bowl of the bowl itself. Prepare racks for her: Take the tube, bend it in half and go through the bottom of the letter P. Make so that there is a rack for a cup between each rack.
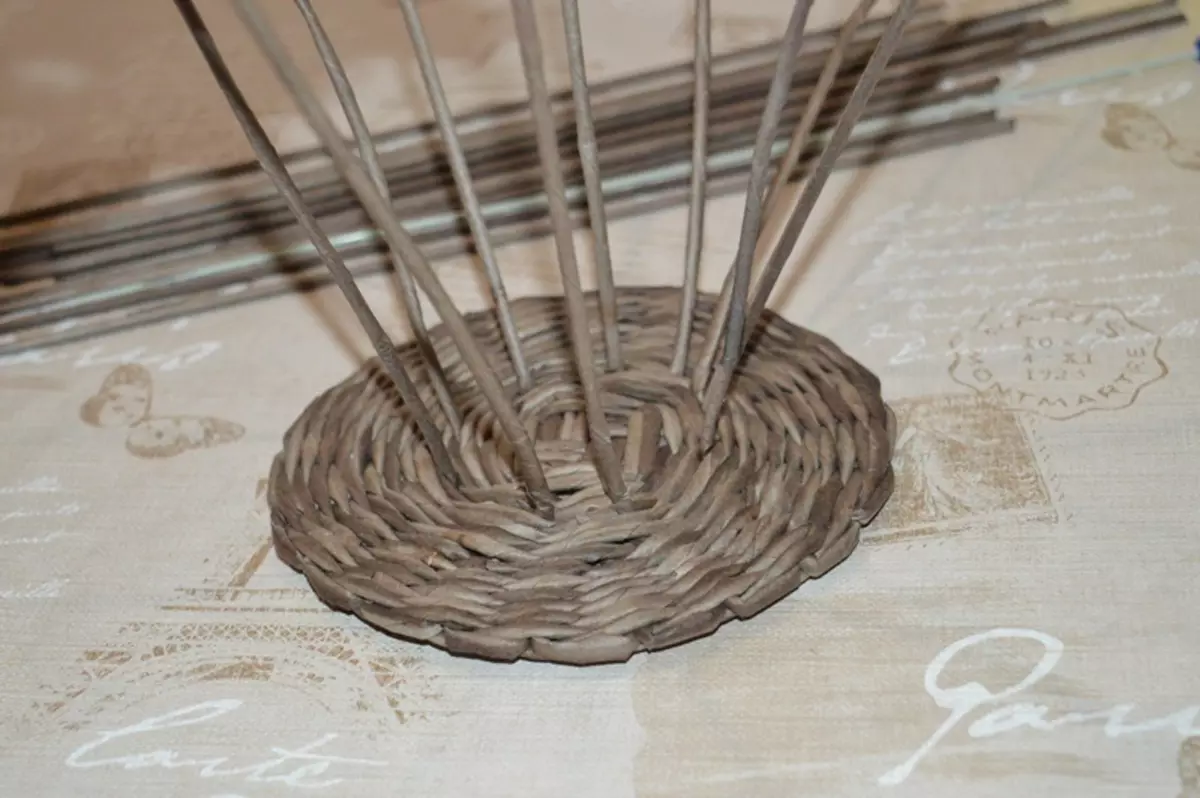
Next, bend in half a single tube, put it on the rack and start weave along the same scheme as the saucer, with one difference in the fact that the racks are now in a vertical position.
After completing two rows, insert the shape (for example, a salad bowl), fix it with clothespins (it is necessary so that it does not slip and the drawing remained even). Instead of clothespins, you can also put something heavy in the form. Continue weaving, pressing the tube to form.
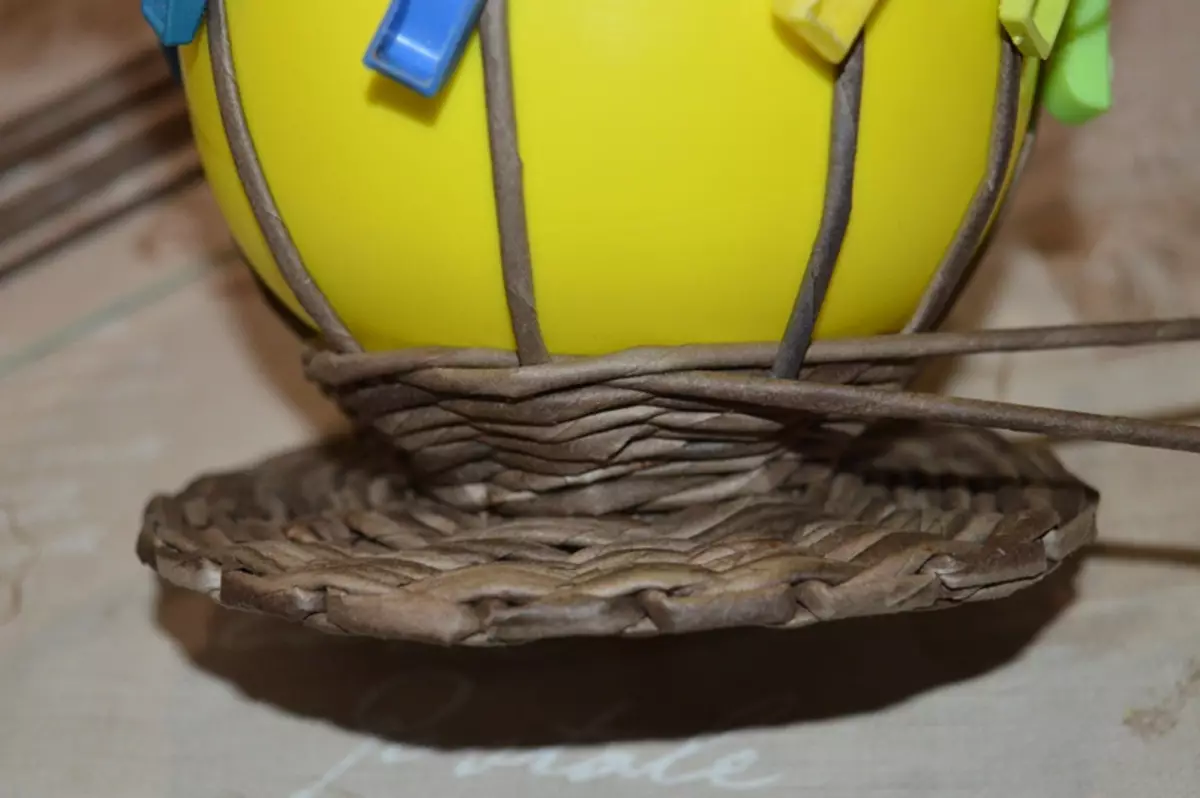
Watch out the distance between the racks. If it approaches three cm, you will have to insert additional tubes, because otherwise the cup will be loose and its form will be unstable.

It's easy enough to do it: with the help of the needles, push the weaving and insert along with each rack on one tube. After that, the form returns to the places, and you wept further by the same scheme.
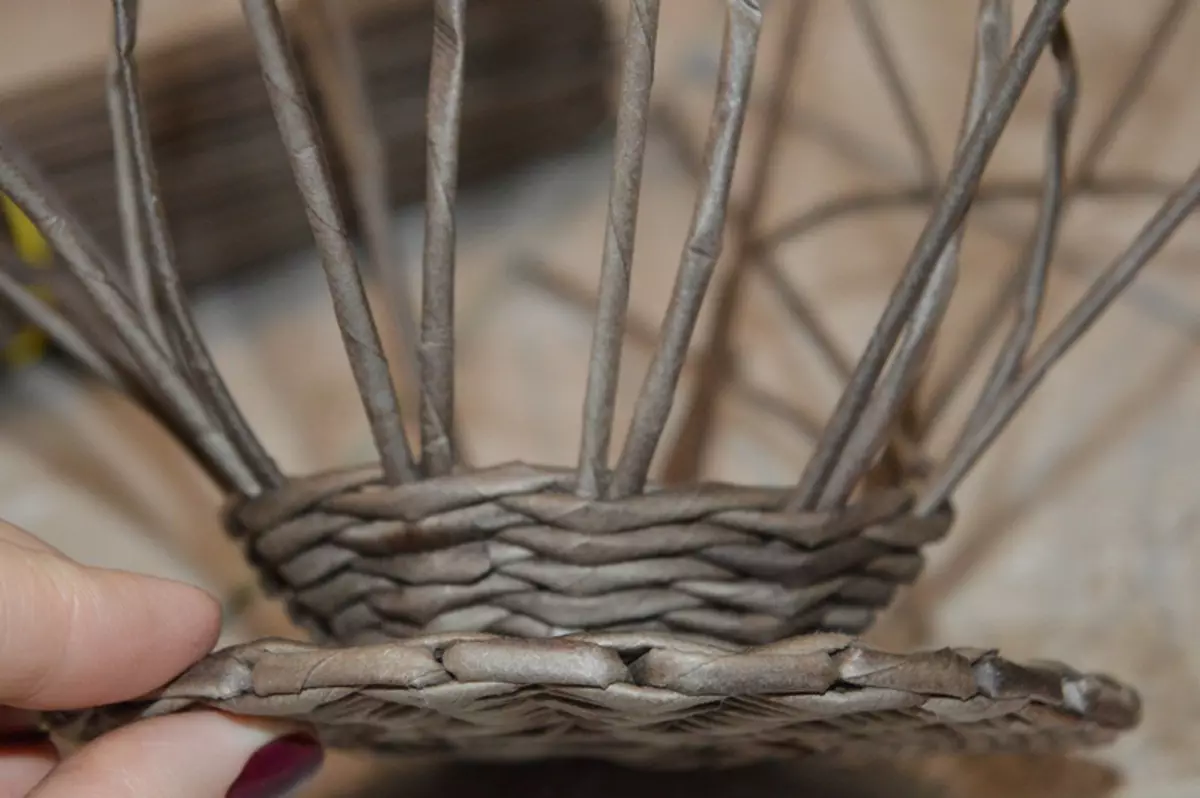
Continue to determine the cup to the desired height. After completing weaving, close the edge as they did before. Cut the working tubes and hide them in weaving, the racks are flattened, and the tips are hidden next to the adjacent racks.
As a result, the following should be:
Stage 5. It remains to weave the handle for the cup.
To do this, take two newspaper tubes and, leaving the tails in 2-3 cm, stick to one tube of the third tail. Place two tubes in parallel at the same distance that is located between the racks in the cup. After that, start talented by eight with the third tube. In the process, the tube can be tightened, to avoid this insert the needles next to them. Stop the handle, and the working tube is tide or hide inside the weaving. I pull the knitting needles.
Article on the topic: Knitted shell cover with their own hands
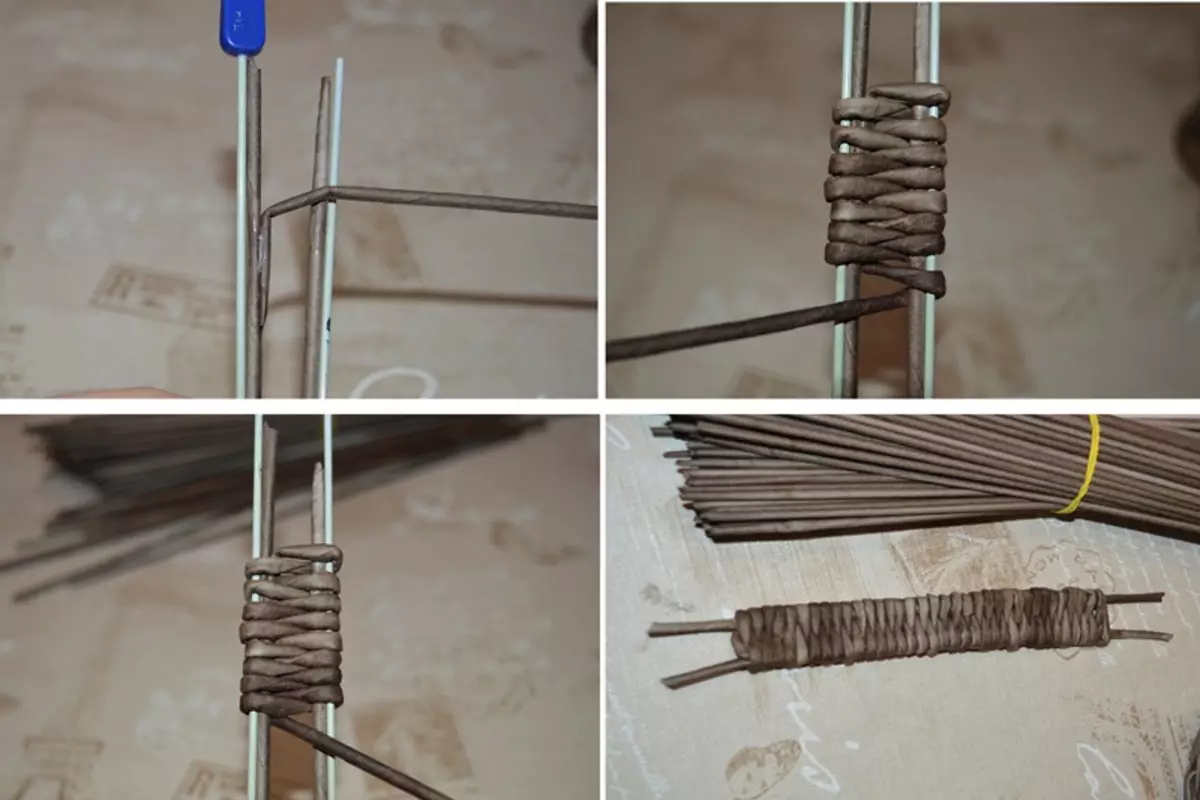
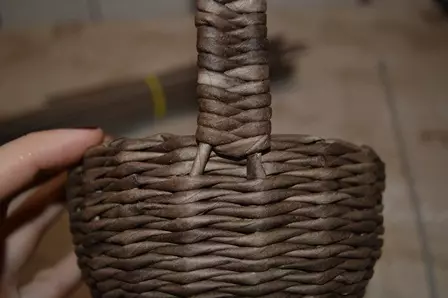
The next step will be the attachment of the handle to the cup. To do this, insert the needle in the weaving next to the rack. This is necessary in order to expand the place for the handle. Insert the handle's tails, pre-lubricating their pva drops.
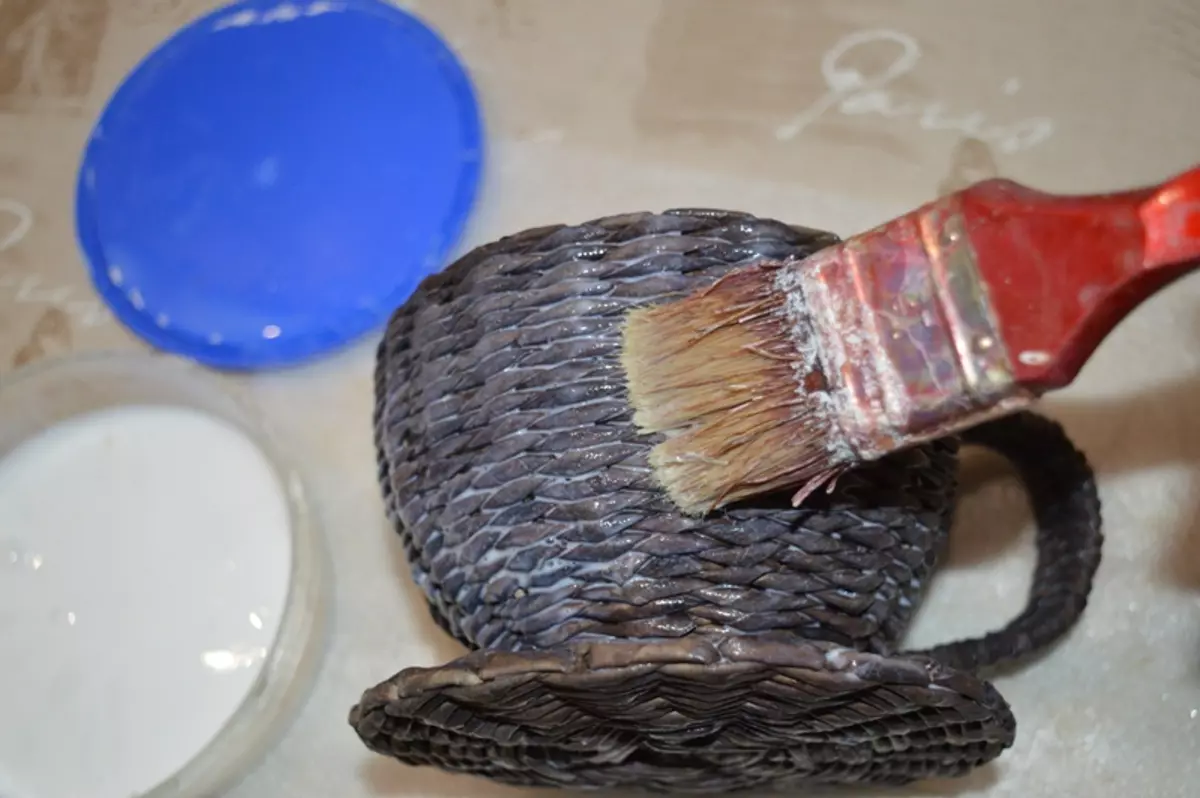
Stage 6. We will make a cup stronger. To do this, it is necessary to process to it. Dilute PVA with water in a ratio of 1: 1 and carefully wrap the cup inside and outside with a brushless brush.
When the bowl is dry to the end, it will be on wood in its strength. However, it is necessary to check whether there are any uneven places in the product. If you do not notice them right away, it will be impossible to correct them after the burrow. To fix the irregularity, simply allege it with your hands, at the same time giving the shape with a handle.
If you think that a cup of already is already durable, then the primer can be skipped.
Stage 7. Lacation. To give a cup of additional strength and protection against moisture, the product is covered with varnish. Moreover, the varnish gives a beautiful gloss and brightness of color. It is better to use acrylic varnish for this, since it dries quickly and does not have an unpleasant smell, which allows you not to move from the room during varnodes. Cover them a cup with the help of the brush with two layers (do not forget to give every layer to dry).
Now your product is ready to become a reliable container for candies and various fruits - it is strong enough and can withstand any mountain of sweets. You can also reap the candy on your desire. For example, so:
If the cup seems to you too complicated to create, you can make a candy and easier. It takes not much patience and time to create it, but despite this, it is as beautiful and can surprise guests. In the next video, it is told how to create such an openwork cannon: