
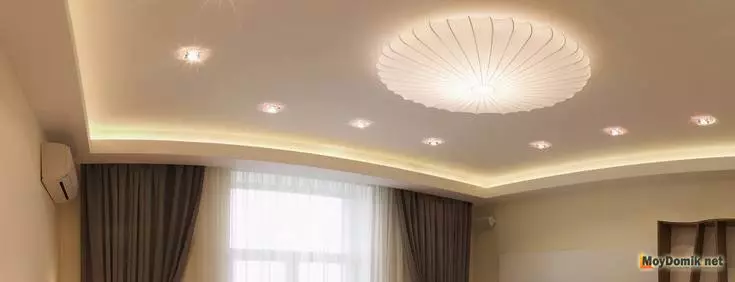
Beautiful, stylish, original ... many more epithets can be chosen by admiring the beautiful two-level ceiling of plasterboard. It is in this that the unusual design of these ceilings is. In the fact that every ceiling looks in its own way.
And the more fantasy you will show working out the sketches of the ceiling, the brighter it will characterize you and decorate the hall, bedroom, living room or kitchen.
How to make a two-level plasterboard ceiling
At first glance, it seems that only tandem designer plus professional builders can create such beauty. But no, for the device of ceilings from GLCs, it is not necessary to finish art school, have a higher education in the specialty "Builder". A set of special tools will not need. It is enough just to have an idea of which ceiling you want to do and get. And also to show a little creativity. The rest is the case of technology.
Despite the fact that visually all ceilings are different, the difference is the final decoration and successful design. Someone more concerns the insulation of the ceiling, and someone design, though, these processes can be associated, complementing each other.
The technology of the device of a two-level ceiling of drywall is identical to each type (single-level, multi-level). And for the newcomer it is easier, this article will show step-by-step instructions - how to install 2 level plasterboard ceilings. But, there is a little theory ...
How to make a two-level plasterboard ceiling - plan
First of all, several important points should be taken into account:- Room height. Two-level ceiling design will reduce the height of the room. For residents of modern apartments in the panel house, even 5-10 cm. Already significant losses;
Council.
If you have a perfectly smooth ceiling, you can mount the second level of the frame right on it. So you will save space.
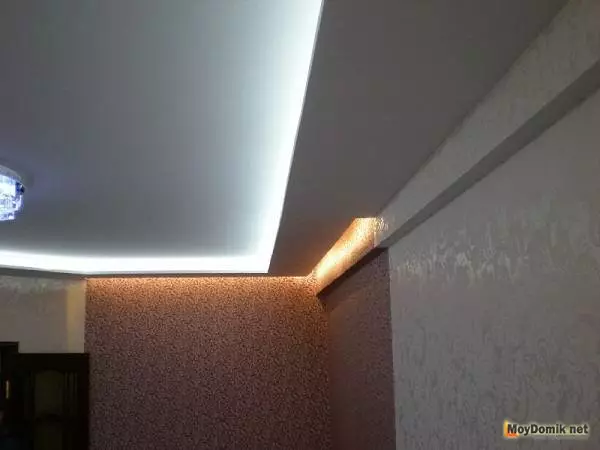
- Distribution of accents. With the help of lamps, mounted in the frame of the plasterboard ceiling, you can zonate the space or shifting the focus on any part of the room.
Luminaires can purchase any power. Plasterboard systems do not impose any restrictions on your choice. As, for example, stretch ceilings or plastic, where there is a danger of using powerful lights (can lead to deformation and even ignition).
- Room humidity. Such a ceiling is not recommended to be equipped in the bathroom, because the sheet can be deformed. Although, there is a moisture-resistant plasterboard (G CLEB), for example, Knauf, with proper installation and organization of high-quality ventilation, can well serve.
Council.
As a protection of plasterboard from moisture, primer is used in several layers.
- The presence of assistants. Alone, a person does not work this job.
- The complexity of the design. The more difficult design, the harder it is to calculate the amount of materials and mounted them, and accordingly, work will last longer.
Projects of plasterboard ceilings
(single-level, duplex and multi-level)
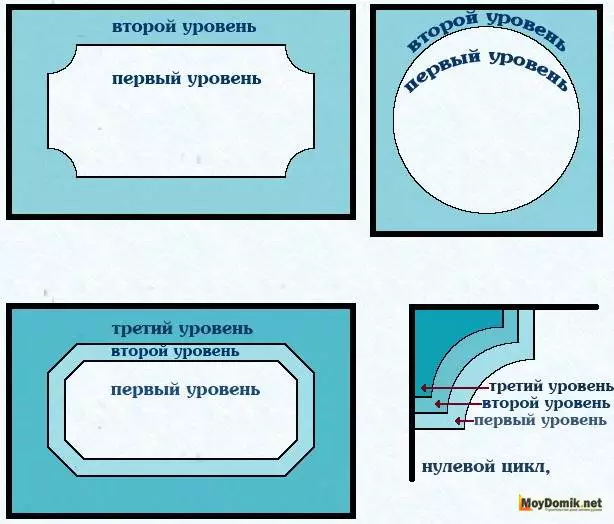
Projects of plasterboard ceilings
Tool for mounting plasterboard and profile
- Scissors for metal;
- Perforator or drill;
- laner knife;
- Corolnic;
- roulette;
- plumb;
- building level;
- plasterboard plates;
- grater for plasterboard;
- The spatula is narrow and wide;
- Gloves and glasses.
Materials for plasterboard ceiling
This selection is needed so that you can calculate and knew exactly what one or another item looks like, and for what purpose is used. We hope that thanks to such a detailed description you do not buy too much and save money and nerves.
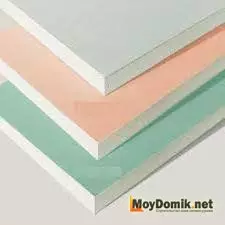
Gypsum CartongipSocardon.
As a rule, ceiling plasterboard is used. Its thickness is 9.5 mm.
For the second tier, in which lamps and sidewalls are not provided, arched plasterboard can be used. Its thickness is 6 mm.

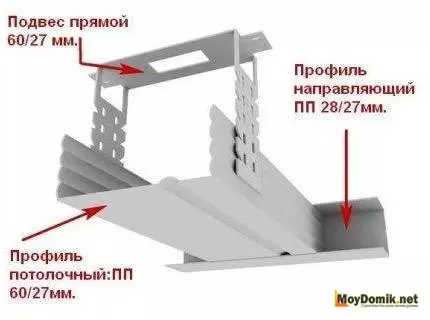
Udfil UD profile UD.
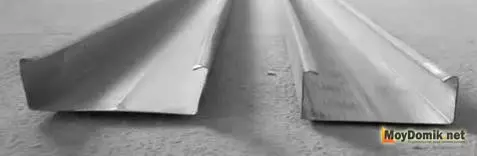
CD CD profile
CD connector CD connector.
Designed for the splicing of two CD profiles.
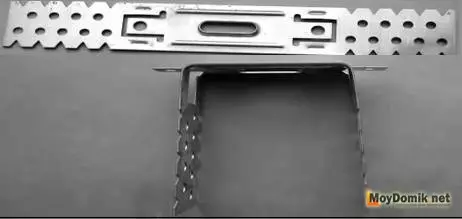
A straight suspension ceiling or ES is a ceiling or ES-bracket with a bracket.
On her profile is attached to the ceiling.
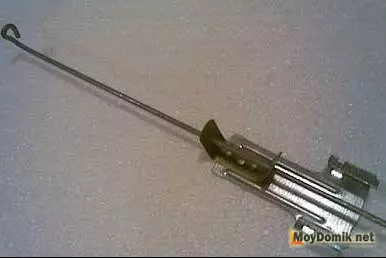
Spring improved suspension.
Used in the event that the length of the straight suspension is not enough for installation. Those., The second ceiling level is omitted too low.
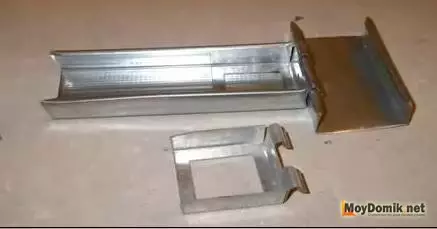
Two-tier connector
Two-level connector 2.
Two-tier connector.
To connect CD profiles at different levels.
Council. When installing, try to reduce the amount of elongation of this type of profile.
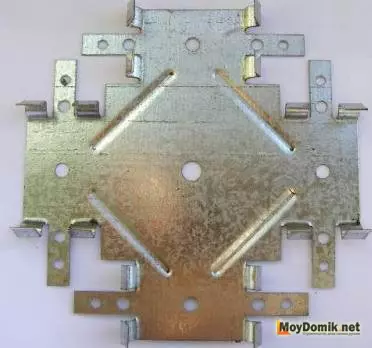
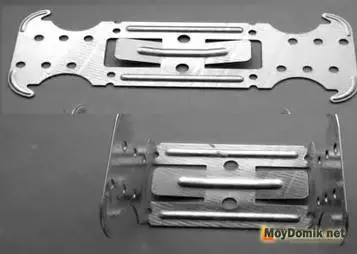
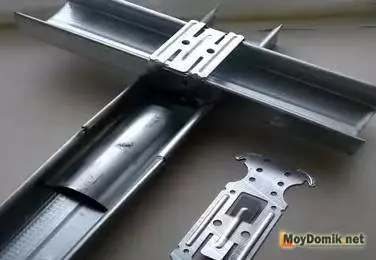
Crab for plasterboard
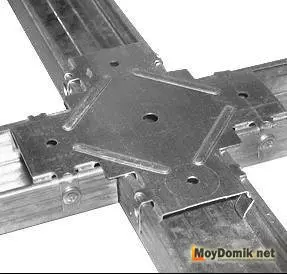
Crab for drywall attractions Crab for plasterboard.
Designed to connect CD profiles at one level.
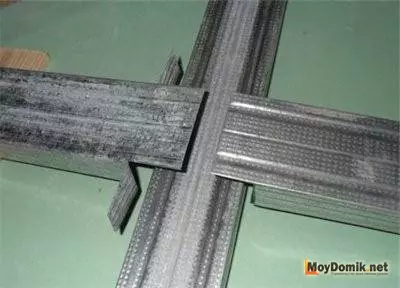
How to replace crab for drywall.
Crab can be replaced. How to do it can be seen in the photo.
Corner connector Profileugal Profile Connector.
Its purpose is to connect the CD profile perpendicular to the same level.
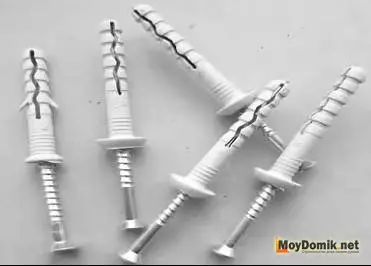
Dowel screw for fastening Profileyubel screw for fastening profiles.
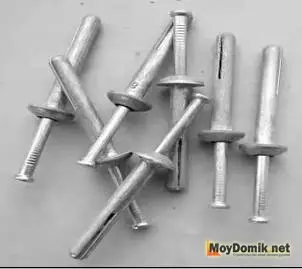
Anchor wedge for fastening a profile-wedge for fastening profiles.
The selection depends on the material from which walls and ceiling are made.
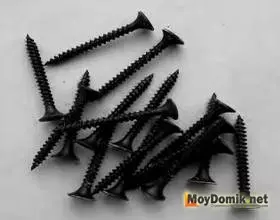
Self-tapping screw for fastening sheets of drywall for fastening sheets of plasterboard.
Samoreza "Bloch" Self-tapping screws for metal 3.5 to 9.5 mm. - "Blokha".

Sherryankalent Serpenta Ribbon (self-adhesive)
For gluing seams or fliesline for ceiling pasting completely.

Putty for sealing seams and stalport for sealing seams and joints.

Embedded lamp luminaires
(Ceiling, point, halogen or LED LED).
Council. Wiring for luminaires start up to how work on the facing of plasterboard will begin.
Schemes and sketches of duplex plasterboard ceilings
Knowledge of what you want to see on the ceiling, according to the end, it will significantly simplify the calculation of the material and work.{banner_link_2}
Before making ceiling drawings, see what kinds of duplex ceilings from drywall exist.
Backlit Gypsum Ceiling - Mounting Methods
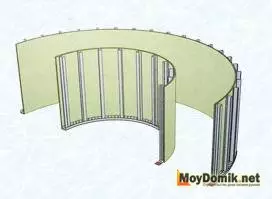
The first method is the second-level device without mounting the first. Used if you have the perfect surface of the ceiling. And the lamp is intended to be placed in the frame.
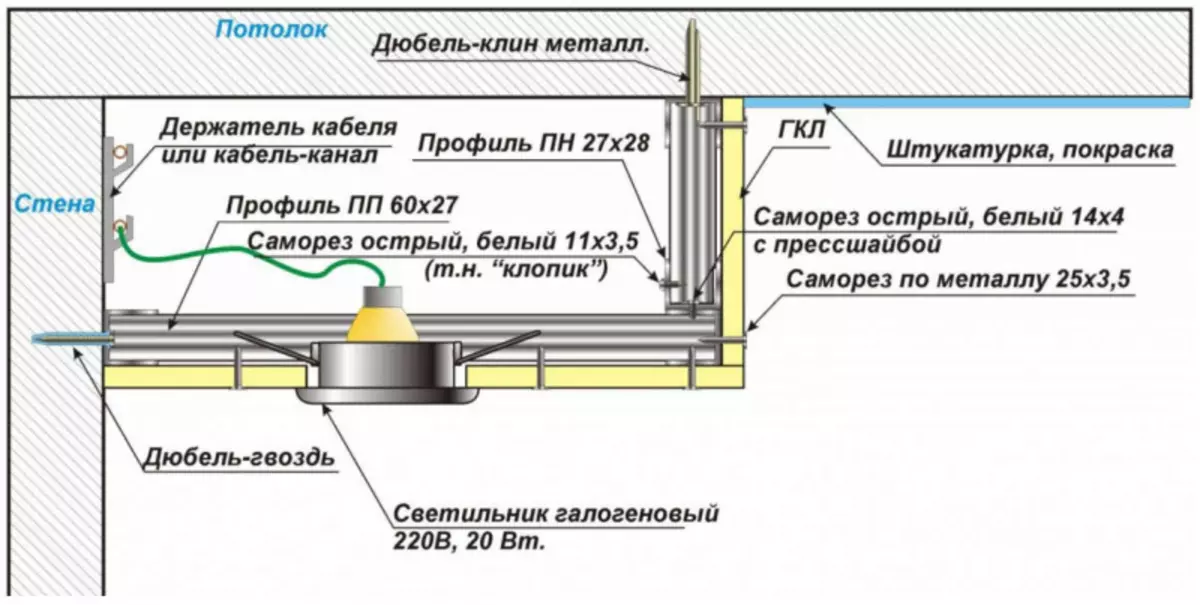
The diagram of the device of the two-level ceiling of plasterboard - the first way
The approach is the same. But the lamps are mounted and side of the frame.
The diagram of the device of the two-level ceiling of plasterboard - the second method
Installation of two frames. Luminaires are mounted in the second of them.
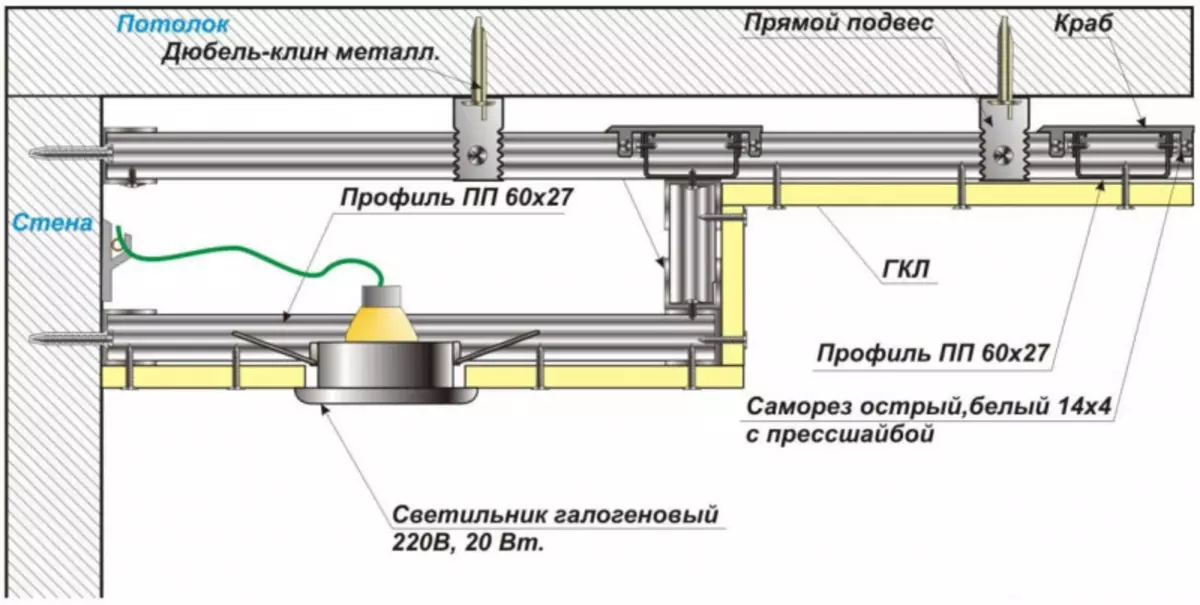
The diagram of the device of the two-level ceiling of plasterboard - the third way
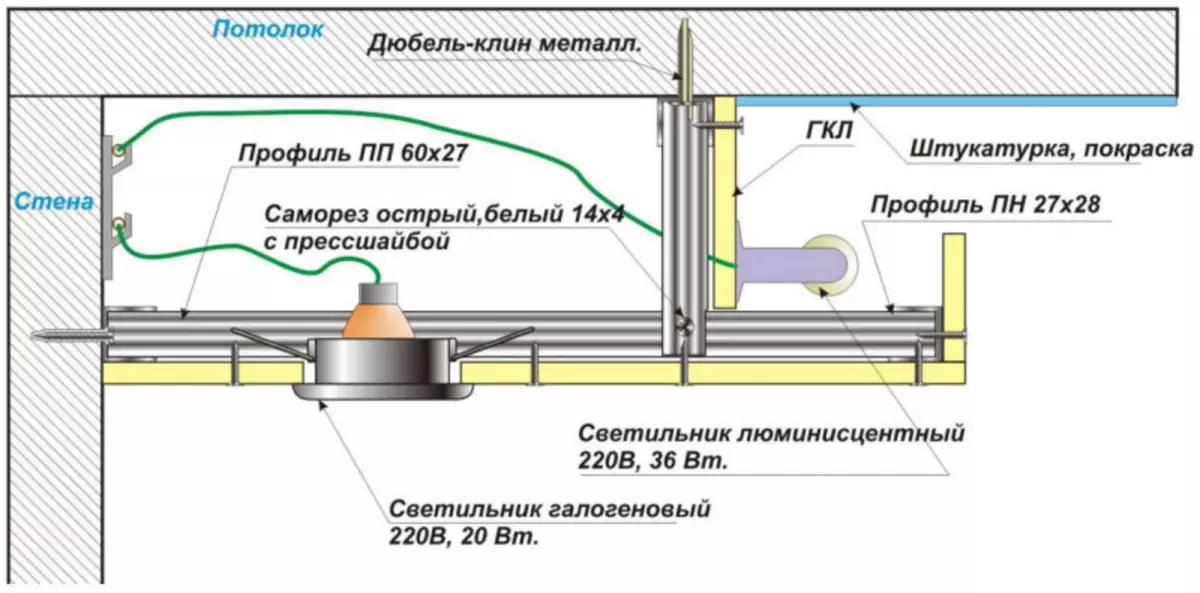
Approach to installation is the same. But the lamps are located at the perimeter of the second tier.
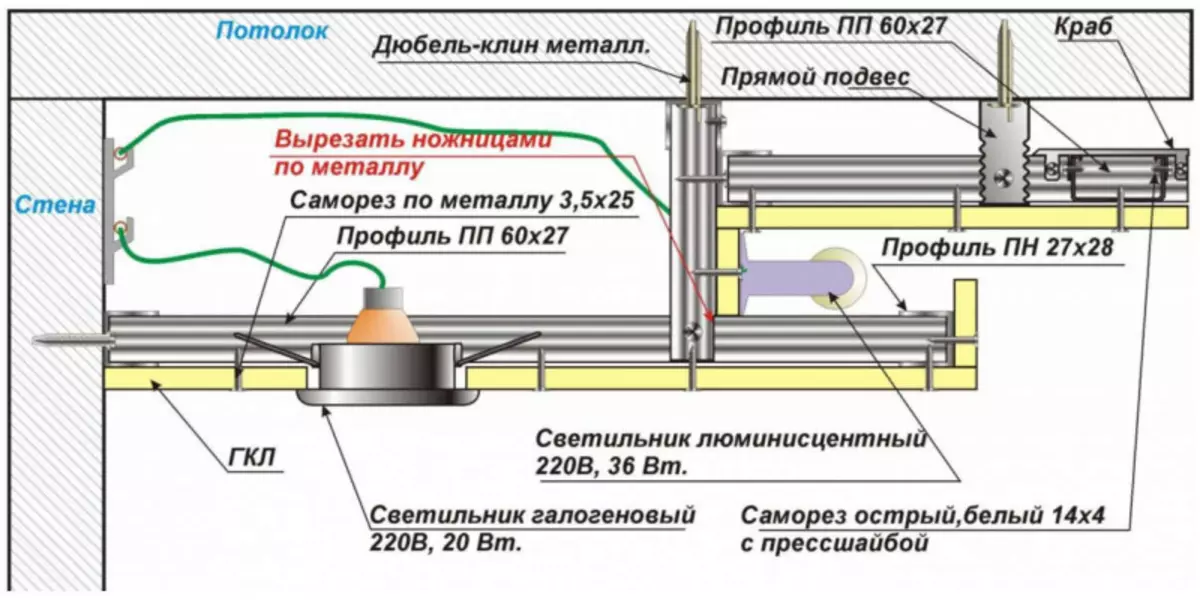
The diagram of the device of the two-level ceiling of plasterboard - the fourth way
A similar approach. But for side lamps instead of a frame, an arrangement of a polypropylene profile is provided, which is glued to the second-tier frame with a putty.
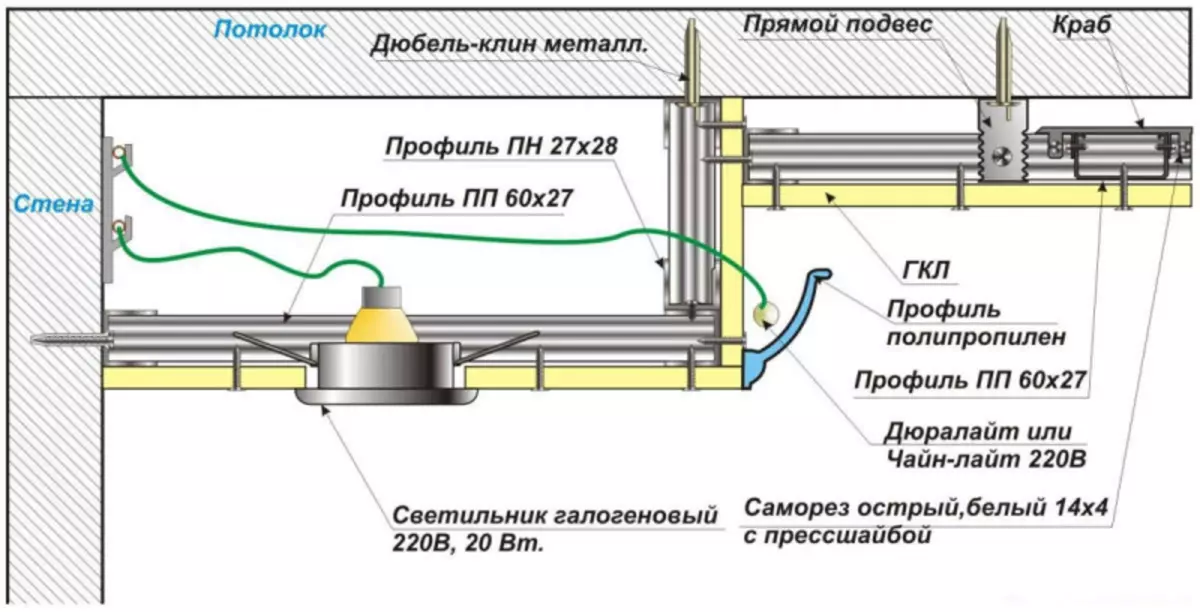
The diagram of the device of the two-level ceiling of plasterboard - the fifth way
Using one of the presented basic installation types, you can easily create such sketches of a two-level ceiling, which will enjoy all family members.
How to make a two-level plasterboard ceiling - installation instructions
It should be noted that among professionals there are disagreements, in what order to carry out the device of tiers. You can select two ways.- In the first case, work starts from the installation of the first level frame. And then the second tier is suspended to it. Applicable if the area of the second tier is insignificant, because in fact, the entire weight of the second frame falls on the sheets of the first.
- In the second case, the frame of the second tier is collected first, and the framework of the first is made between its elements. More complex design.
We will talk in more detail about the first edge of the two-level ceiling. This will give you basic installation information. The second option, more complicated, we describe below and illustrate in the photo.
We make a two-level ceiling of drywall sequentially and in accordance with the instruction, then the work will be performed qualitatively.
Article on the topic: Overview of the catalog of interroom doors YUCAS
The technology of the manufacture of 2 level ceilings from plasterboard provides for the work in the following order:
- Preparation of the ceiling under plasterboard (prepare the workplace).
- We carry out the ceiling markup for drywall.
- Mounting frame for plasterboard - first level.
- Installing the frame for plasterboard - the second level.
- The decoration of the two-level ceiling of plasterboard.
1. Preparation of the ceiling under plasterboard
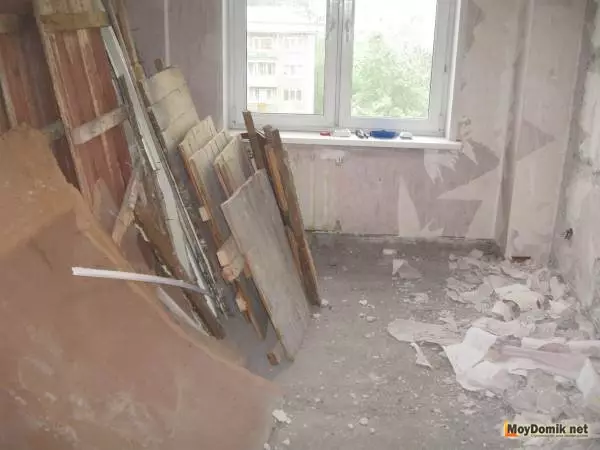
Preparation of the working territory of the ceiling is not similar to screwing the light bulb - here without removal of furniture can not do.
Free the room and approaches to it, it will be easier to carry out installation. It is important to prepare the surface itself. Agree, it is better to do something in a free place than constantly riding, trimming, wash some remains. All loosely adjacent plaster should be removed. Some craftsmen leave it, but everything that keeps himself early or later will disappear.
2. Marking ceiling under the frame of plasterboard
For this you need to take such steps:
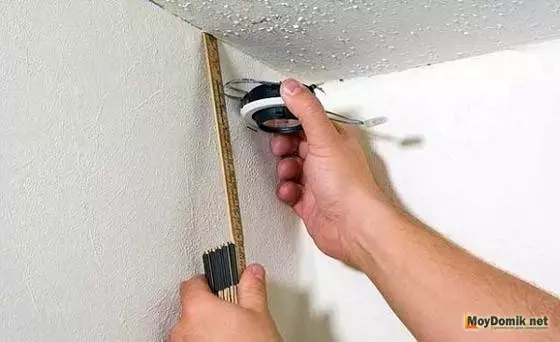
Measurement of the height of angular - measure the height of the angles in the room;
- Determine the angle with the smallest high.
It will serve as the starting point for applying. After all, we need the design to be even relative to the horizontal;
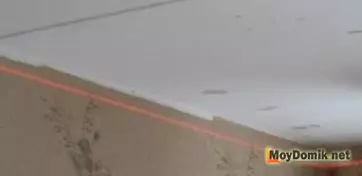
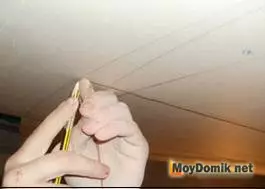
Marking ceiling - make marking.
On the walls for profiles we indicate a flat line. On the ceiling for direct suspension put points. Excessive marking for nothing, will only be confused. For these purposes, it is convenient to use a laser level or water.

Homemade water levels. Water level of the desired length can be made independently using the Kapron hose (n-p, from a medical dropper) of diameters of 10-15 mm. and filling it with water.
It may happen that in your room not only the angles are different, but also the length of the opposite sides. In this case, try the first level of horizontal levels. And then draw a clear drawing on the ceiling and smooth the design along the edges. So you can visually clarify the ceiling.
3. Mounting frame for plasterboard - installation of the first level
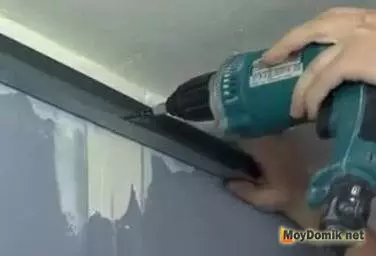
Installing ud-profiles
3.1. Installation begins with the installation of UD profiles.
They are guides and mounted on the wall, around the perimeter of the entire design. Fastening step - 600 mm. As well as on the ceiling.
The method of connecting a profile on the level of profile compound on the wall and in the corner is presented in the photo (right and left, respectively).
The method of connecting the profile in the corner
If the formation of rounded elements is assumed, you need to draw a drawing on the wall, and it is based on the UD profile. But before, on the profile you need to make notches.
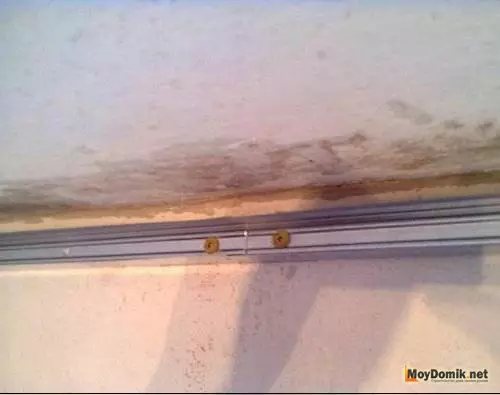
Fastening the UD-profile on the markup is fixed on the ceiling of the line.
Marking under the suspension
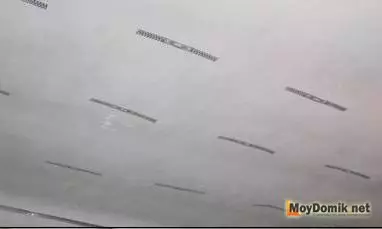
3.2. On the ceiling of the point is a drip straight suspension.
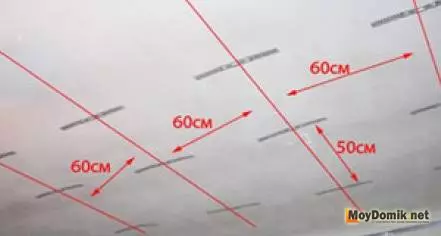
Step under the absence of this, we observe the fastening step - 600 mm.
Recommendation.
If the surface of the ceiling is perfect, then you can skip this stage. And start immediately from the installation of the second level.
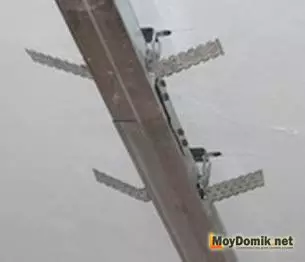
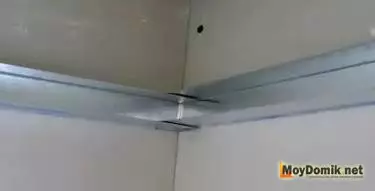
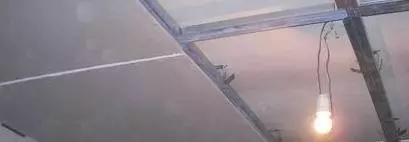
CD-profile mount on suspension
3.3. A direct suspension is fastened with a CD profile.
Conserved CD profile on the suspension
The resulting frame will be viewed submitted on the diagram and photo.
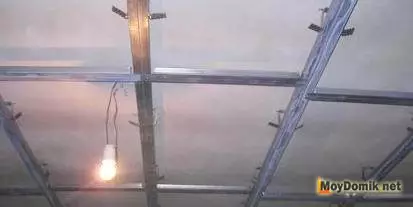
Conserved CD profile on the ceiling
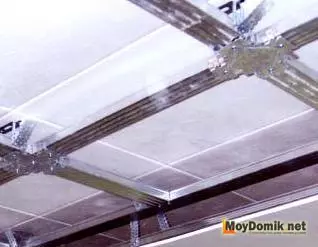
Crabs on CD-profile tracking frame will give the use of crabs.
We sew the frame of plasterboard sheets
3.4. We sew the frame of plasterboard sheets.
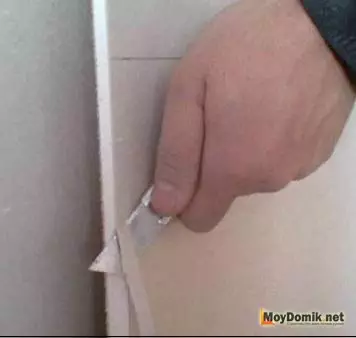
Face on sheets of drywall.
Where the sheet is cut, you need to foresee. To do this, cut a knife with a piece of material from the leaf of plasterboard.
Why the chamfer on the sheets of plasterboardetto is needed in order to better lay the putty on the seam. And seam did not break over time.
4. Mounting frame for plasterboard - installation of second level
Next, we turn to the consideration of the phased installation of the second level of the ceiling.4.1. Marking frame for plasterboard.
The lines under the UD profilation of this, on the wall we carry out the line under the UD profile, and we draw a future drawing on the ceiling.
The presence of a circuit on the ceiling will not only simplify the installation process, but also help to understand how your design will look after the end of the work. And, therefore, you will have the opportunity to make the necessary adjustments.
4.2. Frame from the profiles for plasterboard
Frame from the profiles for plasterboard
Mount the ceiling frame from a metal profile (UD profile), fixing on the wall and on the ceiling.
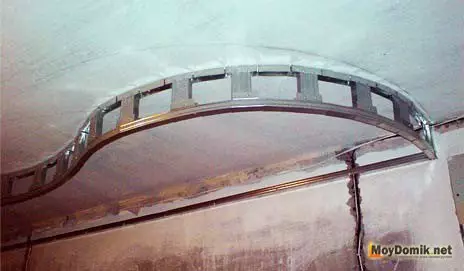
How to make a frame of the desired form (round up profile) we already know.
Article on the topic: New Facebook office
Material prepared for site www.moydomik.net
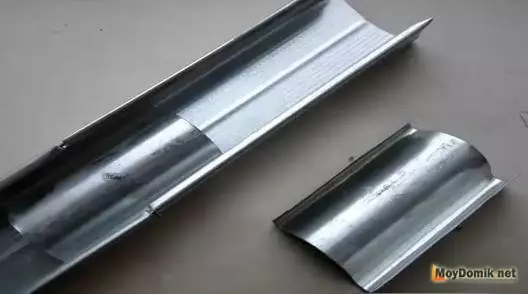
4.3. Lower the frame to the desired length.
For this you need:
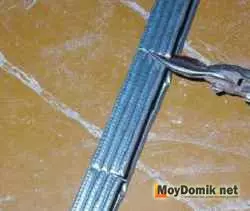
- cut off the CD profile that length you want to lower the framework;
- On one side of these pieces, cut the "tongues". To do this, cut off the side parts by the profile. So easier they will be mounted.
- Insert sliced pieces into the guide UD profile, which is already fixed on the ceiling. You need to insert a flat side.
- Fix pieces with "flea". The step between rectilinear segments is 500-600 mm. More step - it will make the design not enough reliable, smaller - will take it. Step between curvilinear segments - 200-300 mm. This is due to the fact that the curvilinear sheet needs to be fastened more often.
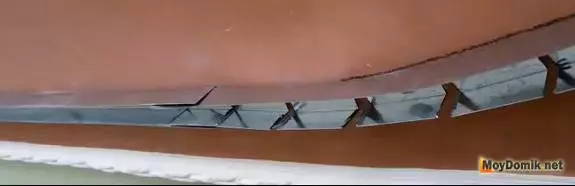
- On the hanging pieces of "dressing" the UD-profile and consolidate their "flea".
The sidewall carcass the result, you should have the sidewall of the frame, like this.
Then follows:
- cut off the CD profile that length, which is equal to the distance from the sideways of the frame to the UD profile located on the wall;
- Secure them with "fleas" on both sides.
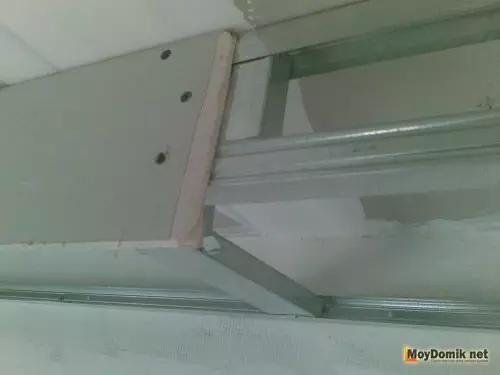
Ready framework you turned out ready metal frame. After that, it should be seen by plasterboard and move to finishing work.
Council. Collecting the frame look into the drawings. Otherwise, it may happen that the jumper will have to the place of the future lamp.
{Banner_Link_1}
4.4. Production of plasterboard arches.
The manufacture of plasterboard arches is a circuit of a photo and a picture can be seen how to bend the plasterboard for the arch and how the CD profile and a sheet of drywall should be prepared.
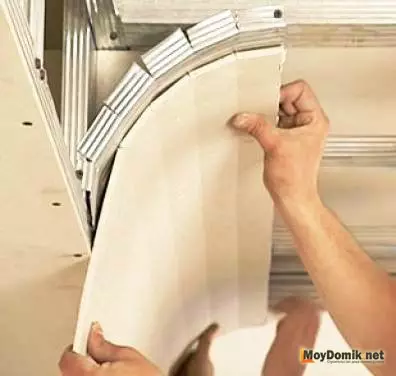
Making the arc made of drywall the device is very simple, it is important to properly make notches on a sheet, without cutting the front layer of cardboard.
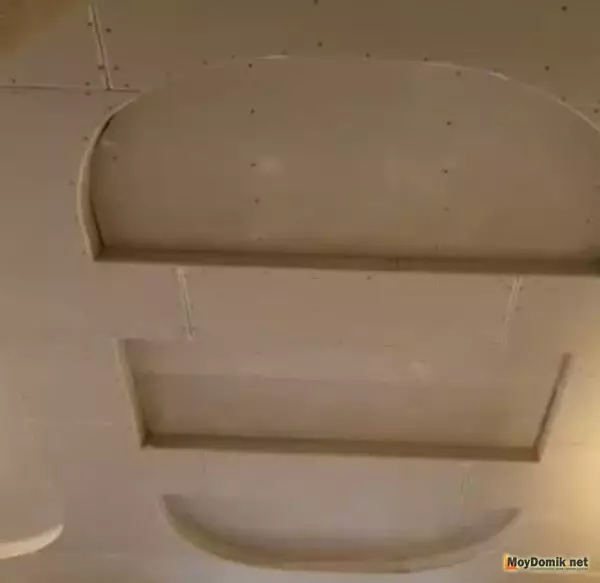
4.5. Facing plasterboard round surfaces
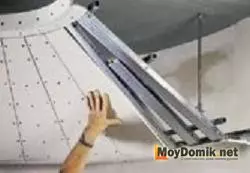
If you can cut the desired size from the whole sheet, the question is solved easily. If not, cut segments and mount them in parts.
It should be noted that in this case the frame must be tougher. Because, each self-tapping screws into the profile.
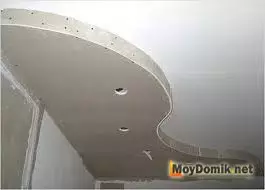
The result of facing by plasterboard round surfaces of your efforts should look something like that shown in the photo.
5. Decoration of plasterboard ceiling
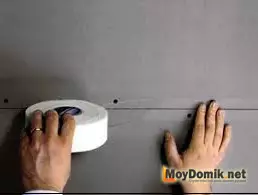
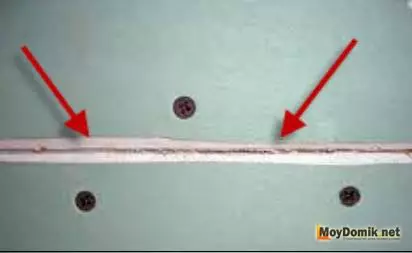
Sealing seams of ribbon-sulfyankashva we are sewn with sickle ribbon.
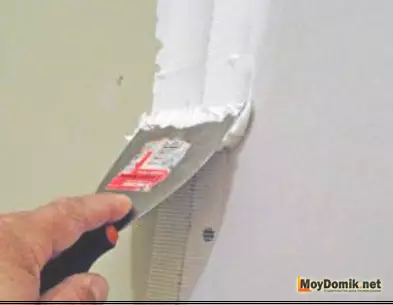
Inserting seams of a wipelukovna ribbon with a small spatula of a little putty.
Sealing the seams and the holes of the wipelobazzazzzazhinzhe apply putty on the self-tapping screw.
This is necessary so that the rust over time does not manifest itself through the paint or wallpaper.
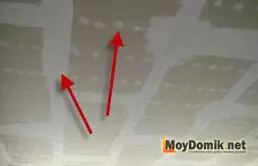
Common shpatlevania is easy to know.
If it is planned to paint a two-level ceiling of drywall, it is better to scapinate the entire surface. Otherwise, under the paint will show ugly seams.
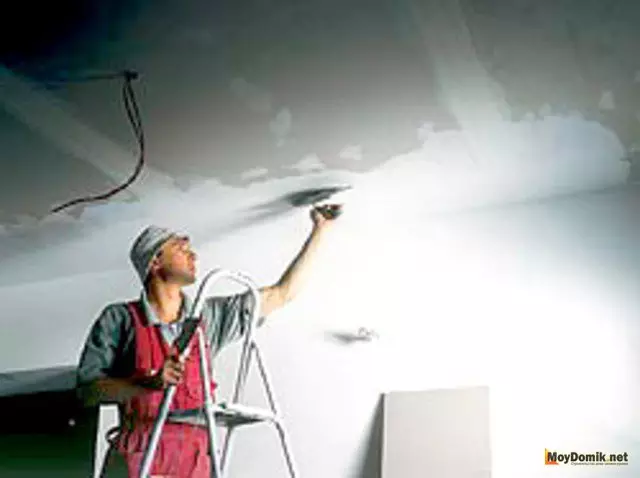
The processing and grinding of the seam (or all the surface) is maintained by a grid-grater or grinding machine.
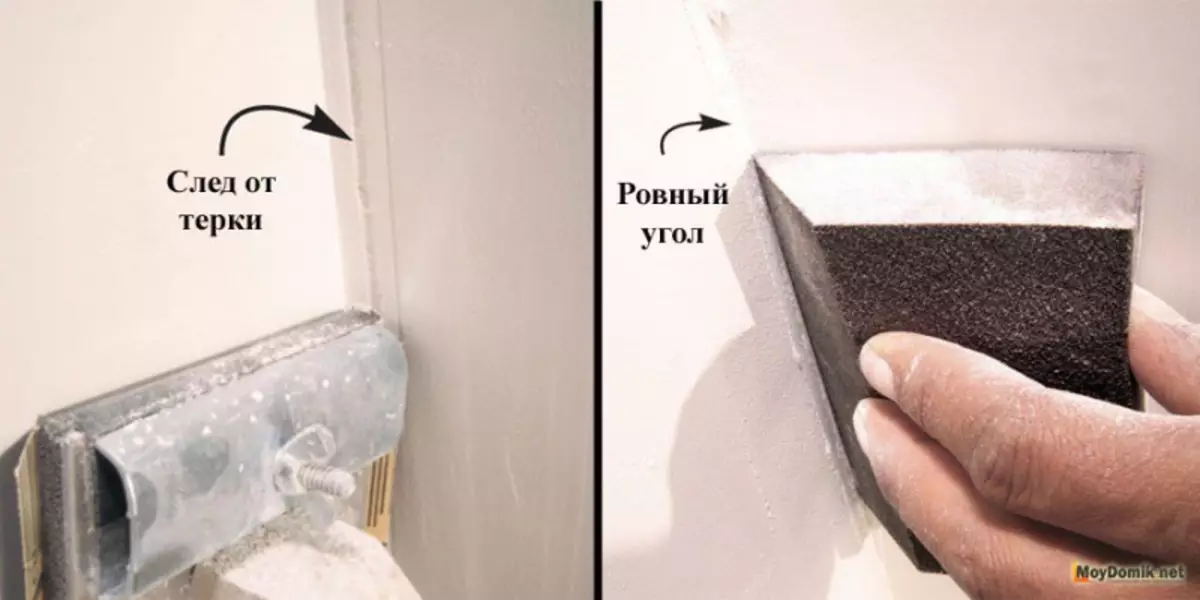
Processing and grinding units.
Especially neatly rub the surface at the corners. To prevent the appearance of side grooves from the grater.
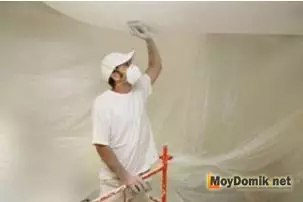
Decoration of plasterboard ceiling.
The painting of the ceiling is optimal and very popular. Staining the ceiling of plasterboard should be accompanied by preliminary treatment of the surface of the primer.
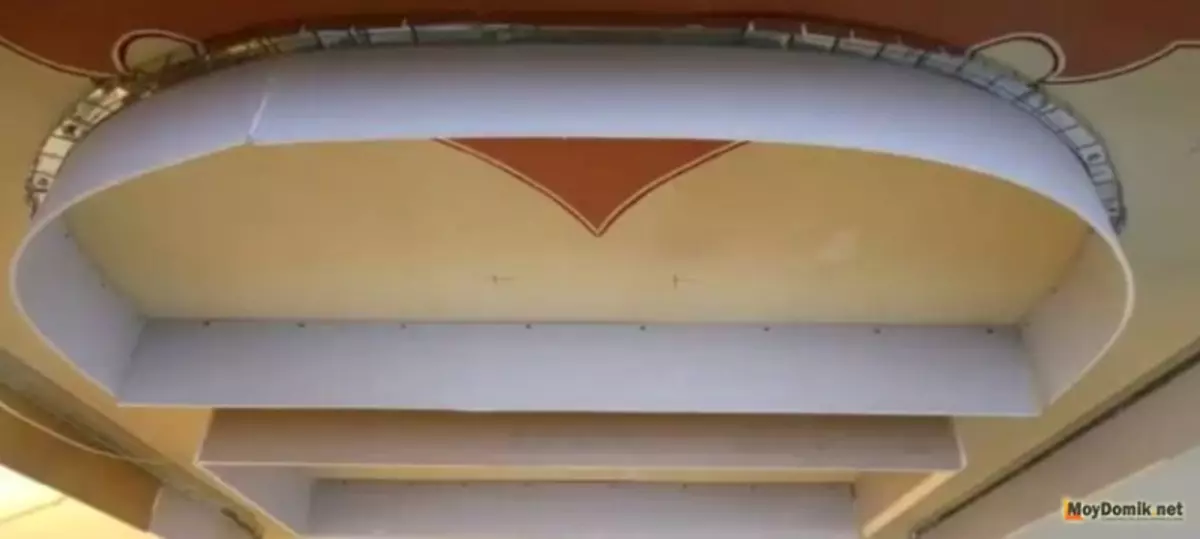
The second method of mounting a two-level ceiling of plaster soundlock
In conclusion, as promised, we present photo instructions on the second embodiment of the ceiling, when the frame of the second tier is collected first, and the framework of the first is mounted between its elements.
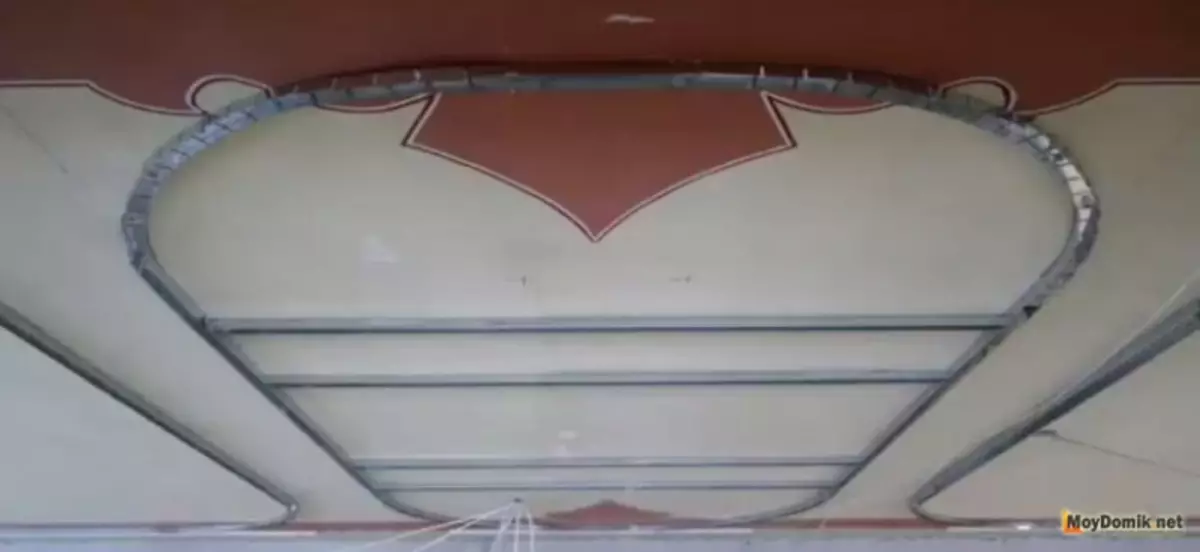
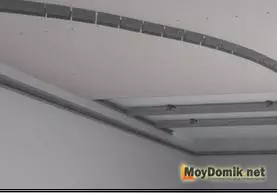
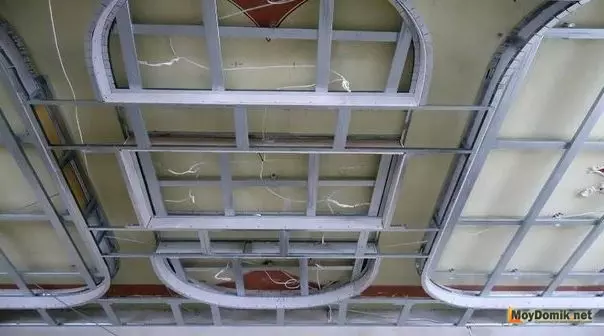
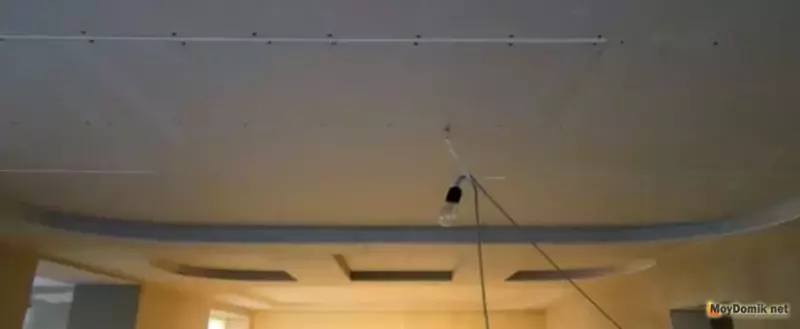
Mounting frame of a two-level ceiling of plasterboard
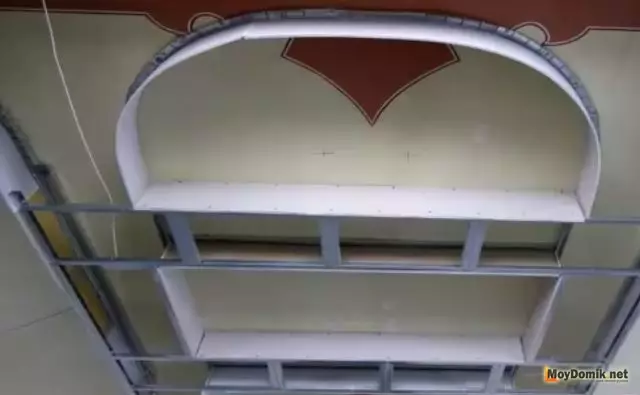
Installation of plasterboard ceiling frame
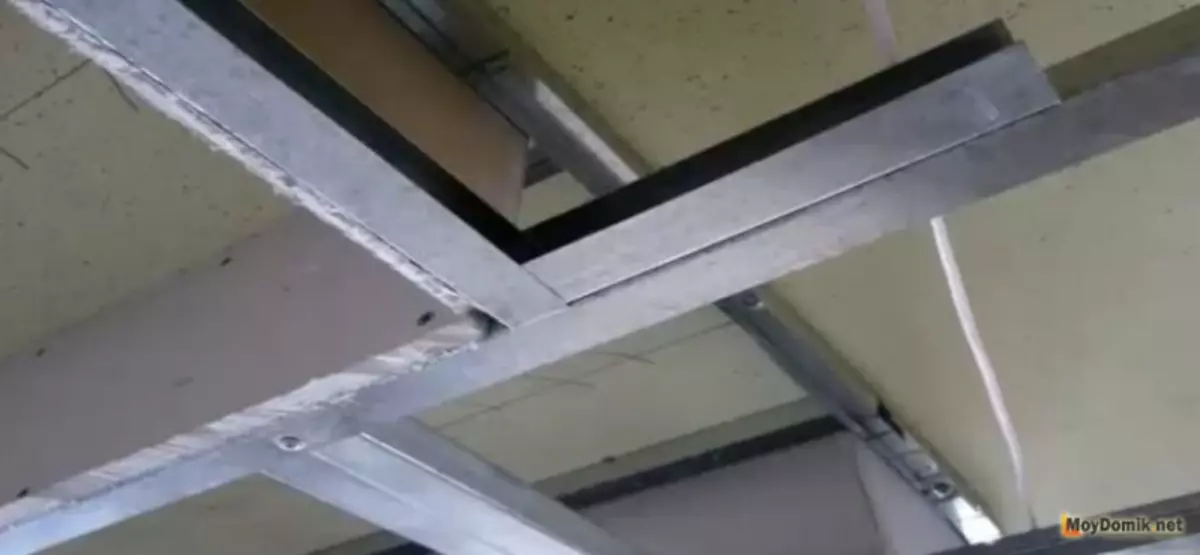
Plasterboard Ceiling Ceiling Frame
Plasterboard Ceiling Ceiling Out
Making a ceiling of plasterboard
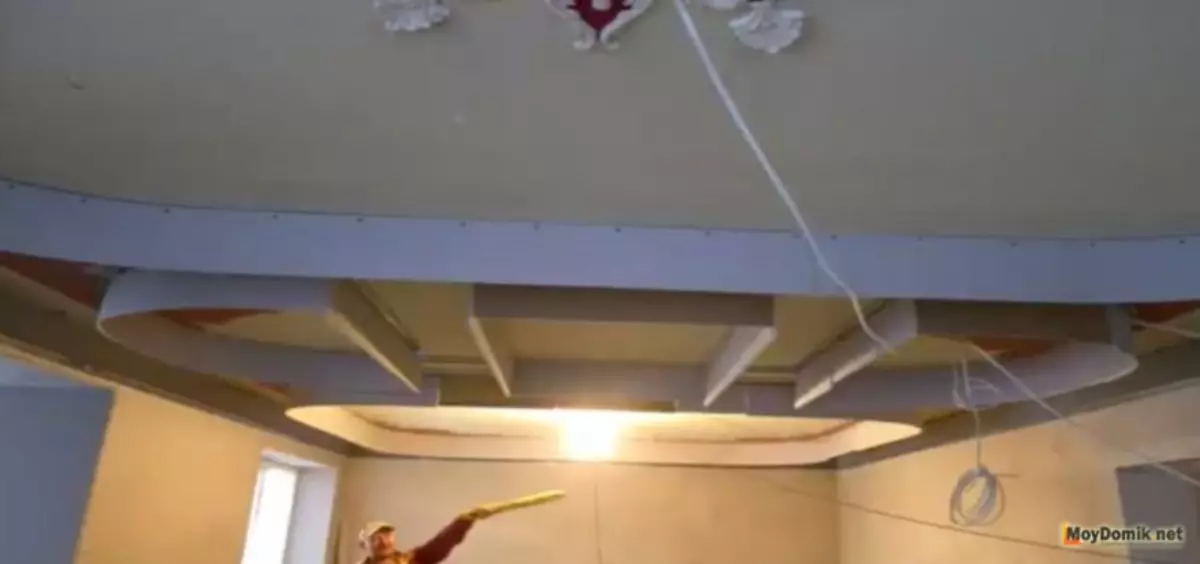
Gypsum Ceiling Device
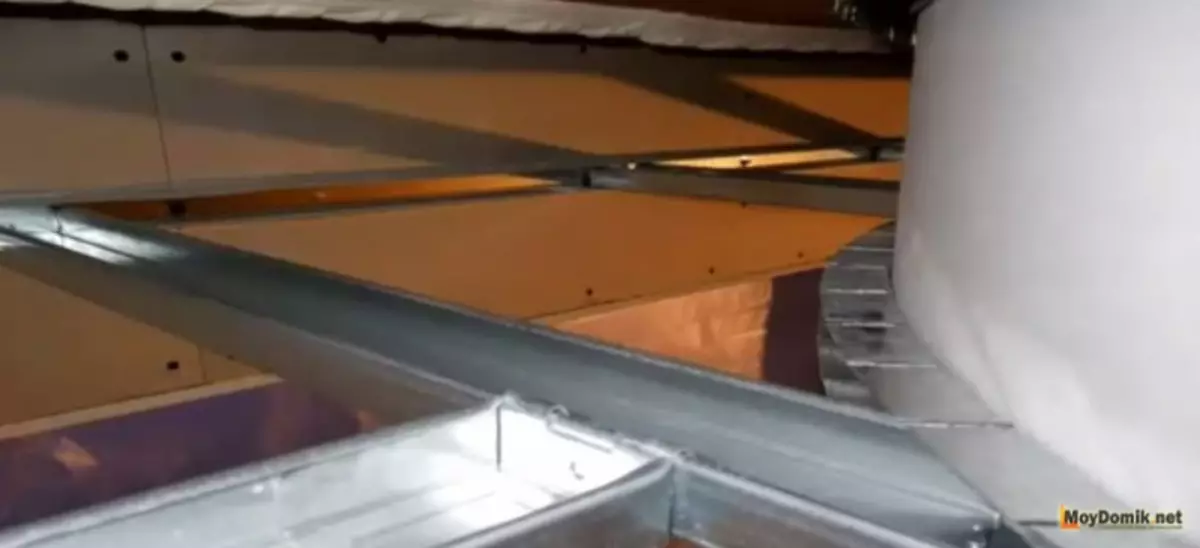
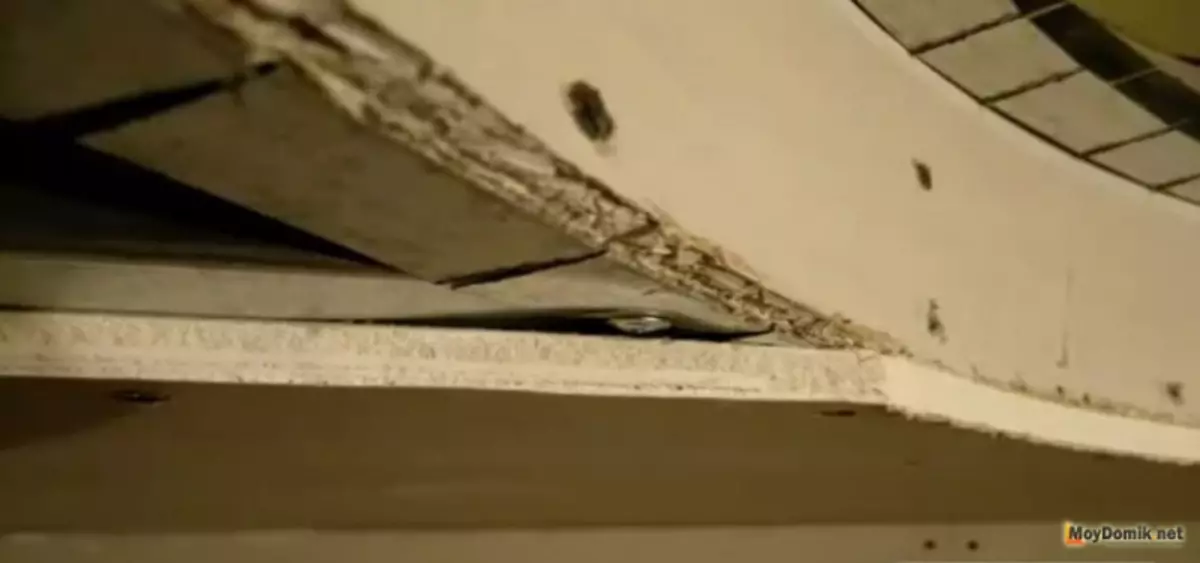
Cutting device 2x-level plasterboard ceiling

Cutting device 2-level plasterboard ceiling
Mounted frame of 2nd ceiling level of plasterboard
Mounting plasterboard
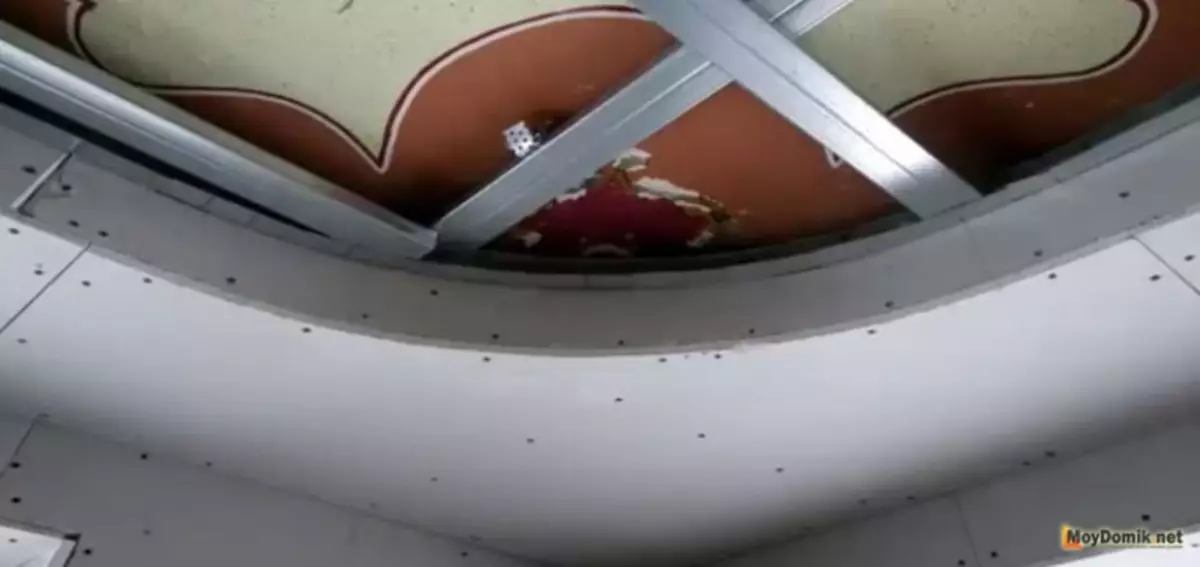
Installation of plasterboard
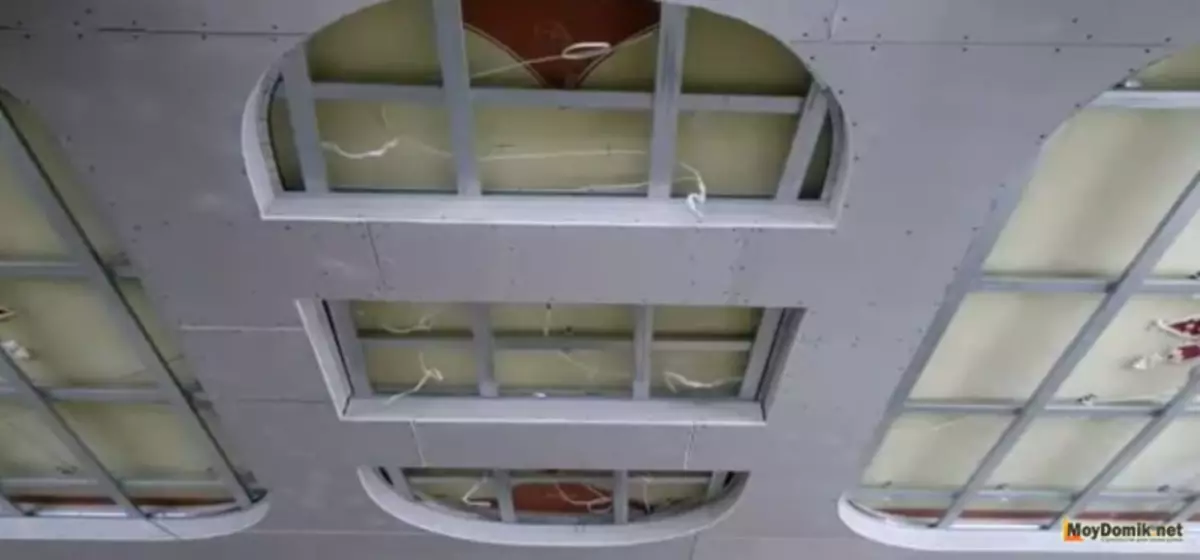
Frame painting from the profile of plasterboard
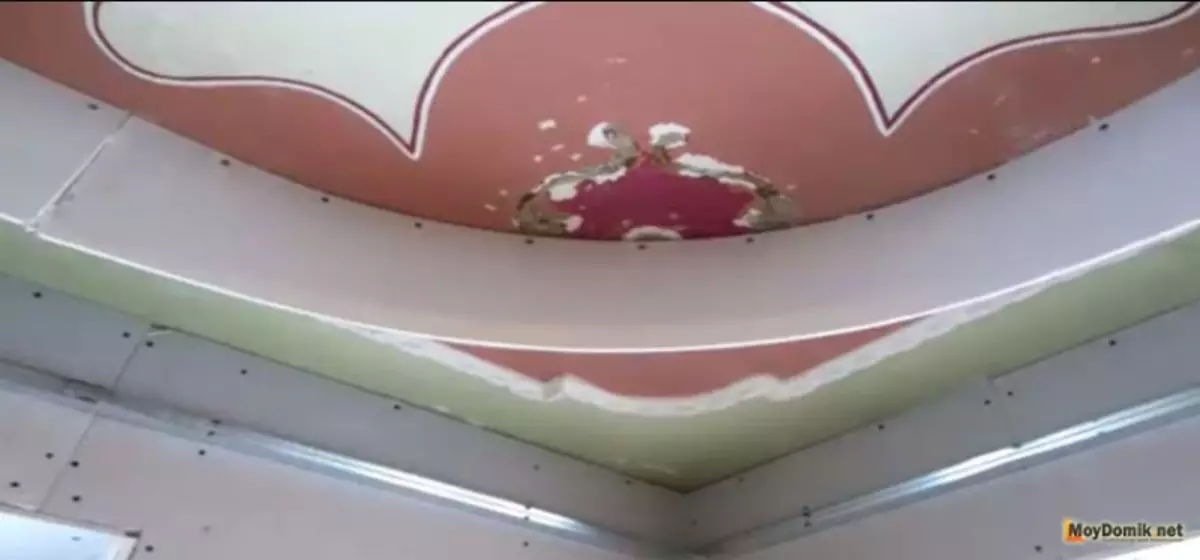
Ceiling covered with plasterboard
Ceiling of plasterboard, ready for finishing
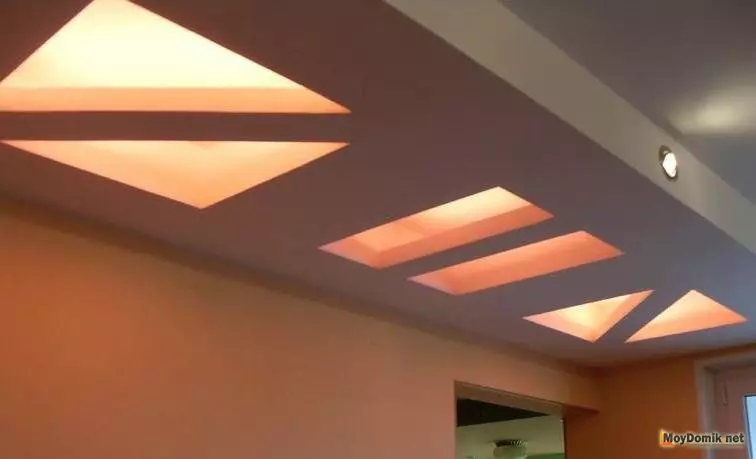
Design of two-level plasterboard ceilings - Photo
Ideas and inspiration on any color and taste
How to make a two-level ceiling of plasterboard do it yourself
Duplex plasterboard ceiling - original design
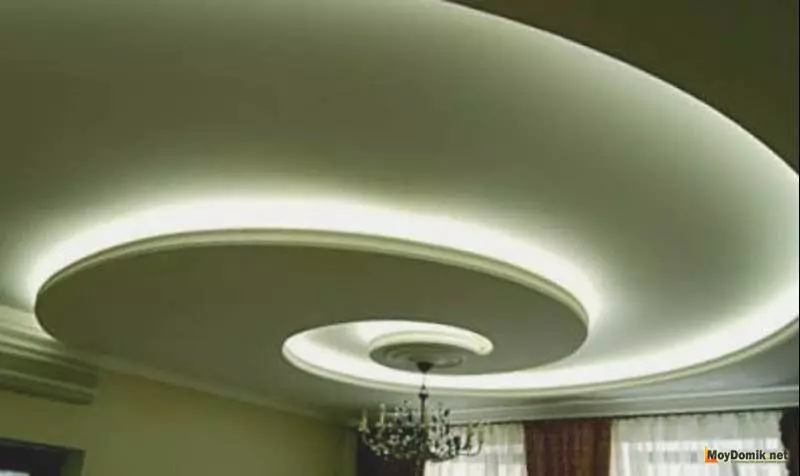
Registration of the two-level ceiling of plasterboard

An example of a two-level plasterboard ceiling
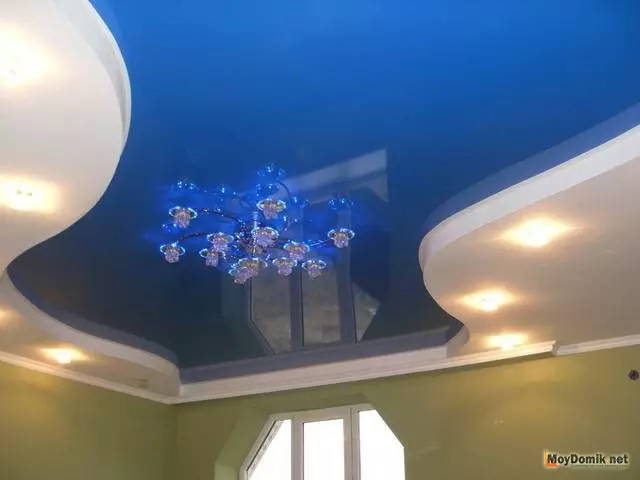
Design of the two-level ceiling of plasterboard
Duplex plasterboard ceilings - video lesson
Conclusion
In this article we looked at how to make a two-level ceiling of drywall do it yourself. We hope that the information given here, as well as the accompanying pictures, will allow you not only to correctly and efficiently implement the installation process, but also to enjoy this, truly creative work.