
When repairing is always faced with installing new plumbing: bathroom, bath, sinks. To date, there is a huge variety of washbasins and shells of various geometric shapes: oval, round, rectangular, asymmetric and symmetrical, paired and angular. In addition, washbasins and sinks differ in the absence of either the presence of holes for mounting the mixer and are divided into several groups, given the installation method. Before installing the sink, it is necessary to calculate the methods of its attachment to a permanent place, the installation procedure is largely due to this factor, the nuances of the installation depend on the size and shape of the product.
Washbasins in the bathroom differ not only by the variety of shapes and colors, but also by the way they are fastened.
Tools and materials for fastening and installing washbasin or shells:
- brackets (often come in a set with a washbasin);
- shock drill or perforator;
- drill on concrete;
- screwdriver, screwdriver set;
- hammer, chisel;
- set of wrench, gas key;
- dowels or screws;
- lugs;
- Washing rubber gaskets;
- hydroelectory;
- Hex nuts;
- Strip sleeves;
- masking plugs;
- Long straight rail;
- Construction pencil;
- silicone sealant;
- Winding or fum-tape.
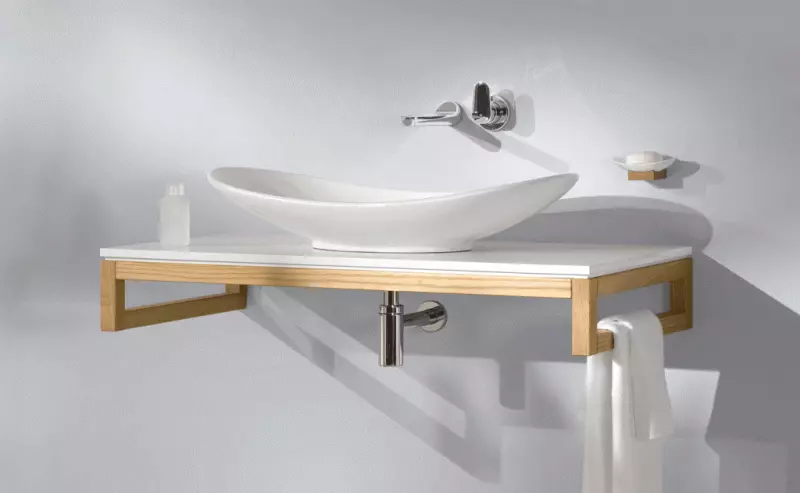
Installation bowl bowl on the wall
Installation of the sink or washbasin on the wall is often used in bathrooms, toilets and other sanitary facilities.According to the standard, the installation height of the bowl should be 80 cm from the floor level to the top of the sink, however, this figure may vary depending on the conditions and circumstances.
Bracket fastenings should be located on a wall of 80 cm from the floor.
Fastening on the wall is based on two special bolts, which are included in the mounting kit for a washbasin. The mount is made by screwing the plastic dowels into the wall, provided that the wall is brick or drywall. If the wall is plasterboard, then it is necessary to install metal structures with a wooden bar in advance. The washbasin is put on the bolts screwed into the wall, and then fixed with plastic washers-nuts. On the side of the washbasin, which contacts the wall, you need to apply silicone to prevent water flow under the sink. The junction between the bowl and the wall can be filled with silicone sealant, after the installation has already been made.
Article on the topic: Several secrets of the saint room design
The mixer is attached to the sink itself, but the water and siphon should be made aesthetic and beautifully, since the open space remains under the sink (excluding tulip). The optimal option would be an example of how the water supply and the output of the sewer tube overlook the wall under the sink. Thus, the drain from the siphon should go straight into the wall, and the flexible hoses of the mixer (hot and cold water) should coolant on the valves overlooking the wall.
Sink Installation on Tumb
Mounting bowl bowl on the end is widely distributed, this type fits perfectly into any interior. Initially, it is necessary to put the cabinet to the installation site of the washbasin and insert the sink table tops. In the drain hole, it is necessary to install a plum grille equipped with a rubber gasket, and then tighten it with a nut under the sink. It is necessary to wear a lock nut with a locking wedge-shaped ring on the plum lattice pipe, after which the glass of the siphon must be attached to the pipe. After the actions produced, the glass of the siphon is pressed to the locking ring, a shut-off nut screws down on it.
After that, it is necessary to connect the sewage from the siphon tube, non-spinned and the inflexible pipe must be temporarily disconnected from it. To do this, the sewer socket is opened by removing the cork or a swing, the rubber sealing ring with a smaller diameter is inserted than that of the ziphon's tap tube. The pipe disconnected from the siphon is screwed into the place of the presser nut. For tested tightness in the sink drain, water is recruited, in the presence of leaks, the nuts are stronger. If there is a hole on the mixer on the sink, it is installed on, while its mount is made on a horseshoe bracket or on a presser nut. Inserted into the hole mixer with a gasket is fixed at the bottom of the undercake or nut, pre-laying the pads with washers under them. The mounting of the horseshoe bracket is made with a nut to the heel, mounted below in the mixer. The washbasin on the stand is established similarly.
Article on the topic: How can you beautifully stick wallpaper in your kitchen
Mounting bowls on brackets and on a pedestal
Connecting the siphon washbasin flexible hose to the rigid tube.
With the help of a pencil, level and long straight rail, you must produce a horizontal line at an altitude of 80-85 cm from the floor to determine the installation site of the washbasin. The length of the horizontal line is postponed, equal to the thickness of the sides of the bowl along the edges, which it will then rely on the brackets. At a similar distance, a mark is made from the horizontal line on the other side of the sink. Both of these marks must be connected to the straight line between themselves, it will be the level for mounting the bracket. Then the bowl turns up the bottom, the brackets are installed on its support side planes, and they must be turned upside down with a support plane down, to the very position in which they will support the sink. There is a distance between the longitudinal axes of the mounting level of the brackets.
When combining the fastening line with the mounting plane of the bracket and when combining longitudinal axes with the marks of their mounting by leaning the bracket to the wall, the labels are made for mounting through the holes available in the brackets. After that, the holes are drilled at the points of attachment, previously marked on the wall, then the plugs are clogged and brackets are screwed.
The bowl is installed on the brackets, the places of its attachment are noted below, then the holes are dried, the plugs are clogged, and the product is finally installed in place. The washbasin is screwed with a wrench of a dowel, to which laying washers are pre-wear. After that, the dowelle is reliably tightened to impart stability.
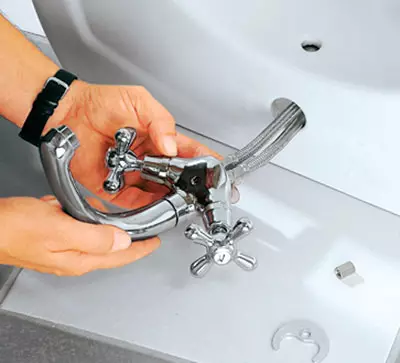
Installation of the mixer on the suspended sink is easier and more convenient to produce it until it is fixed on the wall.
After all the manipulations for the washbasin, the drain system with a tap tube and a hydraulic shutter is connected, the installation of the siphon is made in a similar way, as when installing the washbasin on the end. In the overwhelming majority of cases, the installation of the shell on the pedestal is produced by the wall, this product is attached to it. When installing the bowl on the pedestal, it is important that the drain hole is located in the center. After that, the sink is pressed against the wall, then markers are made through the mounting holes in the place where it will be attached. The drill drill holes, and plugs are inserted into them, after which the holes in the sink and in the wall are combined, and the bowl is attached to the wall using a dowel and wrench. Do not forget to use laying washers. After that, the drain siphon is attached to the sink, and its pipe is inserted into the sewer.
Article on the topic: Jacquard curtains - Raisin of each interior
Installation of the sink bowls on the suspended shelf and on the semi-endest
When installing the shell on the semouping, the discharge flurus should be 0.5 m from the floor.
In the case of placing the sink on the suspension shelf, it assumes the entire load and serves as a stand for various toiletries. The two-storey shelf covers the drain system and is also used as a place to store the smallest things. Initially, the wall marks the level to install the washbasin and the place of attachment. The drill is drilled by holes in which traffic jams are inserted, after which the bowl is mounted on a dowel to the wall . Do not forget about laying washers. Using a level, the horizontal position of the shelf is determined, after which it is placed under the sink. In places of attachment, a label is made, in the drain hole of the bowl, there is a place where the drain pipe on the upper plane of the shelf will be supplied. In the center of the outlined circle drills the hole of the drill.
After that, with the help of a special cutting tool for drilling holes with a large diameter or with the help of the chisel, a hole in the shelf is done. Before installing the shelf, the previously described method is mounted in the mixer. After that, the shelf is attached to the wall, and the drain hole of the sink is combined with the shelf hole.
A siphon is supplied under the shelf and is connected to the sewage of the sewage and the drain hole in the same way, as with other methods of installation of the shell. To install the sink on the semoupestal, it is necessary that the sewage pipes are mounted in the wall, and the discharge of the plum is also located in the wall at half-meter height from the floor (minimum). A bowl is established in the usual way, and the pedestal is attached to the studs in advance in the wall of the studs, which are combined with eye pieces.