
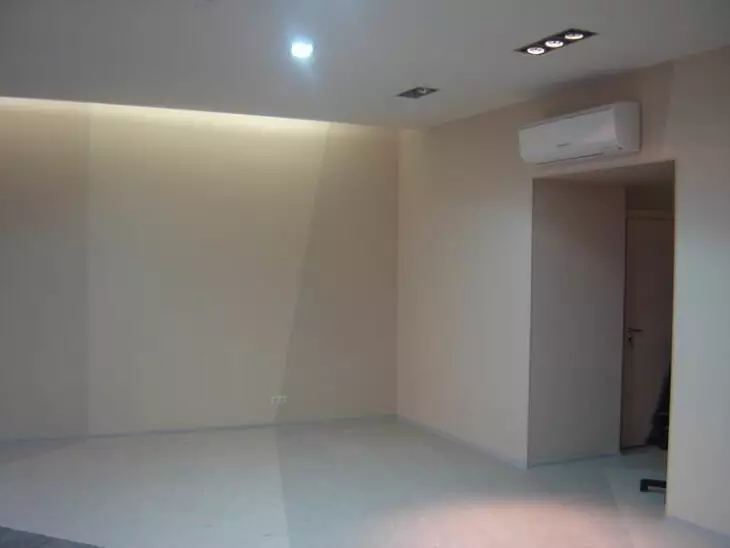
When I was the choice of wall design in your home, I knew exactly what I would paint them. This is a fast and easy way, which allows you to refresh the appearance of the room. In addition, the use of wallpaper, for me it was no longer relevant, and with the use of other finishing materials I came across during the repair of other rooms. And, despite the fact that the painting technology is quite simple, it was necessary to prepare the surface under painting with the help of plaster. After all, the presence of cracks, chips or irregularities is unacceptable for walls under painting.
For the walls under painting unacceptably the presence of cracks, chips or irregularities
What do we know about the preparation of the surface under painting
As everyone knows, painted walls are able to identify the smallest shortcomings, and therefore their proper preparation is very important. The process of preparing to paint is time consuming and worthwhile, so it is necessary to seriously refer to this type of draft work. If all the work you decide to perform yourself, then adhere to the rules for using plaster and do not forget about the technology of leveling surfaces under painting. Despite the difficult process of preparing the wall with their own hands, I received an invaluable experience, which in the future allowed me to finish myself and insulating the facade of my house.
I will try to tell about the right sequence of plastering walls.

If all the work you decide to perform yourself, then adhere to the rules for using plaster
So, there are two types of shuttering under painting:
- Alignment of plaster, and after putty - a smooth surface
- Textured plaster
Between themselves these types are different due to the application of the finish layer of plaster. Despite the fact that the preparation process itself is the same, the final appearance of such walls is very different about each other.
Interesting! Plaster itself is a material that allows you to implement the most amazing design projects. In addition, it eliminates possible flaws, with its help you can create stucco patterns and various textured surfaces under painting.
As everyone knows, painted walls are able to identify the smallest shortcomings, and therefore their proper preparation is very important.
Article on the topic: We choose the curtains to Aliexpress: Is it worth ordering?
When I got acquainted with the material, I allocated several advantages for myself:
- It has water-repellent qualities, plaster can dry after random wetting. It does not lose decorative indicators
- Improves thermal insulation properties
- Eco-friendly material that corresponds to sanitary and hygienic standards
- Non-combustible plaster talks about the possibility of outdoor finish at home and applying it for wooden houses
- Relatively small cost when performing work independently
The process of preparing to paint is time consuming and costly, so you need to seriously refer to this type of draft work.
And if you immediately talk about the lack of plaster, it is important to know such moments as:
- If the activation technology is broken, then the appearance of cracks inevitably
- Plus temperature requires plus temperature for facade
- Plaster layer has its own power limitations
Prepare and plaster
Immediately I want to say that the alignment of walls under painting consists of several stages and each of them needs to pay special attention. Only qualitatively performed work will allow you more than one year to enjoy the results of your work.
Before you start work, it is necessary to clean the surface. There should be no fat spots on the wall, the old finish and the main thing - dust, it is its plaster that does not tolerate. It is impossible to leave pieces of an old finish that peckles. When the area is as stripped as much as possible, a layer of primer with deep penetration is applied. It is better to take advantage of the plaster grid to make the finish more durable.
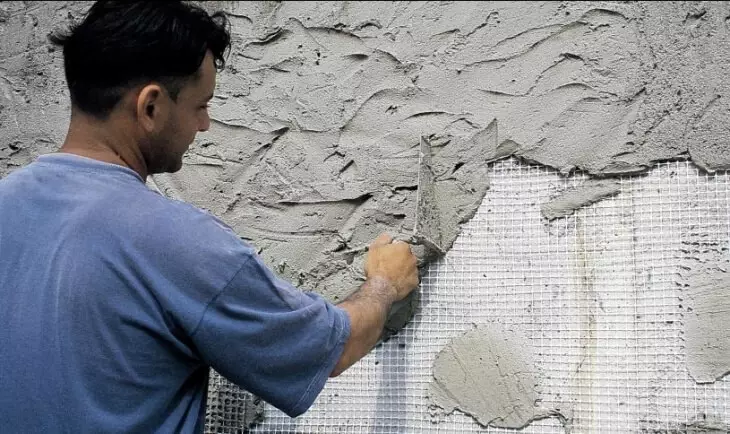
It is better to use the plaster grid to make the finish more durable
The next important stage, I would call the lighting installation. They will allow you to find out the required thickness of the layer layer for alignment. Metal profiles need to be installed vertically and in the same plane. Screw two screws on the line of one profile - on top and bottom. After that, we apply it to self-stakes and screw them down, exposing a vertical position and adjusting the future thickness of the plaster layer. Self-tapping screws for other lighthouses are screwed into the same depth. Then we apply the profile to the self-draws and using the level check its position. If everything is correct, then it is fixed with a solution.
Article on the topic: Installation of cast iron stove in the furnace

Lighthouses will allow you to find out the required layer thickness layer for alignment.
You can use various types of mixtures. Before choosing a suitable plaster, look at the table with the most famous brands.
Ceresit, dry mixes for alignment of walls
| ST + N. | The volume of water for the shifting, l | The viability of the solution, min | The consumption of the mixture per square. m. With a layer thickness of 1 mm, kg |
| 24. | For machine application: 5.5-6. For manual application: 5-5.5 | 60. | 1,4. |
| 29. | 5.5-6.5 | 120. | 1.5 |

Ceresit, dry mixes for alignment of walls
Plaster Plaster Knauf.
| Name | a brief description of | One layer thickness, mm | Consumption at 10 mm layer, kg per square. m. | Packing, kg. |
| Rotband | Universal, dry mix, unless otherwise indicated | Wall: 5-50, ceiling: 5-15 | 8.5 | 25. |
| thirty | ||||
| 20 (paste) | ||||
| Goldband | — | 8-50 | 8.5 | thirty |
| MP 75. | For machine application | Wall: 5-50, ceiling: 5-15 | 10 | thirty |
| MN Start | 10-30 | 10 | thirty | |
| HP Start | — | 10-30 | 10 | 25. |
Important! Of course, it is better to use a solution on a plaster basis, it is much more convenient in the process of plastering and from it less dirt. But if the room with high humidity, then use a mixture on a cement basis.
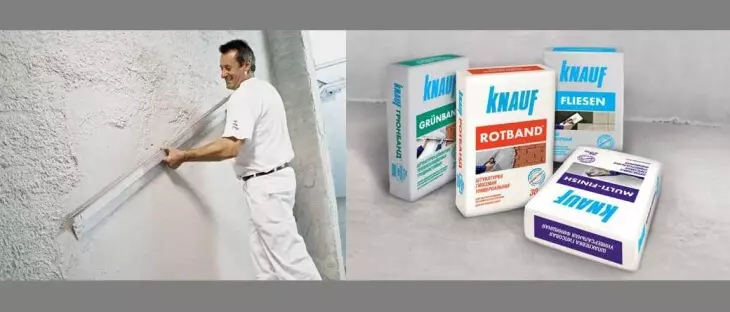
Plaster Plaster Knauf.
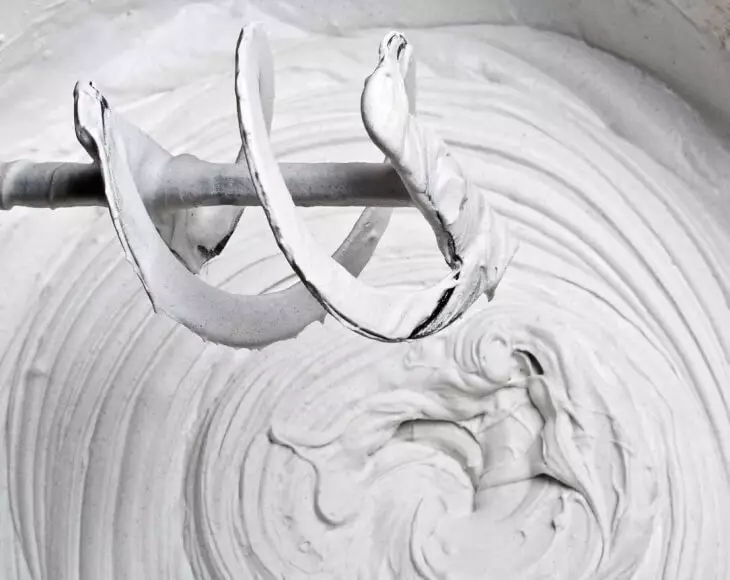
The first thing to produce walls with a mixture of a more liquid consistency than the base solution. In order for it does not grow up, and stick, you need to throw it with the use of force. The coating layer must be approximately 7-10 mm. When our spray is frosted, you can apply the main plaster and align the layer - for this tool, pull the bottom upwards by the guides. After drying the wall, we wash it with a special grater, after which you can clean the beacons and close the holes from them the same mixture. Interporal angles withdraw with the help of a trowel and do not forget about the favorite profile of metal, for outer corners. The primer is applied after complete drying of the plaster.
Article on the topic: What color curtains will harmonize with blue wallpaper: specialist advice
The solution of the finish putty
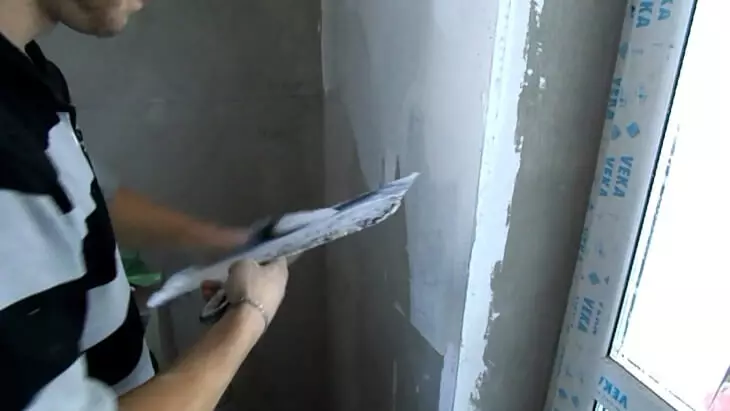
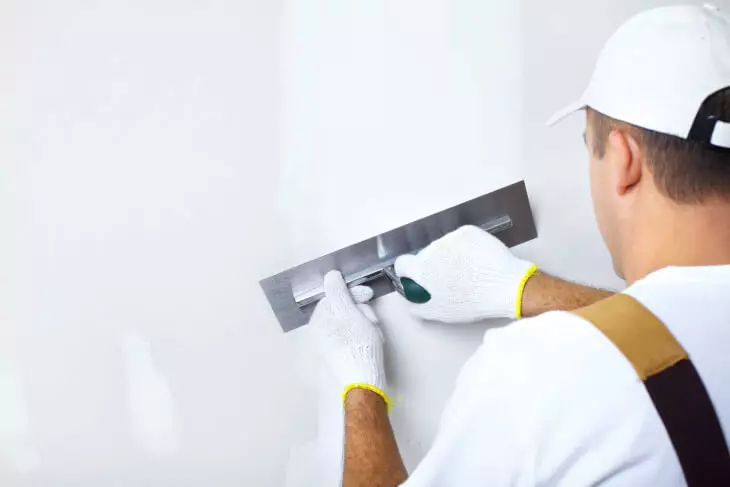
But for painting this is not enough, our wall is not as smooth as required. So we proceed to the next phase of preparation under painting. Here the finish putty will come to the rescue. Pay attention to the types of compositions - exactly about them and the price of the mixture depends. I had no problems with breeding a solution, since the manufacturer does all indicate a package. Apply the putty gently, the layer should be no more than 2 mm. Make sure that the divorces were as small as possible. Next, we are waiting for at least a day until complete drying and grind our surface under painting. In this way, small flaws are smoothed, and after painting there will be no trouble.
I did not want to make my wall textured and made it as smooth as possible. But in the case of textured plaster, the grout is not used, and a variety of patterns are applied instead through the use of spatulas and other tools. Next you are waiting for painting and completion of finishing works.