Having made a postcard on February 14 with your own hands, you show the whole depth of feelings. No postcard purchased in the store will not be able to transfer to the end all those emotions that you experience to a person. It will not be able to warm his heart and soul when looking at her. In this article we will present to your attention several options for festive cards. Step-by-step instructions will be supported by detailed photos.
The article describes the processes of manufacturing both simple and complex card models. Very beautiful postcards are in the technique of scrapbooking and quilling.
Do it yourself a gift for your beloved very nice and easy.
Simple version with lace
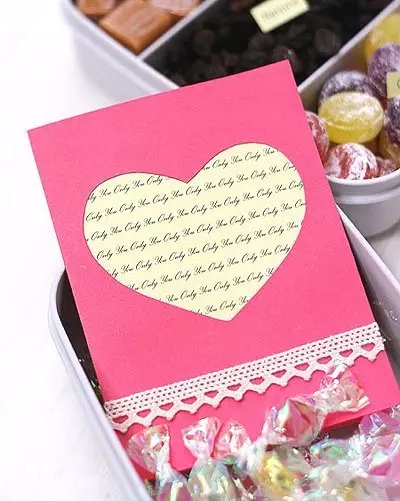
For the manufacture of this postcard, you will need pink, burglar or red paper, a sheet of a glossy magazine with an unusual print or a piece of packaging paper, lace, double-sided tape and glue.
On red paper draw a heart of any size. Cut it. On the inside of the future postcard paste a piece of paper from the magazine. The size should be equal to half of the postcard.
From the outdoor side to glue the lace segment on the bilateral scotch. Card ready. It remains only to enter the words of congratulations.
Round postcard with seal
You will need paper white and red, bulk sparkles, stamp or heart shape, red satin ribbon.
We make billets. A sheet of red paper must be bent in half. It cuts out the form of a future postcard. Separately cut white circle slightly smaller size. The edges of the blanks can be both smooth and figured. Also cut out two more circles, they will be the base for printing.
Apply glue on the stamp and put the print on a small white blank. Sprinkle glitter glue and leave dry. After drying, shake up too much. Heart ready.
Article on the topic: Beautiful tacks do it yourself: how to make decorations for kitchens made of flaps and fabric
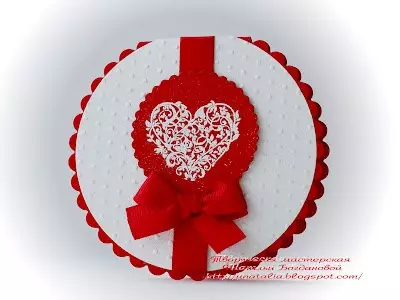
We collect workpieces into a whole design. On the front side of the postcard glue a large white blank decorated with satin ribbon.
Two small round billets glue with each other so that the heart with sparkles is from above. Little billets glue into the center of the postcard. Decorate a postcard atlantic bow.
Postcard beloved ready. On the reversal, you can write congratulations and words of love. If the size allows you to enter small poems.
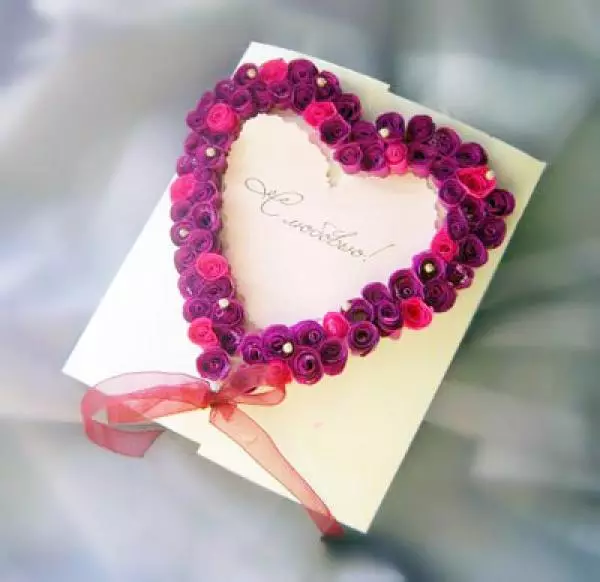
In the technique of scrapbooking
Scrapbooking is a special kind of creativity. Was originally used for the manufacture of family photo albums. But gradually the range of appliances has expanded significantly. Scrapbooking began to apply to decorate notebook books, posters, photos, postcards (cardmayking). This technique of decoration involves working with textured paper, ribbons and lace, rings and buttons, flowers, buttons and other elements of the decor.
For the manufacture of such a postcard, you will need paper and cardboard with a beautiful print and embossed, satin ribbon, a button with a fastener, rhinestones.
In the stationery stores, you can buy ready-made sets for scrapbooking. They are produced in different configuration. You can choose any favorite set and make a postcard with it. Prepare paper blanks. Take the paper that will be the basis of the postcard, and bend it in the center.
On the front side to stick segments prepared from paper of different colors and textures. The junction between the segments to be sealed with a paper lace strip and satin ribbon. At the ready postcard to attach a bow with a special button.

Decorate the postcard. To do this, cut the cloud from textured paper, stick it and glue to satin ribbon. Cloud decorate rhinestones.
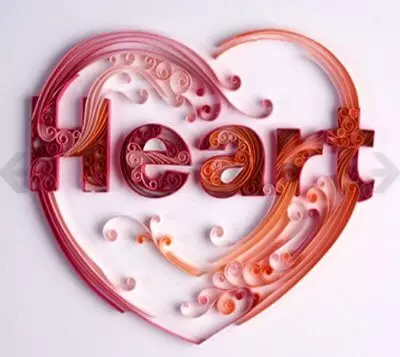
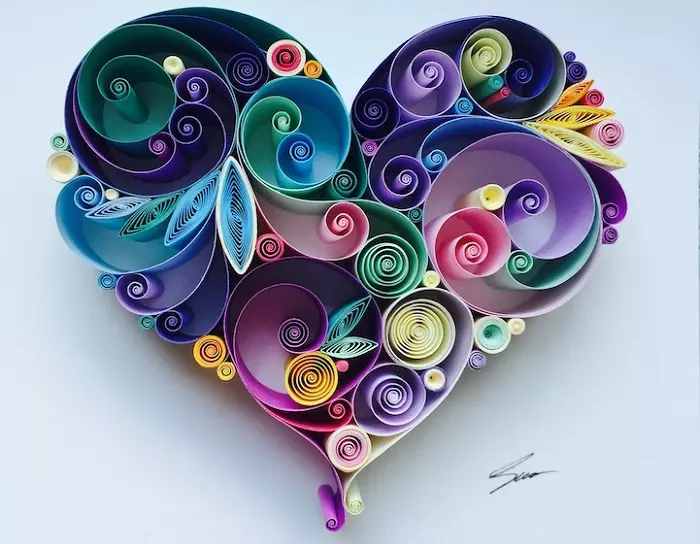
In the technique of quilling
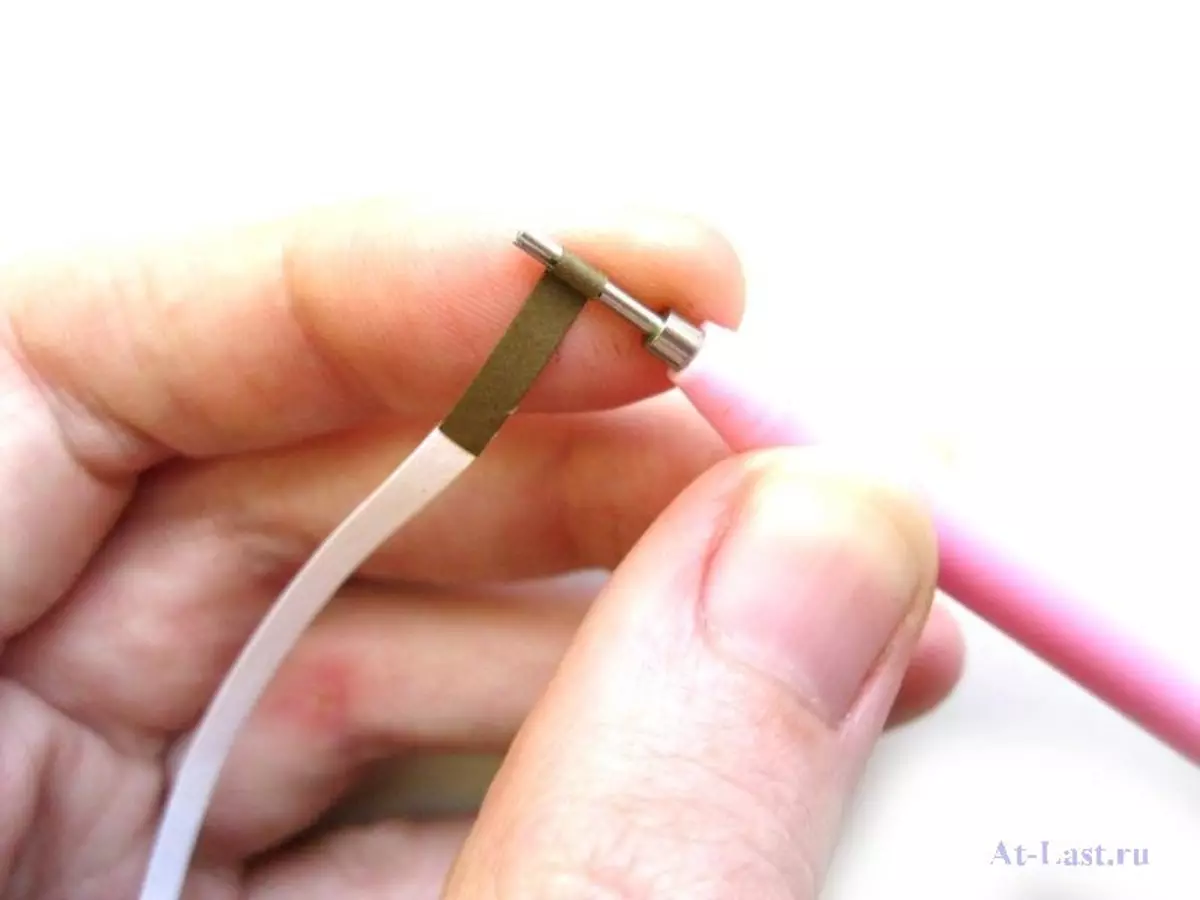
Quilling (paper) is a type of creativity based on the manufacture of compositions of paper twisted into spirals. Strips that attached shape and collected in the element are called modules.
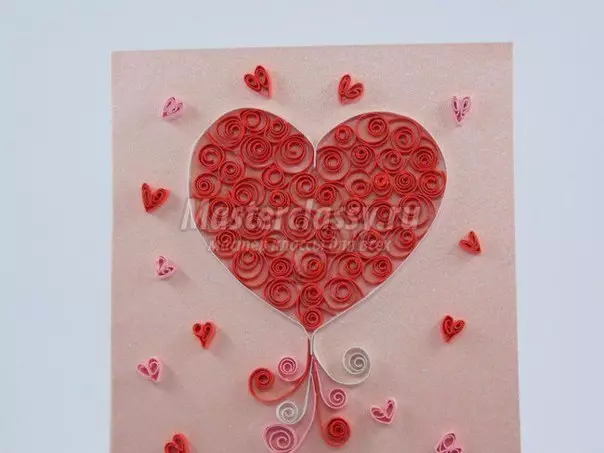
For the manufacture of postcard in the technique of quilling, you will need paper, cardboard, scissors, glue, pencil. You can find ready-made sets for queening with sliced ribbons of different colors and fixtures to twist them.
On a sheet of paper with a pencil, barely noticeably, draw a heart.
Article on the topic: Fish from droppers: master class with photos and video
Thin paper strips screw on a pencil. The resulting twist must be glued into the paper inside the heart shape.
After the whole form is filled, you need to make a long side from the strip of paper of a contrasting color and glue it to spins. The remaining tails do not cut. They must be tightened and leave in random order.
At the end, you must decorate the card with curly hearts. On free areas, you can write congratulations and poems.
If there is a desire to make a more complex postcard in the Quilling technique, then with possible options can be found below.