
An incredibly simple and inexpensive solar collector for additional heating of the house, which heats the air directly.
The most interesting thing is that the solar panel is almost completely made of empty aluminum cans!
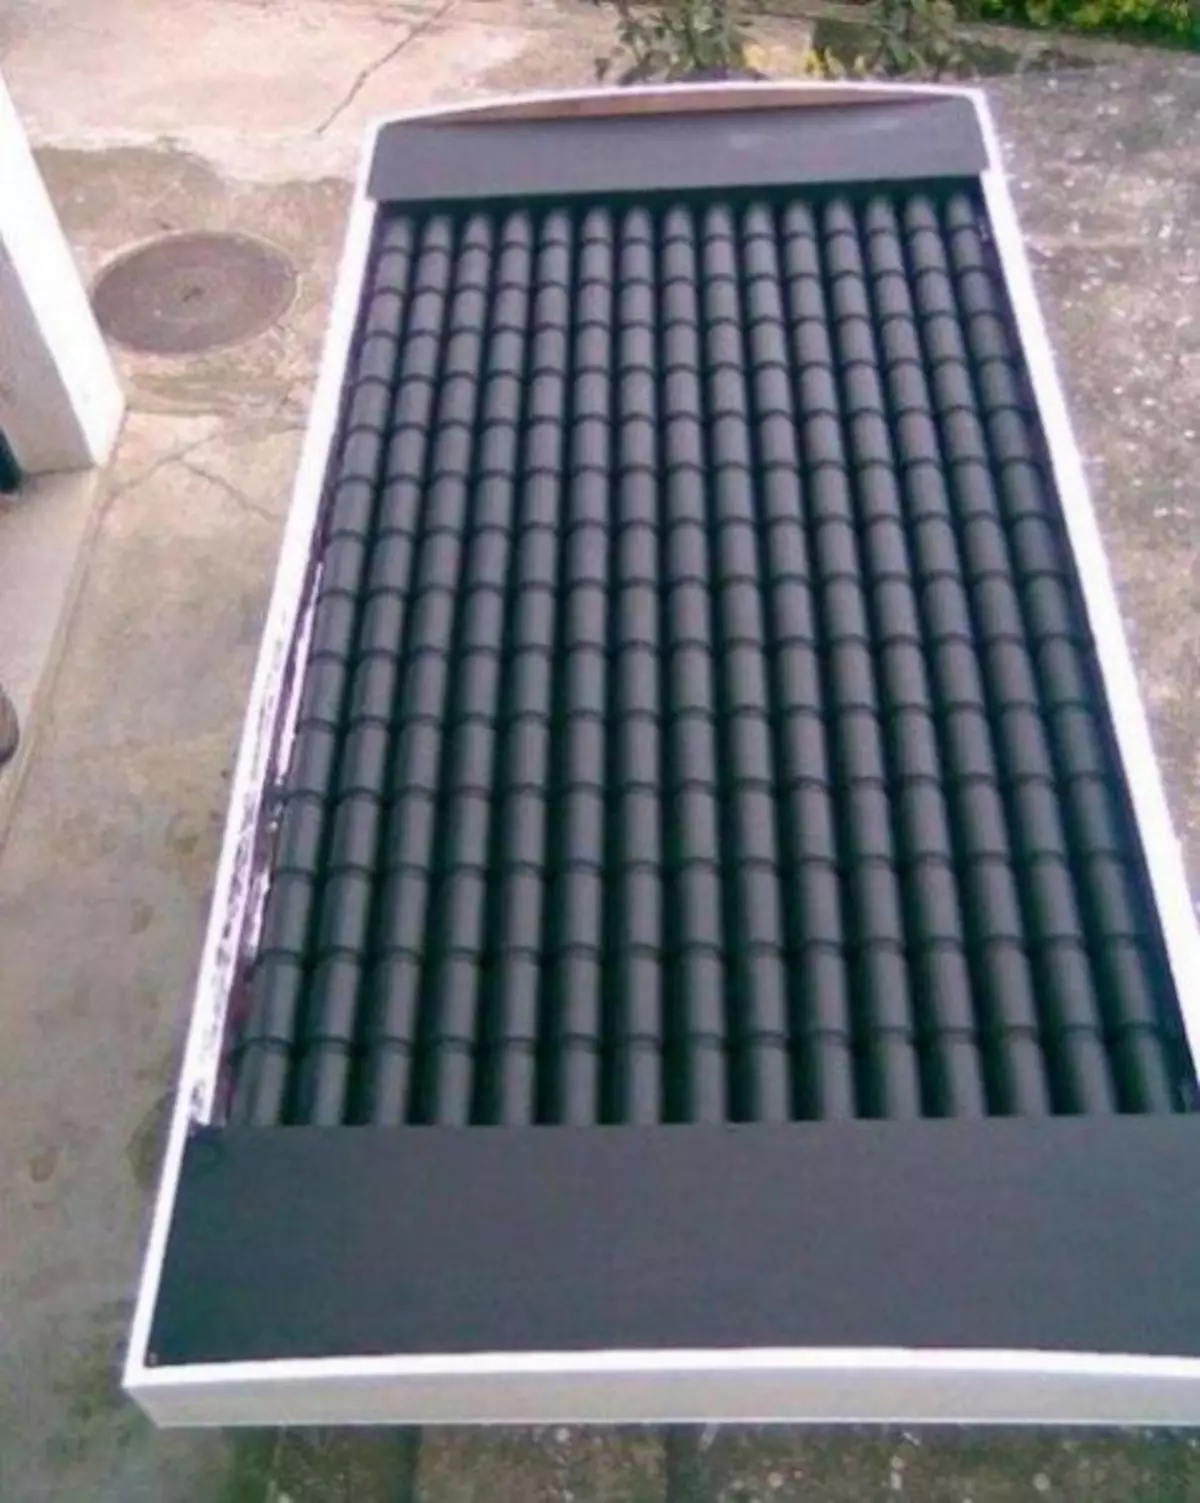
The housing for the solar collector is made of wood (plywood 15 mm), and its front panel is from plexiglass / polycarbonate (you can also use conventional glass), 3 mm thick. On the back of the housing is installed glass gamble or foam (20mm) as isolation. The helicider is made from empty beers from under beer or other beverages, which are painted with matte black paint, resistant to high temperatures. The top (cover) of the banks are specifically designed to ensure greater heat exchange efficiency between air and the surface of the jar. (Please comply with technology!).
When sunny, regardless of the outdoor temperature, the air heats up in banks very quickly. The fan returns the air to the heated air, and in the room heat.
1. Preparing banks
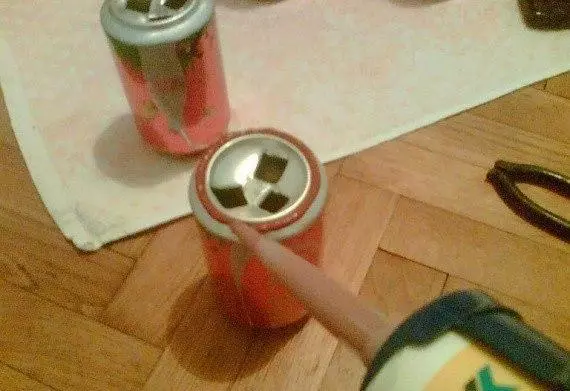
To begin with, we collected empty banks from which they will make the solar panels. We must wash the cans as soon as they begin to spread odors. Attention! Banks are usually made of aluminum, but there are also some of the iron. Banks can be checked with a magnet.In the bottom of each jar inserted a displacement (or nail) and neat openings are made, although you can drill a drill. Then the caliper is inserted and distorted in accordance with the pattern.
Instead, you can use special tools or large crusades. The upper part of the bank is cut by scissors and bended so that it turns out the "fin." His mission is to promote turbulent air flow to assemble as much heat from the heated wall of the can. (Please comply with technology!) All this needs to be done before gluing cans.
Article on the topic: Sliding doors for dressing rooms with your own hands
2. Remove fat and dirt from the surface of the jar
Any synthetic means of degreasing will serve quite well for this purpose. Degreases perform only outdoors or in a well-ventilated room.
3. Sadim jars on glue
The tape of glue or silicone on the bank is resistant to high temperatures, at least up to 200 ° C. There are also products for gluing, which can withstand up to 280 ° C or 300 ° C. Rubblyko cans and the top are perfect to each other, gently apply glue. In detail section of glued cans can be seen in the figure.In order not to miss the vertical horizontal, it is better to make a template in advance of two boards, knitted with nails at an angle of 90 degrees. The pattern in the picture will provide support during drying cans in order to get a straight pipe - solar tunnel.
4. Make the framework
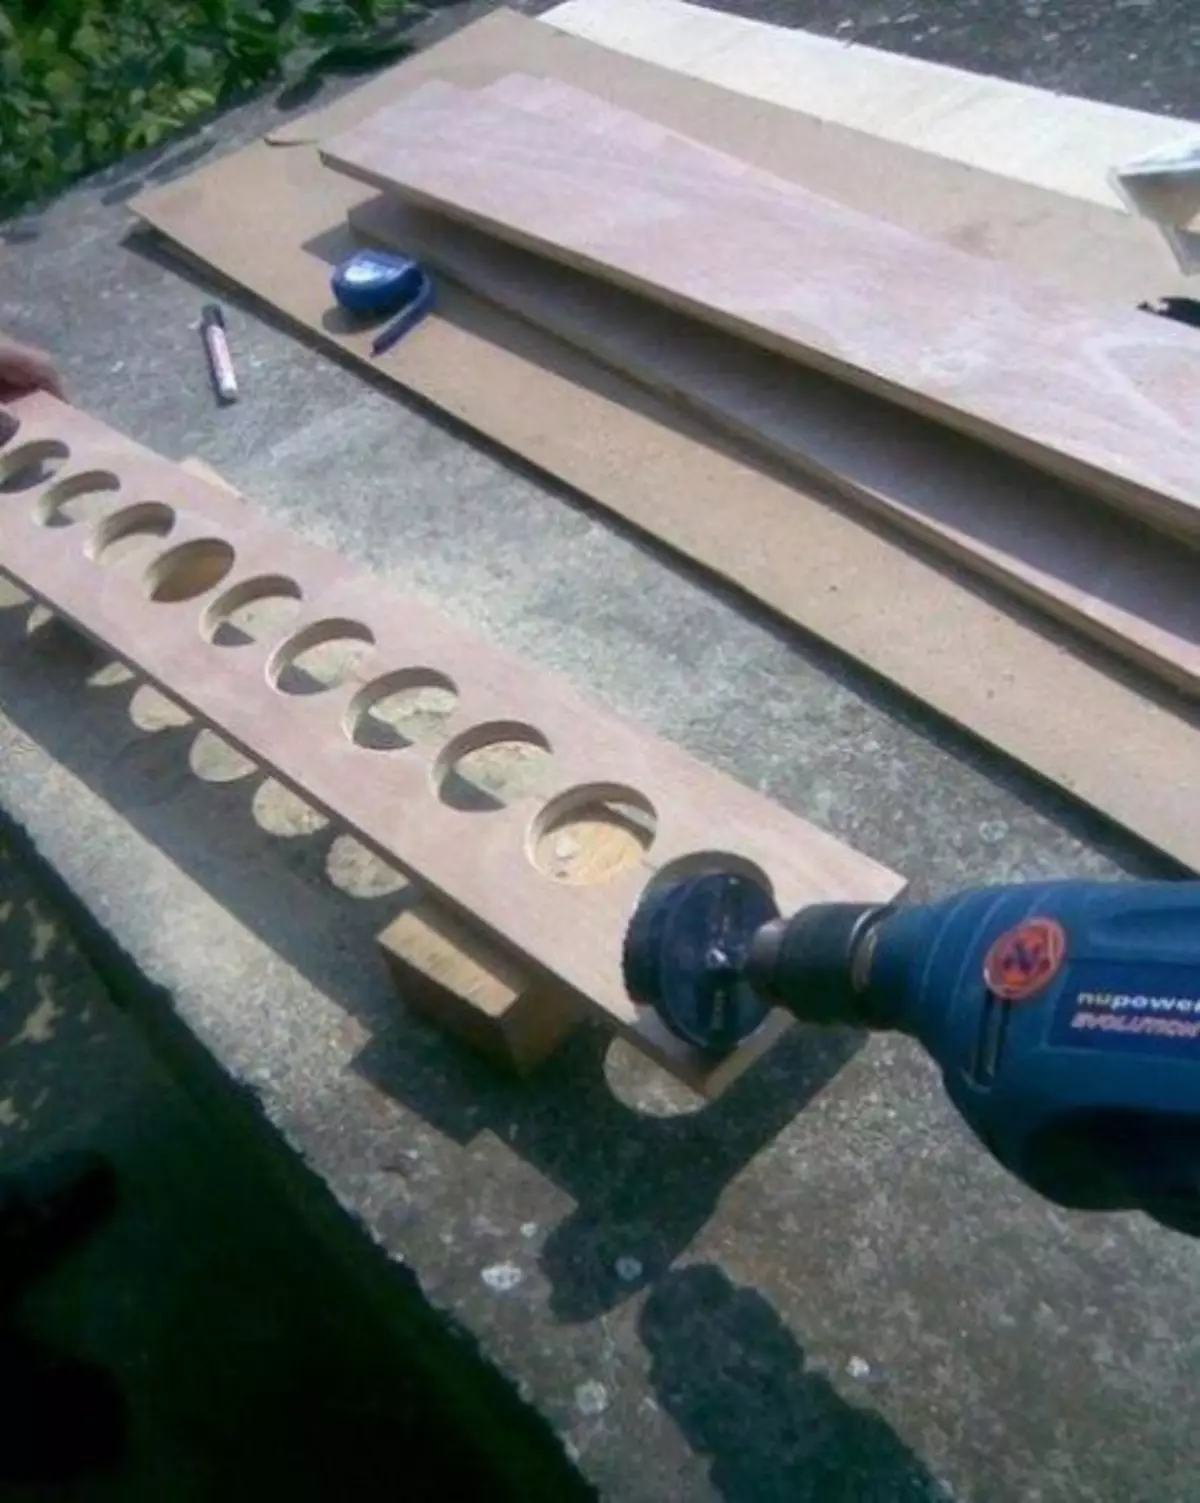
Boxes of inlet and exhaust parts are made of wood or aluminum, 1 mm thick; The gaps in the edges are closed with adhesive tape or heat-resistant silicone. Round holes in the size of the cans are made by a special nozzle on a drill, or a brown.
You will be interested:
Useful tips on storing things in the kitchen
Here are 5 tricks that make glitter old utensils
11 herbs who run mosquitoes
5. Bonding the box
The glue dries very slowly. Do not forget to give it to dry during at least 24 hours. The helium of the helicide is made of wood. The back of the solar collector box is plywood. In order to further strengthen the structure, you can make an inner wall.6. Solar collector insulation
There is insulation between the sections - from fiberglass or foam. All this is closed with a lid of thin plywood. Pay special attention to isolation around the hole for the input and air output in the solar collector.
Article on the topic: How to open the door if the key or castle broke
7. Fastening of the solar collector
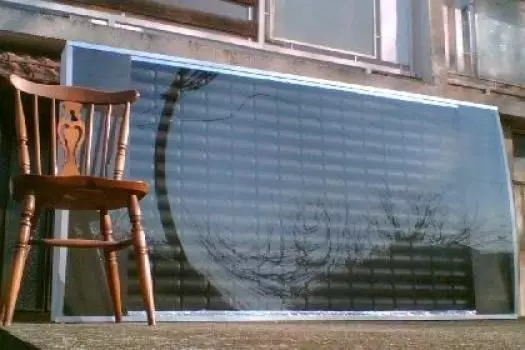
At the end of the work, the helium is painted black and placed in the closet. Top is covered with plexiglass, carefully fitted to the frame. Polycarbonate / Plexiglas should be (preferably) slightly convex to get high strength.Important note:
This design cannot accumulate thermal energy it produces. If the night is cool, then the collector is better to close, otherwise the house will cool. This can be solved in a simple way - by installing a valve or valve, which will reduce heat loss.
Differential thermostat manages the operation of the fan and turns on / off. This thermostat can be bought in the stores of electronic components. The device has two sensors. One is installed in the upper hole for warm air, the other - inside the bottom channel of the cooler of the collector. If you competently installed the temperature threshold, the solar collector can produce an average of about 1-2 kW of energy for heating. It basically depends on what is a sunny day.
The general rehearsal of solar collectors was made in the courtyard before installing the system at home. It was a sunny winter day, there are no clouds. A small cooler extracted from a faulty power supply to a computer was used as a fan. After 10 minutes of sunlight from solar collectors, the air temperature reached 70 ° C!
After completing the installation of collectors on the wall of the house, when the ambient temperature from -3 ° C, from the solar collector, 3 m3 / min (3 cubic meters per minute) of heated air was released. The temperature of the heated air rose to +72 ° C. The temperature was measured using a digital thermometer. To calculate the power of the collector of solar thermal energy, we took the air flow, and the average air temperature is at the outlet of the block. The calculated force that the solar collector gave was approximately 1950 W (Watt), which is almost 3 hp (3 hp)!
Article on the topic: Service and maintenance of boilers
Output:
Given that the results are quite satisfactory, it can be concluded that these homemade solar panels are definitely worth making it. Collectors at least can be used for an additional space in which you live, and your task is to develop and understand which savings can be achieved.
one.
2.
3.
four.
five.
6.
7.
How do you like this idea?