
All who have country houses know how to comfort it comfortably and spend a small amount of money. Therefore, I decided to share my experience, how can you see the ceiling on the country's dacha, inexpensive materials.
The time of indoor repair of the attic, kitchen and bathroom has come. It began with the fact that it was necessary to update the ceiling in the rooms with their own hands. Of course, I, first of all, consulted with friends and began to look closely to the materials offered on the market, which can be used to cover the ceiling. It turned out that the options for building material, not so much.
Ceiling trim in the country with your own hands
Construction Material
Here are some options for building materials that I heard in response to a question than to sew the ceiling in the country:
- stretch ceiling;
- lining;
- MDF;
- Fiberboard;
- plastic panels;
- plasterboard;
- Aluminum Rush Profiles;
- Plastic plates.
For my house, we decided to use wooden panels for plating the ceiling on the attic. The kitchen and the bathroom are distinguished by high humidity, which the tree does not tolerate and besides this is expensive. Therefore, for these rooms, cheap finishes of plastic panels resistant to air humidity were approached. To make the binder such a building material was easy. Ideas from what to make the trim painted very quickly. The building material was chosen at average cost.
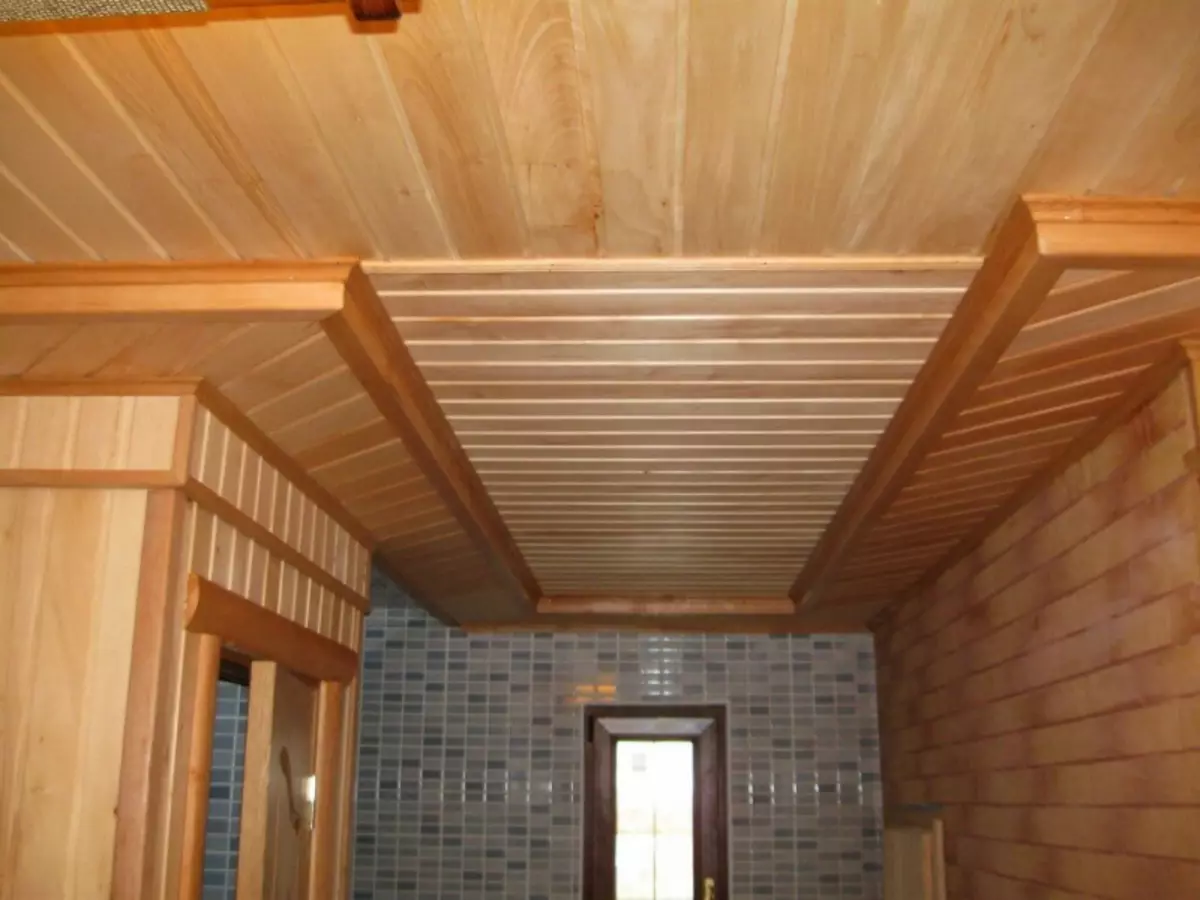
Ceiling clapboard clapboard
Ceiling clapboard clapboard
Very beautiful will look at the lining on the wooden house. From experience, I can say that for a start you will need to accurately calculate the amount of materials with a margin of about 10% of the total. In addition, it is additionally necessary to take care of the protection of building materials from insects and painful fungi, which can hardly cause damage to the tree. Boards must dry well before assembly.
Article on the topic: Kleo wallpaper glue: Review and main characteristics
Lining close-up
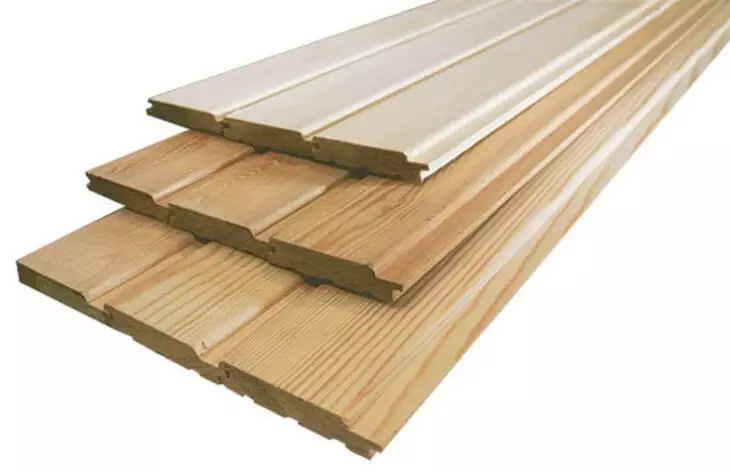
The cheapest price was the pine lining. In order to save on the purchase of 2,4x3m room boards, six-meter boards were purchased, which could be cut in pressure without a residue. There are other sizes of pallets that can be selected for the ceiling cover without waste.
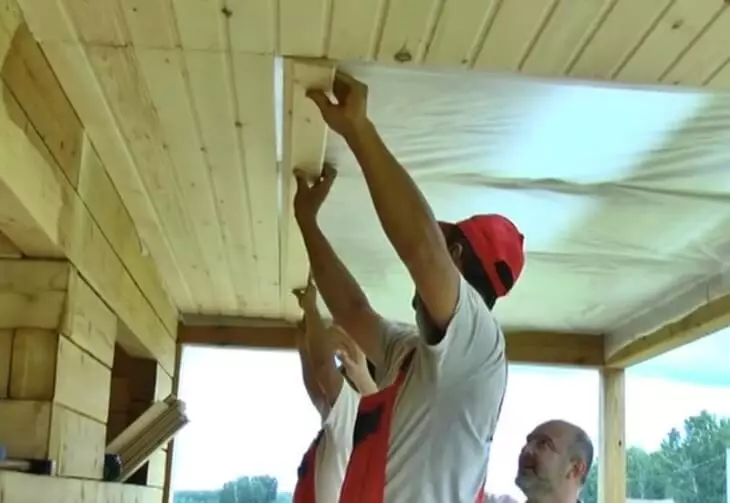
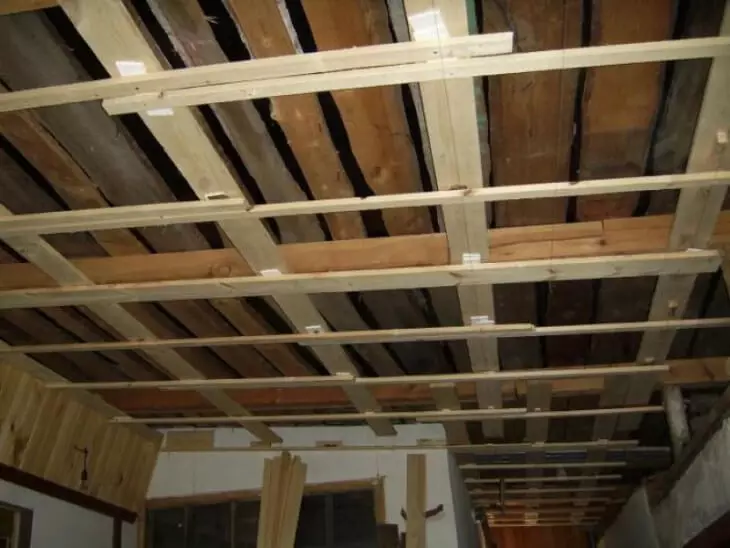
To create a frame, I purchased wooden bars 30x30 too from pine. But you can use a metal profile. Brussia I impregnated with a pre-olifa to protect it from rotting.
Ceiling ceiling clapboard with your own hands
The crate must be done on the ceiling with a distance between bars not more than 1 m, but I made 80 cm. The bar must be perpendicular to the facing boards. I fastened the crate with self-draws, but you can use and just nails that you need to drive at an angle. In places where the ceiling was not too smooth, I put the wooden wedges so that the facing board did not be bombed. I performed cladding with boards by mounting to the bars of the screws. So consistently, inserting a spike of a new board in the groove already fixed, with the help of a screwdriver I crossed the entire ceiling. Too tightly, I did not fix one board to another, so that during deformation during the temperature differences and humidity they did not deform.
After graduating to mount the boards to the bars, I in the depths of the walls with the ceiling strengthened Moldings from Pine. It turned out very beautiful ceiling in the country, which I proudly showed friends.
PVC ceiling stitch
To cover the ceiling in the kitchen I needed to have the following at hand:
- meter;
- drill;
- Reiki;
- electrolovik;
- Finish corners;
- plastic panels;
- brackets;
- screws;
- dowels;
- stapler;
- hacksaw.
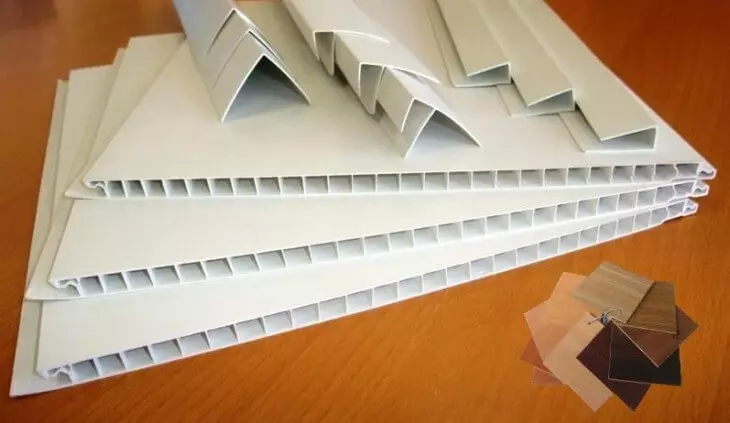
PVC panels and components
First, it is necessary to make a clash from a wooden car of pine 30x30. I fastened them to the ceiling with screws, with a step of 50 cm. On the frames, we secure a corner from the initial side into which we will insert the side edge of the first panel. Perpendicular to the panels at the walls are attached two profiles. Brussia must be perpendicular to the panels, and the corner along. Fresh side part of one plastic strip in the corner, and the ends are inserted into the profile. To make it easier to insert a strip in profile I arched her a little on myself. With the help of the bracket, the staples are neatly secure to the slats panel.
Article on the topic: Connection of a warm floor: a diagram of a heat regulator, video and electricity with their own hands, infrared correct
Wooden doom
The next panel is fastened to the first, customizing the grooves and attaching the brackets. Thus, you need to use stripes until the skin reaches the opposite wall. The last band can be cut if its width is larger than the remaining unclosed space. On the side of the panel to the wall you need to wear a corner and sunmatch it to the raids.
Plastic panels to smire quickly and easily and this material is much cheaper than the lining. But you need to take into account during the installation of PVC panels, that this material is quite fragile and flammable. It should be purchased with a margin so that you can replace the damaged strip. Make such a trim with your own hands is available to each owner.
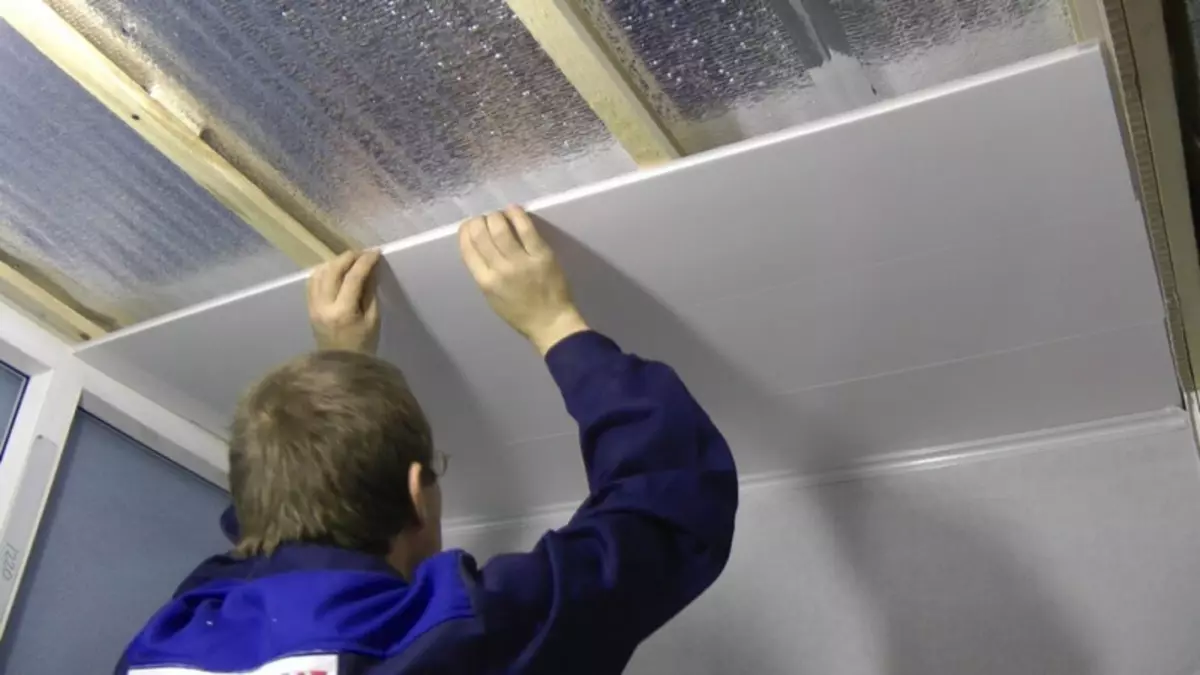
Installation of the panels on the ceiling
Warm material
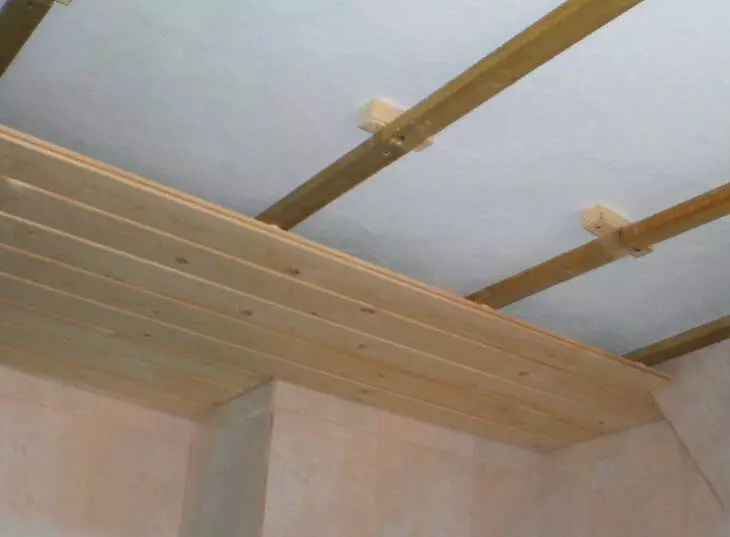
There is another inexpensive method of covering the ceiling with the help of the Fiberboard, which for the country house is suitable for many. Such a ceiling in the country can be treated with oil paint, and you can put the plates on it, which will additionally warm the house. I laid the ceiling in the storage room in this way as soon as the cottage was built.

Sheets of fiberboard
Fiberboard perfectly withstands moisture, but strongly long influence of water can open them. Tools and rails You will need the same for previous types of ceiling. First, outline the places where you will fix the rails. Make it is preferably using a level gauge. We begin to edit the most extreme on the walls. Then you nail parallel to the rest with a step of 50-70 cm. I chose a distance of 50 cm. Attach the plates is necessary for each rail. On the perimeter of the joint we mask the cornices.
When buying DVPs need to give him to stand in the room a couple of days so that it gained humidity. Otherwise, with time it may be swore. And the rest is an affordable and easy version of the ceiling finishes for any person, even with a small income.
Article on the topic: Finishing of the hallway with decorative stone: just, beautiful and modern
Outlusion
Plasterboard
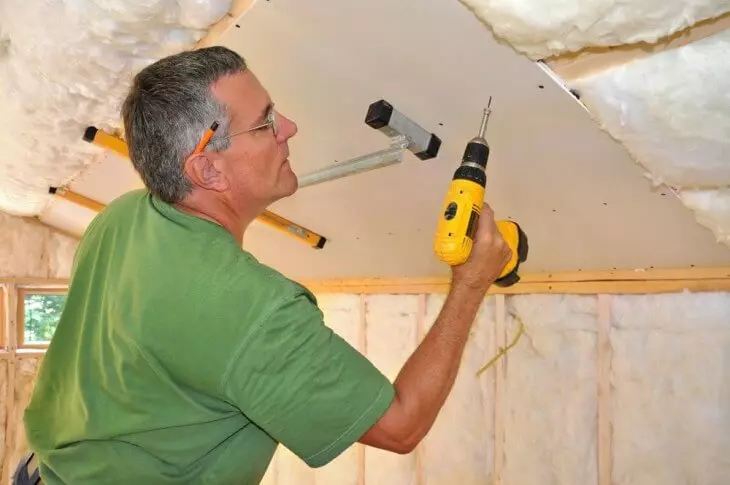
Today is the most common option of wall cladding and ceiling than plasterboard, probably not to find. This material makes it possible to embody different fantasies in the form of intricate figures, backlighting soffits and other features. Mounting plasterboard is also needed using the crate. It uses a wooden bar and a metal profile for its execution. Plasterboard can be simply secured with a whole sheet. And you can cut some intricate knife using a sharp knife. Before fastening the plasterboard, the electrical circular is laid and the points for placement of the lamps. Plasterboard was mounted for equipped with screwdriver with screws.
Ceiling covering Nipswockarton
So now you know how you can shelter the ceiling on your summer cottage. All these works are quite easy to perform. You only need to have the necessary tool, building materials and desire. Hope my experience will be useful to you. Successes to you in the construction of your cottage!