
Assembling the railing for the stairs is completed by installing the handrail. What could be the mount of the handrail, how to make it right, not everyone knows and imperceptibly. Some common ways for wooden and metal stairs describe here.
Fastening the handrail to the bassins of a wooden staircase
It turns out that the wooden railing makes the harder. All because there are many different ways and techniques for working with wood and almost no ready-made solutions, as each staircase is individual, has features. For example, the fastening of the handrail to the balusters can be made using the drums, self-tapping screws, nails, bolts, special ties (zipball), glue. In addition, you can set the railing to "disembark" directly to the balusters and pillars, but there are options with an additional slat, which is sometimes called a "submeritator". And all this is the "right" ways to connect racks with the handrail. That's how you can do it and we will talk in this section.
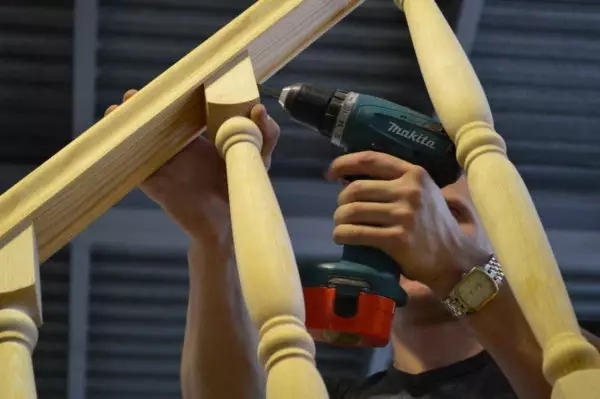
Fastening the handrail of stairs on the support poles or bales can be made in several ways
First of all, cut off a piece of handrail of the desired length. It can be a fragment from one support post to another, a piece for the entire span - from the upper / lower column and until the moment of rotation. It all depends on the design of the stairs. If there are places of joints of two fragments, they must be well treated, having achieved an ideal coincidence. Then the handrails for the street should be covered with protective impregnations, and then - paint / varnish. After you can already deal with the fastening of the handrail for the stairs.
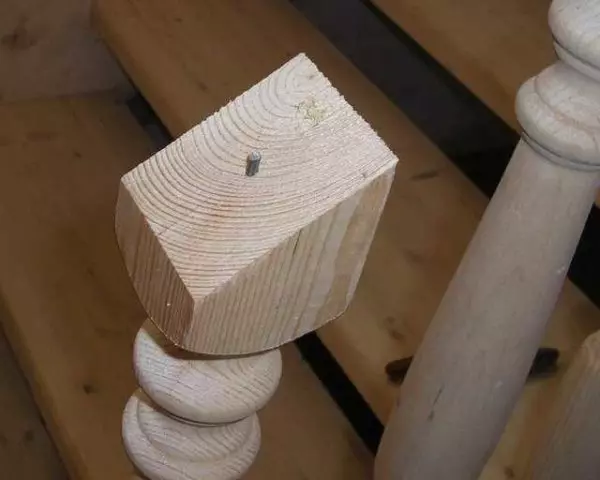
How to cut bales for the installation of the handrail
After installing the baluster on the steps, their tops are at different levels, and without trimming, you will not install the handrail - it does not lie like that. To mount the reference handrail on the stairs, it is necessary to cut the top of the racks at a certain angle. This angle is determined by a steep staircase, and it is not necessary to calculate it. It is determined by "on the spot."
After the balasins are installed, they must be cut
To find the angle of the underrut of the balaasine, you can use a strained between the support pillars of the thread. It is tied at the same distance from the tops of the pillars, which are installed at the top and bottom of the span. Where on the idea, the lower boundary of the handrail will be held. With this stretched thread, the pencil is transferred to the top of the racks. Instead of the thread, you can use a laser level, and you can still temporarily fix the guide (any flat bar).
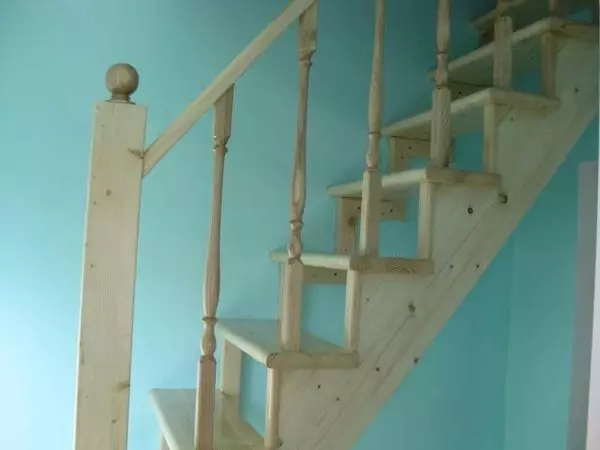
This should turn out - the staircase railing is ready for installation of the handrail.
The line was obtained, now strictly on it screaming the tops of the columns on the stairs. Next, you can continue fixing the handrail for balusters or pillars.
Allow one tip: If for the subsequent installation of the railing, you will need to drill holes for the sewages or studs, make it better before trimming. It's easier to find the center, it is easier to keep perpendicular to the drill. After the holes are made, you can take a saw / jigsaw and to focus on the scheduled rack markup.
Balaasine compound and rails with drains and threaded studs
Consider one of the traditional ways: fastening the handrail with a wanking or studs. Under this type of connection, you must make the coinciding holes in the handrail and racks of the rails of the stairs. If you put the studs, they can be screwed into the holes done in the center, install the handrail to the position in which it should stand. Checking, whether everything is true, go along the handrail, grabbing a fist over each baluster. The protruding ends of metallic studs will be left on the back of the handraille. The handrail is removed, the resulting labels for reliability mark the marker / pencil. Now you can drill holes. With this method of marking the handrail, there are almost no problems with its "landing".
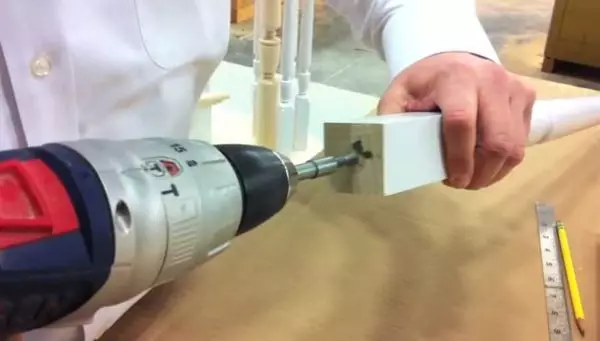
Under the installation of waders and threaded studs make holes for 1-2 mm smaller diameter
Article on the topic: how to sew a curtain tape: step-by-step instructions
The second version of the marking of the handrail for the installation of studs and the waders is carried out before they are installed in balasins. First of all, apply a sliced piece of handrail into place. Then the pencil note from two sides where balaasins are installed. Before applying marks, check the distance between neighboring columns below and near the handrail. If they match, everything is fine, put the marks, if not, correct the position of the rack and only then we apply marks. The adjustment is needed in order for all the supports of the staircases vertically. It will make the railing more reliable.
For a reliable connection, the hairpin should hang up at least 2 cm
After all the balusters are noted, remove the handrail. From the reverse side, the marks applied by us. Between pairs of lines that outlines the baluster, are diagonally. At the place of their intersection, we put the mark. Here and it will be necessary to drill a hole for the wanking or stud. We also find centers on balasines (if there are no holes in them). As you understand, with this method of marking the handrail for the railings, problems may arise - the slightest inaccuracy and the handrail does not fit with the rack. The good news is that in some limits, the baluster can be moved. While it is not fixed - there is a certain freedom, it can be used when installing the railing. Just navigate it so that the spike entered the groove. In general, the fastening of the handrail for the seasons you know.
In order for the installation of the railings, it is more reliable, besides the waders or studs, you can mix with glue. This will make the design more rigid, will extend the service life without the backlash.
With auxiliary plank - submer
Agree that the most simple installation of the handrail for balasins is through self-drawing or nails. What does it stop from such a decision? Overly unsightly result in the form of fasteners, spoiling all kinds. But there is a very similar way, guaranteeing a good appearance of the staircase railing. Auxiliary plank is used, which is also called the submerch.
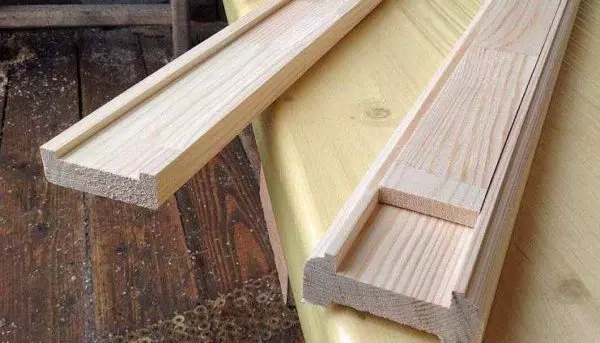
Auxiliary bar is cut in the form of a groove
The auxiliary bar is cut with a spike, which in the mirror reflection repeats the shape of the groove at the bottom of the handrail. It is put on the fastened balusters with a flat side, they are attached (self-tapping and nails - your choice). Do not forget to check the distances between adjacent racks.
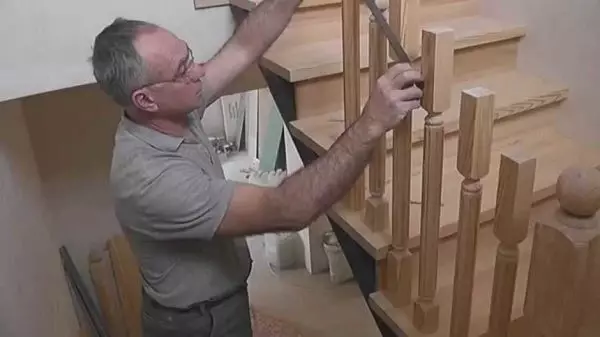
To the auxiliary bar, cleaning the balasins
Then the upper part of the subucleor is riveted with glue and "plant" handrail. Everything. No traces of fasteners on the front of the handrail, everything is holding. The only thing that must be taken into account is that the height of the handrail is obtained somewhat more, as it is added even the thickness of the auxiliary plank (if the plank is wooden, it is at least 2-3 cm).
There is another way to fasten the handrail on the submeritator - small nails or self-pressing from the bottom, at an angle. But with this attachment you can see the caps. They can be disguised as one of the well-known methods, but it is long ...
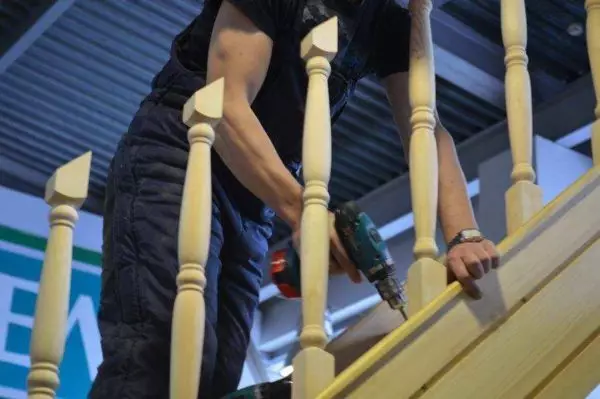
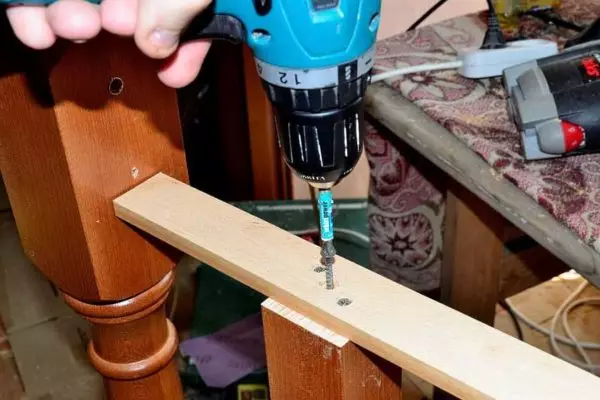
The easiest way is to fasten with self-draws
As you know, over time, the wooden railing "break down" due to the fact that under load they are risen, wood fibers are fitted, the backlash appears. For the ability to the backup, two or more self-press / nail can be used for each balaasine. So the mounting of the handrail will be tougher.
Also, for greater reliability, the bar can be made of metal. Any, thin metal suitable. Although steel, even aluminum. But then it will be necessary either to crop the bar in the size of the excavation on the handrail, or to modify the groove so that the handrail is well for the design. And yet: if the plane is metallic, glue must be found universal, which is well glued wood with a metal. This is the mount of the handrail on the staircase simple, beautiful, reliable. Suitable for those who decided to make a railing for the stairs with their own hands for the first time.
On the spikes of different shapes
It is possible to install the handrail from the tree without metallic fasteners: on the spikes and glue. The spikes are cut in the top of the balusne. Under them in the handrails form the recesses of the same form. Schip / groove form - any. It can be a rhombus, a rectangle, a circle, oval. The main thing is that spikes and grooves perfectly coincide. You can achieve this by making a template and exactly repeating it on each fragment. The minimum spike height is 2.5 cm, so the height of the handrail cannot be less than 4.5 cm.
Article on the topic: How to choose a light-proof curtains Blackout in IKEA and Lerua Merlin
Cut on the tops of the baluster spikes, in the handrails of the removal under them
After a spike is formed on each baluster, and at the appropriate place on the handrails, the groove is cut, they are sampled. When installing the handrail for balasins, they can be slightly shifted to align the holes. You can use the installed handrail after drying the glue (time is on the package).
Complete of the handrail and reference pillar
Often the handrail is not on top of the post, but connects to its side face. How in this case, dock the handrail and pole? The easiest way - after trimming the handrail under the desired angle, fasten on the self-tapping screw or nails, driven at an angle. Cons are obvious - the fasteners hats are visible.
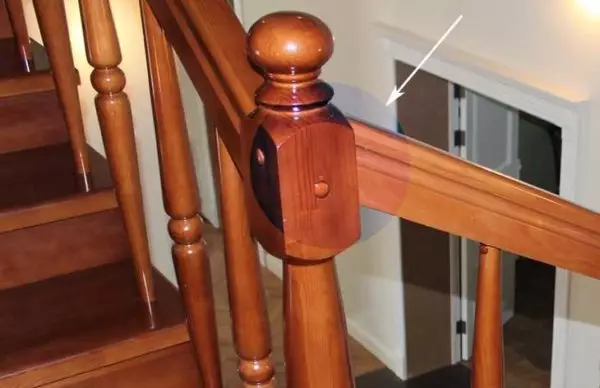
How to connect the handrail with the reference post at an angle and jack
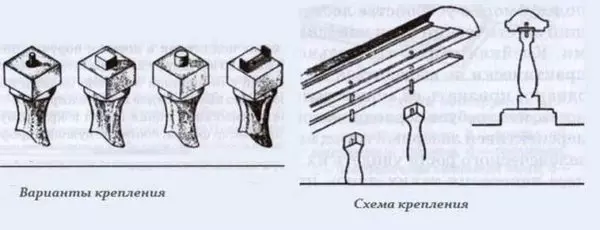
There is another way - use a zip-bolt, which consists of two movably connected spills and gearboxes. Under its installation, a technological hole is needed, which is done at the bottom of the handrail. It is then covered with a stub into the tone of wood and it becomes almost imperceptible. The second plus of such a connection: it can be tightened (to a certain extent), if suddenly, the backlash will appear.
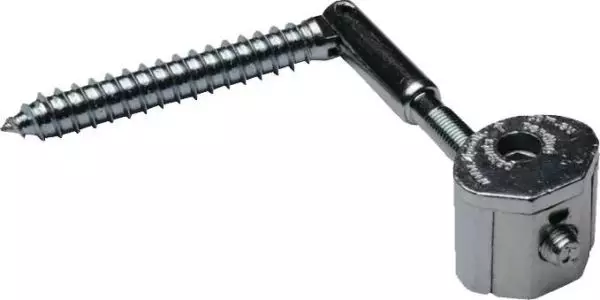
This looks like zipbolt for connecting parts at an angle
Principle of the installation of zipball for connecting handrail and staircase
Even under Zipbolt, it is required to drill holes under the heels - one in the post and in the handrail. The technological hole is usually made on the handrail. It is located so that it is possible to twist the thread under the reducer (the length of this thread is usually 10 mm). The depth of the holes is the size of the spills (from the connection to the edge), the diameter is 1-2 mm less than the diameter of the heel.

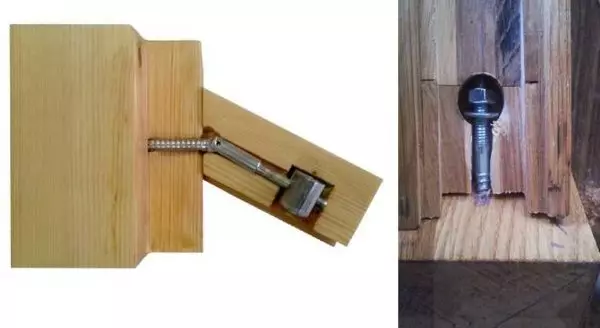
The principle of connecting a staircase and a railing at an angle
Studs are installed in the drilled holes. It is screwed into the post, it is simply inserted into the handrail. A gearbox is installed in the prepared technological hole in which there is a hole for the hex key (6 mm). Deploy the gearbox so that it is convenient to use the key. Turning the key, tighten the thread, attracting the handrail to the post. It is necessary to do this after the balusters are connected to the handrail. Attaching the handrail to the post, we can assume that the railing is installed.
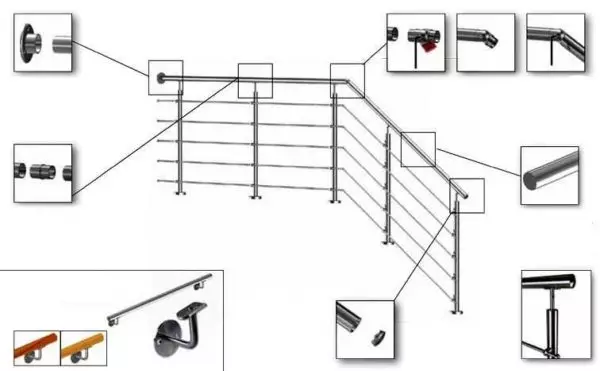
Installation of the handrail for prefabricated metal fences
In general, the assembly of handrails from metal (stainless, nickel-plated, chrome) pipes is similar to the constructor. There are pipes of different diameters, decorative elements to them, and a whole set of different mounts. From all these parts and collected railing. Therefore, they are named "teams." I decide how to mount the handrails for metal balusters / pillars / racks, your task is to choose those elements that are better than the rest suitable for solving your task or more than others you like.
Install the handrail for the prefabricated metal railing can be using special flanges
To connect metal racks / Balyasin with the handrail, there are special tips, which on the one hand are attached to a round / square / rectangular tube, on the other to the handrail. There are models of different types. You only need to find the most suitable, choose the desired: on the size of the racks and the type of handrail.
In metal precast fences, handrails can be different:
- Round metal pipe;
- profile (rectangular, square) metal pipe;
- plastic handrail (round, oval or original form);
- Wooden any profile.
Under each of these handrails there is a mount, and, usually, not one. Choose what you like. Fasten them simple: clamping bolts. But, for reliability, and if it allows the thickness of the metal, you can all connect two metal parts to weld. Thin metal welding is not easy, but if you know how to handle the welding machine, there is nothing impossible. Welding takes more time, but this is the fixation of the handrail will be very reliable.
Prefabricated metal railing resemble a designer
When connecting elements of a metal staircase with plastic or wood, it is necessary to use that fastener that manufacturers are recommended. Additionally, you can skirmize the joints with universal glue. True, in the case of stainless steel, there is no particular sense: the grip will be very low. But still…
Article on the topic: What makes the barn at the cottage cheap and fast?
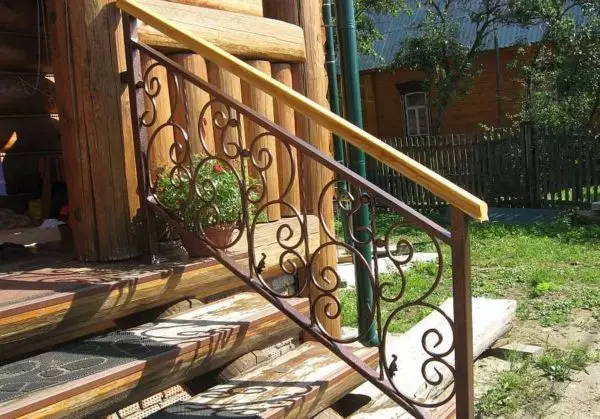
Fastening the handrail for a welded or adhesive fence for the stairs
On adhesive or welded fence usually put a wooden handrail. In the lower part of it, they do the size of the upper jumper of the finished fence. The depth of planting the handrail is about 2 cm. It is possible and more or less - depends on the desire. Connect the railing with the handrail of self-pressing, which are twisted through the holes in the upper jumper. It is important to choose the length of the fastener: it should be a little (minimum - by 5 mm) less than the height of the handrail so that the screw does not stick on the surface.
In the upper jumper to make holes and pass the railing across them
In this case, the installation of the handrail for the staircase is simple:
- In the upper jumper make holes that are slightly larger than the diameter of the selected screws, but less than the diameter of the hat. Step - from 50 cm to 1 meter.
- The handrails are cut, where it is necessary to customize the joints of the junctions to the perfect state.
- Install the handrails into place by achieving the perfect coincidence of the joints, secure them in such a position with clamps.
- Mounting fasteners are installed through the holes in the jumper.
- Remove clamps. Fastening the handrail is completed, the railing is ready to operate.
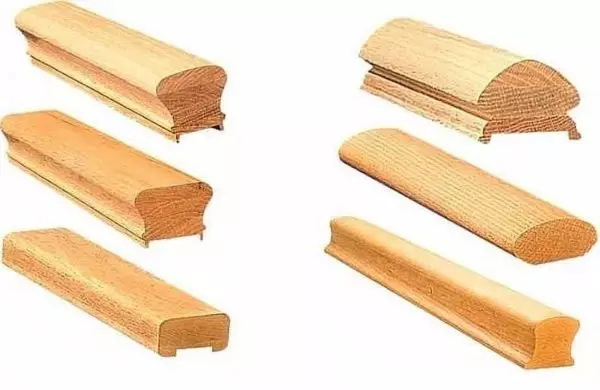
Pick up the handrail profile is also important
There is still an opportunity to glue a wooden handrail to metal welded or wrought-iron railings. When choosing glue, it is necessary to watch it can connect wood and metal. For external stairs (on the porch, for example), you must also pay attention to the range of operating temperatures. Otherwise, no difficulties:
- smear the glue on the instructions;
- press parts, fix clamps;
- leave before drying the glue;
- Remove clamps.
To reliably fasten the handrail to the steel staircase, you can use both of these methods. One thing does not interfere in any way.
Methods for fastening the handrail of stairs to the wall
The wall is fixed by the handrail if the width of the steps on the stairs exceeds 120 cm. The second handrail is made from the same material and the same shape as on the balusters, but fasten it to the wall.
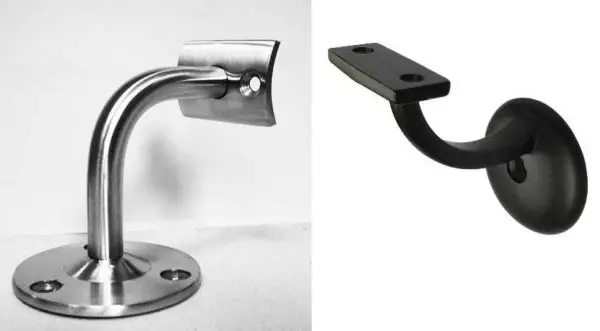
To mount the handrail on the wall there are a number of fixtures - brackets - under different profile (round, oval, curly). On one side of the fastener is a round or square fragment with a flat surface and holes done in it. This part is installed on the wall. We select fastener depending on the material from which the wall is made. We use self-tapping screws, if the walls are wooden, dowels for walls of concrete and brick, and special dowels for fastening to a light concrete.
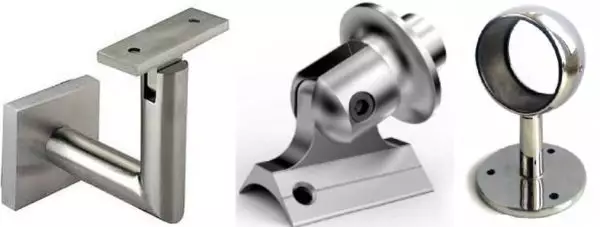
Several types of brackets for mounting the handrail against the wall
The quantity and size of fasteners for the installation of a staircase on the wall are selected based on reasons of reliability. On each bracket manufacturers make minimum four holes. Here are four self-press / dowels / nails for each and put. When the length is selected, it is better to proceed from reasons "the longer, the better." Still, there may have a solid load on the wall handrail, so it is better to be restrained than to fly down ...
The second part for the wall mount of the staircase railing is where the handrail itself is attached - may be different. Under round pipes can be a ring of a certain diameter, a smooth area usually goes under rectangular or square handrails. In this part of the bracket for the staircase, too, there are holes - so that the railing can be fixed. And in this case, the quantity of fasteners should be equal to the number of holes (according to the same considerations).
There are more such options.
There are brackets for wall mounting handrails with different angles of inclination. Choose them on the basis of their own ideas about the convenience and planned support altitude. There are still telescopic models that allow you to set the distance to the wall and / or angle of inclination. There are still end wall brackets, which simultaneously with the fixation of the edges of the handrail also decorately declared them.
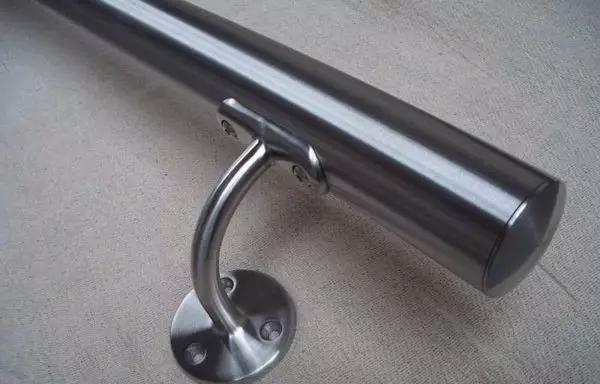
Approximately all this is installed
The number of brackets depends on its handrail length. It is usually put on one element in terms of edges, and the calculated number, with a distance of 40-60 cm. The smaller the bearing wall capacity, the more often we put the wall holders for the railil.