
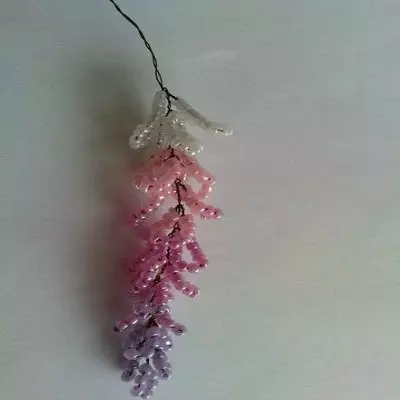
Everyone knows that wisteria is very beautiful. Do it easy, but time consuming. Master class "Wisteria from beads with their own hands" with step-by-step photos will help you master the popular beadwork technique quickly and without too much effort.
The happiness tree can be made of the following materials:
- Lilac, pink, light pink and white beads for flowers;
- Green two shades for leaves;
- 0.3; 0.4; one; 3 mm wire;
- PVA glue;
- Alabaster or gypsum;
- Paint brown;
- Foil or bags;
- Brush;
- Stones and beads, shells, etc. (for reservoir decoration);
- Light blue gel candle or transparent sealant (for the reservoir itself);
- Capacity (can be cut from a bottle of carbonated water to cut) or take a stand for room colors.
Web together
The scheme of weaving wisteria is not difficult, but requires attention and doctrity. Let's start with wisteria twigs.Step 1
Take the wire the finest of those that you need - 0.3 mm, approximately meter. Take 6 biserin on it, move them into the middle of the wire and twist an oval loop.
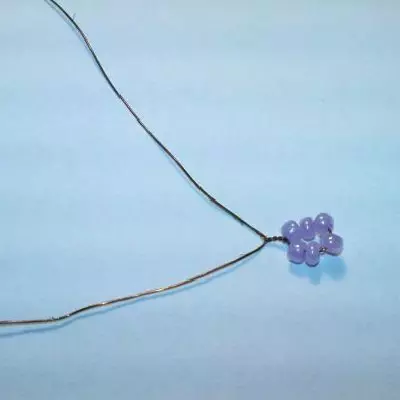
Step 2.
On the left side of this loop, you need to take another 12 such loops.
It is very careful about the color scheme. Every 2 loops, the amount of beery will increase, pay attention to it.
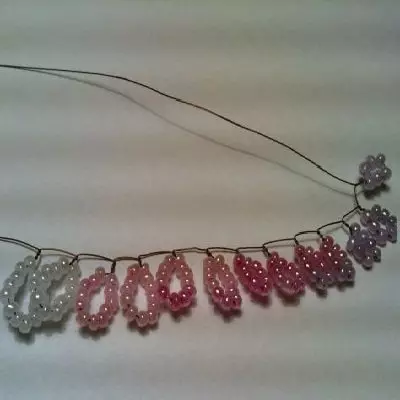
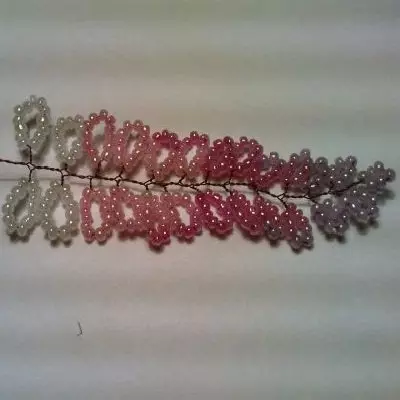
The first two loops of 7 biserin of the same color as the central loop (lilac); The second two loops of 9 beerin - three pieces, first pink, then three lilac, then pink again; The third dukey of the loop of 10 pink and 4 light pink; The fourth two loops goes 4 pink, 4 light pink, then again 4 pink and 4 light pink; And lastly two loops of 12 pcs. Light pink and 13 white beads. If you do everything exactly according to the description, then a smooth change in color in inflorescence is obtained.
Article on the topic: Origami Cat: Master Class with Schemes and Video
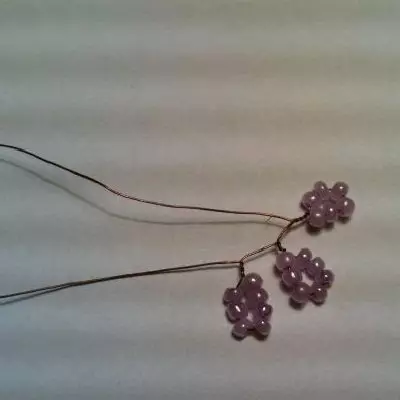
Step 3.
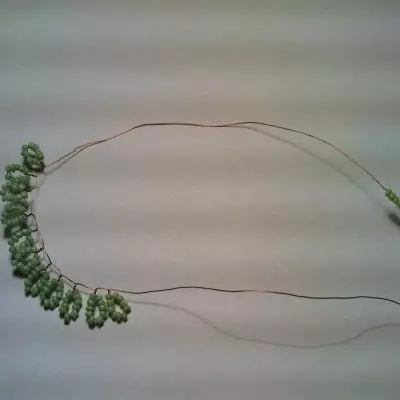
Right side weave in the same way. Next, we combine the loops of the left and right side by twist.
Step 4.
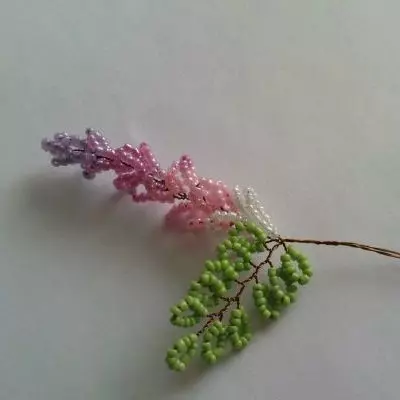
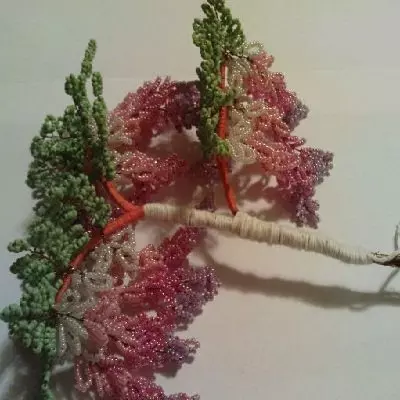
The loop must turn up to the central loop. As a result, we get this twig:
Such branches need to be done 32 pcs. Now go to the leaf of wisteria.
Step 5.
For leaves, the wire is taken a little thicker - 0.4 mm.
In this case, you can immediately dial a lot of bisper on the wire and start twisting the loops in the same way as they did for the twigs.
The loops consist of 10 beads and should be 11 pieces. Twist so that it turns out the branch.
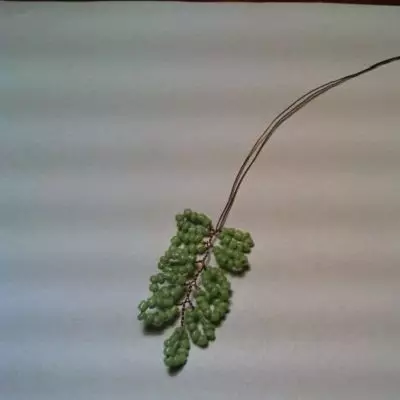
Twigs with leaves should also be 32. You can bind leaves differently (parallel weaving) and they will look different:
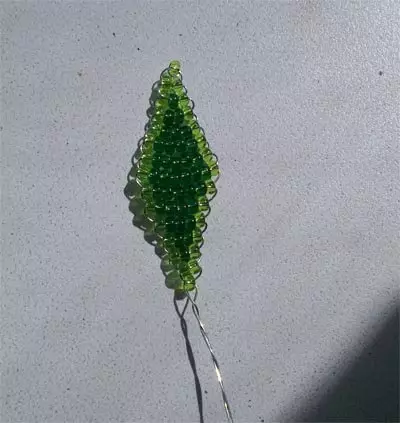
And it is so: you take 1 beerin, make the ends of the wire from different sides to it, then ride 2 bispers, then three, etc. Up to 6-8 in a row, after that, the amount of beads decrease alternately one. If the leaves are two-color, then weave from the edges with light beads one thing, and in the middle of the leaf dark. And remember, such leaves in wisteria must necessarily look up, and the inflorescence itself down. We proceed to the assembly of a tree.
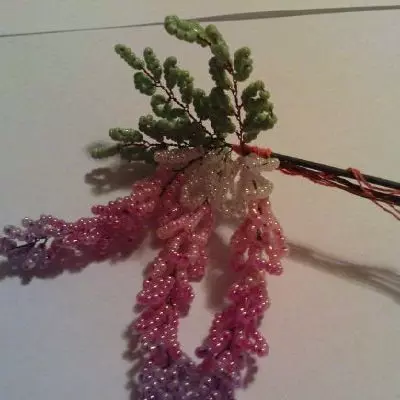
Step 6.
For the assembly it will take 1 mm wire. To her, you combine a pair: a twig and a leaf, which after that you have to wrap thick thread. Through the cm add another 1 twig, in such a way, we will scrape 4 branches.
Step 7.
It is necessary to fasten two twigs to the fifth.
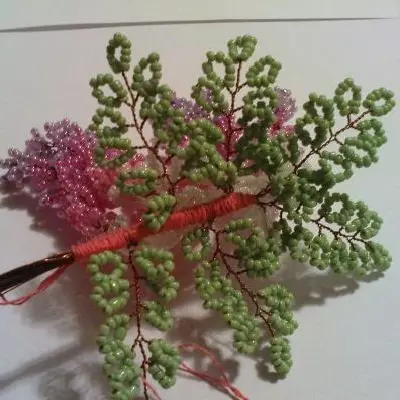
Step 8.
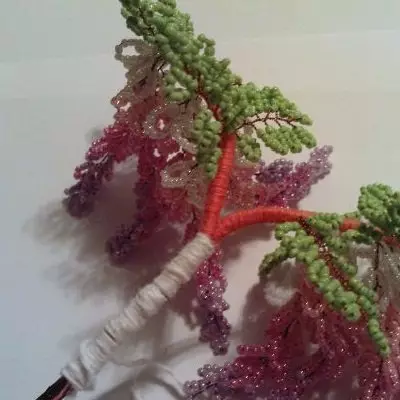
Connect all twigs with a wire of 3 mm. Start on top - two large branches connect and wind thread. Slightly below another twig, take it and finish again thread. The remaining branches (6 and 8 twigs) wrap the thread, and attach to the tree first a big branch, then smaller. The trunk is desirable to twist.
Article on the topic: Missoni pattern with knitting patterns - how to knit
Step 9.
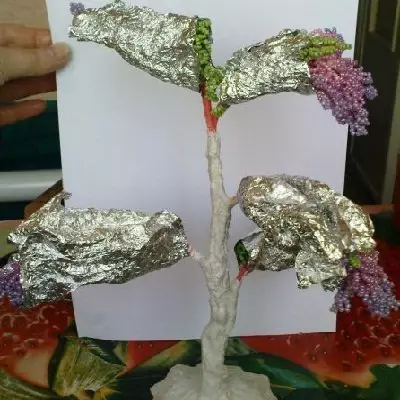
It's time to prepare a stand. Cut the bottom from the plastic bottle. Pour the mixture into it: Alabaster and PVA glue (1: 1). Insert your tree in the stand. Wrap a foil or put on the plastic bags on the tree branches, so as not to stain it. Fear the trunk with a solution that flooded into the stand, and make a small recess for the future reservoir near the tree. Before you will assign a tree into a drying, you need to decorate a place near the reservoir, or lay out beads or seashells, plant some flower next to him to harmonize with your glycine. Only make it necessary in advance until the alabaster dries.
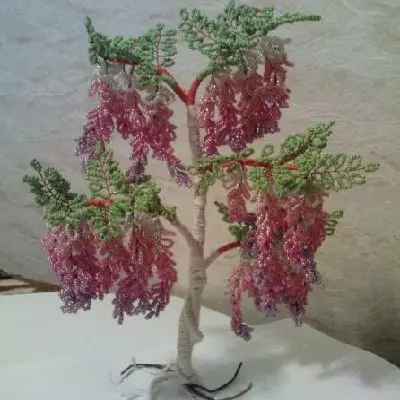
Then, when the alabastrock dries, paint the tree trunk: acrylic, watercolor or gouache. Next, to make a reservoir itself, you need to take a gel candle, warm it up in a water bath and immediately pour into the recess you made in advance under the tree. Well, that's she. Consider how it sparkles in the sun. Isn't it a miracle?
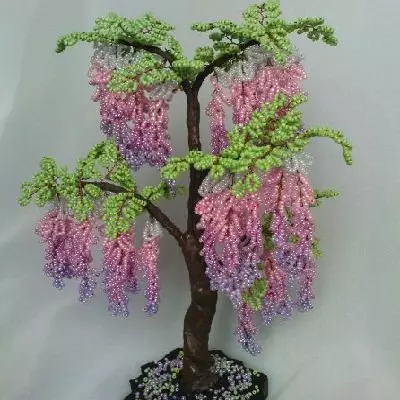
In the event that the leaves are made by parallel weaving, then the tree should look like this:

Video on the topic
And also you can watch videos about different types of wisteria.