

The angular shelf for icons is the subject needed in the homes of Orthodox Christians.
You can adapt to the arrangement of the saints of the saints and a conventional shelf purchased in the store. But the kid made with their own hands seems best for the wizard.
What can I make a stand for icons?
Traditionally, a tree was used to make an angular shelf under the icon. It may be smooth pine board, and valuable rocks (whitewind oak, cherry, etc.). The appearance of the finished product will depend on the quality of the material.
In the modern world, materials that imitate the valuable species of wood, but their acquisition will not cause difficulties or large cash costs.
Plywood or LDSP is as easy to process, like a massive board, allow you to make openwork lining, and decorative balasins with almost no experience and special machines.
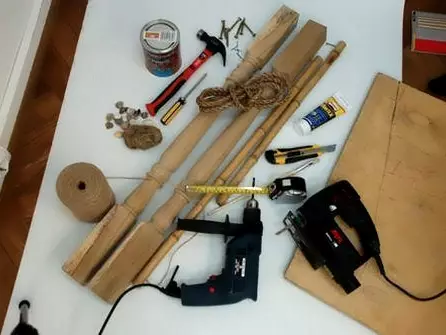
In addition to the array of wood or sheet materials, you will need:
- Electrolovka and hand-made sawdust;
- Drill with a screwdriver nozzle;
- Self-tapping screws, furniture, joiner glue;
- sandpaper with large and small grain;
- varnish or paint.
Develop a sketch of an angular shelf for the icon can be independently using drawings and photos. Product dimensions need to be selected arbitrarily based on the size of the icons and their quantity.
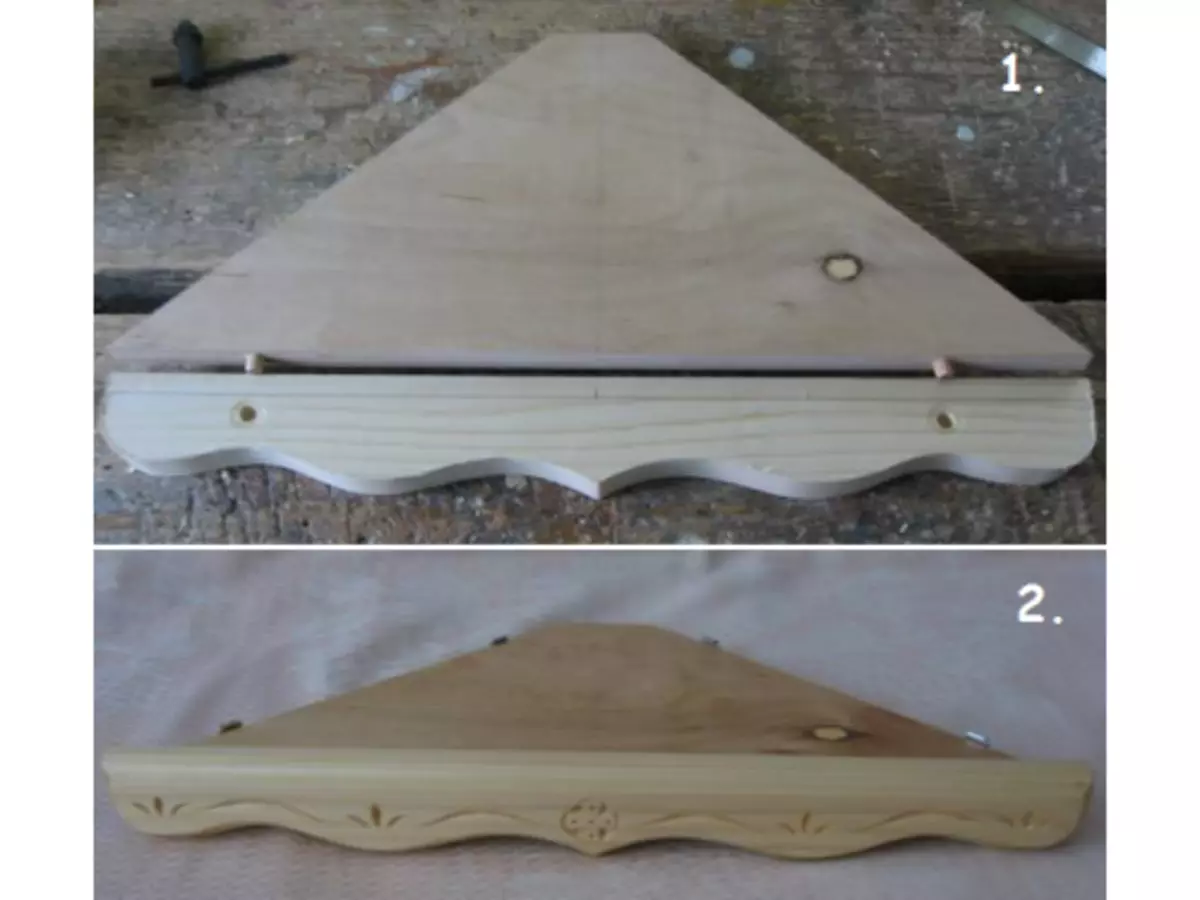
Simplest stand for icon
A single-tier angular white shelf consists of only two parts: an angular element and curly cornice (barma), which simultaneously performs the functions of the decor and fencing.
The curly circuit of the cut must be pre-drawing on paper, then transfer the sketch on the folded sheet folded in half to get symmetrical relative to the center of the half. By pattern, draw the edge contour, cut the pattern with an electroll q. If the shelf is desired, the corner icon can be decorated with burning, painting or carvings.
Article on the topic: Points-Massifiers: Video lessons with a description of the work of crochet
To create the pattern of the angular element on the sheet, you need to draw a straight angle. The parties must correspond to the size of the icon if it is alone, or be more to place several small images of saints, lamp, etc.
Having postponing the desired sizes around the angle, you should connect the extreme points of the straight line. The resulting triangle needs to remove part in the direct angle area so that the shelf for the icon is conveniently installed on the wall.
In the edge of the long side of the corner drill holes for the wanking. Part of it should perform above the edge at a distance less than the thickness of the board, from which the cornice is made. Lubricate the woven with glue and insert into the hole. Depending on the size of the Corner of the Vacan Shock, it can be 2 or more.
Response deepening in the wrong side of the cornice must be drilled so that the holes do not work out. The connection is made with glue, after gluing the part you need to tightly press each other until complete drying.
The simplest shelf for the corner icons can be fixed on the wall with metal loops on the edges of the short sides of the triangle. You can navigate the plank wall to which the angular element will be laid. The length of the slats should be slightly less than the sides of the corner so that the cornice does not interfere with the shelf lying smoothly and horizontally.
The shelf for icons with their own hands can be painted with acrylic and other paints, covered with transparent varnish or carefully polished and grated wax.
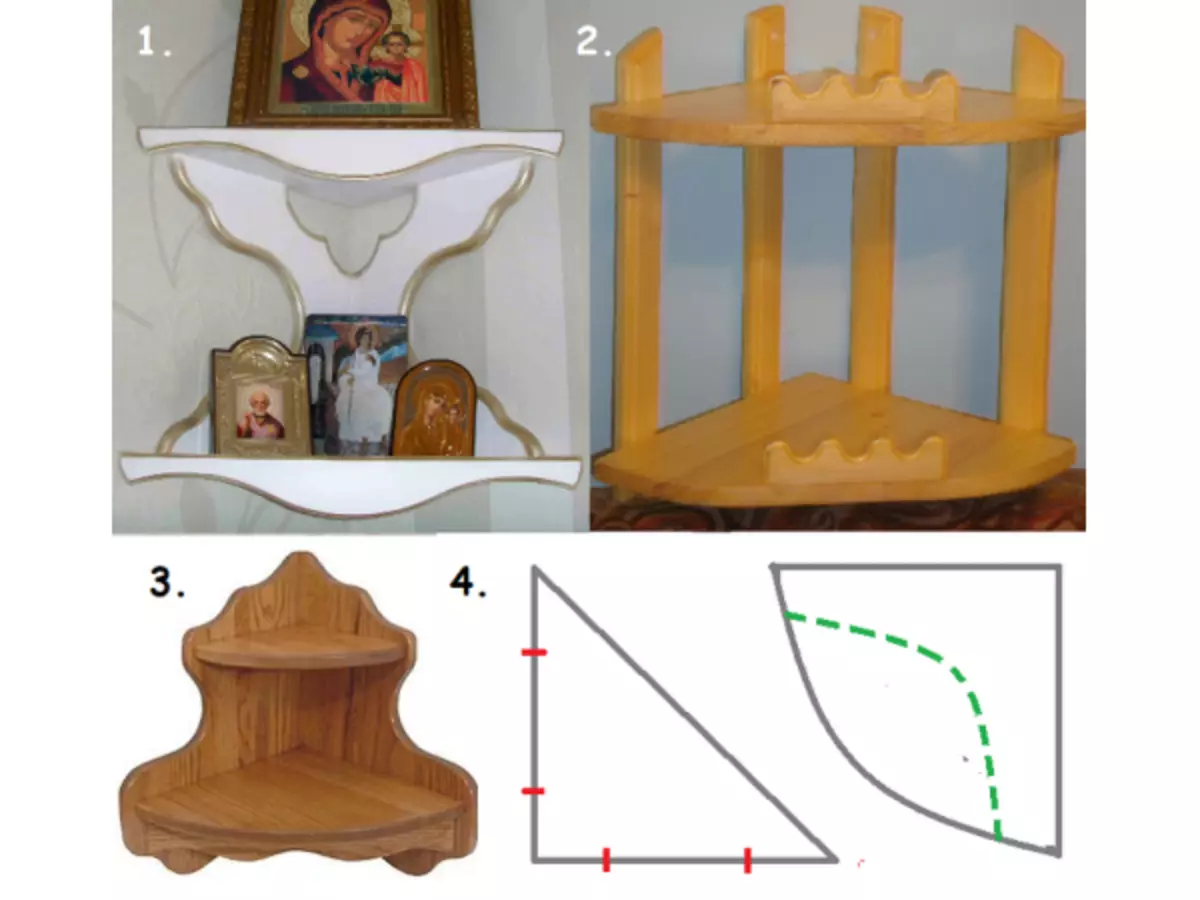
Corner bunk shelves from plywood.
The angular bunk shelf can be made as simple. The difference between it from the previous version is that the corners are attached not to the wall, but on curly supports, which simultaneously carry and aesthetic function.
The backdrop of such a shelf consists of two identical, mirror-repeating parts of the details. Figure and size them are chosen arbitrarily. You can connect them with self-drawers or wrappers with glue, imposing one on the edge of another and driving the corresponding holes.
Article on the topic: Men's sleeved knitting needles: Schemes and descriptions of clothing for men with photos and videos
Shelf for icons white can additionally be framed by cornices. For the manufacture of other angular shelves for icons, corners with a rounded front side are used. Fasten the shelves are most convenient for the self-tapping screws, screwed up with the inside of the backs in the edge. If you need a trigical shelf for a three-tiered or more icons, then you can increase the length of the backs and set another number of corners of any shapes and sizes.
Kyot with decor
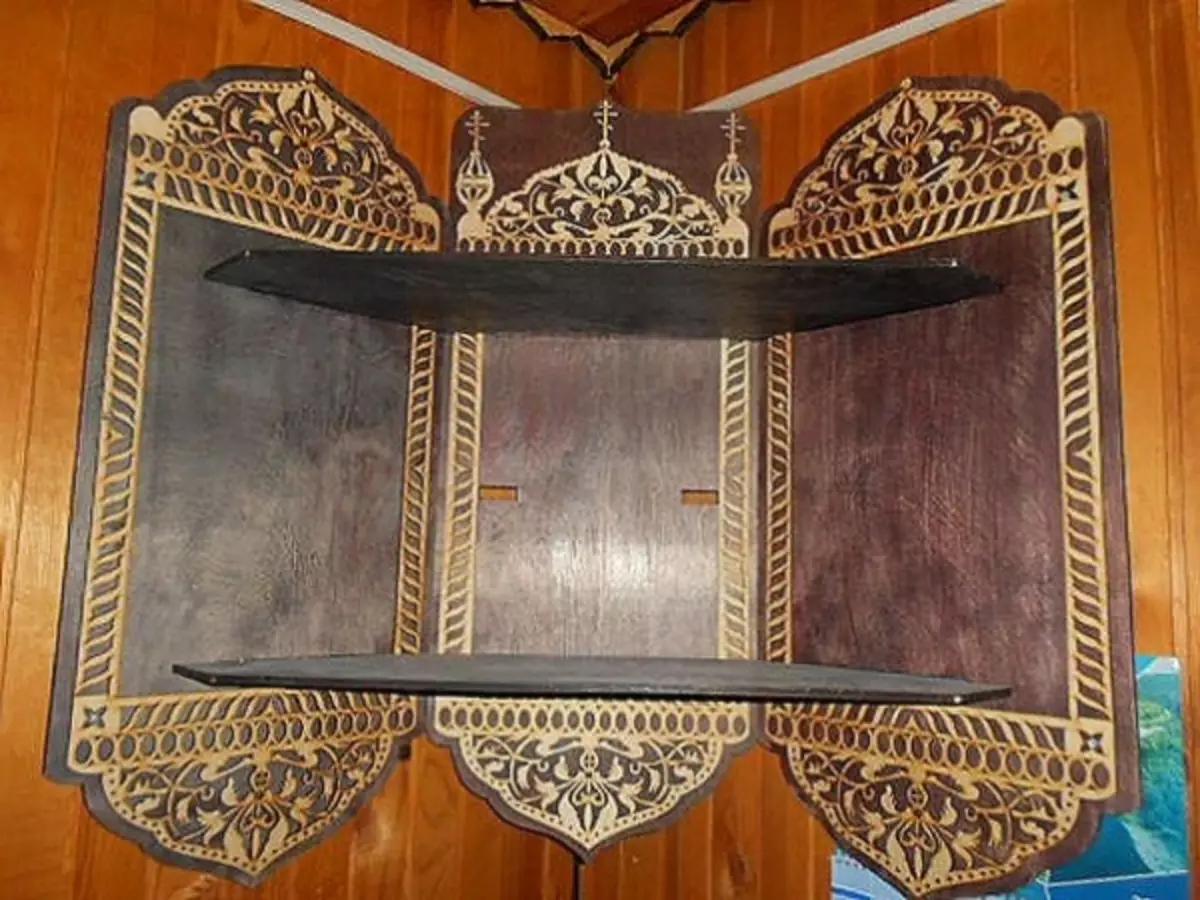
The shelf for icons bunk angular looks very difficult only with appearance. It is not much more complicated to make it than previous options. The drawings will help their homemade master to make an angular shelf for icons with their own hands in a few days, using only a jigsaw.
For backs, thick plywood (8-10 mm) can be used, a thinner material (3-4 mm) is suitable for the lining. Drawing of the decor move to a sheet of thin plywood and carefully chopped with a manual jigsaw along the contour. From thick plywood make the base of the backs. Side parts should be 2 pcs.
Shelf for icons Wooden corner is going like this:
- The details of the backs are polished onto the spikes and paint in a dark color.
- To cut out of the plywood 8 mm corner according to the scheme (2 pcs.).
- Prepared decorative lining to cover with varnish or paint gold acrylic paint. Glue back to the backs.
- Spikes on the edges of the corners to lubricate with glue and insert into the corresponding holes on the backs of the back.
The shelf for the corner icons is practically ready. In the same way, multi-tiered structures can be made, increasing the number of corner elements.
Self-made shelf for icons, wooden or chipboard, it will be gently look like, if after sawing the parts to handle the front sections of grinding, removing the chamfer or rounding the sleep.
In the absence of such a tool, this operation can be done using a file and emery paper. The edges can be highlighted with contrasting color or gild.
Article on the topic: Layout of the solar system with his own hands for school: Master class with photo