
Good day!
Original knitted crochet rugs bright, stunning beauty, apparently from Japanese magazines, I recently saw on the Internet.
I tried to deal with the schemes and technologies of knitting. These new ideas were very simple in performance and I want to tell you about the manufacture of such original knitted rugs, and of course boast which mats I got

.
Original crochet rugs
To knit original rugs, it will take some remnants of woolen, half-wing or synthetic yarn of different colors, but the same thickness and hook №2 -2.5. Threads must certainly be the same thickness to make a high-quality flat product.
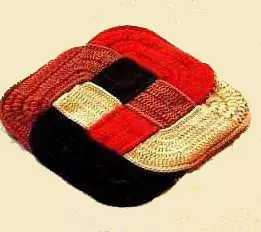
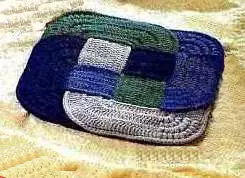
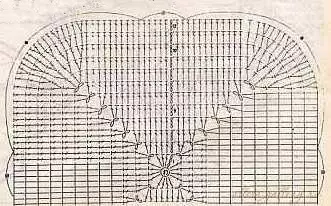
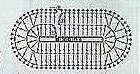
For the manufacture of such mats, you need to connect four lanes of different colors according to the scheme:
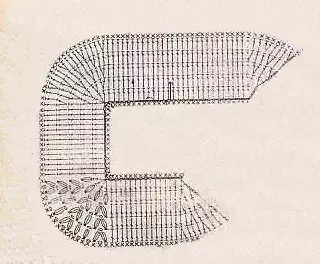
First, knit a chain of 60 loops (as a result, a rug is a size of about 30x30 cm, but it also depends on the thickness of the thread), we bind the chain by the b / n columns.
- 2nd row: 4 loops for lifting, 1 column with 2 nakida from the first loop of the previous row, 14 columns with 2 nakida, 4 columns with 2 nakida from one loop of the previous row, 14 columns with 2 nakids, 4 columns with 2 nakida from One loop of the previous row, 28 columns with 2 nakids, 2 columns with 2 nakida from one loop of the previous series. Already it turns out a strip with 4 rounded corners.
From 3 to 6th a row of knitting by columns with 2 nakidami, in the angles for the roundabout, we make an increase as follows:
Right upper and lower corners (at the ends of the strip)
At the beginning of each row instead of the first column knit 4 loops for lifting.
- 3rd row: 2 columns with two Caidis in each of the 2-columns of the previous row angle,
- 4th row: * 2 columns with two embers from one side of the corner of the previous row, one column with two nakida *, repeat another time,
- 5th row: * Two columns with two nakids, 2 columns with two embers from one side of the angle of the previous row *, repeat once,
- 6th row: * 2 columns with two embers from one side of the angle of the previous row, three columns with two navigas *, repeat once.
Article on the topic: Poule with your hands from knitted yarn: workshop for crochet
Upper left corner
- 3rd row: 2 columns with two embers in each of the 4th corner of the previous row,
- 4th row: 4 groups of 2 columns with two embers from one side of the angle of the previous row, between them one post with two navigations,
- 5th row: 4 groups of 2 columns with two nakida from one side of the angle of the previous row, between them two columns with two navigations,
- 6th row: 4 groups of 2 columns with two embedders from one side of the angle of the previous row, between them three columns with two embers.
Lower left corner Knit a special way that the additional effect of the rug attaches:
- 3rd row: 2 unfinished columns with two nakida, accumulated together, in each of the 4-born angle of the previous row and on the 1st air loop (VP) between them,
- 4th row: 2 unfinished columns with two Nakida, closed together, 1 VP, 2 unfinished columns with two Nakida, acclaimed together, from one group of the corner of the previous row, knit 2 more groups between them 1 VP,
- 5th row: knit 3 groups is similar to the 4th row, between them 2 unfinished columns with two nakida, awaited together,
- 6th row: knit 3 groups is similar to the 5th row, between them twice 2 unfinished columns with two Nakida, accused together.
- 7th row: I bind all loops by b / n columns.
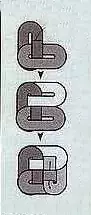
Ready stripes need to sequently sew with each other: to the long side of one band, we sew a short side of the second and so on.
Now the resulting long color knitted ribbon must be overwhelmed as follows as shown in the diagram:
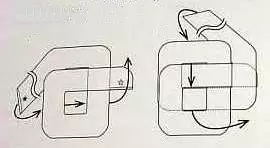
I associated small colored stripes for the sample and show how to intertwine them. Striped I stitched in such a sequence: gray, turquoise, burgundy, pink.
Article on the topic: Organizer for trifles with your hand from fabric on a master class
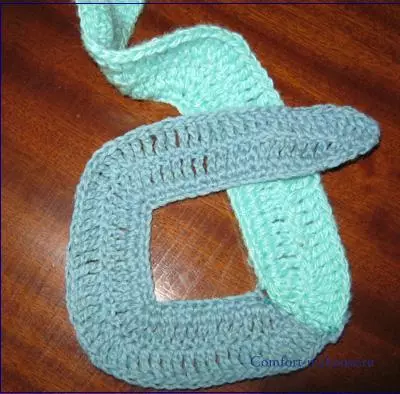
We put one strip of the resulting color tape (gray) on the table, the entire tape is displayed up under the gray strip.
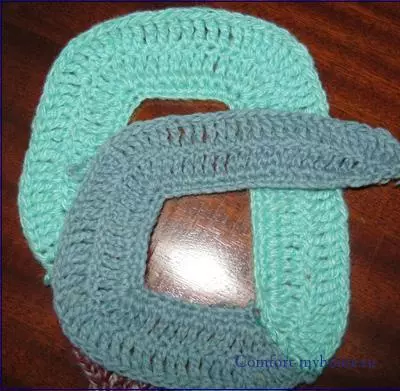
Since the bands are rounded angles, they themselves turn where they need. We bring the ribbon to the left, then down and right under gray and turquoise stripes.
Then turn up on the gray strip, left and down to turquoise, we take out in the middle part of the receiving rug over the gray stripe.
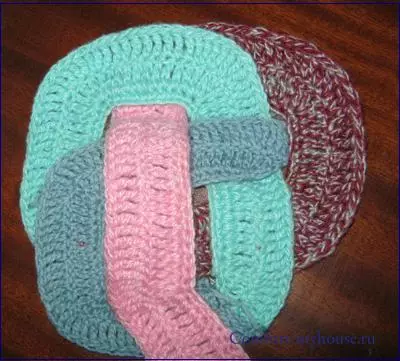
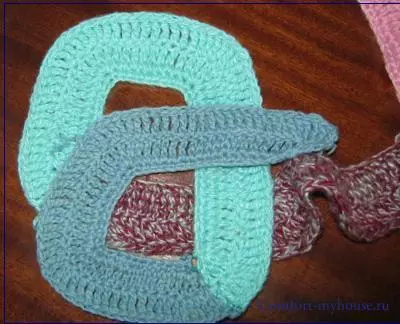
We bring the ribbon to the burgundy strip down, we take over the gray stripe and then turn to the right above the turquoise stripe and up under the burgundy strip.
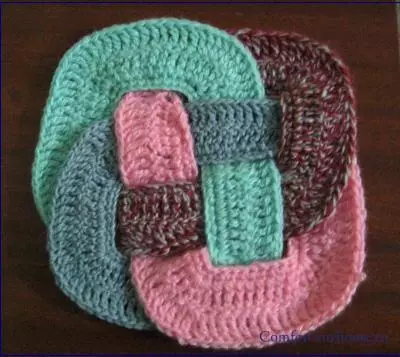
If, maybe immediately in the figure it is not clear how to intertwine a ribbon from the strips, then in the process of manufacture it will become more obvious.
We connect the ends of the strips (in my case gray with pink) and for strength, so that the strips retain the form and do not move, we grab threads from the wrong side.
Crochet rugs in terms of schemes, I think it will not be difficult to do.
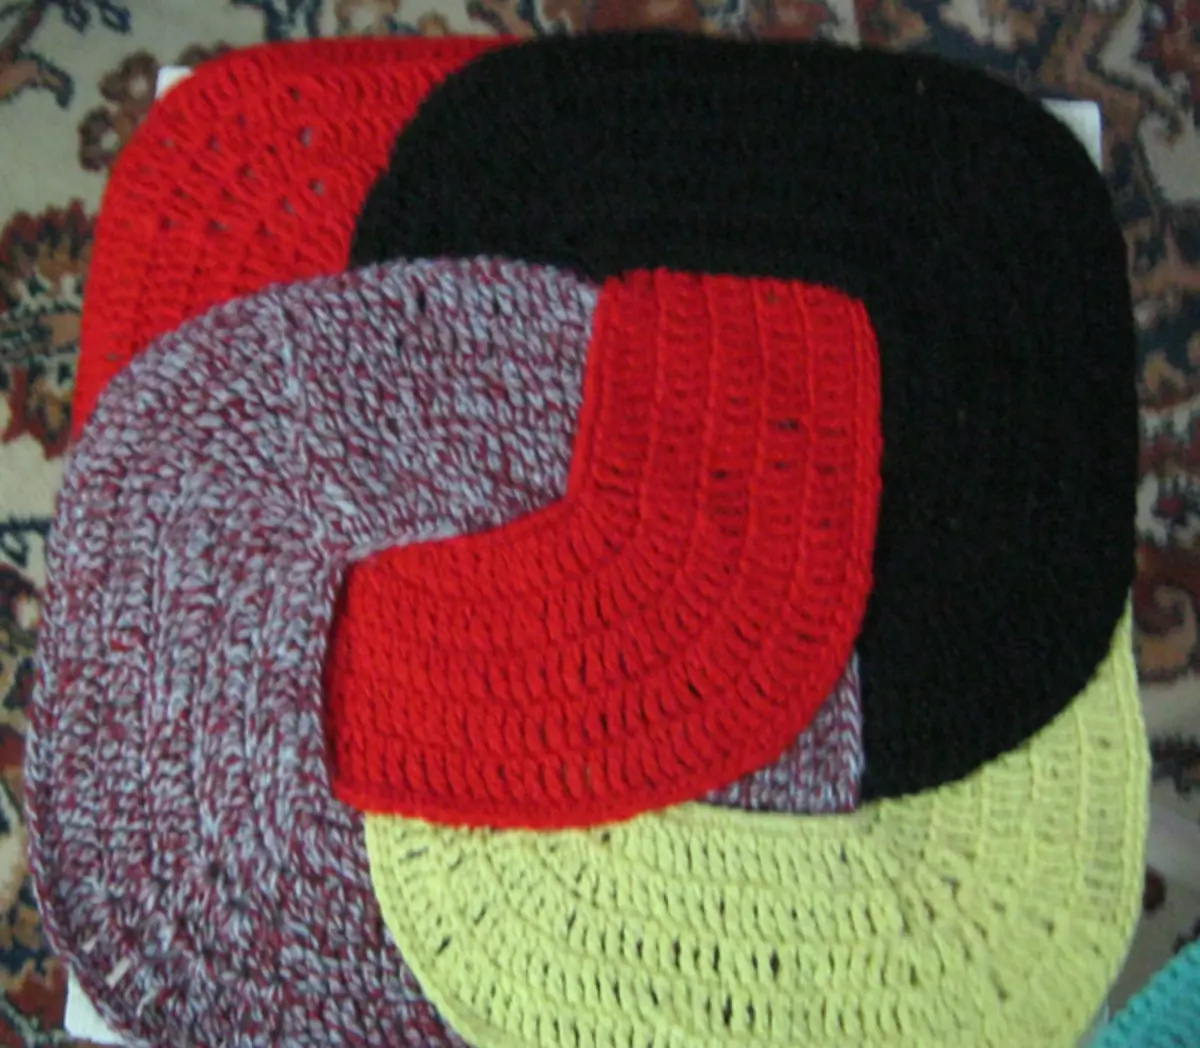
Such original mats can be used for stools, for example.
To make a rug on the floor, you can connect according to the scheme and sew the basis.
Knitting is starting from the center and knit the square by columns with 2 nakids, making additions in four angles first two VPs, and then as like when knitting the strips.
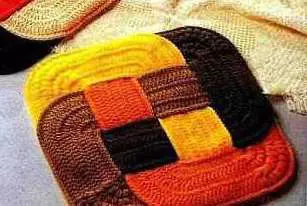
Original knitted rug of four parts
But another interesting idea of the bright original crochet rug made in a similar technology, but on another scheme.
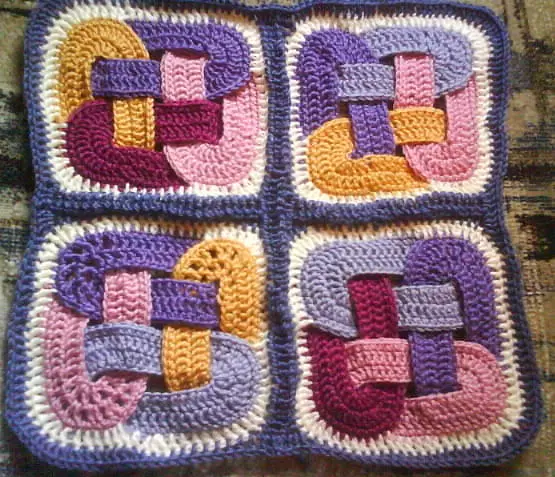
The photo presents the work of Natalia V. - participants of one of the groups on needlework.
For such a rug, you need to link small strips of oval shape, (without connecting in a circle), according to the scheme:
We recruit the chain from the VI, we bind it with two rows of columns with 2 nakida and one side of the b / n columns, we make an increase for rounding from two sides: 2-3 columns with 2 nakida from one post of the previous row.
Article on the topic: Treasure chest. Volume Postcard POP-UP
The ends of one strip are sewn, the second strip is intertwined with the first, as shown in the diagram, sew,
Interstate the third and fourth strips alternately, stitch. Then we bind the resulting element of the rug from the b / n b / n columns. It turned out one color square.
You need to connect four such squares, arrange them next to each other and tied up with b / n columns, connecting elements with each other.
So nice to master the Japanese crochet and tie such original mats with your own hands!
And I tied up from the remains of yarn two rug and twisted them for another technology, which I will tell you next time. It turned out a completely different effect of a combination of colors.
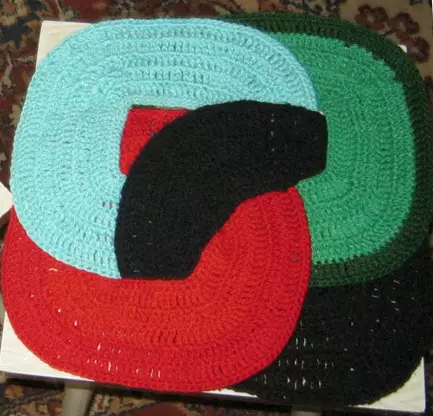
Original crocheted rugs look so cool in the kitchen! Just do not pass!

In combination with patches in the form of a strawberry, they brought a bright accent in the interior of my kitchen, made it fun, more warm and cozy. For your kitchen, I want to tie a couple more accessories, which you will tell you, as well as about the new even more beautiful ideas of original knitted rugs.
In order not to miss new articles, I advise you to subscribe to the update newsletter!
More beautiful mats:
Tsarist Round Rugs in the Modern Interior
Japanese mats
Original and very simple rugs crochet