
Any kitchen, from the plate to the washing there is a zone that is rapidly contaminated. It is constantly washed away from oily splashes, dirty water. Previously, the apron was done from the tile, ceramic mosaic. Now the apron is popular, both from old materials and glass.
Earlier, the whole kitchen was laid tiled. Now people save and appeared other high-quality materials. The working area can be chopped by tiles, and the walls nearby are separated: wallpaper, decorative plaster, artificial stone, paint the glass panels.
If you want the glass surface to be reliable, the glass is chosen on the apron, covered with a film, which is called triplex (or take tempered). If you accidentally hit quite strongly on the glass (seasoned) with a hatch, picking meat, then it will break into small parts. But these parts will not be so sharp as from the usual. But usually the owners are careful. No one specially spoils your property and makes chops carefully.
Benefits
The glass apron is convenient, practical, functional, hygienic. You can order a whole panel on the company, which will have a minimum of joints. Those joints will be well posted, practically not visible. The dirt will not be clogged there.Benefits:
- Apron is perfectly clean. It is easily with his own hands and detergents on the sponge: fat, soak, dirty and soap water, which spattered walls during cooking, washing dishes.
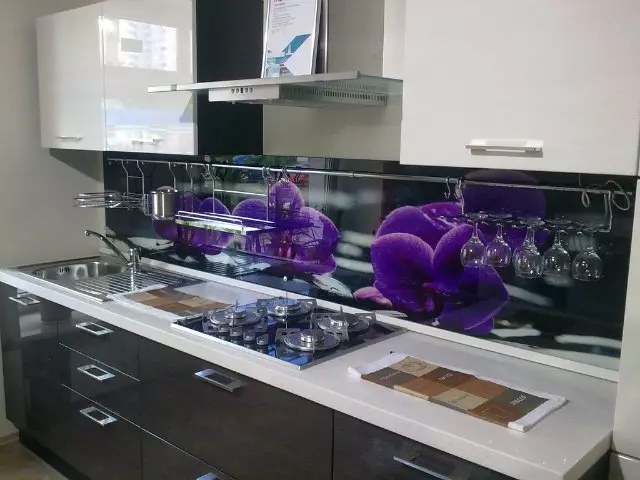
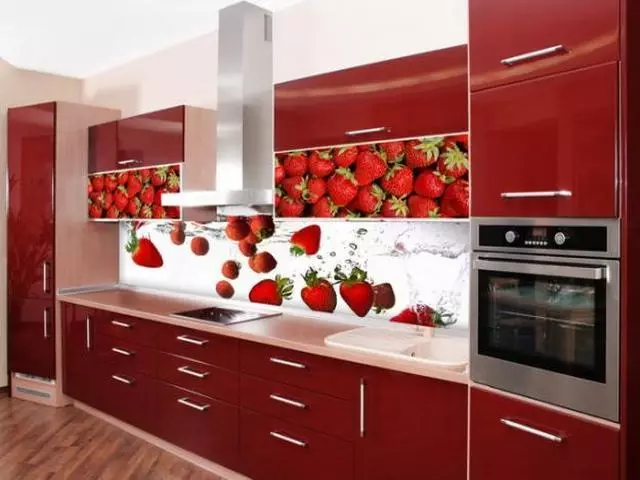
- You have the opportunity to independently acquire the photo printing you want to see in the working area on the surface of the glass.
- In the interior of a small kitchen, the apron of glass will visually expand the space.
- If you decide to put it with your own hands, you can then renovate. In some cases, it will not be possible. Consult with experts and immediately decide what option does it suit you?
- After the labor day, returning home, go into the kitchen, and there is such a beauty! And you can create it with your own hands.
- Creativity. Make such a apron, place a glass of such a picture that always dreamed about. Select the type of glass and implement the intended.
- Strength. The glass thickness must be up to 8 mm. The tempered will be thin and durable, but when repaired, it will have to completely replace it with a new one, as it is very strong, at home do not cut part at home.
- Available cost. The apron of glass makes it inexpensive. It is more profitable than ordering on the company.
- Hygienicity. It is just to care for him. Mud has nowhere, except for seams, clogged. So, harmful bacteria are not multiplied in large quantities, but after careful cleaning and at all, the working area is clean.
- Do not forget the sequence, ride sufficient openings for outlets in the place where there will be various mounts. After the glasses have passed - no one does. Almost impossible.
Article on the topic: Partition do it yourself
Views
You are firmly confident that we will handle - make a glass apron with your own hands? Spend measurements and order material on them on the company. The rest, you make it yourself, but for glass processing you need equipment. However, these are obvious things.
Some tried and trying to apply the desired drawing to the surface alone or cut the required exchange. Unfortunately, equipment is really required, otherwise nothing comes out. Listen to the good advice of experienced comrades and specialists will make blanks quickly, efficiently.
Decide what kind of material you need:
- Monophonic matte.
- Glossy.
- With drawing.
The most popular blanks on which there is a drawing. The wizard on the wrong way will make the image. Using UV ink. They do not burn out. In decade will be the same bright. Hold the temperature to 120 degrees.
An apron for a kitchen will serve for a long time if you take two blanks, and there is a poster between them, or a special method of the desired drawing. The masters say that the poster can be replaced, but the image, depending on which method is applied.
Manufacture
Consider in detail how to make apron? First install the kitchen set, then proceed to the installation.
- Measure the length of the workplace length centimeter. Take the height according to lower data that was measured. Part of the working wall will close the plinth from the tabletop. To conveniently install, break the cloth on the part. From half a meter to a meter long, 60 cm high - optimal.
- If there is a glass on the corner, then take the thickness of the one that is back to another around the corner.
- Order masters grinding all the ends. So the joints will be less visible. Glass can take any (better cool), but with a thickness of no less than 0.6 cm.
- On the background, buy a photo wallpaper that you liked in the store. This is economical. If you order a print at a plant engaged in advertising, it will be more expensive. There is a range of drawings. The most expensive option - on the plant to buy a film with a pattern.
Article on the topic: Warm floor in the apartment from central heating
She is self-adhesive. In order not to be seen by the wall, just buy an empty film. More often choose white, but it can be black, color, depends on your plans, desires.
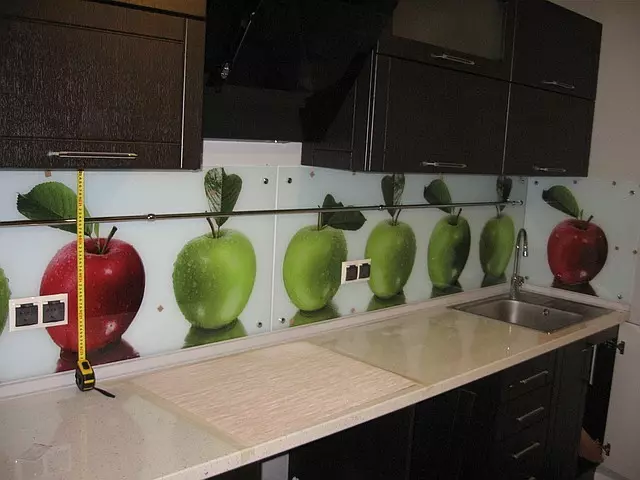
Figure will be applied directly to the film where there is no glue. The film is attached to the glass. Do not stick it on the wall.
If necessary, the drawing is clenching. In other words, it is printed on the contrary, as if they saw in the mirror. When you choose a drawing for the background, remember that the coating is although transparent, but greenish.
Book a service at which the film you will definitely cut under your sizes. Then you easily apply it to parts of the canvas. The overall drawing will be accurate, beautifully docked.
If you purchased a photo wallpaper, then stick them onto the wall of your kitchen, pre-with-inquiry from 5 to 6 cm down and up. Part of the canvas, which is hood (hoods are made above the slab) are attached by P-shaped aluminum profiles. Glass is riding on the side of these profiles.
This installation is carried out before you hang lockers. Otherwise, they will have to be removed to fill the glass cloth into profiles. Lockers hang into place. At their lower edge, attach a M-shaped aluminum profile. Meet the seller. Learn which profile you need, such a length and buy.
Break the screws. Prealt in the opening profiles. Insert the top edge of the panel to the profile of the M-shaped form. Bottom fasten the basetop.
Parts can be attached to special fasteners with a wide special hat. They are multicolored, glossy or matte, your taste. Sold in the construction supermarket.
When the panels on the company will be made for you, ask to be drilled in 5 cm from all hole angles from 6 to 8 mm diameter. You can ask to make holes under your sockets. 7 cm - the desired diameter.
Article on the topic: how to bring an oil stain from clothes
Technology:
- Attach part of the panel to the wall.
- Through the glass holes, place the mark on the wall.
- Place the panel and drill holes there.
- Fasteners directly insert with the wall.
- Take the panels from the glass on it.
- Fastening with wide comfortable hats, attach them to the wall.
If you chose the film transparent, which is self-adhesive and the image is printed on it, then do it:
- Each of the panels apply to a previously made smooth surface. If she was like this - excellent.
- Declaring the affordable side of the side where you can glue the transparent film.
- Fully (before dry) wipe.
- Take the pulverizer, which spray flowers, pour into it water, dilute the liquid soap.
- Spray the glass.
- Remove the fragment of the film with a drawing with a substrate. Spray the soap fluid on the glass and the film itself. Due to this solution, the drawing can be moved by different directions. When I perfectly align it on the panel, act further.
- Liquid, moving from the center to the edges, you need to remove. Use rocket. To accidentally do not scratch the image, take the substrate earlier from the film, put it on top and drive a device - remove soap water.
- Let the film be sinking. Also stick the substrate in color. Cut holes in the required locations. If the edges appear behind the panel - cut out too much.
- Creparate parts, as described earlier: with profiles using a special fastener.
Decorating
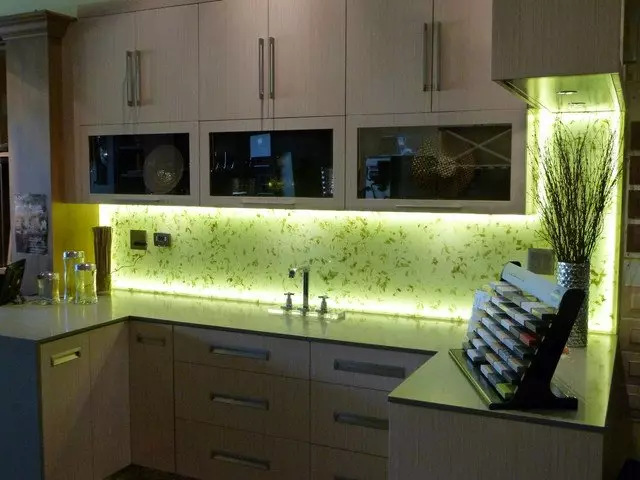
So, as designers can decorate, it will not always work. With your own hands, we decide the working area to your taste. We select backlight. Good SPOT lamps (small) or LED tapes. The view from the kitchen will be attractive, unusual. Electricity saves.
The drawing on the kitchen panels can be changed. Rosettes remove, like the panels. Put everything on the table. Remove the film. Do everything neat.
The main thing is that there are no dirty traces left, they will spoil appearance. Glass apron is a great, practical, functional addition for your kitchen. He makes a fresh note in the interior. Good for those who love to periodically update the kitchen.
A tile or a panel of artificial stone is difficult to change, and here you can cross the drawing and update the design of the room.